At the suggestion of someone at autogeek, I will be buying the Meguiars Microfiber Correction system which includes the 5" backer plate.
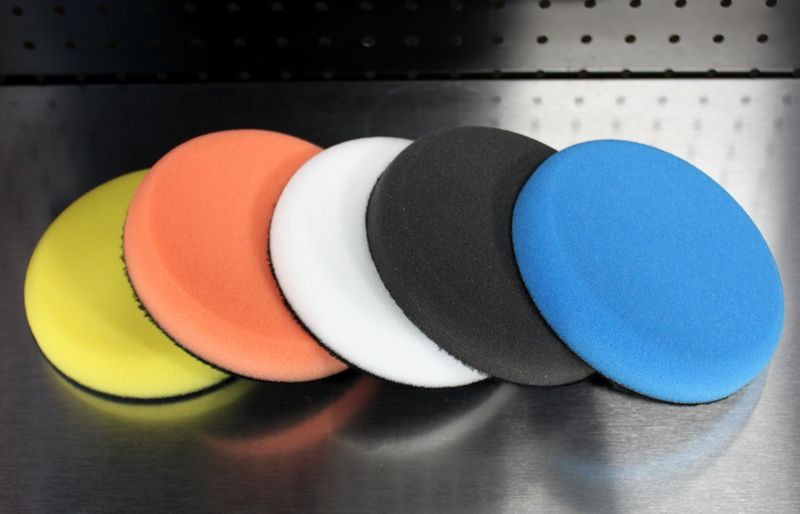
I have been buying the ccs pads, but judging by the replies it appears I should go with flat pads? I already have the 5" red flat finishing pad, what additional 5" pads should I get?
Get orange, white and black. These will take care of anything.
Click and read these...
5 inch Backing Plates on Meguiar's, Griot's and Porter Cable DA Polishers
5 1/2 inch and 6 inch Buffing Pads on Autogeek's Online Store
Lake Country
5.5" Flat Pads
On a related note, when should a soft wool bonnet be used? I recently started using after removing wax with a microfiber bonnet to buff. Is that correct?
Thank you very much for all the replies
Wool bonnets are for use with traditional old fashioned orbital buffer and they tend to be very large. You don't need one and I wouldn't use one myself to remove wax.
The Traditional Orbital Buffer aka The Wax Spreader
Copyright ©PBMA - AutogeekOnline.net® All Rights Reserved
I have used microfiber bonnets and shown millions of people how to do the same but now days I just wipe everything off by hand.
Here's the full article on how to use a microfiber bonnet to remove wax. Note these only work for waxes and sealants that DRY not WOWO products and they are also not for removing compounds and polishes. Just thin, dry coats of wax or sealant.
How to use a microfiber bonnet to remove dried wax by machine
There are two ways to remove wax off your car's paint, the normal way, that's by hand, and by machine using a microfiber bonnet using a DA Polisher, like a Porter Cable, Meguiar’s or Griot’s Garage DA Polisher.
Benefits to machine removal of wax
First of all, removing wax by machine is
personal preference; some people like this technique while others prefer to simply wipe-off waxes by hand.
The technique of using a microfiber bonnet over a foam cutting pad provides equal pressure over the entire face of the pad and removes any pressure points created typically by your fingertips when wiping off by hand.
For some people, letting the machine do the work might be a physical advantage than using their arms and shoulders to wipe the wax off, just depends upon the physical limitations of the person.
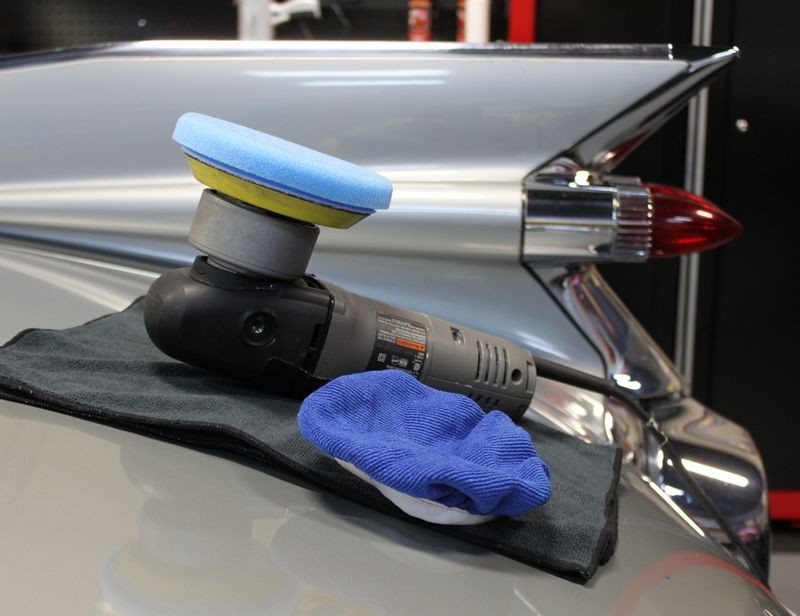
Indigo Microfiber Bonnet and a Cyan, Hydro-Tech, 5.5" Foam Cutting Pad
Drying Waxes
The first thing I want to point out is removing wax by machine works best if you’re using a wax that is supposed to dry first before removing. I need to make this point because some waxes are formulated to be wiped-off while they are still wet and these types of products really only wipe-off well by hand.
Removing dried wax by machine works best when you apply a thin coat to start with and the best way to apply a thin coat of wax is by machine. Of course if you already own a DA Polisher than you probably already know this and you likely already apply your waxes by machine.
It's kind of hard to explain why you can remove a wax that's supposed to dry by machine but it's hard to remove a wax that remains wet by machine but let me give it a try…
Two reasons why you can remove a dried wax by machine
1. Because the residue is dry.
When wax is wet, just out of the can or bottle, because it's in a fluid or liquid form, it will try to stick or cling to any smooth surface. When it's dried, it looses this characteristic.
Think of how dried wax residue after removed from the paint is kind of a dusty residue. If you scraped some off of your microfiber towel or bonnet and placed the dust on a table, you could blow on it and it would move off the table; this is because it's no longer wet and trying to stick to the table.
This same characteristic is important when you're machine removing wax because as the microfiber bonnet on a foam pad on a machine is breaking up and loosening the wax off the surface, because this wax residue is dry… it will loose it's grip on the paint and come off onto the bonnet and then because it's a dry residue, you can remove it off the bonnet with your fingernails or with a nylon brush. If it were wet it would soak into the bonnet.
2. Because the microfiber bonnet remains dry.
Sounds kind of simple but here's what I mean, because the residue from a wax that dries is dry, it has no moisture to dampen or make your microfiber material wet, so your microfiber bonnet remains dry as your work around the car removing wax. Periodically you simply need to remove any of the dry, dust residue that will build up on the microfiber material and you can do this with a nylon brush or even your fingernails.
A non-drying wax has a wetness to it usually from some type of beauty oils in the wax that impart clarity, depth and gloss but there could also be other liquid protection ingredients and carrying agents that retain some of their wetness after they are applied. If you try to remove a coating over a panel that is wet, the liquid portions of this film will transfer from the paint to the microfiber bonnet as the microfiber material will act to adsorb and absorb the wetness. The more wet wax you remove, the wetter your microfiber bonnet becomes as the wet residues load up on the face of your microfiber bonnet. Once the face of the bonnet becomes wet with these liquids it will no longer remove more wet wax and leave a dry finish behind, it will more or less simply act as though you're back to the wax application process, that is spreading out and creating a layer of wet wax on the paint.
You could have a stockpile of dry microfiber bonnets on hand to switch to a dry microfiber bonnet as soon as the current one becomes wet but it's really faster to remove non-drying waxes by hand. A microfiber towel folded 4-ways gives you 8 clean wiping sides that you can continually turn to as you're wiping off the wet wax and after all 8 sides of one towel are used you can quickly and simply switch to clean, dry microfiber towel.
Conversely, you can usually remove all the wax residue from a wax that dries using only one or two bonnets by cleaning the removed wax off the working face of the bonnet or reversing the bonnet or switching to a clean, dry bonnet.
Products Needed
Reversible Microfiber Bonnets
Microfiber bonnets are pretty much all reversible so you can use one side till it loads up with dried wax and then remove it, turn it inside out, give it a shake and put back onto your buffing pad and get back to work with the other side. I’ll show you my technique for cleaning your bonnet on the fly and often times you can remove all the wax off an average size car with just one side of bonnet.
Firm, dense pads for use under the bonnet
The key to removing dried wax using a DA Polisher is a firm pad like a foam cutting pad or a Lambswool polishing pad. My personal preference has always been to use a foam pad because it provides a
level of cushion due to the nature of the foam cell wall structure. Lambswool pads have the firm feature and that's helps to remove the dried wax, but because they don't have a foam backing, they don't have the cushion foam offers.
The cushion offered by foam enables the pad to conform to a curves and body lines better than the hard, flat feature provided by the lambswool pad with a microfiber bonnet over it.
Any of these foam pads work well for removing dried wax,
5.5” Lake Country Flat Yellow Cutting Pad
5.5” Lake country Flat Orange Light Cutting Pad
5.5” Lake Country CCS Yellow Cutting Pad
5.5” Lake country CCS Orange Light Cutting Pad
6” Lake Country Purple Kompressor Pad
6” Lake Country Orange Kompressor Pad
If you want to try the Lambswool Polishing Pad under a microfiber bonnet, then this 6” pad works well.
6” Lake Country Lambswool Polishing Pad
Dedicated Clean Dry Pads for Machine Removing Wax
The best thing to do is to dedicate a pad to go with your bonnets and don’t ever use this pad for any machine cleaning or polishing work. Use a permanent black marker to mark the back of your buffing pad to indicate it's
only to be used with bonnets to remove dried wax.
Dry stiff pads
If the pad is wet, it will transfer its liquid to the microfiber and get it wet; this will dramatically reduce its ability to remove wax. So don’t try to use a pad that’s either wet with product or wet after being washed but not dried. Dry pads are also stiff and it's this stiffness characteristic that is needed to get the wax to come off the paint. So only use clean, dry foam pads.
Clean pads
If your pad has been previously used to apply some kind of paint care product and it’s dry, the dried product residue in the pores of the foam pad will
shake loose and accumulate inside the bonnet. This will contaminate the side of the bonnet against the pad making it unusable if you try to reverse the bonnet.
Step-by-Step How-To
Swipe Test
The first thing you want to do is to make sure the wax you've applied is dry and ready to remove, to do this you use the Swipe Test. Once the swipe test shows the wax is dry and ready to remove, you can begin removing the wax by machine.
Removing the Wax
It doesn’t matter much where you start but the normal protocol would be to start where you started when you applied the wax and then follow your path of travel. Another way is to just start at the top and work your way down.
Work Area Size
The size of area you tackle is basically as far as you can reach and manage comfortably. When removing defects using a DA Polisher you only want to work a small section at at time that same rule doesn't apply when you use the same tool to either apply or remove a wax by machine. You can basically tackle as large an area as you like and that you can comfortably reach.
Speed Setting
Use the
high speed setting to remove dried wax. I tend to use the 6.0 Speed Setting because you really want all the power the tool has to offer when trying to convince dried wax to give up it's grip on the paint and transfer onto the bonnet.
Downward Pressure
You want to use
firm downward pressure when removing the wax. The reason for this is you want the nap of the microfiber
slicing into the coating of wax and then breaking it up and this cannot be accomplished with light pressure.
VERY IMPORTANT
Don’t lift the face of the buffing pad off the car at any time when operating the polisher at high speeds, if you do the pad rotation will quickly speed up and chances are very good the effect of inertia will cause your buffing pad to fly off the backing plate and land on the ground somewhere where it will become contaminated with dirt and thus become unusable.
A technique for moving from panel to panel
A technique for how to move the polisher from panel to panel without having the pad fly off the backing plate even though you don’t turn the polisher off is to at the same time you lift the pad off the surface,
quickly place your clean hand against the face of the pad/bonnet. This won't hurt you and having the firm pressure of your hand against the pad will keep the pad from flying off the polisher till you touch it down again onto a new panel. For example going from the roof to the hood or from the hood to a side mirror, etc.
A technique for cleaning your bonnet on the fly
As you work your way around the car removing dried wax or paint sealant, you will get a build-up of dried wax residue on the face of the microfiber bonnet. While you have the option to remove the bonnet and reverse it and then place it back onto the buffing pad to use the clean side, what I do is in one smooth action, lift the oscillating pad off the surface of the paint while at the same time hold the fingernails of my 4 fingers against the bonnet with enough pressure to keep the pad from flying off the polisher but not so much that I stop the pad from rotating, and then move my fingernails over the surface of the microfiber bonnet and this is usually effective enough to remove any dried wax residue off the working face of the microfiber bonnet.
This fingernail technique works well enough to quickly remove any dried wax build-up and then get back to work and that’s the idea of doing anything
on the fly…
Variation of the bonnet - Just use a microfiber towel
Some people will simply place a clean, dry microfiber
towel flat onto the paint and then place a clean, dry buffing pad against the microfiber and remove wax using the microfiber trapped between the pad and the paint. I’m not a big fan of this method because the microfiber towel can easily work its way out from under the pad, especially if you try this on a vertical panel.
On Autogeek.net
Bonnets
Cobra™ Indigo 6 Inch Microfiber Bonnets 2 pack
All Bonnets
Small, firm dense foam buffing pads
Lake Country Hydro-Tech Low Profile 5 1/2 x 7/8 Inch Foam Pads
5.5” Lake Country Flat Yellow Cutting Pad
5.5” Lake country Flat Orange Light Cutting Pad
5.5” Lake Country CCS Yellow Cutting Pad
5.5” Lake country CCS Orange Light Cutting Pad
6” Lake Country Purple Kompressor Pad
6” Lake Country Orange Kompressor Pad
Small, firm lambswool pads
6” Lake Country Lambswool Polishing Pad
")