TornadoRed
New member
- Aug 19, 2010
- 683
- 0
I've been detailing my own cars as a hobby for about a year now and it was getting kind of old just washing and waxing new cars. I did some correction on my daughter's white neon over the winter, but I was getting the itch for a challenge. Plus I have about 5 years worth of wax that I need to try.
There's a friend at work that picked up a '95 BMW 5 series that was a good challenge. The previous owner took very good care of it, mechanical wise, but the paint has lost its luster. I see the car in the parking lot and it's always clean, so I figured he'd might like to have me spruce it up. When I asked him if I could detail it, he looked at me like was crazy, but he was all for it.
My plan was to do a clay, a simple light polish, and I wanted to finally try my Griot's Best of Show wax. Also I was going to do mild interior clean and dress with Wolfgang's Vinyl and Rubber Dressing which I like on my own cars.
After he dropped the car off we walked around it and I started to wonder what I got myself into. I should've taken a closer look before making the offer. Everywhere I looked was defect of some kind. He told me the car has been repainted which I didn't realize how important that information was until later. Also, the previous owner had two dogs. Yep, one look inside and I made up my mind that I wasn't touching it.
I started by washing each panel with DP Rinseless and claying using Mothers clay with DP Rinseless as lube. As I was claying, I noticed that the paint actually has a metallic flake!
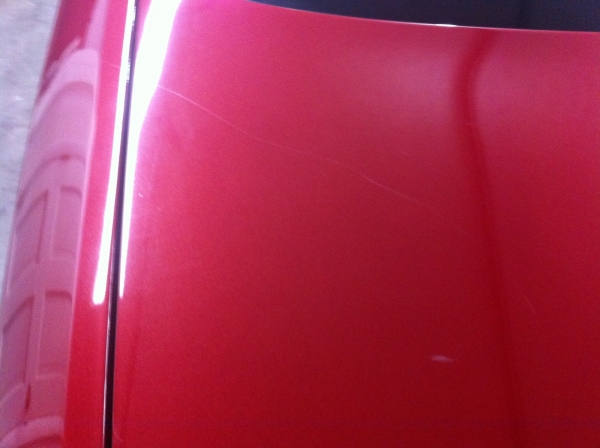
Once the clay was done, I started on my test spot on the trunk. All I can say is this paint was hard. I used a Griot's ROP with a Griot's orange pad and Machine Polish 3 and it didn't even make a dent. Well that shot my plan for a one step polish. So I hit it with a Griot's orange pad and Machine Polish 1. That was a little better, but still hard work. (Quick review on GGMP1: easy to work with, a little hard to remove)
Test spot before

Test spot after. 50/50 pic didn't turn out.

So I moved on to the roof and then to the hood. This was not going easy. Many of the defects just weren't budging and I realized one big thing; whoever repainted this car needs to be shot. They painted over the old paint's defects. This made the job very frustrating because it was hard to tell what was correctable. Plus with it being so hard, it was going very slow. By the time I got to the hood, I had to switch to a 5.5" cyan pad for MP1. I should've switched sooner as it took fewer passes to get it to look decent. It was frustrating that I was working it so hard and not getting the results I would've liked. I was able to get the driver side done with the MP1 and cyan pad by midnight. I went to bed but couldn't sleep, so I went back out to the garage at 4am.
Later that day my wife came out and decided to take a shot at the interior. Since I wasn't going to do the interior, I didn't take before pictures. I really wish I had because my wife made that interior her #####. There was dog hair everywhere and all of the leather and cloth was nasty, as you can imagine hauling two dogs around. The only thing she used was a half bottle of Ultima Interior Shampoo Gel (it's not a gel haha) and several costco MFs.
Since this had taken a lot longer than I planned, I decided to use an LSP I knew would be quick and went with Wolfgang Deep Gloss Paint Sealant.
Other products used: Griot's Wheel Cleaner and DP Gloss Tire Gel. This was the first time I used the tire gel and I really like the look. The wheels were oxidized and damaged and the tried sidewalls are cracked so I didn't take pics.
Now the pics...
Hood before

Hood after

Hood w/ oxidation before

After (Not 100% grrrrr) Notice the UTTGP on the wipers and cowl (forgot the sprayers grrrrr)

Trunk before
Trunk after (scratches on the left would not come out grrrr)

Driver side rear 1/4 panel before

Driver side rear 1/4 panel after

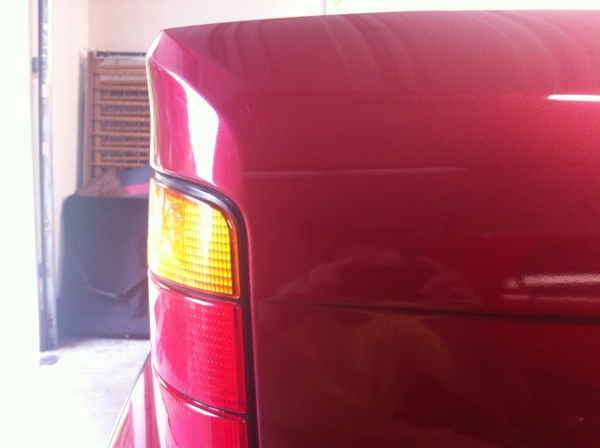
Rear bumper before
Funny story here. He was recently rear ended and this was the only damage. The tail pipes punched two holes in the other car's license plate.

Rear bumper after. Check out the UTTGP on the trim! Compare to the lower piece. (which I forgot grrrr)

Passenger side rear 1/4 panel before
Passenger side rear 1/4 panel after

Passenger door before (this must've been where the dogs looked out the window)

Passenger door after (UTTGP on door handle)

Roof before (the new paint over the old bad paint)

Roof after (at least the reflection is better)

There's a friend at work that picked up a '95 BMW 5 series that was a good challenge. The previous owner took very good care of it, mechanical wise, but the paint has lost its luster. I see the car in the parking lot and it's always clean, so I figured he'd might like to have me spruce it up. When I asked him if I could detail it, he looked at me like was crazy, but he was all for it.
My plan was to do a clay, a simple light polish, and I wanted to finally try my Griot's Best of Show wax. Also I was going to do mild interior clean and dress with Wolfgang's Vinyl and Rubber Dressing which I like on my own cars.
After he dropped the car off we walked around it and I started to wonder what I got myself into. I should've taken a closer look before making the offer. Everywhere I looked was defect of some kind. He told me the car has been repainted which I didn't realize how important that information was until later. Also, the previous owner had two dogs. Yep, one look inside and I made up my mind that I wasn't touching it.
I started by washing each panel with DP Rinseless and claying using Mothers clay with DP Rinseless as lube. As I was claying, I noticed that the paint actually has a metallic flake!
Once the clay was done, I started on my test spot on the trunk. All I can say is this paint was hard. I used a Griot's ROP with a Griot's orange pad and Machine Polish 3 and it didn't even make a dent. Well that shot my plan for a one step polish. So I hit it with a Griot's orange pad and Machine Polish 1. That was a little better, but still hard work. (Quick review on GGMP1: easy to work with, a little hard to remove)
Test spot before
Test spot after. 50/50 pic didn't turn out.
So I moved on to the roof and then to the hood. This was not going easy. Many of the defects just weren't budging and I realized one big thing; whoever repainted this car needs to be shot. They painted over the old paint's defects. This made the job very frustrating because it was hard to tell what was correctable. Plus with it being so hard, it was going very slow. By the time I got to the hood, I had to switch to a 5.5" cyan pad for MP1. I should've switched sooner as it took fewer passes to get it to look decent. It was frustrating that I was working it so hard and not getting the results I would've liked. I was able to get the driver side done with the MP1 and cyan pad by midnight. I went to bed but couldn't sleep, so I went back out to the garage at 4am.
Later that day my wife came out and decided to take a shot at the interior. Since I wasn't going to do the interior, I didn't take before pictures. I really wish I had because my wife made that interior her #####. There was dog hair everywhere and all of the leather and cloth was nasty, as you can imagine hauling two dogs around. The only thing she used was a half bottle of Ultima Interior Shampoo Gel (it's not a gel haha) and several costco MFs.
Since this had taken a lot longer than I planned, I decided to use an LSP I knew would be quick and went with Wolfgang Deep Gloss Paint Sealant.
Other products used: Griot's Wheel Cleaner and DP Gloss Tire Gel. This was the first time I used the tire gel and I really like the look. The wheels were oxidized and damaged and the tried sidewalls are cracked so I didn't take pics.
Now the pics...
Hood before
Hood after
Hood w/ oxidation before
After (Not 100% grrrrr) Notice the UTTGP on the wipers and cowl (forgot the sprayers grrrrr)
Trunk before
Trunk after (scratches on the left would not come out grrrr)
Driver side rear 1/4 panel before
Driver side rear 1/4 panel after
Rear bumper before
Funny story here. He was recently rear ended and this was the only damage. The tail pipes punched two holes in the other car's license plate.
Rear bumper after. Check out the UTTGP on the trim! Compare to the lower piece. (which I forgot grrrr)
Passenger side rear 1/4 panel before
Passenger side rear 1/4 panel after
Passenger door before (this must've been where the dogs looked out the window)
Passenger door after (UTTGP on door handle)
Roof before (the new paint over the old bad paint)
Roof after (at least the reflection is better)

 rops:
rops: