Cannot remove swirls

TP143

New member
Joined
Apr 5, 2012
Messages
22
Reaction score
0
Hi all,

I have given this a few attempts now without success. I am using a GG6/WG Total Swirl Remover/Orange Pad combo on a 06 black Ford Fusion. I have watched all the videos and believe I am replicating the process. I have given 6-8 passes on speed 5&6 on a few areas of the vehicle and only 50% or so of the swirls are removed. Even at slower pass speeds I do not achieve better results. Besides a ton of swirls my paint is fine. Do you think I need to step up to a more heavy duty compound/pad or is this only for imperfections greater than swirls? Any other thoughts?

Thanks
 
Maybe post a picture... Are you left with the big/deep swirl marks, or just fine swirls?
 
What type of car/paint do you have? That makes a big difference in product and technique.

One important part of polishing I don't here too much about is the downward pressure you need to apply to the machine. You need to apply more than what you think. I learned this awhile back watching Mike's vids and noticed how compressed the pad was while he polished. Watch for yourself and see.

Another common mistake is moving too fast. You want nice slow and steady passes that overlap each other 50%. Slower is better as it allows the polish to work and break down.

At last, some sirls are too deep and need serious paint correction. If you are not familiar with those techniques than just use a glaze to help fill because they are pretty advanced.
 
assuming you checked pad for trash first?and washed car and clay barred first. good luck!
 
ive done 6 cars now, which isnt much and leaves me still in the newby status ......... but ive tried several swirl removers/compounds and i ALWAYS have to resort back to megs 105 cut with some ultimate compound ... maybe i have done the 6 hardest rock hard clear coats on earth, but i have never had an easy car yet ... corvette, 2 mustangs, 2 saturns and a jeep ... i bet ive tried 10 free samples or purchased compounds/swirl removers ...

i dont know how these guys are correcting with less abrasive swirl removers ............ i havent been that lucky yet .......
 
I bet I've used this same combo th OP is using on 25 cars with excellent results! Thinking he isn't using downward pressure to break down the polish.
 
^^^
OAN, did your shipment ever arrive?
EDIT: Survive the train wreck?
 
Last edited:
Hi all,

I have given this a few attempts now without success. I am using a GG6/WG Total Swirl Remover/Orange Pad combo on a 06 black Ford Fusion. I have watched all the videos and believe I am replicating the process. I have given 6-8 passes on speed 5&6 on a few areas of the vehicle and only 50% or so of the swirls are removed. Even at slower pass speeds I do not achieve better results. Besides a ton of swirls my paint is fine. Do you think I need to step up to a more heavy duty compound/pad or is this only for imperfections greater than swirls? Any other thoughts?

Thanks

Which orange pad, LC or Griot's? I might be remembering things wrong, but I think I read that the Griot's orange pad doesn't really have a great amount of cut.
 
I always worry about the amount to downward pressure with an orange CCS pad, I'm afraid I'm going to dent a panel pushing down when there is such little give in the orange pad :S
 
First read this, everyone should read this BEFORE running into problems as it's a check list to avoid the common problems. Someone once suggested it to be included with ever order and it can be, simply add my how-to book to the order as it's in my how-to book on page 95

DA Polisher Trouble Shooting Guide


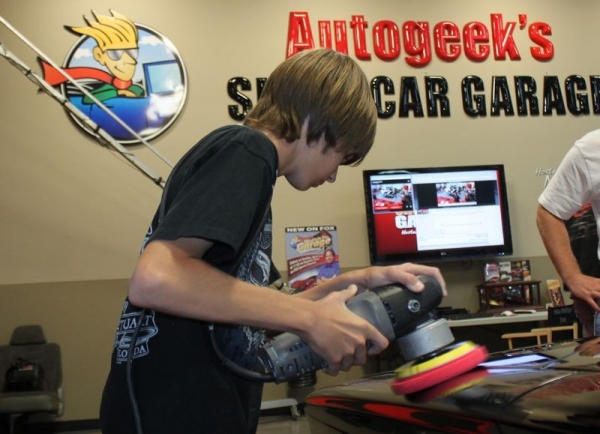
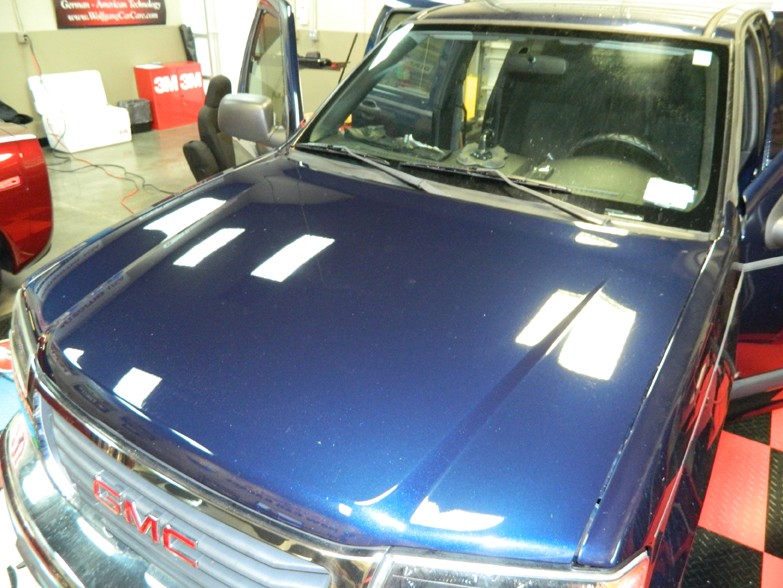
Tyler, age 15 removing swirls using a Porter Cable 7424XP Dual Action Polisher
1965Plymouth035.jpg


When you're first starting out machine polishing and learning to use a DA Polisher it's common to have questions about your results and your results are directly tied to your technique.

Here's a list of the most common problems,
1. Trying to work too large of an area at one time.

2. Moving the polisher too fast over the surface.

3. Using too low of speed setting for removing swirls.

4. Using too little downward pressure on the head of the polisher.

5. Using too much downward pressure on the head of the polisher so the pad quits rotating.

6. Not holding the polisher in a way to keep the pad flat while working your compound or polish.

7. Using too much product or using too little product.

8. Not cleaning the pad often enough.
Here's a list of the solutions in matching order,

1. Trying to work too large of an area at one time.
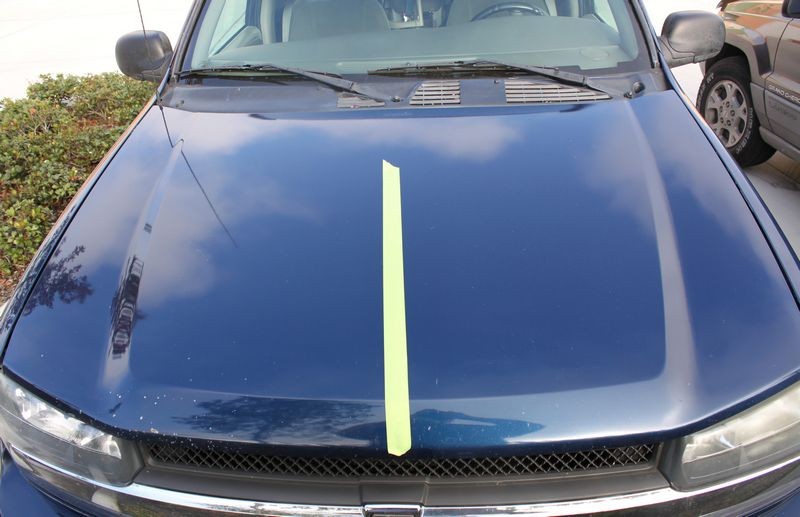
Shrink the size of your work area down. You can't tackle to large of an area at one time. The average size work area should be around 20" by 20". Most generic recommendations say to work an area 2' by 2' but for the correction step, that's too large. You have to do some experimenting, (called a Test Spot), to find out how easy or how hard the defects are coming out of your car's paint system and then adjust your work area to the results of your Test Spot. The harder the paint the smaller the area you want to work.


2. Moving the polisher too fast over the surface.
For removing defects out of the paint you want to use what we call a Slow Arm Speed. It's easy and actually natural for most people new to machine polishing to move the polisher quickly over the paint but that's the wrong technique. One reason I think people move the polisher too quickly over the paint is because they hear the sound of the motor spinning fast and this has psychological effect which causes them to match their arm movement to the perceived fast speed of the polisher's motor.

Another reason people move the polisher too quickly over the paint is because they think like this,

"If I move the polisher quickly, I'll get done faster"

But it doesn't work that way. Anytime you're trying to remove swirls, scratches, water spots or oxidation using a DA Polisher you need to move the polisher s-l-o-w-l-y over the paint.


3. Using too low of speed setting for removing swirls.
When first starting out many people are scared of burning or swirling their paint, so they take the safe route of running the polisher at too low of a speed setting but this won't work. The action of the polisher is already g-e-n-t-l-e, you need the speed and specifically the pad oscillating 
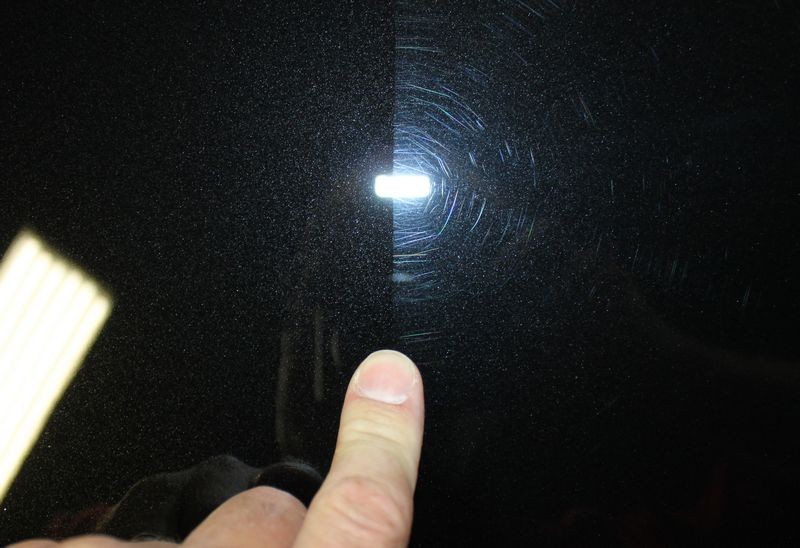
and rotating over the paint as well as the combination of time, (slow arm speed), together with the abrasives, the pad aggressiveness, and the downward pressure to remove small particles of paint which is how your remove below surface defects like swirls or scratches.

Removing below surface defects is a leveling process where you need the abrasives to take little bites out of the paint and to get the abrasives to take these little bites with a tool that uses a Free Floating Spindle Bearing Assembly you need all of the above factors working for you including a high speed setting.


4. Using too little downward pressure on the head of the polisher.
For the same reason as stated in #3, people are scared, or perhaps a better word is apprehensive, to apply too much downward pressure to the polisher and the result of too little pressure is no paint is removed thus no swirls are removed.


5. Using too much downward pressure on the head of the polisher so the pad quits rotating.
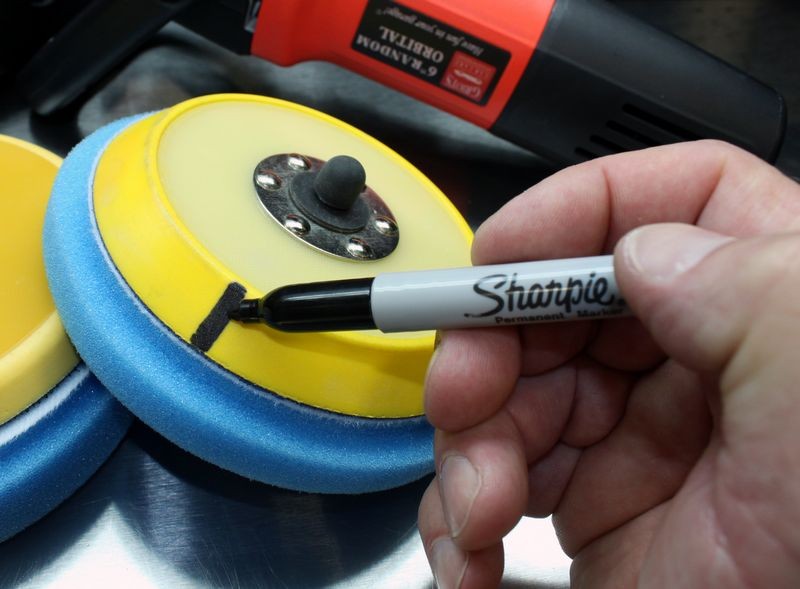
If you push too hard you will slow down the rotating movement of the pad and the abrasives won't be effectively worked against the paint. You need to apply firm pressure to engage the abrasives against the paint but no so much that the pad is barely rotating. This is where it's a good idea to use a permanent black marker to make a mark on the back of your backing plate so your eyes can easily see if the pad is rotating or not and this will help you to adjust your downward pressure accordingly.

Correct technique means finding a balance of applying enough downward pressure to remove defects but not too much downward pressure as to stop the rotating movement of the pad.

This balance is affected by a lot of factors like the lubricity of the product you're using, some compounds and polishes provide more lubrication than others and this makes it easier to maintain pad rotation under pressure.

Another factor that can affect pad rotation are raised body lines, edges and curved surfaces as anytime you have uneven pressure on just a portion of the face of the pad it can slow or stop pad rotation. This is where experience comes into play and experience comes from time spent behind the polisher.


6. Not holding the polisher in a way to keep the pad flat while working your compound or polish.
Applying pressure in such a way as to put too much pressure to one edge of the pad will cause it to stop rotating and thus decrease abrading ability.


7. Using too much product or using too little product.
Too much product hyper-lubricates the surface and the result is that abrasives won't effectively bite into the paint but instead will tend to skim over the surface. Overusing product will also accelerate pad saturation as well increase the potential for slinging splatter onto adjacent panels.

Too little product will means too little lubrication and this can interfere with pad rotation.

Again there needs to be a balance between too much product and too little product and finding this balance comes from reading articles like this one, watching videos an most important, going out into the garage and putting in time behind the polisher and as you're buffing with specific product and pad combinations, pay attention to pad rotation.


8. Not cleaning the pad often enough.
Most people simply don't clean their pad often enough to maximize the effectiveness of their DA Polisher. Anytime you're abrading the paint you have two things building up on the face of your buffing pad,
  • Removed paint
  • Spent product
As these to things build up on the face of the pad they become gummy and this has a negative affect on pad rotating plus makes wiping the leftover residue on the paint more difficult. To maintain good pad rotation you want to clean your pad often and always wipe-off any leftover product residue off the paint after working a section. Never add fresh product to your pad and work a section that still has leftover product residue on it.


Pad Cleaning Articles

Why it's important to clean your pads often...

How to clean your foam pad on the fly

How to use the Grit Guard Universal Pad Washer


Tyler, age 15 machine applying a paste wax using a Porter Cable 7424XP Dual Action Polisher

1965Plymouth067.jpg


1965Plymouth071.jpg


:buffing:
 
Video: Mark your backing plate to make it easy to see pad rotation


MarkYourBackingPlate01.jpg


Here's a quick video that show how and why to mark your backing plate to see and monitor pad rotation while doing any correction or polishing steps.


[video=youtube_share;QM8PnDooZP8&hd=1"]How To Check Pad Rotation on a DA Polisher -...[/video]​


It's also important to maintain pad rotation with PC style tools when using a one-step cleaner/wax or AIO type product on neglected paint.

It's not vital to maintain pad rotating when applying a finishing wax or finishing paint sealant to a finish that you've just buffed out.

Note: Finishing Waxes and Finishing Paint Sealants would be of the type that don't offer any cleaning or abrading ability.


See my article here,

The Difference Between a Cleaner/Wax and a Finishing Wax
Subtitle: How To Choose The Right Wax or Paint Sealant for your Detailing Project


Also see these videos...

Video: How to remove shallow RIDS and how to machine apply both a paint sealant and a finishing wax


Video: How to buff tight areas plus concave and convex curved panels by machine


Video: Tips for using a Rotary Buffer and the Flex 3401 on vertical panels


:xyxthumbs:
 
And of course, BEFORE buffing out an ENTIRE car, first dial in your process and make sure you're getting GREAT results to one small area before buffing out the entire car.

If you can't make one area look GREAT then you're not going to be able to make the ENTIRE car look good.

Make sense?

Your test spot tests 4 things,

  • Product choice
  • Pad choice
  • Tool Choice
  • Your skill and ability

How To Do a Test Spot


A Test Spot
TestSpot03.jpg


A Test Spot is where you take the products, pads, tools and your best technique and buff one small section, usually on a horizontal panel, to test out these things to see if they'll create the results you want, hope for and dream about in some cases.

If your choice of products, pads, tools and technique works to remove the defects and restore the finish to your expectations, then theoretically you should be able to duplicate the same process to the rest of the vehicle and create the same results.

If your choice of products, pads, tools and your technique doesn't create the results you want, hope for and dream about then you can come to the forum and post what you're seeing and we'll do our best to help you tweak your technique, substitute different products, pads and/or tools to see you through to success.


Tape Line
It helps to place a piece of painter's tape on a horizontal surface, usually the hood or trunk lid but if you want to be more discreet you can use the roof. Then only work on one side of the tape line as this will make it very easy for you to see visual changes due to the distinct demarcation line between before and after results.


Tape-line using 3M Green Painter's Tape
TapeLine02.jpg


Before and after results along the demarcation line
FlexVideo005.jpg


Test Spot performed by Nick Rutter @ Autogeek on a severely oxidized 2006 GMC Canyon
Here's a series of pictures taken by my co-worker Nick from a severely neglected truck he helped another co-worker Jason to buff out. For this project Nicked performed a Test Spot and the pictures really tell the story of what a Test Spot would look like that I've created this article using these pictures and Nick's permission.

The project vehicle is a severely neglected 2006 GMC Canyon with a heavily oxidized clear coat finish. In this case Nick used a one-step cleaner/wax applied by machine but you would buff the paint in the same way with whatever "system" you were planning on using.

If using a multiple step approach then you would use all the products and do all the steps to your Test Spot because this would be what you would do to the entire vehicle if the results from your Test Spot are good and you want to see what the true end-results are going to be. You can if you want skip applying the LSP or Last Step Product if you're happy with the last prep step as in most cases the application of your LSP will simply either make the paint look even better or maintain the results you've created.


Test Spot
test-spot-redone.jpg


Hood Competed
TestSpot04.jpg


Truck completed
TestSpot06.jpg


TestSpot07.jpg


See the original write-up for this project here,

How To: Maximize Time with a Cleaner Wax/AIO


Test every detailing project that's new to you
If you've never worked on the paint on the project you're currently detailing, the before you buff out the entire car, take a moment to do a Test Spot.

I do a Test Spot on ever car I work on as this give me an idea of,
  • How the paint reacts to machine polishing
  • How the products and pads are working on this specific type of paint
  • A feel for if the paint is hard or soft or somewhere in-between
  • A very good idea as to how the paint will and thus how the vehicle will look after the project is finished.
Plus, if you're buffing out the car professionally you can share with your customer how awesome they're car is going to look after you get through with it.


Here's the results from some of the Test Spots we've done to some of the recent projects cars here at AGO


1959 Chevrolet El Camino - Extreme Makeover - Modeled by Christina

1959ElCamino008.jpg


1959ElCamino084.jpg


Live Broadcast Video - 1965 Plymouth Valiant - Extreme Makeover


Before
1965Plymouth013.jpg


Test Spot
1965Plymouth025.jpg


After
1965Plymouth078.jpg


Wetsanding Test Spot
Even if you're going to wetsand or dampsand a vehicle it's just as important to do a Test Spot by sanding a section of paint and then testing to see what it's going to take to remove 100% of your sanding marks.


Test Spot
MorePeopleMoreBuffers003.jpg


Hood compounded
MorePeopleMoreBuffers004.jpg


After
jaysk508.jpg


Test, test, test...
Test out the products you're planning on using over the entire vehicle to one small area first. Make sure you're getting the results you want, hope for and dream about before buffing out the entire project.


:)
 
Mike, if I prime a dry LC foam pad with product like you showed in your "How to prime a foam pad when using a DA Polisher" article then clean the pad "on the fly" with a terry cloth do I need to re-prime the pad before I get back to polishing? I'm sorry if this is a stupid question.
 
Back
Top