Hey 'Geeks! It’s been awhile since I’ve had the time to do a little write-up of my work, so I thought I’d share what went into this recent project of mine! It's not 100% 'Detailing' but I hope you all enjoy anyway…. This is a long one
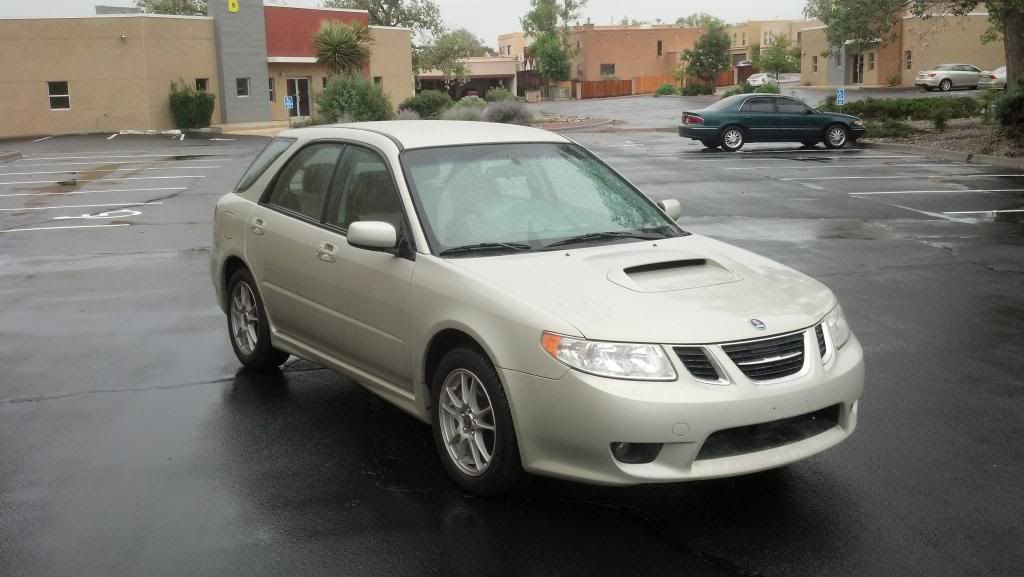
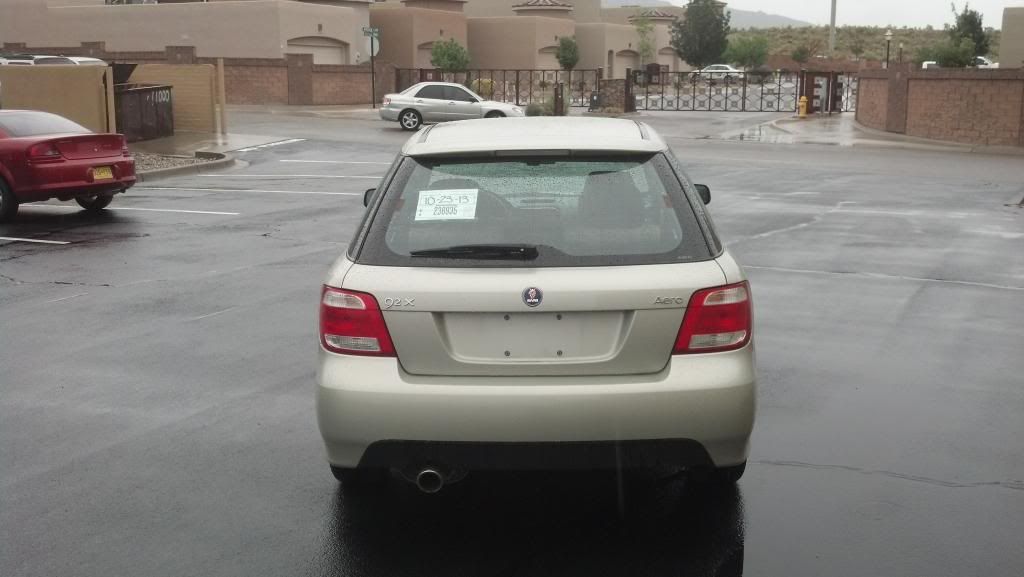
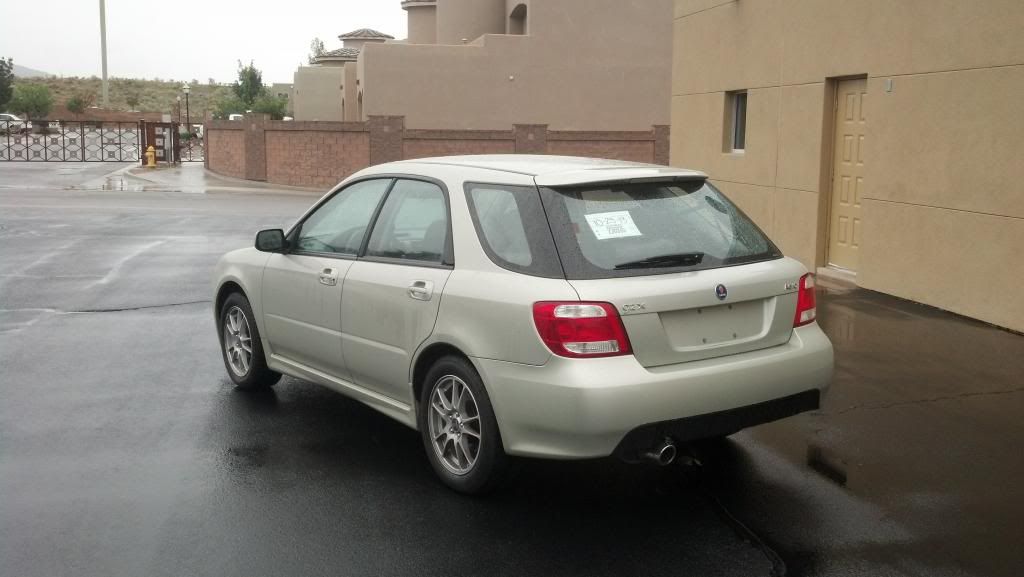
Year - 2005 Make - Saab Model - 9-2x Aero Color - Desert Silver Metallic Vinyl - Avery Dennison Lagoon Blue Matte Metallic
I purchased this car a couple months ago from Kirkland, Washington off of AutoTrader. Low miles, one owner, very clean, straight body, etc etc… I needed it. My biggest gripe about the car was that the paint that came on this thing from the factory is, in my opinion, Ugly. So before it arrived, I knew something had to be done about it and that’s when the vinyl was ordered. I chose Avery’s Lagoon Blue Matte Metallic simply to be completely different from what anyone would see on the road. It’s a very unique color, being Matte and having a Metallic flake in it, it almost changes color in different lighting. In addition to vinyl wrapping, other areas of the car needed attention to go with the entire “look”, so you will see that documented here as well.
This car is daily driven, and on top of that, I don’t have the time to spend maintaining (Waxing/Sealing etc.) the vinyl and every other surface on this car regularly, so it only made sense to protect it, top to bottom, with the best protection available and forget about it. For this, I chose CarPro’s CQuartz Nano-Coatings and Optimum Polymer Technologies’ Ceramic Coatings.
Recently, I became the first and only Authorized Installer in the State for CQuartz Finest. Now I won’t get too into describing this phenomenal product right now, as I’ll be working on this write-up all through the night if I did, so for now I’ll just say that it’s AMAZING!
Unlike waxes and sealants, CQ Finest adds a measurable 2~3µm thick protective “glass” coating. While the durability of wax and sealants which is measured in months, CQFinest durability is measured in years!
CQ FINEST is the most exclusive automotive surface protection in the world! Only available to select detailers, Finest was designed specifically for those with discerning tastes for its exceedingly rich & glossy finish, as well as its ability to resist the elements and protect like no other. While its beauty is undeniable, that is only the start! Long term protection of that beauty and resistance to the environment is equally important. Utilizing a proprietary condensed nanotech material, FINEST adds a measurable 3µm tough, high gloss “glass” layer, which protects the paint from dirt, brake dust, bugs, bird bombs, and tar for a minimum of two years. To experience the glossiest finish and best protection on the market, visit CQuartz Nanotech Ceramic Automotive Paint Coating for more information.
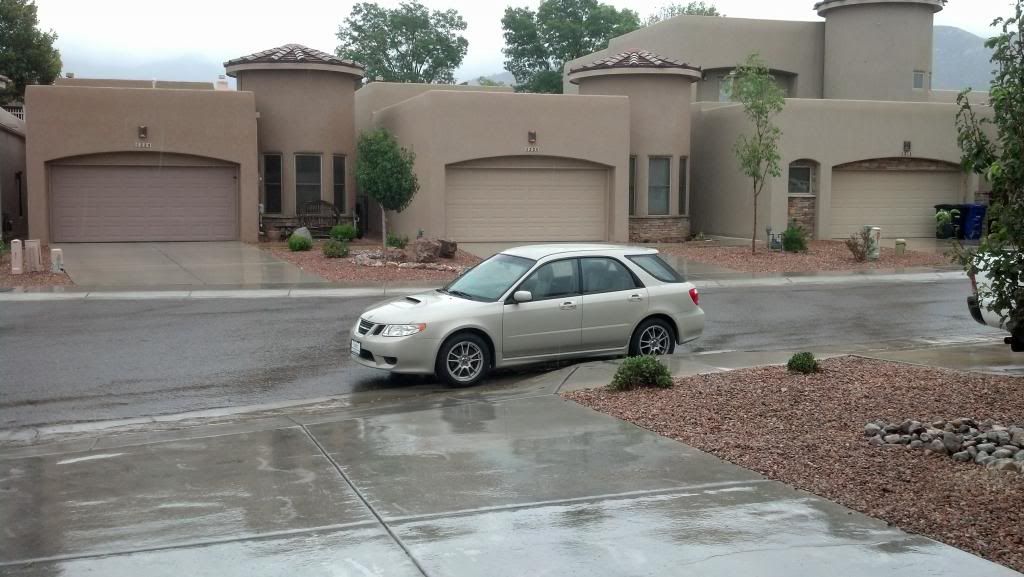
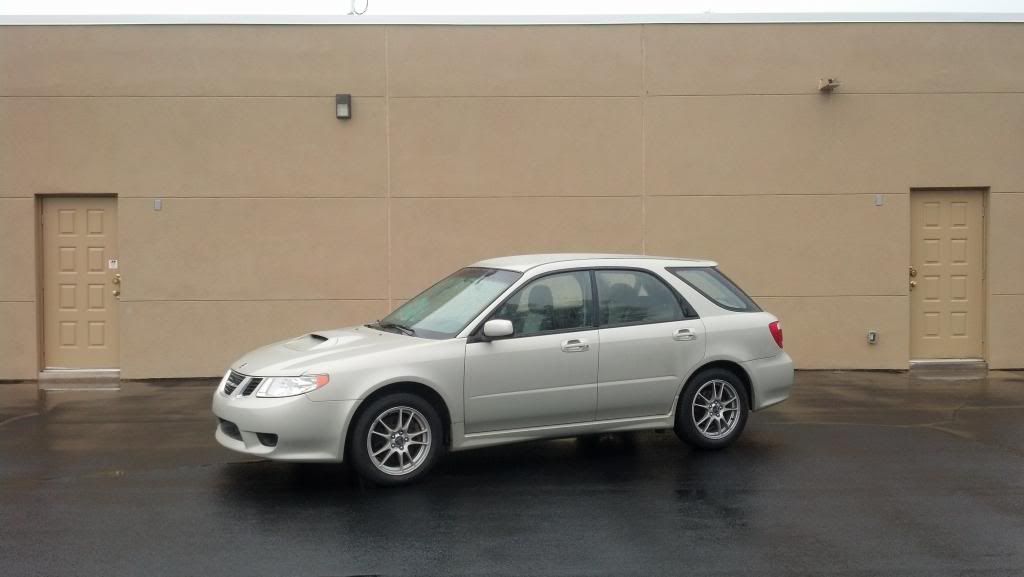
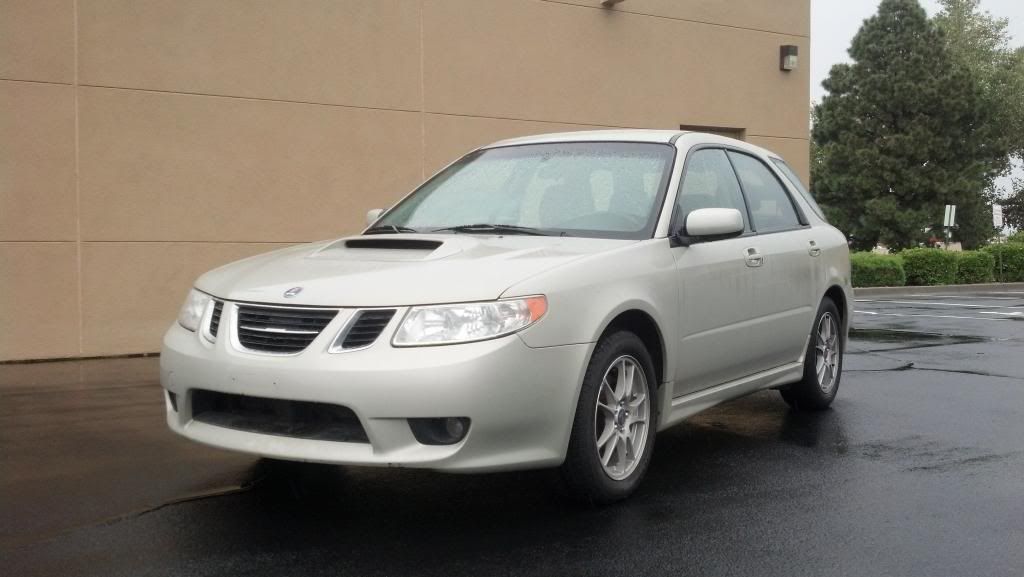
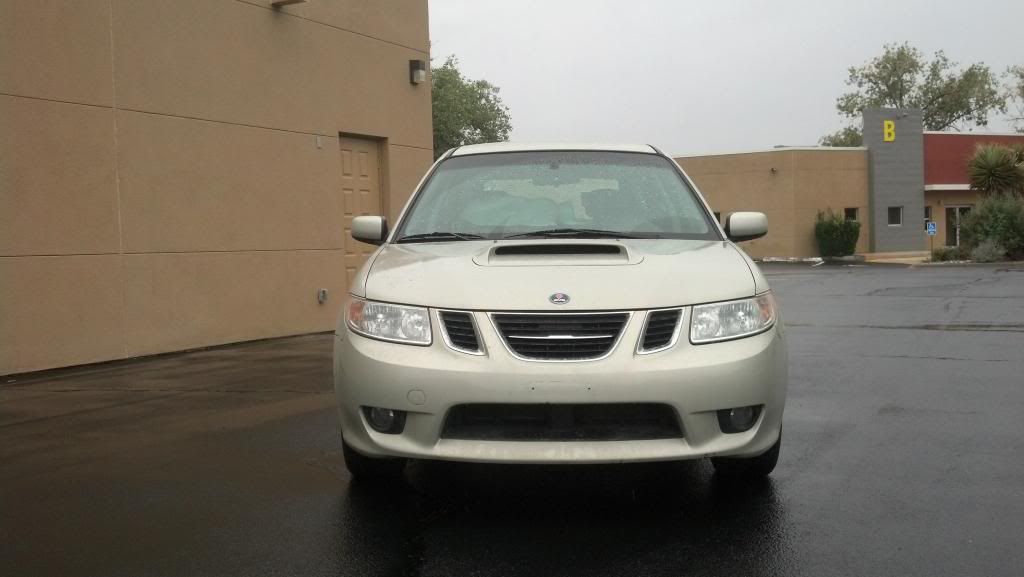
Upon arrival to her new home... the NM Desert:
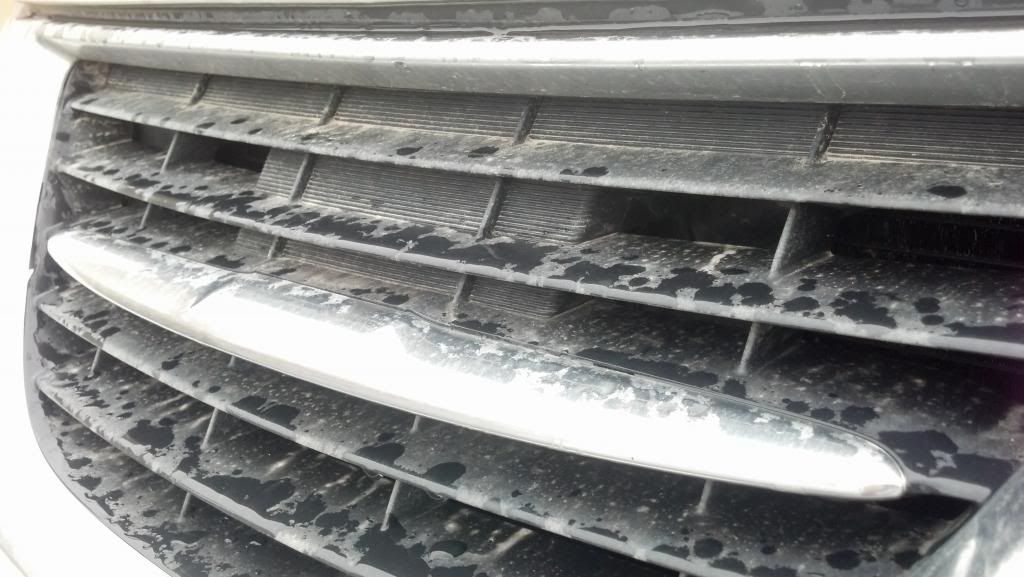
Sun-Beaten, Dry, & Faded Trim
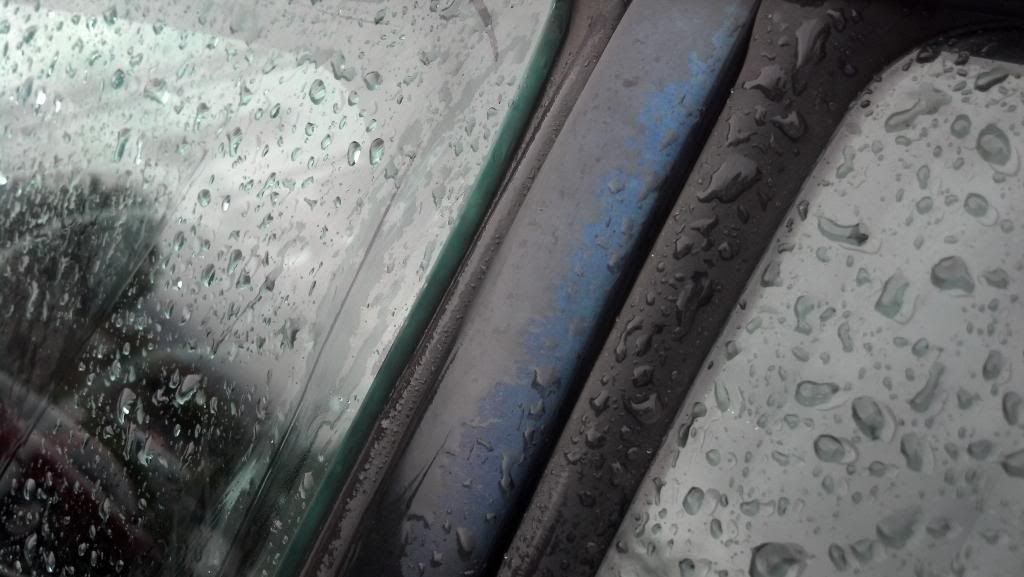
Rainbow Trim
More faded Trim that needs attention
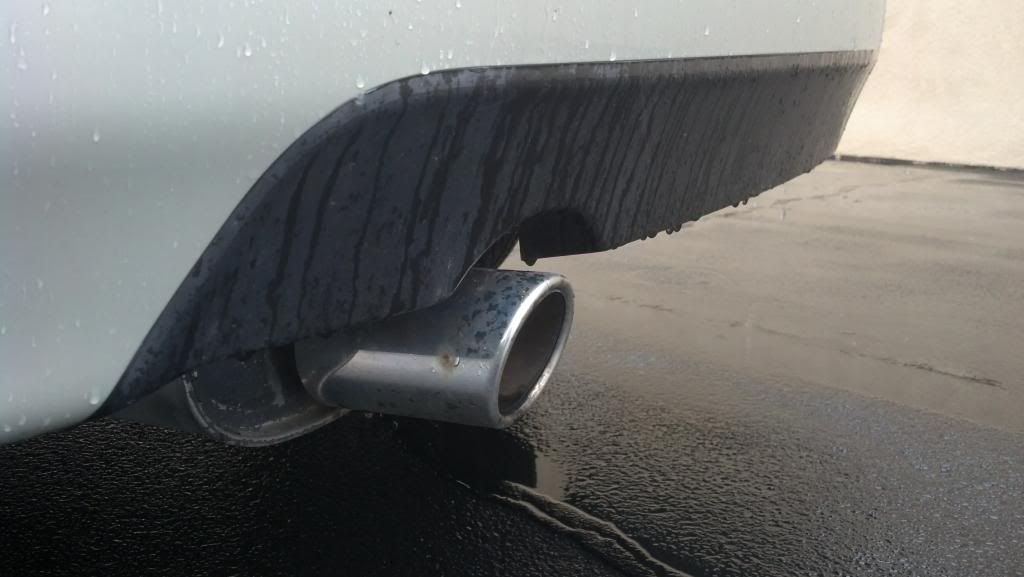
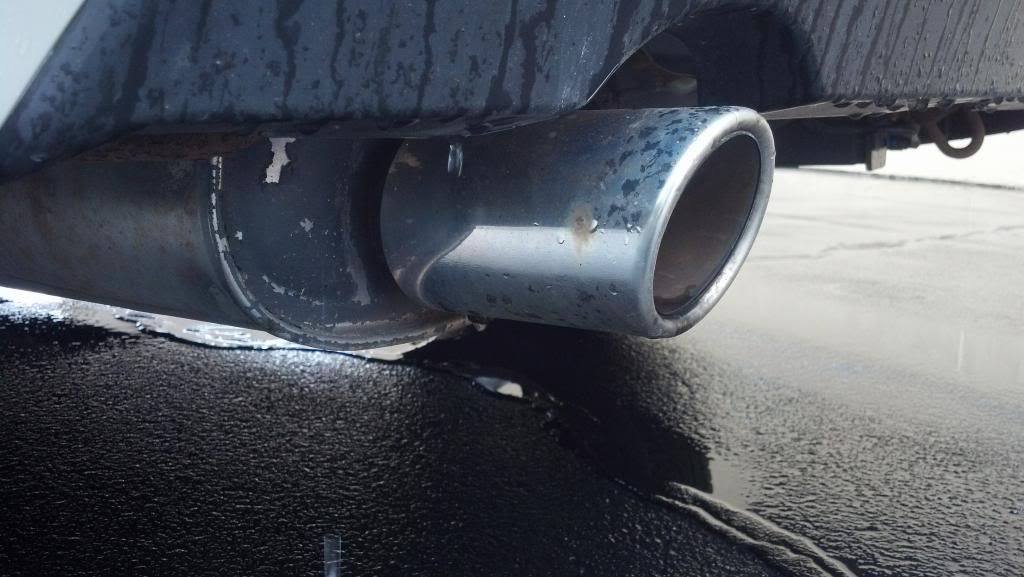
Exhaust needs replacing
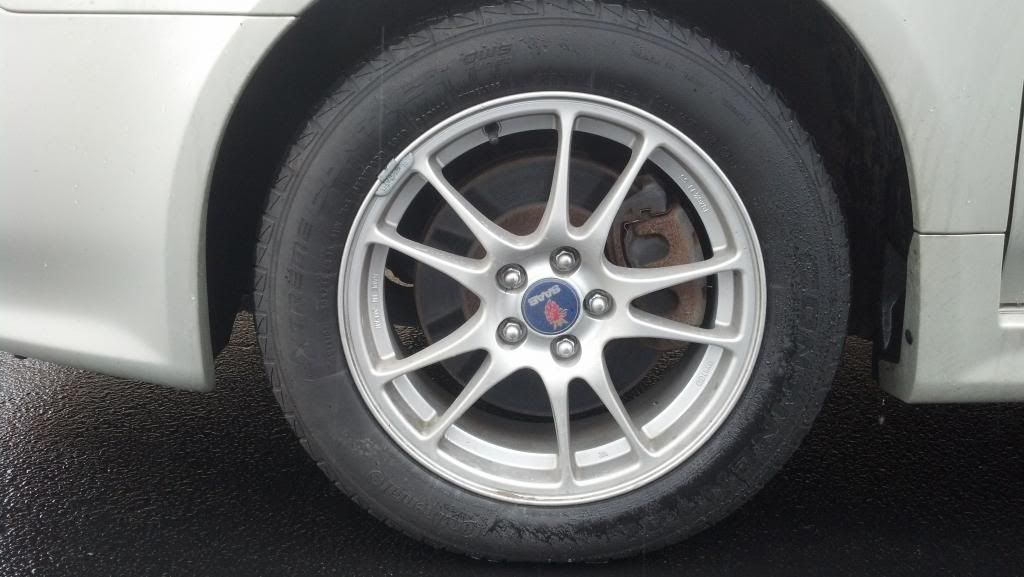
Stock wheels are nice and rash-less but wouldn’t fit the ‘New Look’
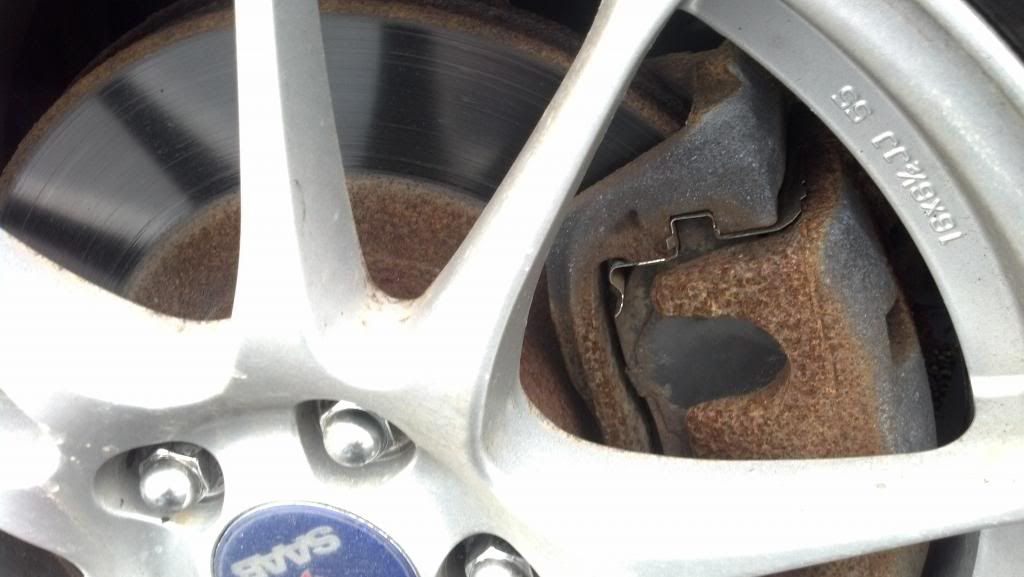
Ugly rusted rotors and calipers
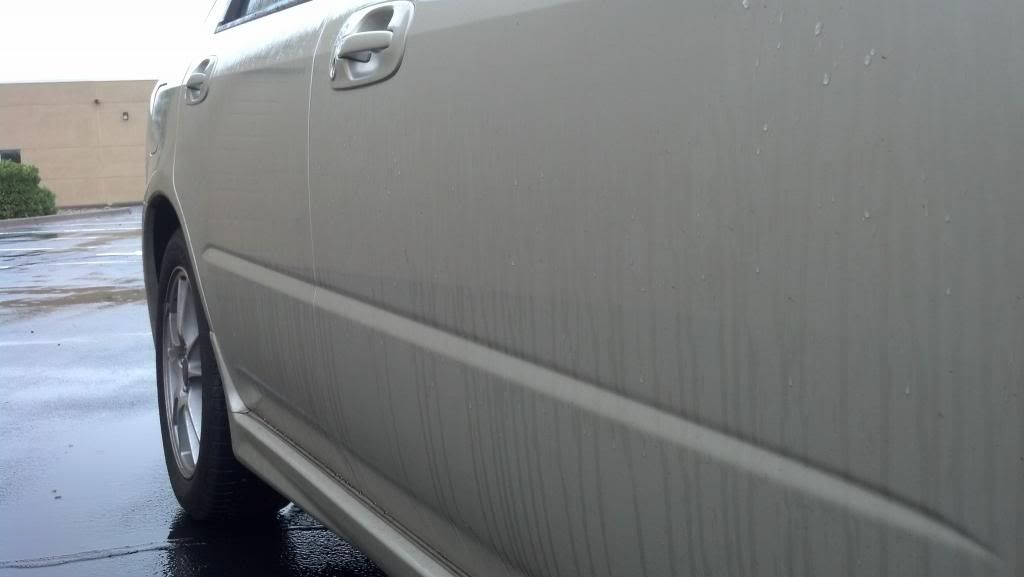
Oxidized dull, dirty, and unprotected paint.
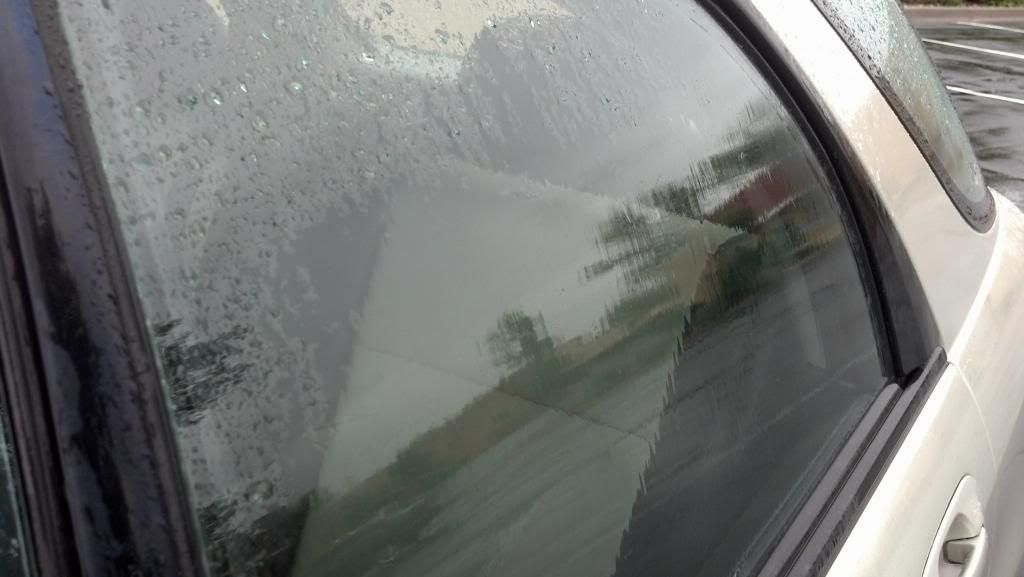
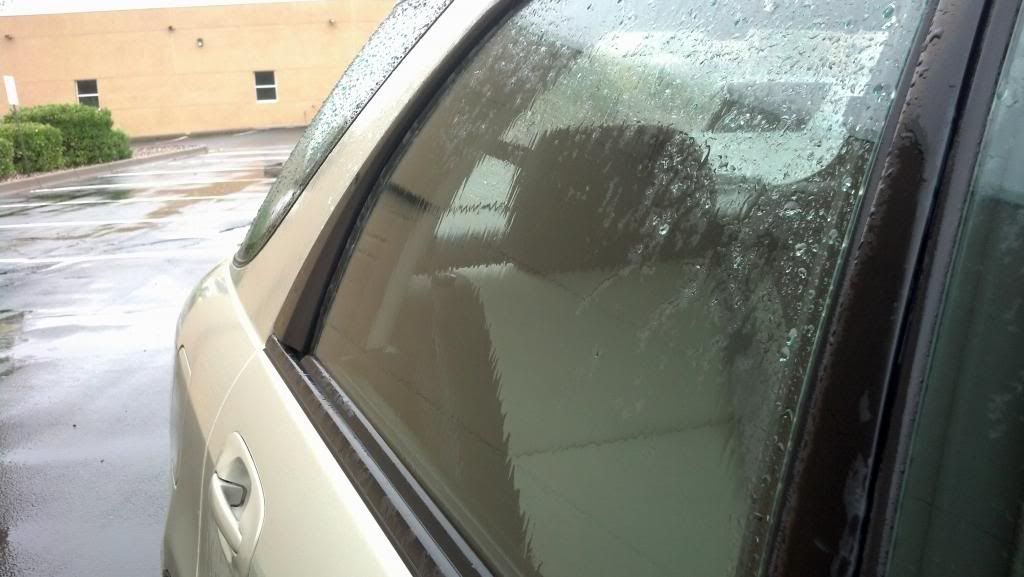
Water laying flat on the paint is not a good sign. I was fearing heavy amounts of contamination at this point…
The rain was clinging to the glass as well showing no signs of protection. This glass will be clayed, polished and protected later
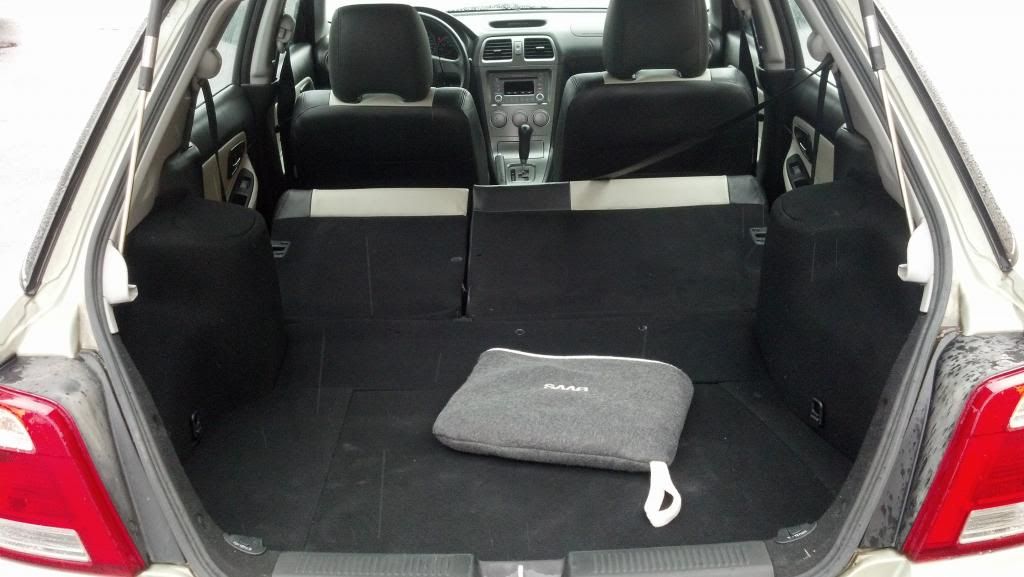
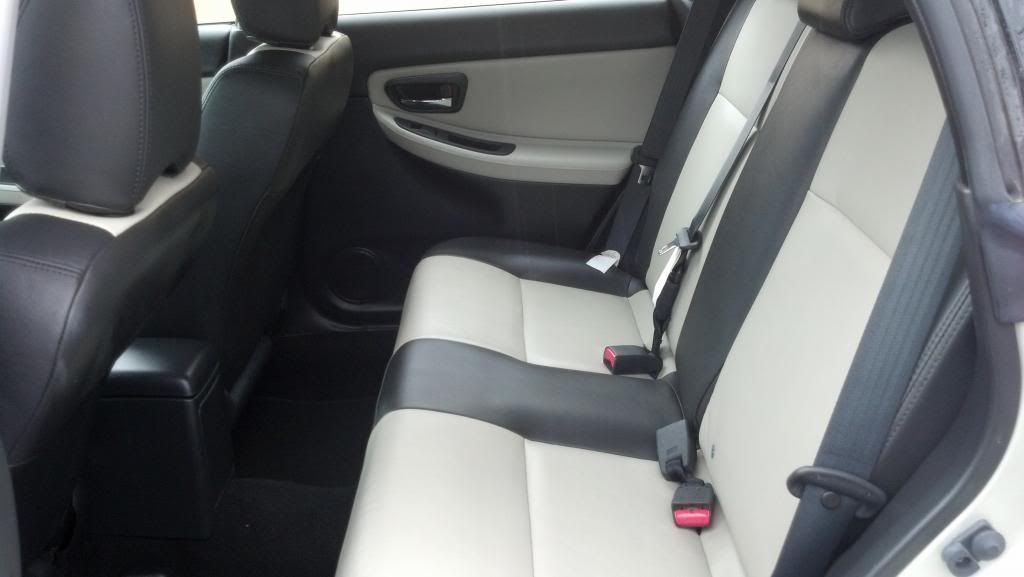
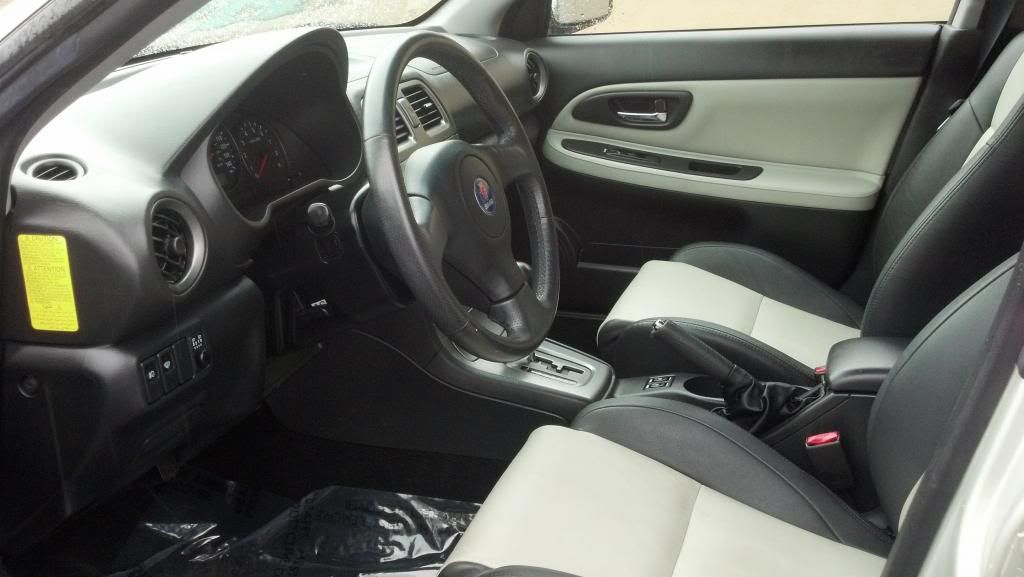
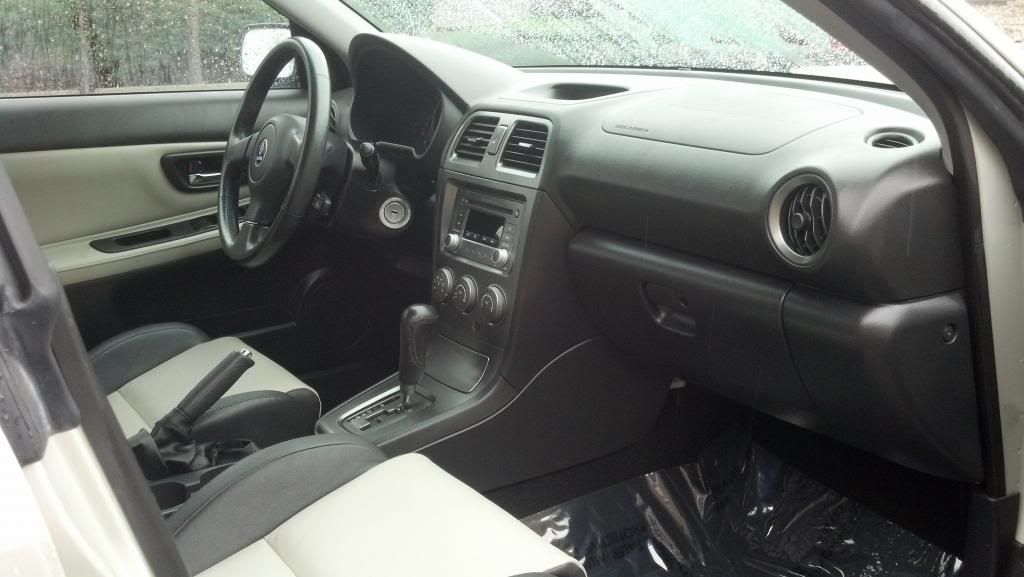
I got lucky with the Interior being basically flawless. No smoke, pets, stains, tears, rips, or scratches! It did have a mild odor but that would be easily remedied later in the write-up
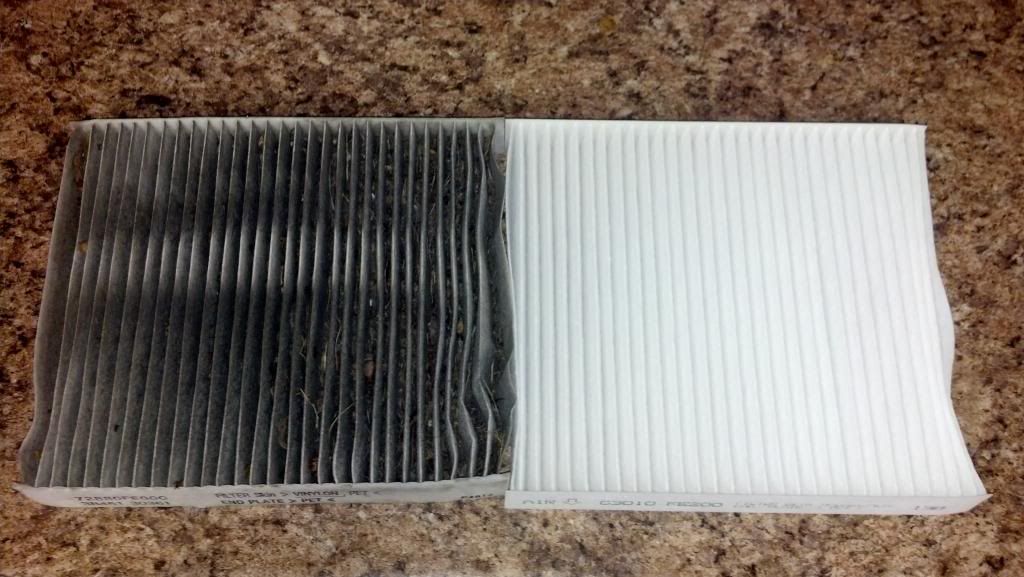
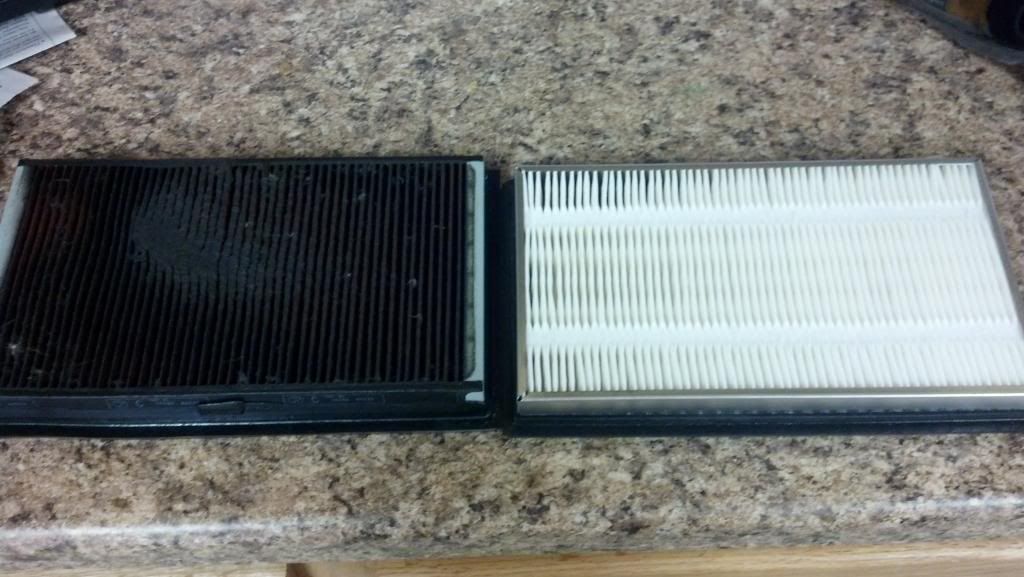
After initial inspection, the first thing I do with any used car I purchase is change the Cabin Filter! Before the New filter was installed, So2 Pure was applied to kill bacteria and odors before they enter the cabin.
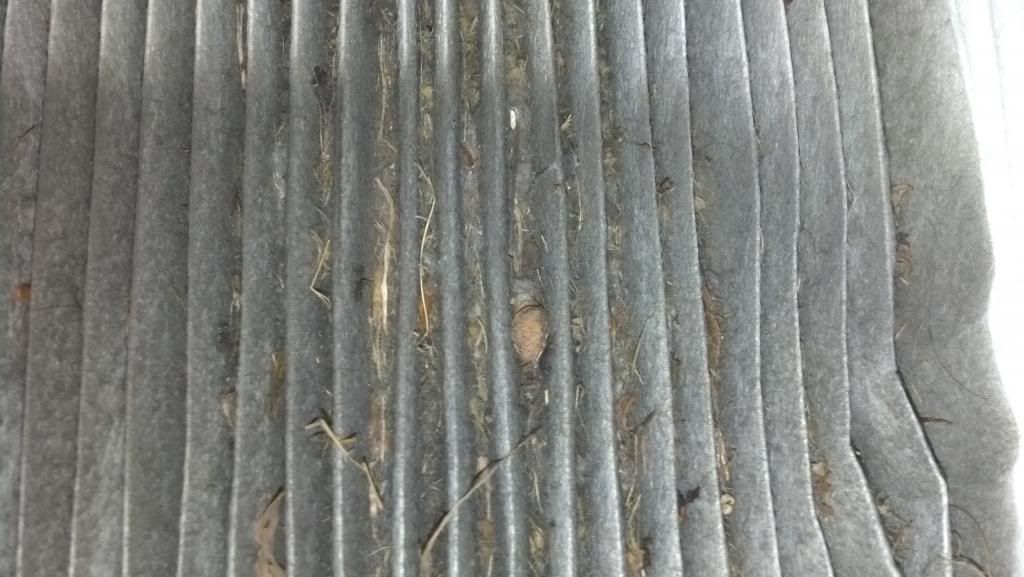
47,000 miles of filth trying to make it’s way through the ventilation system!
Air filter was next. Almost like someone coated it with grease and oil
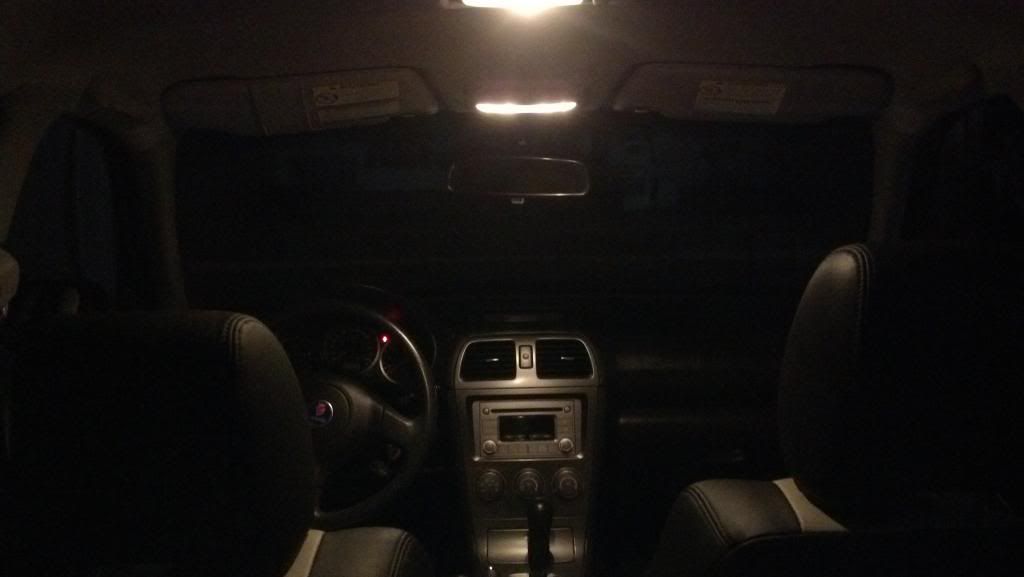
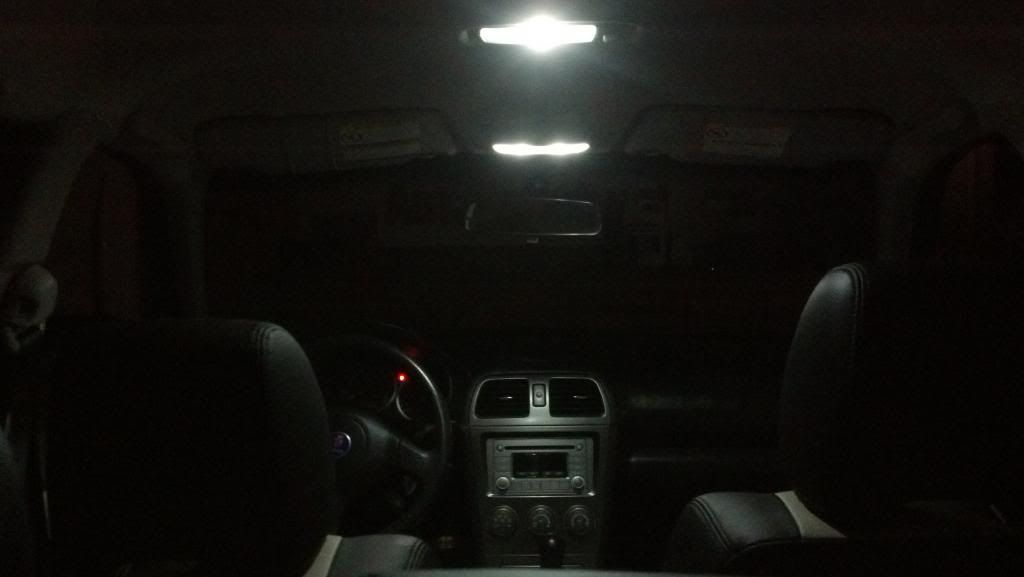
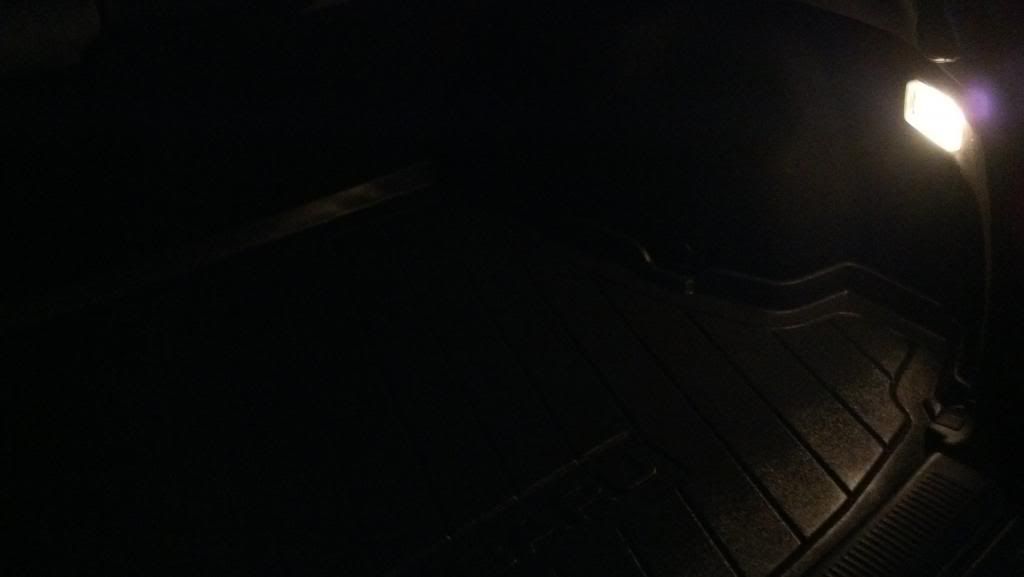
Next was getting rid of every bulb and replacing them with LEDs. Really cleans up the look, and very bright white light makes it much easier to see!
The Brake Calipers and Rotors were coated with Opti-Coat. The pic below shows some water beading after it had cured…
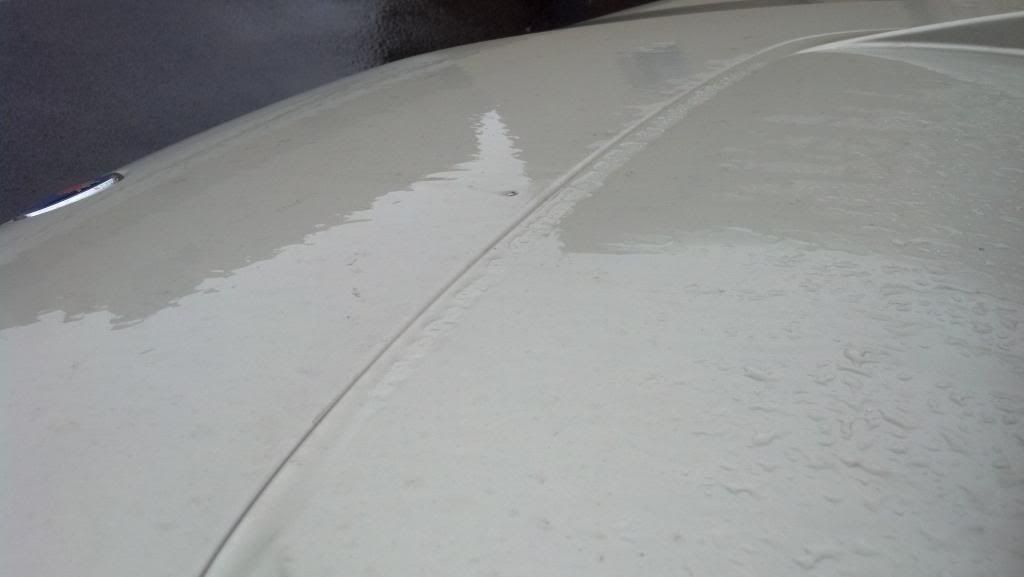
Walked out in the morning after a full night of rain and saw that this poor car is seriously lacking some good protection on it's paint! Pic shows the rear portion of the roof on the Saab
And here's our other car parked right behind it. Same area on the roof, same angle. That's a great example of how water should act when your paint is protected with a durable product! If water on your paint doesn’t look like it does in the picture below, then you need at the very least, to wax it. *Wolfgang Deep Gloss Paint Sealant 3.0... ~2.5 months old*
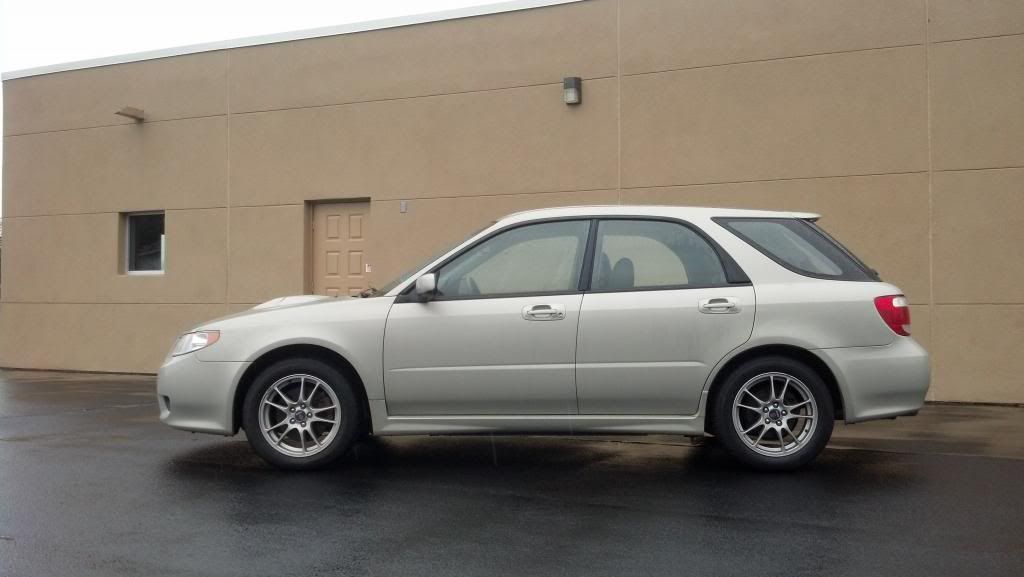
The clouds decided to go away for a bit so I could see what the vinyl looked like in the Sun!
A Big Thank You goes out to Wayne (aka RatFink) for tossing my old rusted exhaust to the side and installing the Sti catback! Much better looking and a nice subtle rumble
The Wheels arrived. After they were washed and dried, they were coated with Optimum Opti-Coat.
Optimum’s Opti-Coat is a hard wearing, aftermarket, ceramic clear coat for superior resistance to scratching (9H) and chemical etching from environmental impacts. It provides permanent protection for all factory paints, and can also be applied to exterior glass, metal, and hard plastic surfaces. This coating is the perfect candidate for my wheels as I hate spending the time cleaning all the caked on brake dust that accumulates in such a short period of time. Opti-Coat makes it much more difficult for brake dust to adhere to the wheel and most importantly, makes cleaning much easier
Every inch was coated
Making sure to get behind the spokes
After the Coating cured, I tested the water beading on the center caps. Perfect spherical beads!
Carpro’s ReLoad Silica Spray Sealant was used to Top the Opti-Coat on the wheels
On to the Wash and Decontamination:
The car was Foamed and left to dwell to help loosen any dirt on the surface before we touch the paint. This helps reduce the chance of scratching/marring the surface while washing. Foam was rinsed off, re-Foamed, Hand Washed, Rinsed, then Dried via warm filtered air through a blower.
After the car was dried, the paint, glass, exhaust tip were Clay Bar’d.
Have you ever felt your paint after it has just been washed? Does the surface feel gritty, almost like sand paper? What you’re feeling are contaminants that have embedded themselves into your clear coat and they cannot be removed with a normal washing. A Clay Bar is used with a lubricant to remove these contaminants that are stuck on the clear coat! After a Clay Bar Treatment, your paint is left feeling smooth as glass!
*Important* By continually having a layer of protection on your paint, whether it be a wax, synthetic sealant, or coating, you will greatly reduce the accumulation of these contaminants over time! Clean paint not only looks and feels better, but your layer of protection will last much longer as well.
Clay Bar before
Clay Bar after claying a 2x2 foot section. The Clay has picked up an immense amount of contamination
After Claying, I gave all the paint and glass a thorough soaking of IronX and agitated every inch with a boar’s hair brush. IronX is a chemical cleaner that works its way into the pores of the paint and dissolves the contamination that a Clay Bar cannot reach. While clay will remove Above surface bonded contaminants, IronX works to clean the paint even further Below the surface. After Claying and an IronX treatment, you are left with a super clean and smooth surface that is correctly and properly prep’d for polishing, a wax/sealant/coating, or in this case, Vinyl!
A chemical reaction occurs when IronX comes in contact with contamination, and the liquid will turn red/purple as it starts dissolves them.
After the final decontamination step (IronX), the car was pulled outside for another foam wash and rinse. Once again it was dried, and now that it is 100% clean, I was able to see the true condition of this paint. The Sun showed me that swirls, spider webs, and marring was present on all panels. Luckily I will be covering it up with vinyl!
Vinyl Wrap:
Here are some before and after shots of the wrap in progress
Bumper was finished and removed so that I could install the headlights and the New bulbs to go with them.
Stock Bulbs on the left, Replacements on the right
Parking lights, Before
And After
Stock HID and parking lights *Left, Replacements on the *Right
After the bulbs were in and tested, it was time for a minor headlight restoration. Below you can see by the reflection of the fluorescent lighting on the lens. The headlight lens doesn’t look bad, but still somewhat hazy/cloudy and pitted.
Before
After. Results are crystal clear
Once they were all cleaned up, Opti-Lens Coating was applied to the pair.
Optimum’s Opti-Lens Coating is the most advanced pre-polymer resin for headlight protection. Once applied to the headlight or other hard surfaces, the resin will form covalent bonds with the substrate and crosslinks to form a permanent film. Opti-Lens coating contains high levels of UV blockers to prevent headlights from fading over time.
In our harsh New Mexican environment, where our vehicles are exposed to extreme temperatures and enormous amounts of UV rays all year round, you can see even New vehicles’ headlights oxidizing in a very short time. This car will sit outside 24/7, so a product such as Opti-Lens is a must to keep my re-freshed headlights looking clean and clear.
All done
Before reinstalling the front bumper, the fog lights needed some attention. The plastic surrounds were coated with CQuartz DLux Trim Coating.
Uncoated on Left, Coated on Right
Closer Look
CQuartz DLux is NOT a Trim dressing. It does not have a greasy/oily feel to it and does not attract dirt/dust like other products! It is a Silane-based glass coating that contains more than 50% pure silica. After application, the coating cures to form a super hard and extremely durable glass-like barrier that restores your faded trim to a Like-New appearance. It can withstand temperatures in excess of 800 degrees Fahrenheit and will last 12+ months!
The picture below shows a couple drops of the product that I let cure overnight in a plastic container to demonstrate it’s nature and the layer it will build on the surface it’s applied to.
One of my fog lights had a hole in the front so they were both tinted using a yellow film to lock out any moisture that could potentially cause problems down the road
The Front Grille was painted with Plasti-Dip to get rid of the chrome surrounds
Everything was then reinstalled
The single sheet of vinyl was wrapped completely under the bumper and tucked away
The leather seats and door cards were thoroughly scrubbed down using a PH balanced leather cleaner and a gentle horse hair brush, rinsed with distilled water, then dried. After all leather was properly prepped, it was time to seal in the cleanliness with CQuartz Fabric and Leather Coating.
CQuartz F&L uses nano-technology to provide the leather with a very durable, long-lasting hydrophobic layer, that will protect against UV degradation, sweat, salt, water, liquids, dirt, bacteria and stains. Perfect for this cream colored leather that is very tough to maintain. Best of all, once this products cures, there is no greasy/oily feel to it like other leather “dressings” and it adds a slight sheen to the leather, making it look New, NOT wet and glossy.
Application
Leather seat, Before CQuartz F&L
After CQ F&L. You can see it added a nice satin finish and darkened the leather up a bit
To test the product’s hydrophobic properties, I sprayed distilled water onto an untreated leather door card. When I tried to wipe the area clean, the water just smeared/spread which took a few passes to dry completely
The same area was sprayed once more after it was treated with CQ F&L. You can see very tight water beads, which made clean-up effortless
After the leather was coated, I moved onto the carpeting and headliner to address the mild odor that remained in the fabric from the previous owner.
For this, CarPro’s So2 Pure Odor Eliminator was used. So2 Pure is an advanced high-end grade purification coating based on the latest nano-science technology.
The carpeting and headliner were thoroughly cleaned using various products before applying So2 Pure
Interior After:
Dash and Center console were cleaned of its old oily film, then all vinyl/plastics were dressed using a non-greasy satin finish UV Protectant
Exterior Surface Protection:
Entire Car was thoroughly cleaned with CarPro’s Eraser so that no body oils interfere with the Coatings’ bond to each surface
CQuartz DLux came back out to coat the rest of the Trim and Carbon Fiber vinyl
Before
After
Just to give an idea of how CQuartz Performs, The left side is untreated/raw Carbon Fiber vinyl and the right side was coated with CQuartz DLux Trim Coating. The results are nothing short of spectacular. Super hydrophobic
50/50 faded Trim
Finished up nicely
For all exterior glass, I went with CQuartz FlyBy30 Windshield and Glass Coating. The glass had already been clayed earlier in the write-up, so all that was left to do was polish and then apply the coating.
CQ FlyBy30 resists the friction and abrasion from road rash, wiper blades, dust, car washes, harsh cleansers, and the environment. With a high water droplet contact angle and low sliding angle, FlyBy30 promises fast repellency and glass that is easily cleared from rain, ice, snow, and bugs.
Applying FlyBy30 to windshield
After the exhaust tip was clayed, polished and cleaned, it was coated with Opti-Coat
Ambient and surfaces temperatures noted before application
CQuartz Finest Coating was applied in two thick coats to all vinyl
CQuartz Finest is warrantied to last a minimum of 2 years! Door Jambs were cleaned and coated as well
I performed a similar test to the vinyl as I did with the leather earlier in this write-up. Below are a few pictures I took after distilled water was sprayed onto the raw untreated vinyl after the hood had been wrapped. You can see that vinyl naturally beads water fairly well, much better than raw unprotected paint
Closer look
The next set of photos show how the water acts to the vinyl surface after it has been Coated with CQuartz Finest. Nice, consistent, and uniform water beads
A closer look
Even closer. The water beads act as a magnifying glass in this photo and show off the metallic flake in the vinyl! Not bad!
Finishing touch was dressing the rubber with a semi-gloss no-sling tire dressing
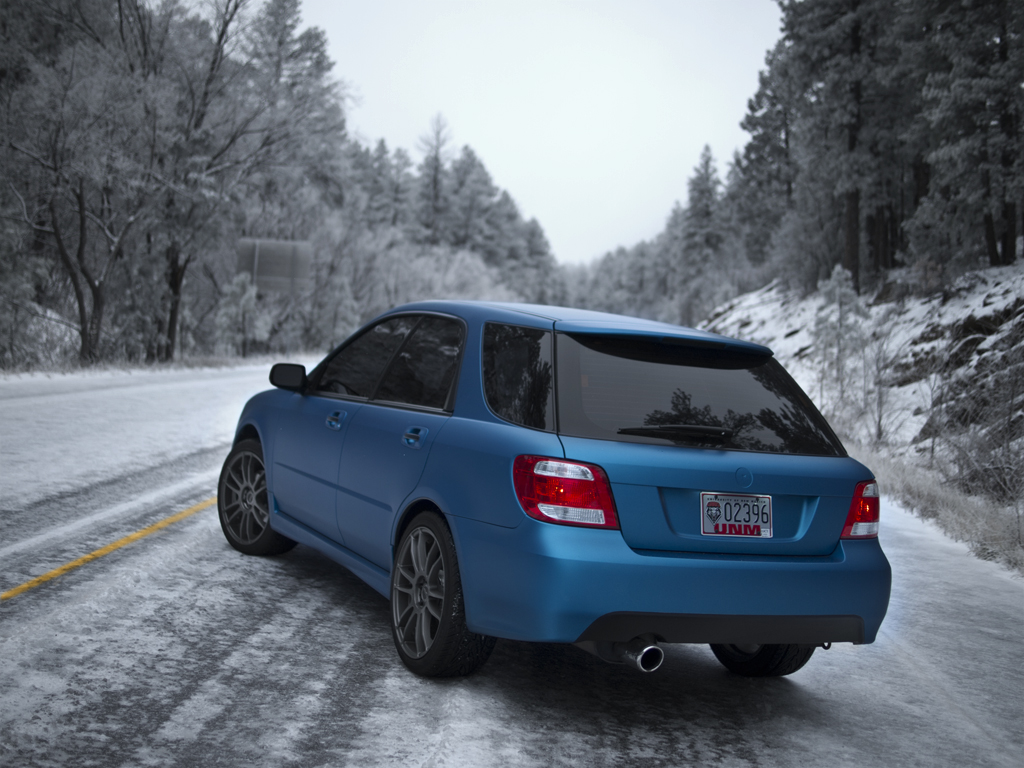
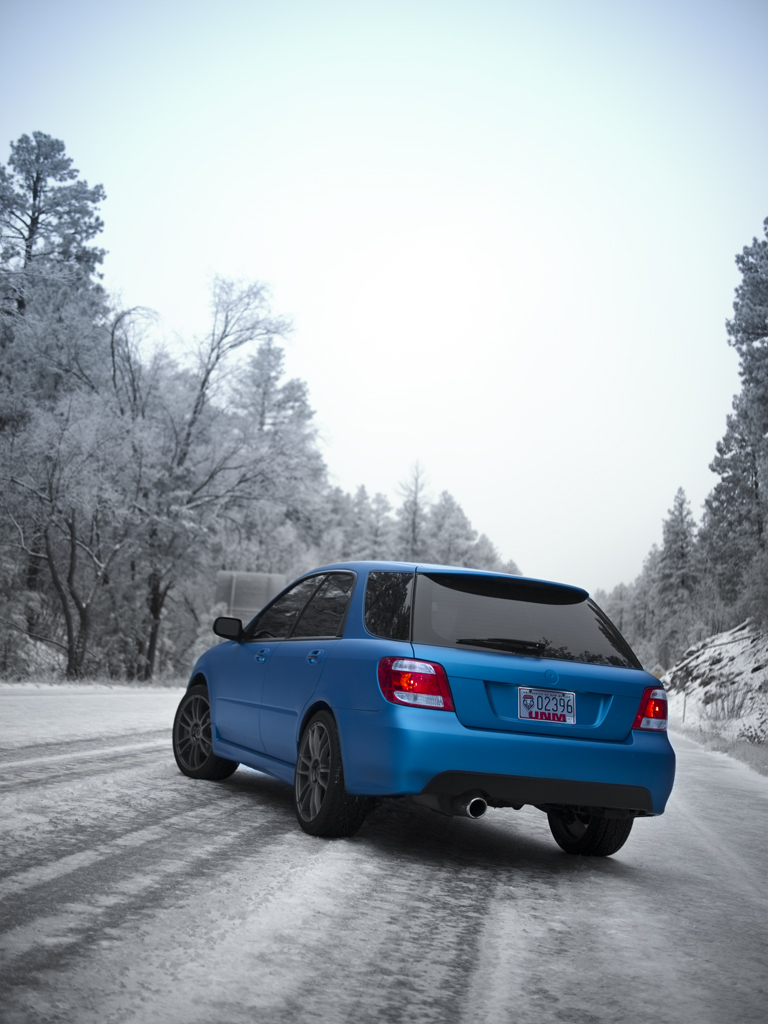
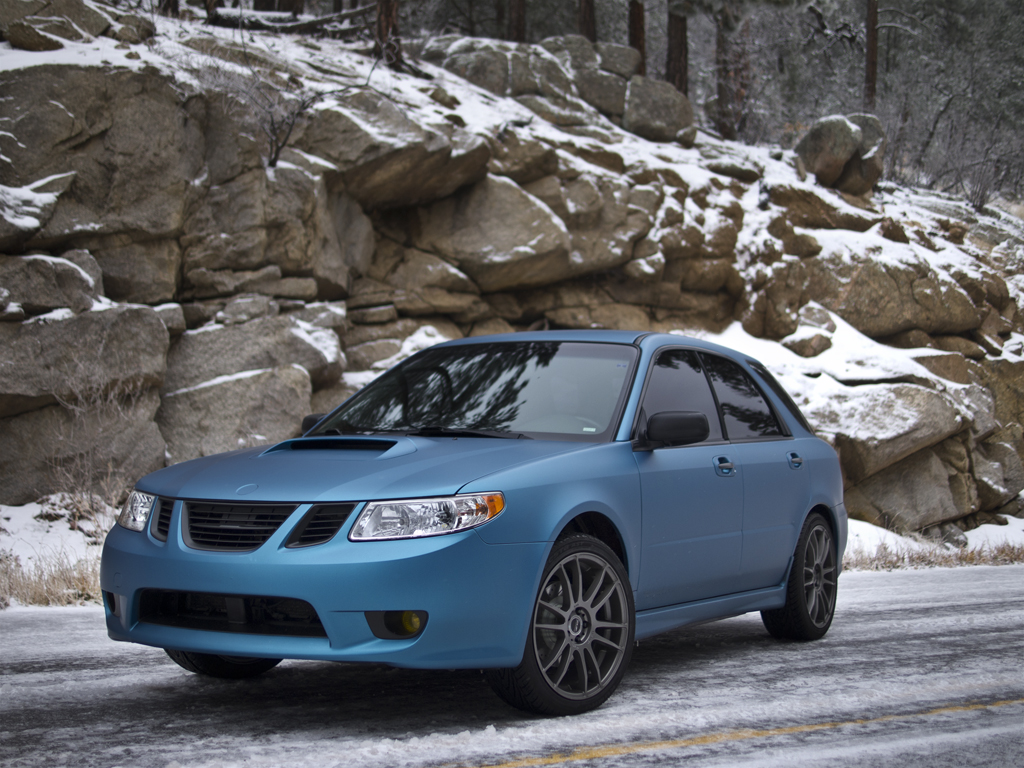
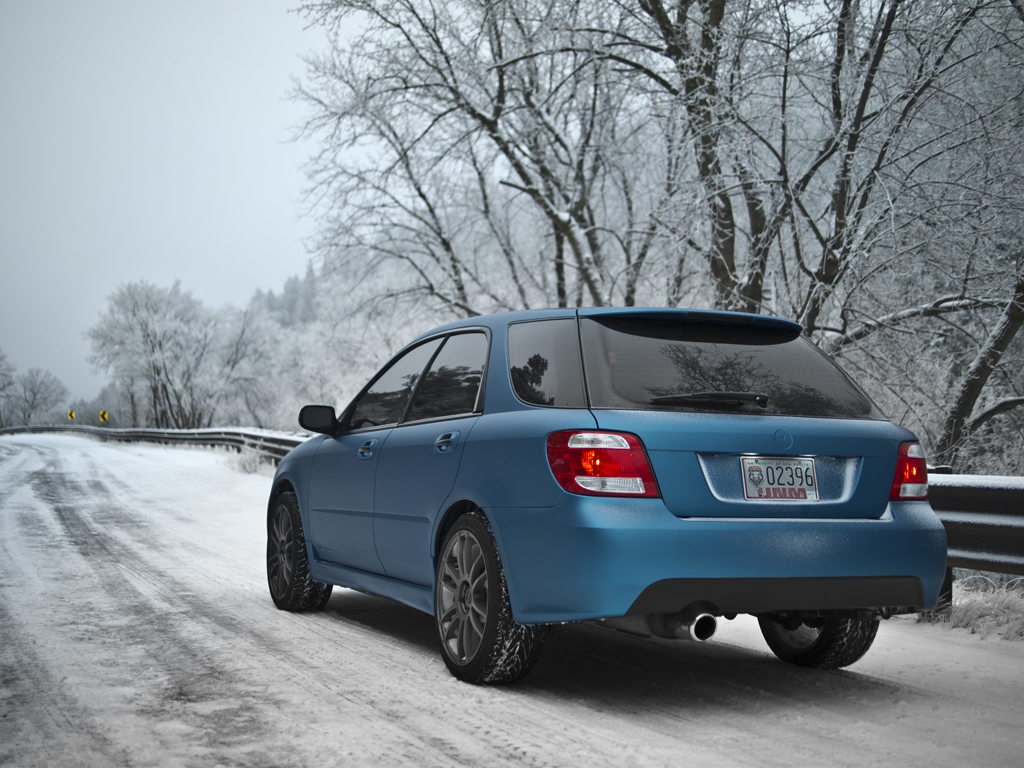
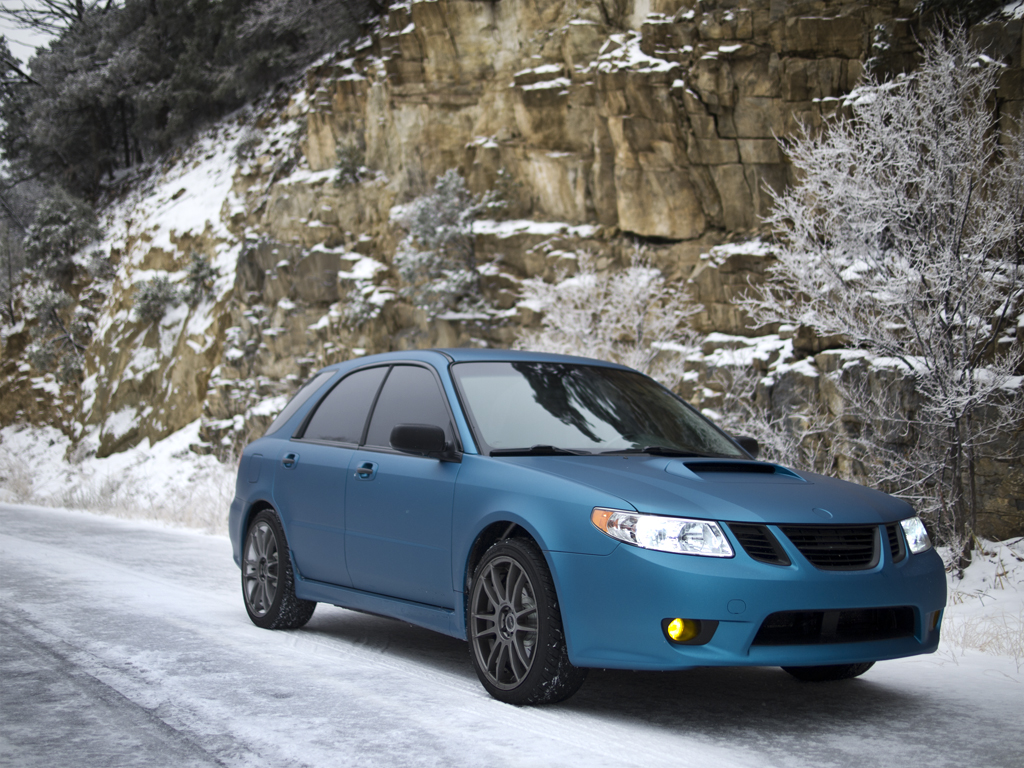
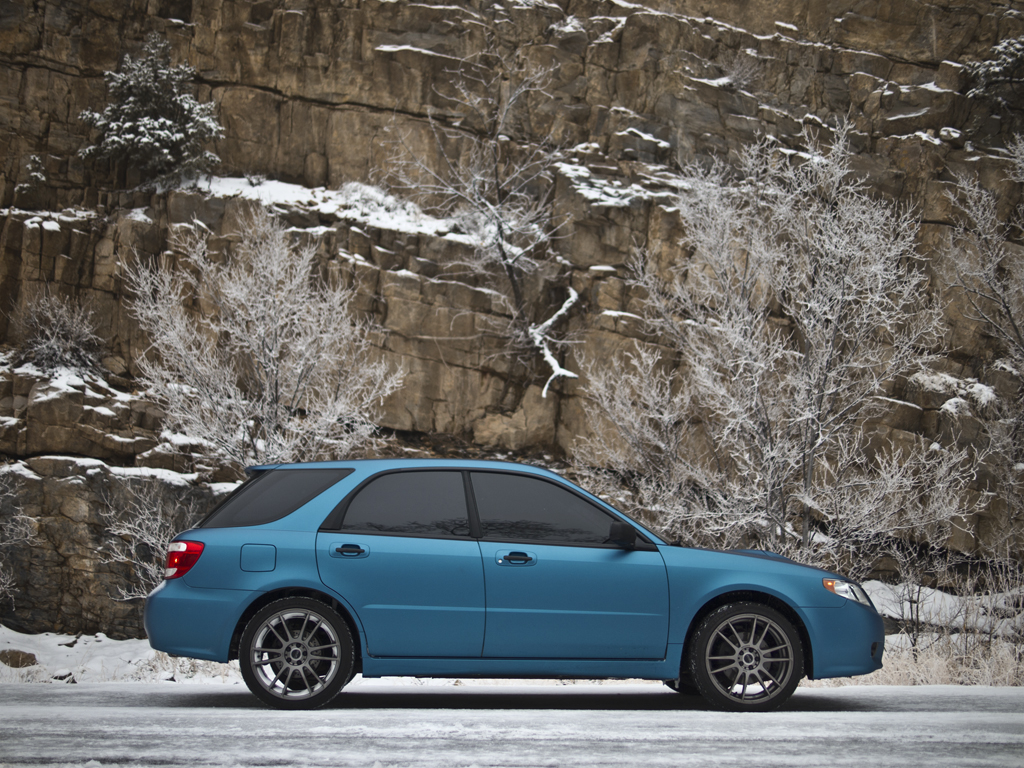
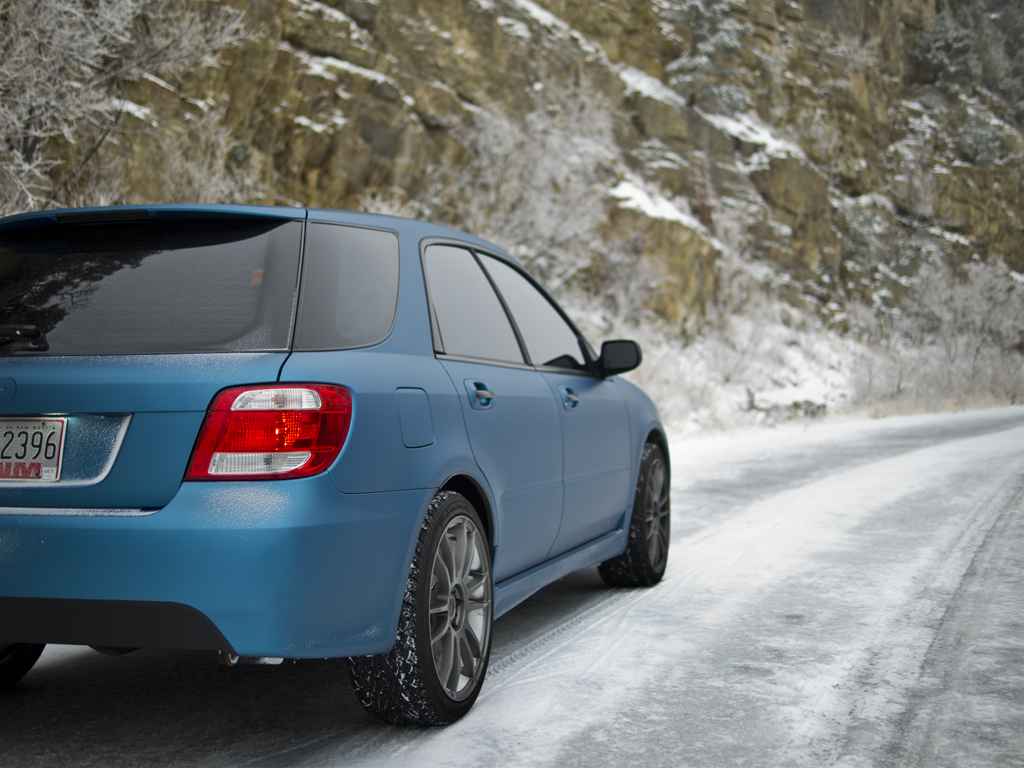
Final Photos:
Pulled her outside to get a breath of fresh air in her new skin…
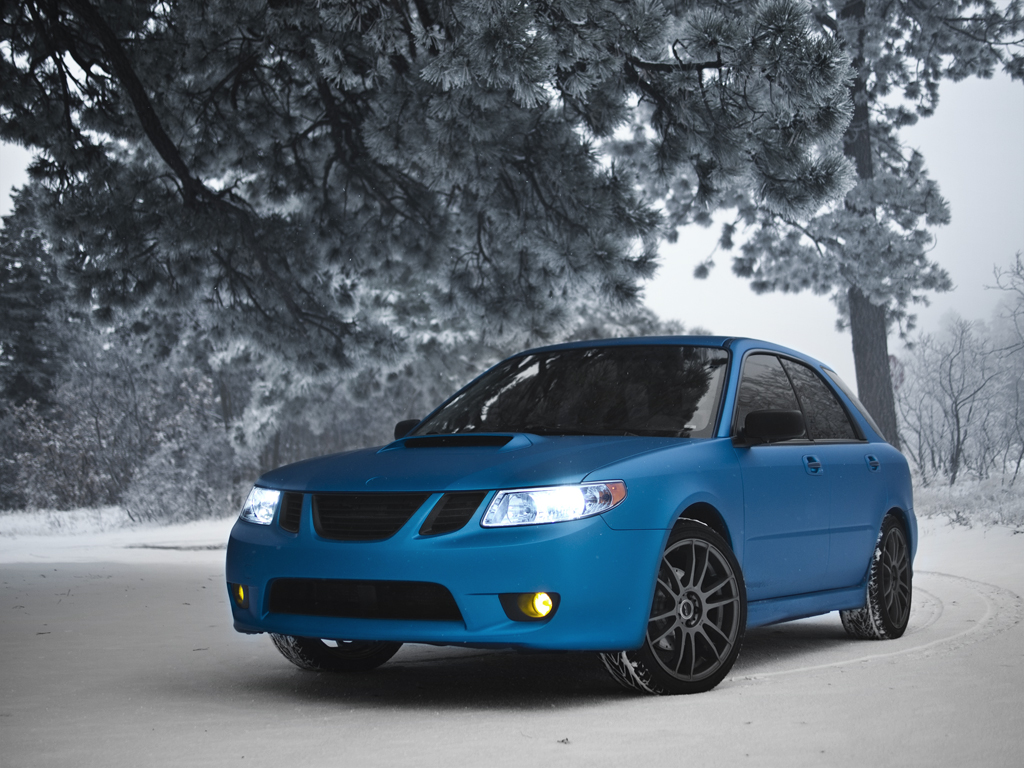
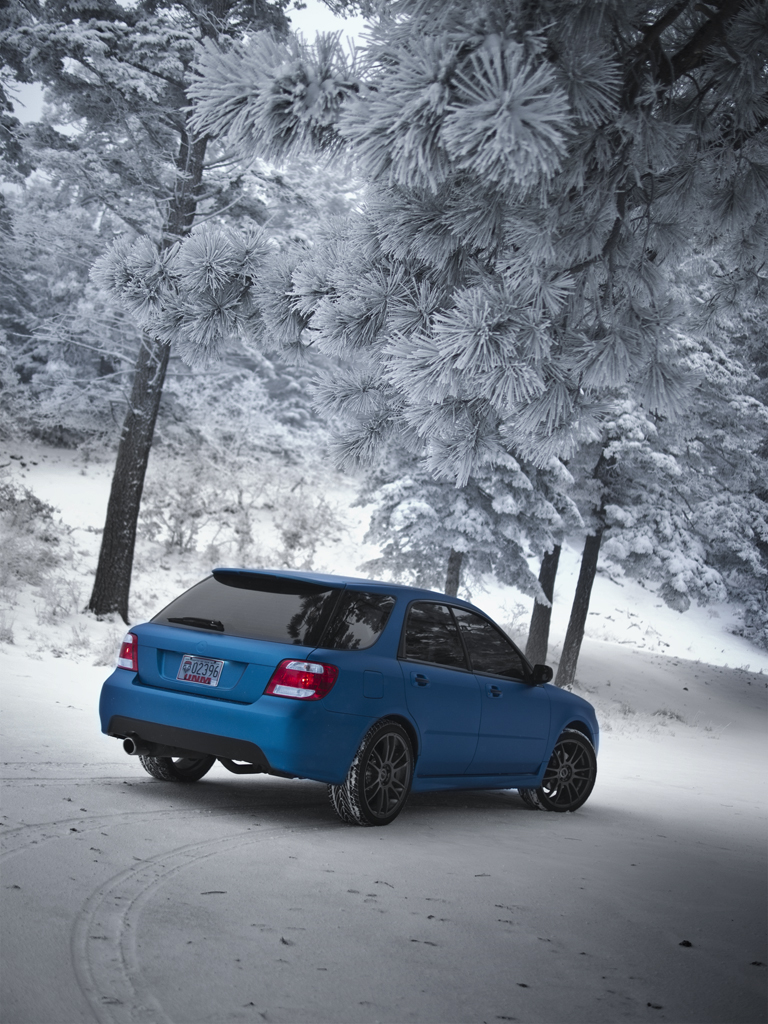
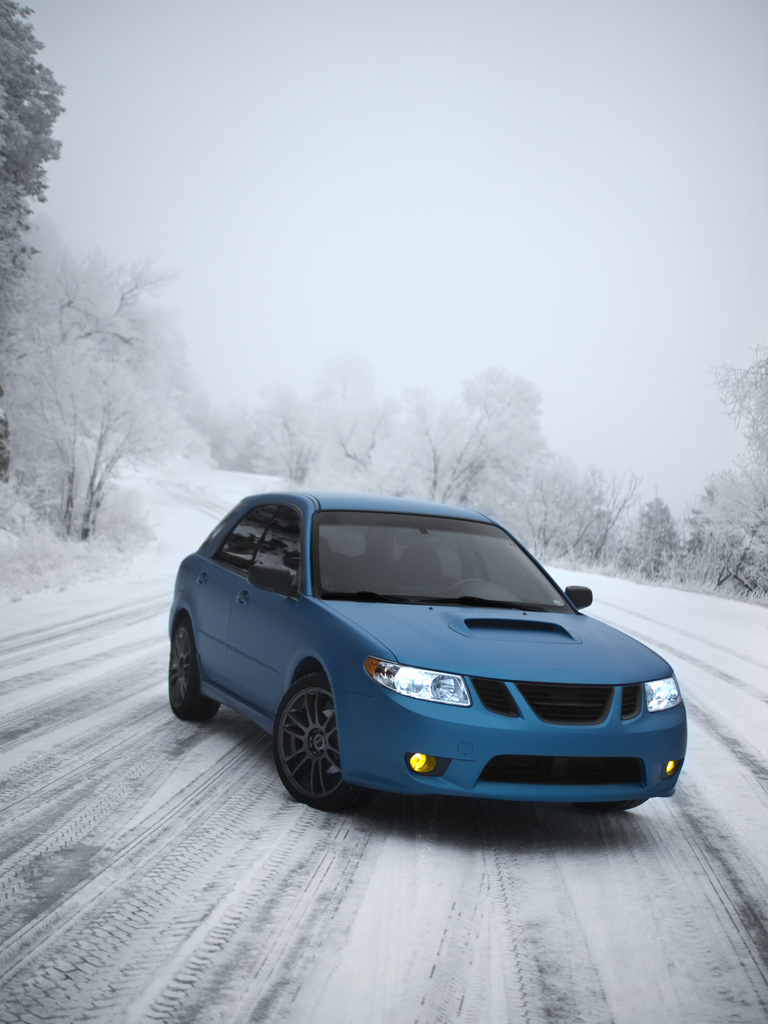
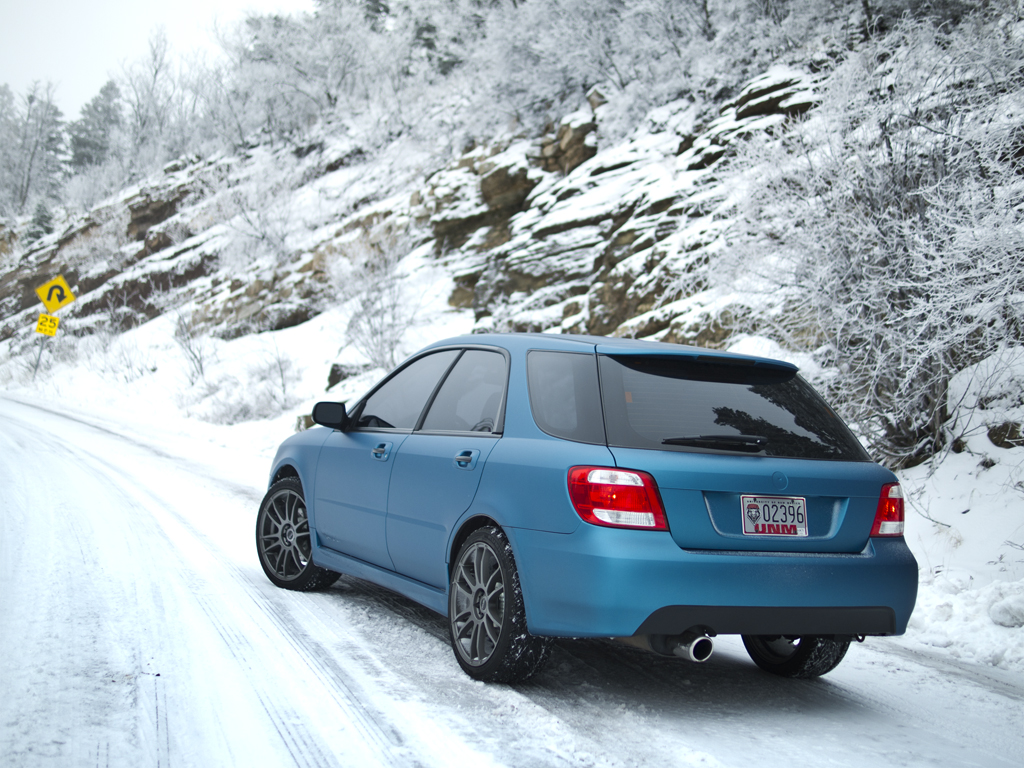
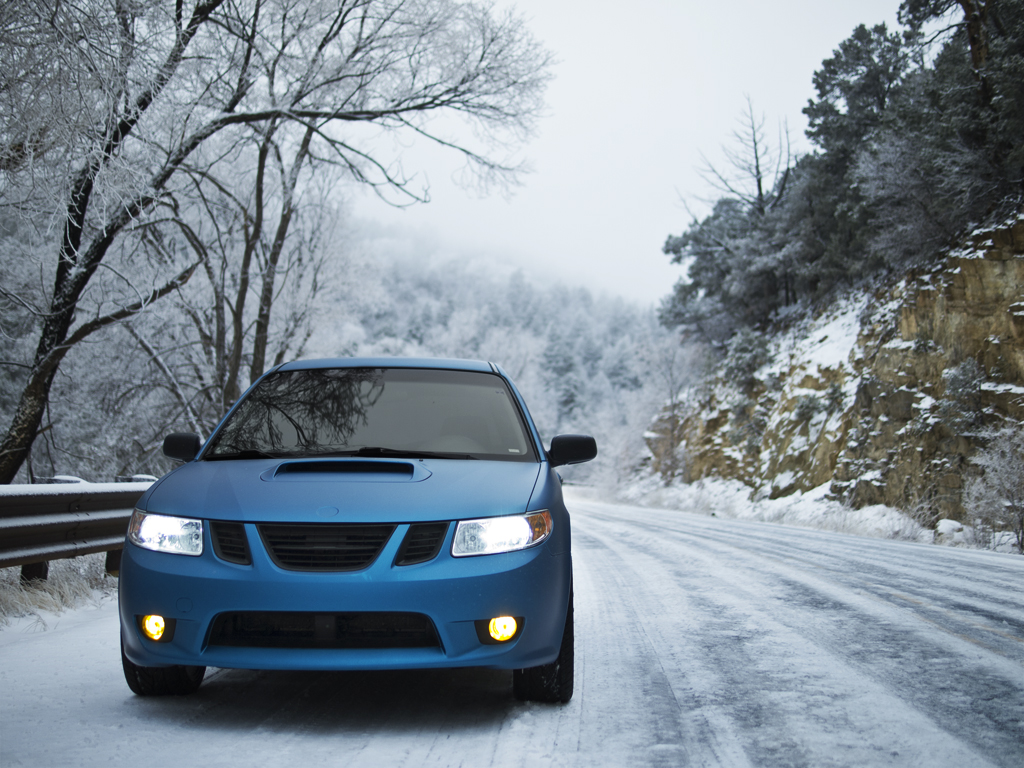
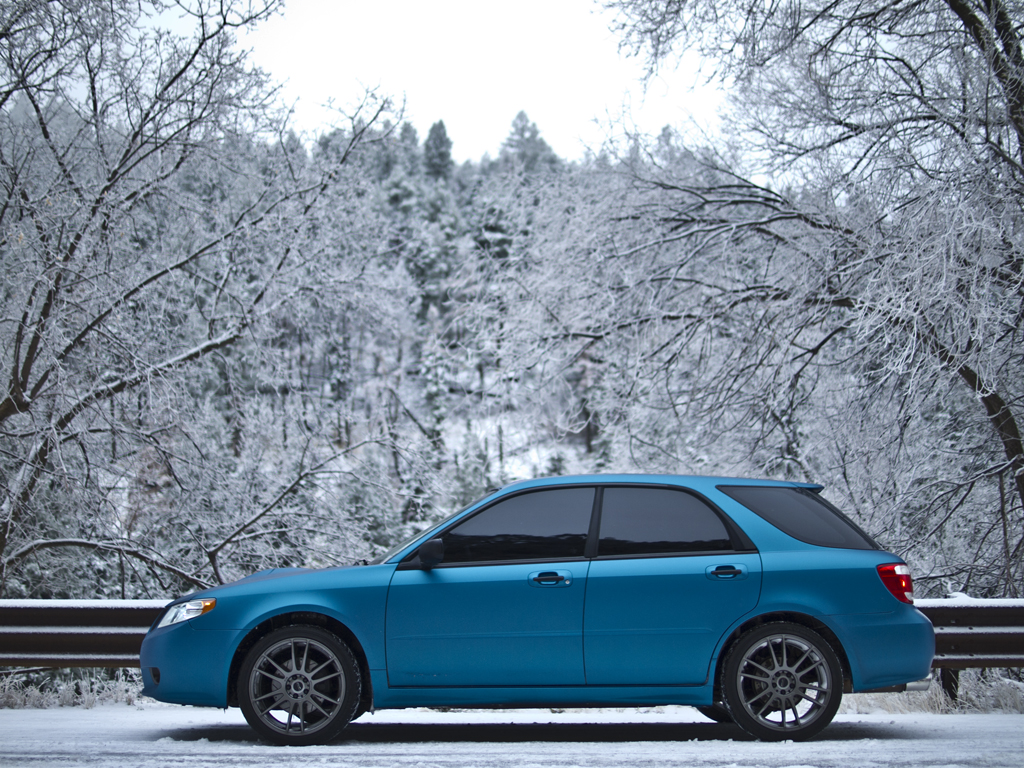
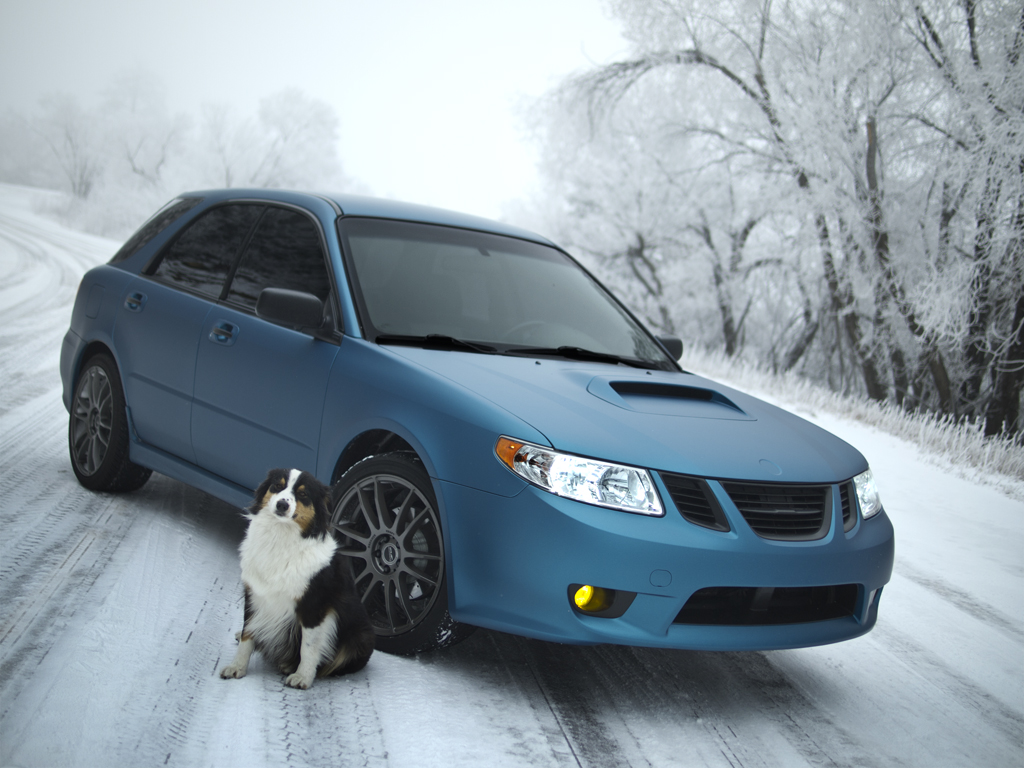
I recently took a short trip up the mountain with a buddy for some killer snow shots. Couldn't have been a better day for it!
I just wanted to show off the photos he took of the car. Came out great IMO!
Thanks again, Conner! :beer:
One other thing I wanted to add, was that the car hadn't been washed in a couple weeks when we took these photos! It was rained on and still looks quite clean. CQuartz Finest along with all other coatings used, are making my life much easier!
Of course we had to plug my pup in here! She was uncomfortable, can you tell?
Normally I don't like the matte/vinyl wrap and blacked-out fad- but this looks great! Love the color, love the look, and the love the work you put into it!
I too am not a fan of the satin/vinyal wrap look, but the quality of the work here is fantastic, it looks like a factory paint job. The details on the rest of the car were amazing too. I'm liking the carbon fiber accents.
awsome job on your new saabaru. speechless writeup. one question or comment i have is it is the first time i'm hearing somebody put opti-coat on rotors. i would think the rubbing of the pads and heat would strip that opti-coat off sooner or later.
All I can say is WOW. I really liked the wrap job (typically not a fan of those), but the color combo and the attention to detail really make that car stand out. BTW, what is the longevity of a typical wrap?
awsome job on your new saabaru. speechless writeup. one question or comment i have is it is the first time i'm hearing somebody put opti-coat on rotors. i would think the rubbing of the pads and heat would strip that opti-coat off sooner or later.
")


 ….
…. 


")

 rops:
rops: