Today was a planned day off, effectively giving me a "weekend" for a change. And I had every intention of doing nothing other than tinkering in the garage!
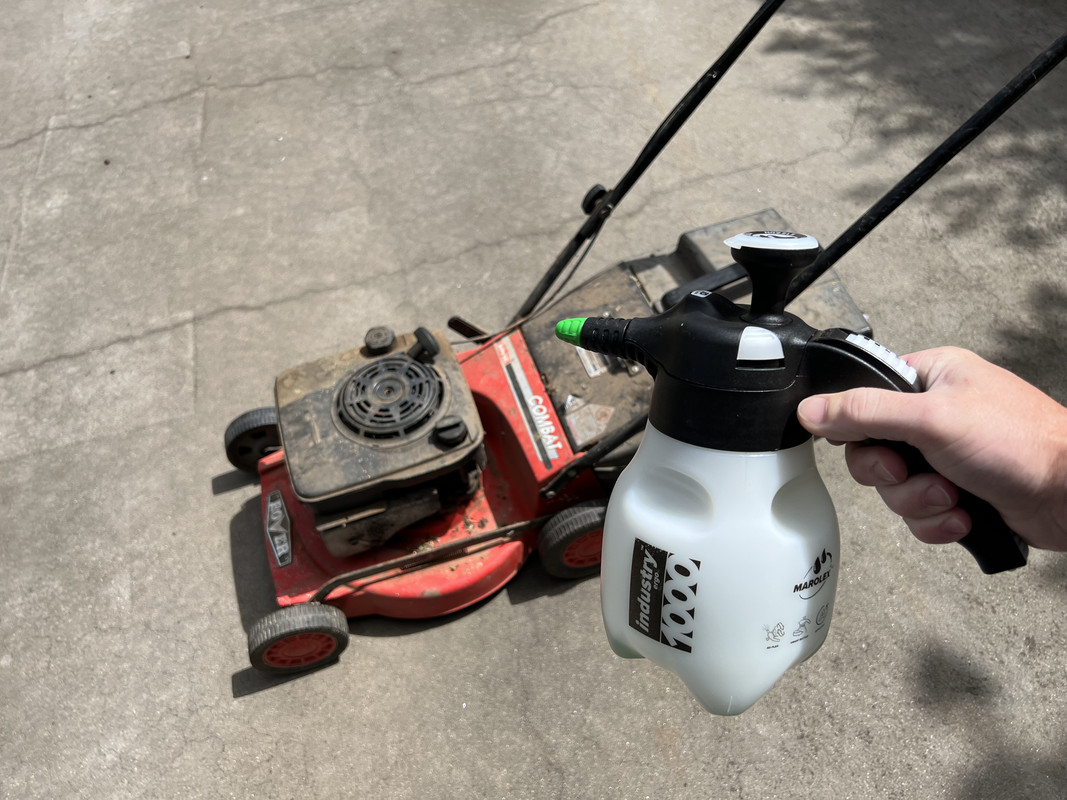
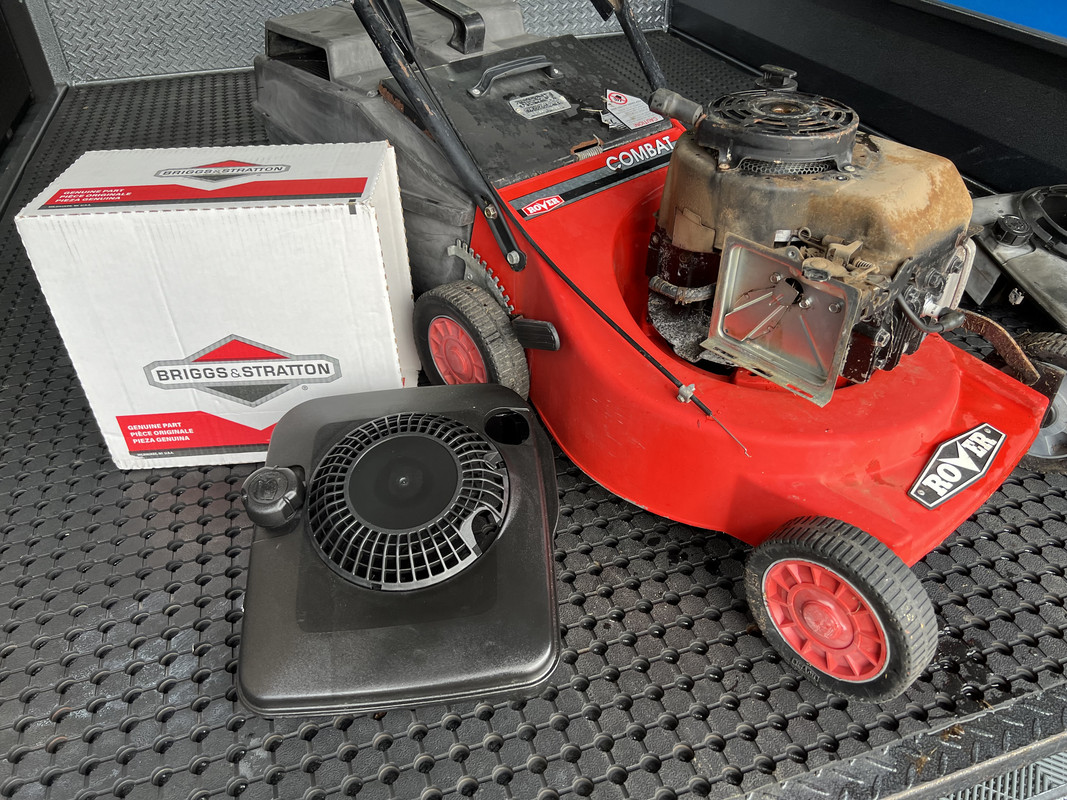
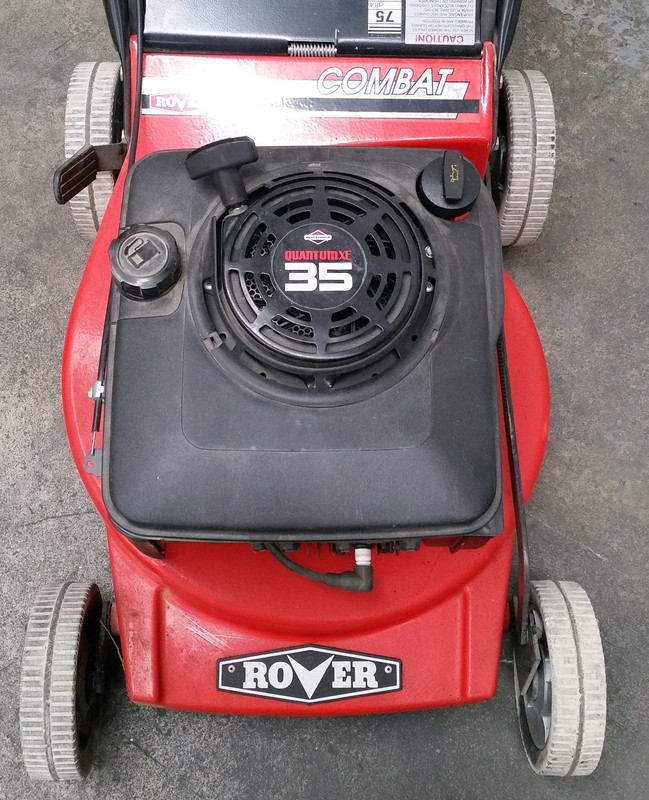
After waiting 107 days for a replacement part, I was finally able to get the Rover Combat back to operational order.
That part being the replacement fuel tank. Because this is an early Briggs & Stratton Quantum, I needed the earlier version of the fuel tank. The problem here is the aftermarket doesn't make a replacement part, so shopping OEM was the only avenue. This meant waiting for it to arrive in the country, although I strongly suspect the later version of the fuel tank would have fitted this engine, but I wanted to keep it original.
GENUINE BRIGGS & STRATTON FUEL TANK 494351 / 497343 / 699392
Newer style -

Older style -


To recap, this mower was given to me by my longest serving client. It was actually last used by me more than 17 years ago and had sat at the back of the garden shed ever since. At the time, the engine would surge when at operating temperature and there was a fuel leak from the tank, enough to empty the contents within a few hours.

When they cleaned out the shed a few months ago (107 days in fact), he offered it to me, otherwise it would have gone to the tip. Let me say that would have been a huge shame as even though the engine needed some work, the alloy base was in perfect condition and the blade boss even has its original coat of red paint on it.
The first step, previously documented, was a clean to remove 17 years of dust and mouse droppings! :groan (That's Shine Supply Wise Guy for those here for the "detailing".)


For a 31-year-old lawn mower, it looks fantastic. Granted, a 17-year slumber probably has something to do with that.
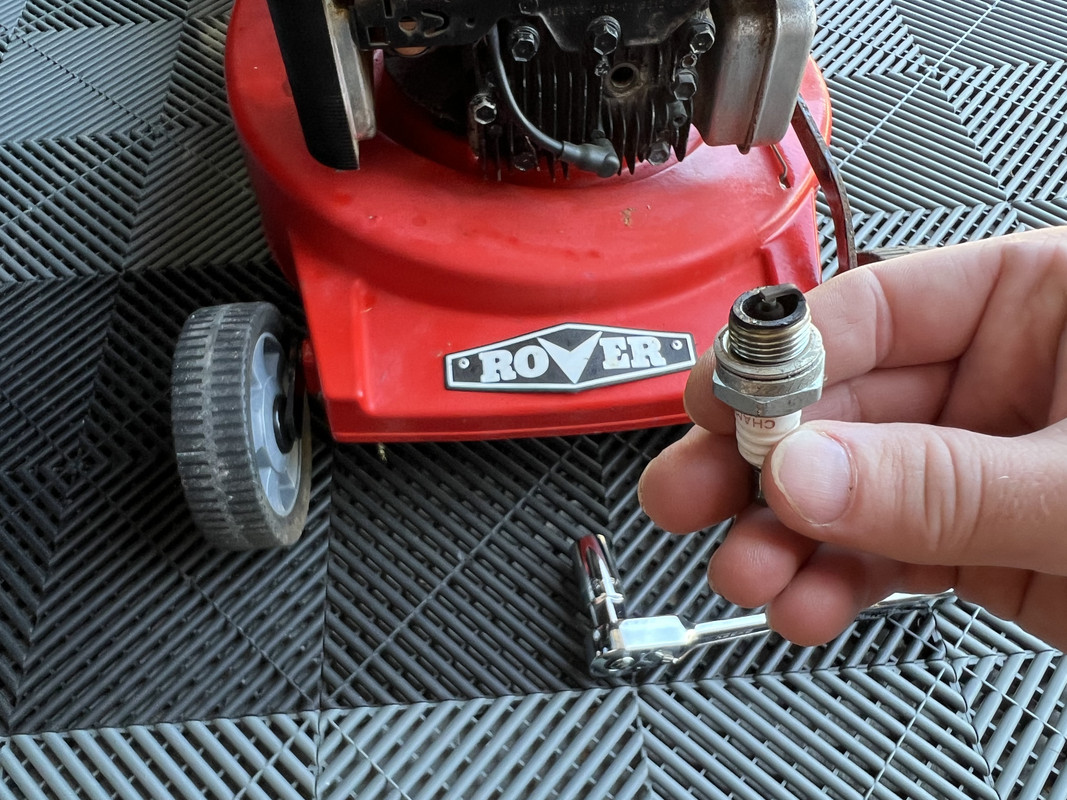
I then replaced the spark plug with a Champion J19LM, the modern replacement for the CJ8. The old one wasn't too bad, but I was on a roll.

I then made sure to re-torque the cylinder head bolts as these have a habit of backing off over time, especially the exhaust side.

The handlebar locking handles had cracked and were not offering enough tightness, so I replaced those with some aftermarket cam-locks. These are not brilliant, so I will probably look into some OEM ones.


I then waited...........and waited...........and waited........and emailed...........and waited..........and then emailed..........and finally the fuel tank turned up, joining some new fuel line, air filters and a carby rebuild kit. Which is where to take off from today.
https://www.greenacresmowers.com.au/fuel-line-and-clamps-to-fit-briggs-and-stratton-qu
https://www.greenacresmowers.com.au/air-filter-pre-filter-spark-plug-fits-briggs-strat
https://www.greenacresmowers.com.au/carb-repair-kit-for-briggs-stratton-max-quantum-mo

My plan was to simply replace the tank and see how this went. After researching, it was looking likely the fuel leak was causing the surging issue. When the throttle was cracked into the choke, the engine would smooth out, leading me to think that the carby was not the issue and that the engine was simply running lean due to a lack of fuel flow.
First step, I removed the air filter cover, followed by the throttle cable.

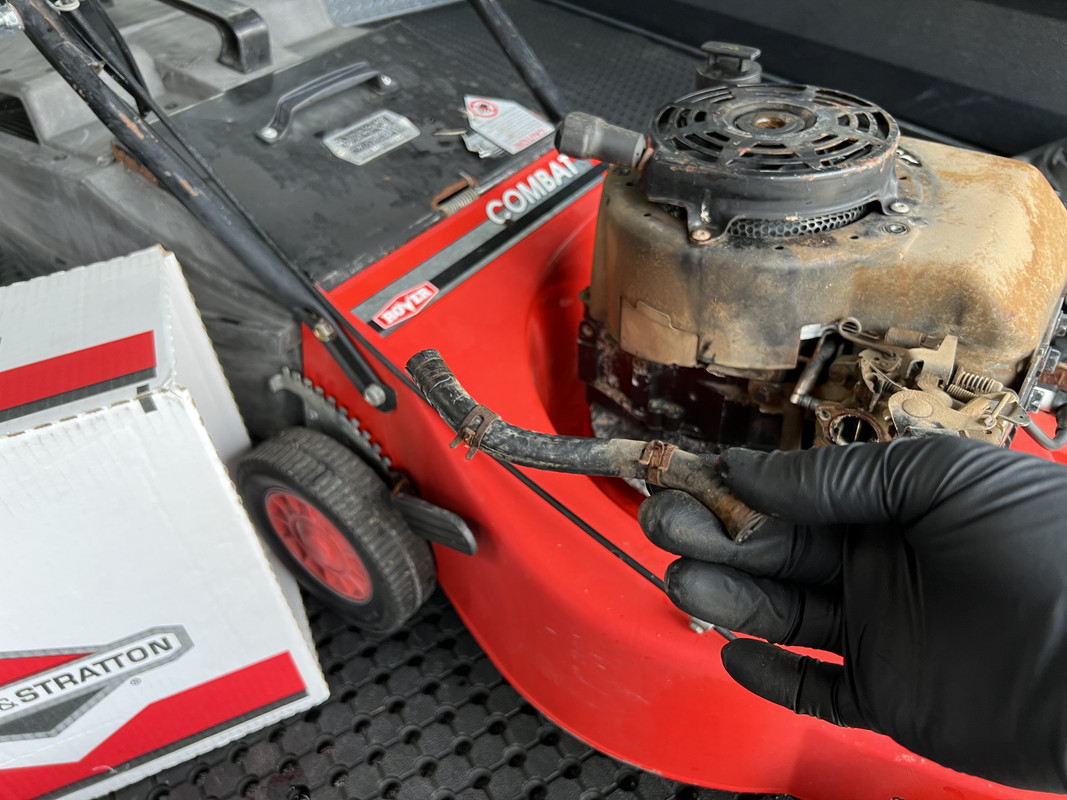
I then went to remove the fuel line from the tank, which I immediately found the problem...................

So, the leak was caused by a perished and cracked tank outlet, which finally separated when I went to remove the clamp and hose.

The three top mounted bolts and one side bolt were removed, and the tank lifted off the engine.

New tank ready for install. At this point I realized I had the later version of this tank, which offers a slightly bigger volume and extends further rearwards. Thankfully, it still fitted this engine. The larger fuel volume is not a bad thing, from experience, these engines are pretty thirsty. '
While I was this far in, I wanted to take a look at the carb. This meant removing the air filter housing, which I took the opportunity to clean while it was off the engine. That housing was changed to plastic on later engines. I also cleaned that part. I then removed the old fuel hose from the carb. Also note the breather hose comes away from the metal pipe and remains with the housing.

That hose was well past it, so I'm glad I thought ahead and ordered a replacement.
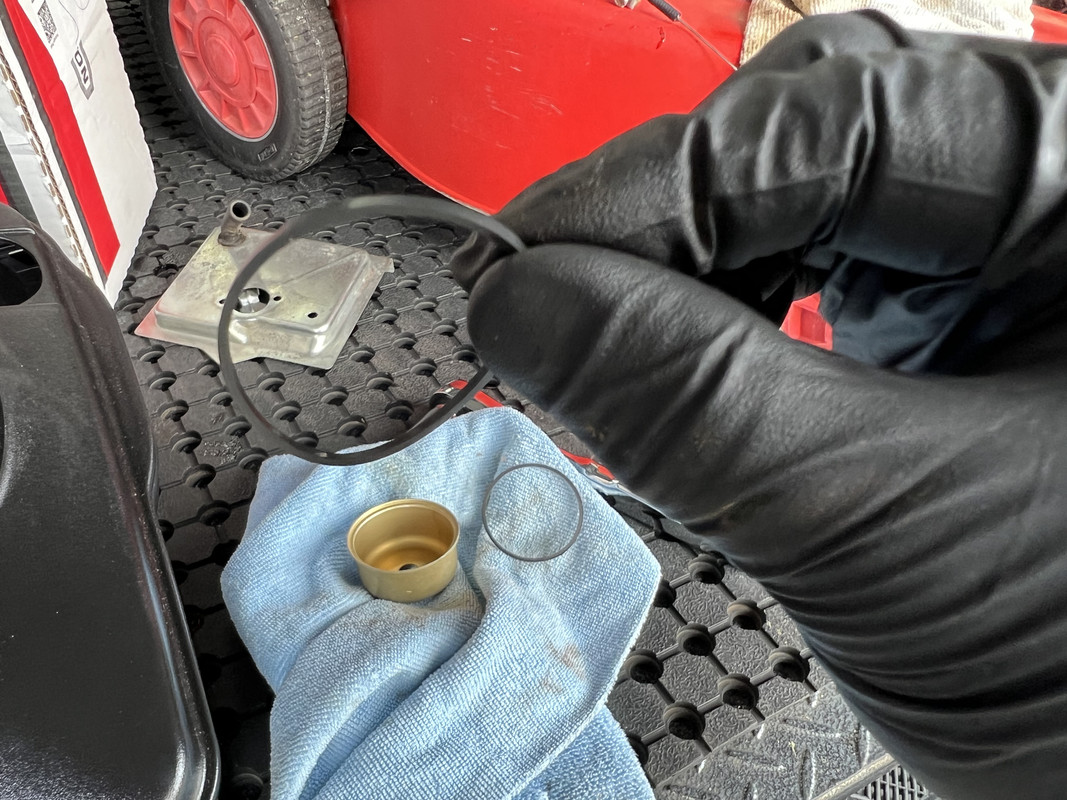
I then removed the bowl, which is held in place by one single nut which also functions as the main jet. You will also note I had installed the new hose to the carby.

The bowl was surprisingly clean, no sediment or varnish.

Main jet / bowl nut, which was cleaned.

Because of the condition of the bowl, I decided to not go any further. I did however replace the perished bowl o-ring, and replaced the main jet gasket, both included in the kit.
The old carb inlet gasket was in bad shape and was replaced with the item in the kit.

Once the carb was back together, I installed the new tank. I cut the new hose to length and fitted it to the tank nipple. Using the heat gun to warm up the rubber was a stroke of genius!

With the air filter housing reinstalled, it was then time for the new air filter.

This engine was only fitted with the one paper element, but some were also fitted with a foam pre-filter, which I decided to include for thoroughness.

The green filter fits into the plastic cover, the paper filter is then placed over that and then installed back on the engine.

I then installed the recoil cover, which this engine was missing for some reason. The throttle cable was also re-installed.


While it should have had a "Quantum 35 XE" decal, I couldn't find one for sale, so I used the Briggs & Stratton logo supplied with the new tank.

It was then time for a test run. I filled the tank with some fresh fuel, thankfully no leaks from the tank, new hose or from the carb bowl. A this point my heart sank because the thing wouldn't fire. :doh
I removed the plug and sprayed some starting fluid into the cylinder and got it running. I then realized the choke was not engaging, causing the cold start issue, a quick adjustment to the throttle cable solved that. After letting it run for a while, I was confident the replacement fuel tank had solved the surging issues. :dance
It was then time for an oil change.................

I'm not a big fan of using SAE30 mono-grade oil in small engines, this stuff is so thick and syrup like. But these older Briggs had looser tolerances and really needed this type of oil.
The old oil that came out still had a red hue to it, leading me to a theory. I suspect this mower had been serviced before it was put away. Newish looking oil, brand new blades and a decent looking spark plug. I think the thing was serviced in an attempt to address the surging issue, but whoever did it didn't dig deep enough.
Because this is an older Quantum, the carby still has high and low speed adjustment screws. Briggs frustratingly removed those on the later engines, presumably for emissions and to stop owners messing about with them. Those newer engines really don't idle, the throttle only controlling high and low speed running. But this engine can be throttled down to a nice tick over, making catcher emptying much nicer. It also has a more pronounced top end without having to play with the governor to extract those extra revs.
Top end adjustment............

Idle adjustment..............

A little video demonstration.................
That video was taken before I fine-tuned the carby, managing to get the engine to hold a stable idle without compromising the top end performance. I did want to check the rpm's with my digital tacho, but I have somehow managed to lose the dam thing. :doh
People have been telling me to sell this mower. After mowing some lawns with it today, giving it a decent workout with and without load, this thing rips! Despite having a claimed 3.5 hp, low for the 190cc capacity, it has a great top end to compensate. It's not going anywhere! :birds
Such a satisfying little project, one that I would have liked to have completed earlier, but good things come to those who wait.