DFB's Garage

Polishing Continued...............................

Back on the polishers today as I continue working around the car. Today, I started on the hood, in particular the gloss black hood vent. I knew this would test my patience, so starting on it while I was still fresh made the most sense. While this part of the car looked ok from a distance, it was hazed out and dull when viewed up close. I tell someone had a go at polishing it, the dried compound the giveaway.


I'm going to be honest here, I did my best but I just couldn't get it corrected like I wanted. First, I started with Reflect on the yellow Rupes, but the marring was still present. I then tried Perfect Finish on the same pad, again, no dice. I then tried a microfiber pad with Perfect Finish, no luck there either. So, after another pass with Reflect with barely any pressure, I concluded that I was both removing and installing the marring. In the end, I gave it one last polish by hand using Carpro Essence and walked away. The black roof in comparison was easy.


This hood vent reminds me of the gloss black trunk panel on my S550, which would scratch by just looking at it. Because these gloss black trims are not actually painted, I think the only real solution for this would be to have it painted and clear-coated. It's an easy removal, so I'll have to think about it. In the meantime, I'll just coat it and try to ignore it.


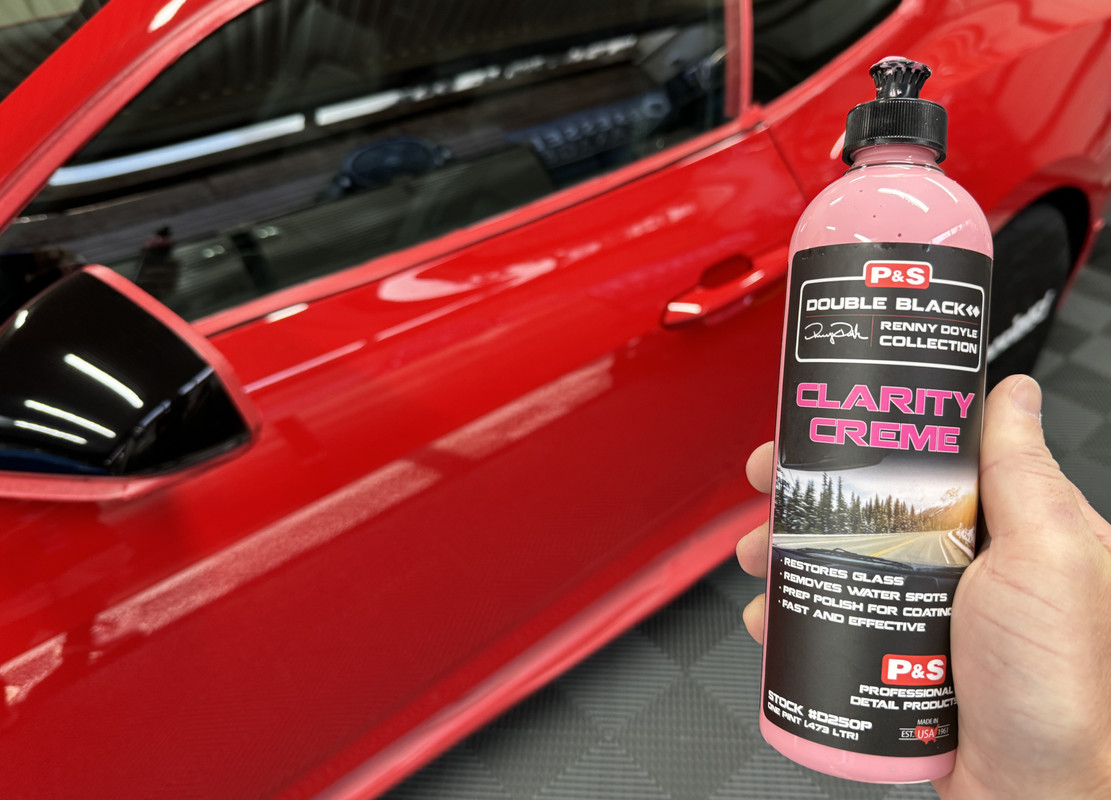
I also got the glass polished today using P&S Clarity Creme. To avoid plastering glass polish all over the rubber trims, I went around the edges with a Carpro glass hand polishing block, which uses the same rayon material as their normal glass pads. I then put a Lake Country SDO Blue pad on my 3-inch ShineMate and took care of the inner sections. I really like this product, its so easy to use and does not require micromanagement like CeriGlass does, or require a sledgehammer to remove the residue afterwards. That 473ml bottle will last you the rest of your life, negating its cost.


From here, I removed the tape and began cleaning up polish residue and dust out of the cracks and crevices by using compressed air, rinse-less wash and Carpro Eraser. I also had to break out the Meguiar's M39 to remove some residue from the rear GT badge and 5.0 fender badges.


Am I 100% happy? Probably not, mainly because of that hood vent and a couple of imperfections that I will need to address. But overall, the car has taken on a much deeper, crisper tone to its paint. This is something that was noted by the guys at the dealer last week, that despite both being Race Red, they looked different side by side. That would be down to the polishing and ceramic coating that my old car got before trade, that work bringing out a more defined glass-like depth to the paint.

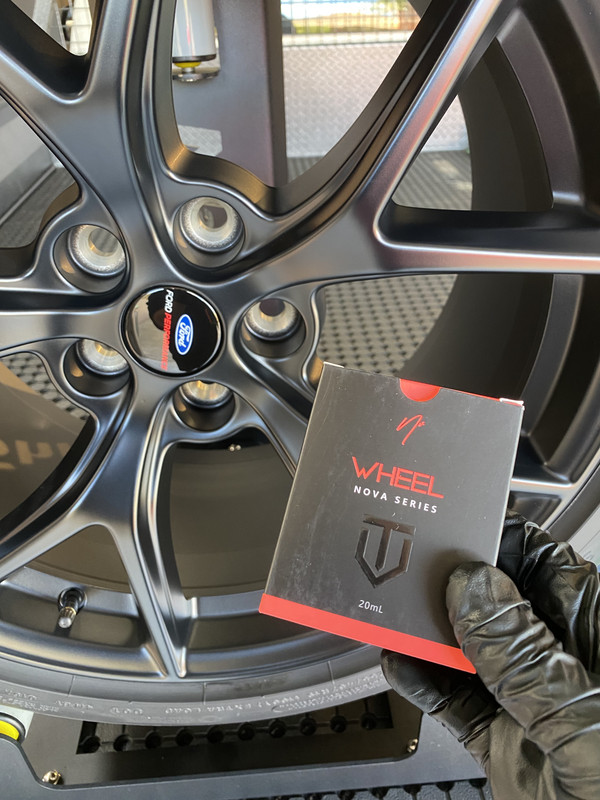
Up next, a thorough wipe down with a prep spray, then coating the paint, trim and glass. I then have two sets of wheels to coat. No rest for the wicked! :rolleyes:
 
My 5-liter Trace-less and Touch-less v2 arrived today.


I gave Trace-less a quick whirl, it certainly has a strong solvent aroma peppered with a scent, and it flashes away to a streak free finish with minimal towel effort.

Use on interior and exterior glass plus acrylic, and infotainment screens. Safe on tinted glass, mirrors, spectacles and hard glazed surfaces. Only use clean lint-free cloths free of detergents and fabric conditioners – these will cause smearing.

For Touch-less v2, its double the concentration and will require me to recalculate the panel impact ratio match my pressure washer and foam cannon outputs.
 
My 5-liter Trace-less and Touch-less v2 arrived today.


I gave Trace-less a quick whirl, it certainly has a strong solvent aroma peppered with a scent, and it flashes away to a streak free finish with minimal towel effort.


For Touch-less v2, its double the concentration and will require me to recalculate the panel impact ratio match my pressure washer and foam cannon outputs.
Looking forward to your v2 results Deyon

Sent from my SM-G991U using Tapatalk
 
  • Like
Reactions: DFB
It took me a bit to understand what you were referring to, but got there eventually.

Purify is an iron remover that NV say can be used as a clay lubricant. From what I can tell, they were one of the first to make this suggestion that an iron remover can function as a clay lubricant. From what they say, Purify has some lubricants added to help things out. In the past, I have used it like this, but only on a very well-maintained car................my own. If think you are asking for trouble doing these two steps together if dealing with heavy contamination. I also hate messing with iron removers, getting up close and person with clay doesn't appeal.


So why use Purify? I've found it to be one of the better out there, and I've found it the least offensive odor wise. I remember seeing it being used to full effect by Sandro..................


The Gyeon Clay Lube is more in line with a detail spray, as in lots of lubrication and low residue. I suspect its just a more concentrated version of their Quick Detailer. I just wish they were more specific with the dilution ratios, they just say "up to 10:1". Actually, my bottle is the old version, Gyeon have since launched a new "Redefined" version.
OK, makes sense; perhaps odd labeling on their point as that was why I was asking - seeing 2 bottles both with labels describing them as clay lube. I've seen iron remover used as lube as well but it was also on what was a very clean car and the "clay" was one of TRC's Ultra Decontamination Clay Scrubbers so, presumably, the potentially abrasive bits hide in the scrubbers holes I guess (cuz iron's smart like that). Saves a step but as infrequently as I use iron remover (hobbyist here) that's not such a big deal for me and I can't help visualizing that I'm scrubbing metal bits all over the finish. Thanks for responding, I now understand what I was seeing.

All that said I'm also the guy that's fine with using an ONR dilution for my clay lube, too, so no doubt there's an army of folks that would be happy to tell me how wrong *that* is. 🤷‍♂️
 
  • Like
Reactions: DFB
And so, here is my YouTube on camera debut.........................


Yeah, I know, that's cheating. But, at least you can see some of my words in action with this time lapse. I did the driver's side wheels before turning the camera on so that there wasn't a delay before the action started. I'm multi-media-tasking here, hence the pauses in action to take stills.
Made a comment on this video but it was deleted?
 
Looking good! Please post pics with your old ford racing wheels in it.


Sent from my iPhone using Tapatalk
 
  • Like
Reactions: DFB
Ceramic Coating!

For the last two years, the thing I procrastinated over the most was what I would put on the paint of this car. My first thought was to go with Gyeon Mohs EVO. After using Pure EVO on my Ranger and Jaguar, I wanted something that was naturally slick, which Mohs addressed over Pure. I then changed my mind and decided to just put a wax on it, Collinte 845 the likely candidate, or perhaps Wolfgang Deep Gloss Paint Sealant...........both favorites of mine for their gloss and slickness. But that all changed at the 11th hour.

After feeling like a wax wouldn't do the car justice, I went ahead and ordered Armour Detail Supply Quartz. The main attraction here being the natural slickness it was said to possess, backed by the claims of superior real-world durability.


The car had sat covered overnight to limit dust settlement. The first step was to go over the whole car with ADS Panel Prep. I wouldn't say this is my favorite panel prep, but that centers around the pure joy I get from using Carpro Eraser, that scent is so distinctively pleasant.


It was then time for the coating. To start, I applied the coating to the horizontal surfaces, trunk lid, roof and hood. The ADS coating lays down rather thickly, feeling quite sticky under the applicator. After it has "sweated", it's then leveled down with a towel, then buffed with a second towel to remove any residual. Rinse, repeat. Because of how this coating cures and hardens, you will need to swap out your applicator halfway.


I have said this before, but I always feel nervous applying coatings, they just aren't as forgiving to use. After that first panel, I was reminded of this. The ADS coating is very grabby on the initial wipe, actually I felt like I had to fight it, which is very disconcerting. However, after those initial wipes, the surface turns to a lovely slickness. This is a unique characteristic of the ADS coatings, something I have come across with their wheel coating. So, I was prepared for that.

The coating went on the paint, lower unpainted black plastics and the window trims. Afterwards, I then applied Gyeon Quick View to the glass.

I'm not sure if this is obvious, but I was a little stressed out applying this coating. I'm sort of conflicted if I should have just done wax as planned. However, after applying Amplify (after 4 hours), I'm feeling much better about the end result.


Next in line, the wheels.
 
Made a comment on this video but it was deleted?
Really? I'm not sure what happened there, I usually get notifications for YouTube feedback, I went looking for a comment on that video, but nothing has come through on my end. I certainly didn't delete anything. Strange.
 
Really? I'm not sure what happened there, I usually get notifications for YouTube feedback, I went looking for a comment on that video, but nothing has come through on my end. I certainly didn't delete anything. Strange.
My comment was something like Hey Chicken Legs you do have a face, congratulations on the new car it was worth the two year wait. As my YT name is I like chicken sausages.
 
My comment was something like Hey Chicken Legs you do have a face, congratulations on the new car it was worth the two year wait. As my YT name is I like chicken sausages.
Hmm, very odd.

And thanks!
 
Ok, so I've found out that for some reason, my account was filtering comments. Seems I had a backlog of comments that I never responded to, so I appologise for not replying. Took me a while to figure out what was going on, but I feel really bad about not noticing the comments.
 
Ceramic Coating!

For the last two years, the thing I procrastinated over the most was what I would put on the paint of this car. My first thought was to go with Gyeon Mohs EVO. After using Pure EVO on my Ranger and Jaguar, I wanted something that was naturally slick, which Mohs addressed over Pure. I then changed my mind and decided to just put a wax on it, Collinte 845 the likely candidate, or perhaps Wolfgang Deep Gloss Paint Sealant...........both favorites of mine for their gloss and slickness. But that all changed at the 11th hour.

After feeling like a wax wouldn't do the car justice, I went ahead and ordered Armour Detail Supply Quartz. The main attraction here being the natural slickness it was said to possess, backed by the claims of superior real-world durability.


The car had sat covered overnight to limit dust settlement. The first step was to go over the whole car with ADS Panel Prep. I wouldn't say this is my favorite panel prep, but that centers around the pure joy I get from using Carpro Eraser, that scent is so distinctively pleasant.


It was then time for the coating. To start, I applied the coating to the horizontal surfaces, trunk lid, roof and hood. The ADS coating lays down rather thickly, feeling quite sticky under the applicator. After it has "sweated", it's then leveled down with a towel, then buffed with a second towel to remove any residual. Rinse, repeat. Because of how this coating cures and hardens, you will need to swap out your applicator halfway.


I have said this before, but I always feel nervous applying coatings, they just aren't as forgiving to use. After that first panel, I was reminded of this. The ADS coating is very grabby on the initial wipe, actually I felt like I had to fight it, which is very disconcerting. However, after those initial wipes, the surface turns to a lovely slickness. This is a unique characteristic of the ADS coatings, something I have come across with their wheel coating. So, I was prepared for that.

The coating went on the paint, lower unpainted black plastics and the window trims. Afterwards, I then applied Gyeon Quick View to the glass.

I'm not sure if this is obvious, but I was a little stressed out applying this coating. I'm sort of conflicted if I should have just done wax as planned. However, after applying Amplify (after 4 hours), I'm feeling much better about the end result.


Next in line, the wheels.
Deyon, the car looks great

Do the pics do it any justice, what does your eye see "before and after"

I know you used regular Quartz but did your applicator crust up quickly? I ask because mine never did, well until the next day

You mentioned removal and application being "comcerning", I wonder if this was purely environmental? I say this because I applied it in upper 70's and not terribly humid but not low either and it was a dream to apply/remove

I'm sure in the near future, after it's cured completely, you'll have a "GLOWING" review of ADS Quartz

Sent from my SM-G991U using Tapatalk
 
  • Like
Reactions: DFB
Deyon, the car looks great

Do the pics do it any justice, what does your eye see "before and after"

I know you used regular Quartz but did your applicator crust up quickly? I ask because mine never did, well until the next day

You mentioned removal and application being "comcerning", I wonder if this was purely environmental? I say this because I applied it in upper 70's and not terribly humid but not low either and it was a dream to apply/remove

I'm sure in the near future, after it's cured completely, you'll have a "GLOWING" review of ADS Quartz

Sent from my SM-G991U using Tapatalk
Yes, the applicator crusted up pretty quick, temps were about the same for you.
 
Wheels!

Prior to the sale of my old S550, I removed the Ford Performance HP Performance wheels from the car. I didn't necessarily do this with the intention of fitting them to the S650, rather they are worth more than the original gloss black Performance Pack items that came on the car. The same with the solid black lug nuts.


Like the S550 Performance Pack wheels, I'm not in love with the standard S650 versions. Actually, they look pretty good, especially in the graphite colouring rather than the satin black that my car came with. I have two main gripes with both S550 and S650 PP wheels, they hide the brake calipers and......................they take forever to clean.

And so, curiosity has got the better of me, I've decided to trial the HP wheels on my new car. With two sets of wheels to choose from, I have effectively doubled my wheel workload. :rolleyes:

I bought these wheels new in mid 2021, effectively addressing three key factors. First and second being the above-mentioned caliper visibility and cleaning ease. The third being a functional aspect, ridding the car of the diabolically bad Pirelli P-Zero's. For a performance tyre, these couldn't have been worse if Pirelli tried. For a powerful rear drive car, the lack of traction you would understand in performance orientated driving, but not low-speed driving in residential areas. Replacing them for Michelin PS4S transformed the car. Having said that, the latest P-Zero Ford is currently using are apparently a marked improvement.


Being a brand-new set of wheels, I wanted to go all out in keeping them looking good. At the time, apart from applying DLUX to plastic trim, these wheels would be the first time I had used a ceramic coating on a painted surface. After looking at a few coatings, I settled on NV Wheel. Considering how nervous I was, the coating went down well, and I learned a new skill.


I never really loved that coating, it just didn't exhibit the sort of hydrophobic qualities I was expecting. From what I can tell, to get the durability needed on wheels, the slickness and water behavior tends to suffer on wheel-specific coatings. For me, both of those aspects matter to me just as much as the actual protection.

NV Wheel did provide decent longevity and was still mildly present when the wheels were removed, however, I wanted to start fresh with a new coating. The problem here being the satin/matte finish, you can't simply polish off the remainder of the previous coating, unless you want a gloss finish. So, I needed to do the best I could working with that constraint.

First up, I applied Gyeon Iron Remover to each wheel and left them to soak.


From here, I rinsed off the iron remover and used undiluted brake buster to get them clean. I then clayed using a traditional clay bar and Gyeon Clay Lube. After this, I grabbed the Big Boi to get the wheels and tyres dry.

Next, onto one of my favorite detailing tasks, refreshing tyre sidewalls with Stoners Tarminator. Both front and back sidewalls were done...................yes, I know. :ROFLMAO:


I then did three rounds of prep spray, starting with Carpro Eraser, then Rupes Reveal Strong, then ADS Panel Prep.


The choice of coating wasn't really a choice, rather a mere formality. After first applying ADS High Temp Wheel Coating to the XR6 this time last year, I couldn't be happier with this product. It goes on quite thick, and has some grabbiness during the first wipe off, but it transforms to a lovely slick finish. Water behavior is exceptional and cleaning stupid easy. I may not be 100% sold on paint coatings in general, but on wheels, this coating is a must.


The ADS wheel coating is a single layer product, but it can be layered if desired. Considering how matte wheels are somewhat porous, I decided to apply two layers. The barrels in particular soaked it up, to the point where leveling was pretty pointless. After four hours, I applied ADS Ceramic Sealant to protect the coating as it fully cures.


Overall, I'm very happy with how these came up, the coating has brought additional depth and richness to the finish. I'll keep you in suspense a little longer though, I'll be swapping the wheels over tomorrow, coating the calipers as I go.
 
I like the standard wheels and as for the ass on the stang i was a little psh but now i like it.

All i will add is congratulations on the new car drive it, love it but enjoy it! Don't let the world/people get you down remember how it felt when you first drive her hard and at the end of the day your doing pretty bloody good for yourself. 💃
 
My 5-liter Trace-less and Touch-less v2 arrived today.


I gave Trace-less a quick whirl, it certainly has a strong solvent aroma peppered with a scent, and it flashes away to a streak free finish with minimal towel effort.


For Touch-less v2, its double the concentration and will require me to recalculate the panel impact ratio match my pressure washer and foam cannon outputs.

With it being 50% wouldn’t you just use half as much with same ratio or does that throw it off?


Sent from my iPhone using Tapatalk
 
  • Like
Reactions: DFB
And congrats on the new car! Been a long journey. When to go see about a Darkhorse but I’m still sour that originally the S650 was suppose to be new platform but then Ford realized there the only ones still making pony cars so the redesign not needed.

I like the front a lot. From side it has been said looks like A6th gen Camaro and Mustang blended which I see. Just can’t get myself to love the rear. The interior was a total nice upgrade.

I think we’re in the same camp that the 15-17 GT was probably the best looking modern muscle car.

She looks good with those wheels.


Sent from my iPhone using Tapatalk
 
Caliper Coating & Wheel Change!

I have to confess, I'm a bit of a brake nerd! There is something about a big set of brakes that gets me fired up. Obviously, there are practical benefits to having big brakes, but I also love geeking out over how they look. On a performance car, those two things are equally important.

On the S550, all Australian-market Mustang GT's came with meaty 6-piston front calipers acting on 380mm vented rotors. At the rear, a single piston sliding caliper on 330mm vented rotors. I never found a situation where I felt the need for more brakes, not something I could say about my two Falcon's. The only drawback? That Ford chose not to paint the calipers, instead going for a grey anodized finish. I did ceramic coat them, but they sort of blended into the background, especially with the Performance Pack wheels.


For S650, Ford made some sizable improvements to the braking package. Firstly, this helps offset the weight increase over the S550, but it also has visual benefits. The front calipers are still 6-piston Brembo's, but they are considerably larger than before and includes brake cooling ducts. At the rear, Ford ditched the single piston caliper for a 4-piston Brembo caliper. Rotor sizes have increased to 390mm front and 355mm on the rear. Also on the rear, a separate caliper for the electric handbrake, this change necessitated the inclusion of GT350/GT500 suspension components.

Aesthetically, Ford are also now painting the calipers in blue, red or black depending on model and options chosen. In the US, there are several brake colour configurations, be that bundled with an option package, or via a standalone option for $600. In Australia, it's a little more straight forward. The default colour for Mustang EcoBoost and GT is gloss black with white lettering. For Darkhorse, Ford uses Notorious Blue with Grabber Blue lettering.

There is one exception to the above, when Magneride is ordered, Ford also includes red painted calipers with white lettering. Magneride will set you back $2950, which is something I wanted regardless, so the painted calipers are a rather handy side benefit.


With my old HP wheels coated, today was about swapping them onto the car, while also taking the opportunity to ceramic coat the calipers while I was in there. Working corner to corner, I removed the PP wheel and cleaned the caliper using a brush and N-914. Typically, you would use an iron remover as well, but I skipped this today as they are virtually brand new, not to mention using an ADS Wheel Cleaner on them during the decon wash.


After rinsing with water, I hosed down the caliper with Carpro Eraser, wiped dry, then went over it with compressed air to remove any trapped moisture. I then followed with Rupes Reveal Strong for just before the coating went down. Coating here was again ADS High Temp Wheel Coating.


Coating the calipers can be a bit fiddly, but I decided to use up some Gtechniq AP2 finger applicators I had in stock, this made it really easy to apply.


I'm sorry, but these things are pure pornography! 🤤


Take note of the anodized hand brake caliper on the rear.


As each caliper was coated, I then offered up the HP wheels and secured them in place with the solid black lug nuts I took off the S550. Mustang's use a crazy high torque value on the lugs, 150 ft-lbs or 204 Nm. I then dressed the tyres with OG Tire Dressing, buffed down after 30-minutes.


And so, here are the finished results. In some ways, these wheels make the car look like my S550. But then, they also show off those sexy calipers. Actually, I love them! 😎


But there is a problem, one that burst my bubble. Of all the parts that Ford carried over from S550, for some unknown reason, they changed the TPMS sensors from 315 MHz to 433 MHz. This means they don't talk to the car, throwing a pressure warning. They can't be coded or reprogrammed either, so of course, the only way to fix that is to remove the tyres and replace the TPMS. Now I have yet to see the warning light, I haven't actually driven the car as I'm waiting for the caliper coating to cure. Also, the PP wheels are in the garage and still talking to the car. :(

Bugger bugger bugger! Ford kept certain highly visible parts on the new model, but decided to change something that is not seen. This will annoy a lot of people in the US where Mustang owners often have a separate set of wheels with winter tyres, probably transferred from a S550 as well. :(

I was feeling so good about this wheel change. Apparently the TPMS light doesn't flash, so its a case of just ignoring it, or pulling them back off and have them swapped. I was going to coat the PP wheels I took off the car today anyway, so they will have to go back on if I have the TPMS changed. Not the end of the world, just an unexpected roadblock. Cars!
 
With it being 50% wouldn’t you just use half as much with same ratio or does that throw it off?


Sent from my iPhone using Tapatalk
In theory yes, but considering how potent it is, I will just recalculate to be sure.
 
Back
Top