Extreme Exterior Makeover Contest Begins!

Meghan

Super Moderator
Joined
Mar 3, 2006
Messages
15,033
Reaction score
0
Extreme Exterior Makeover Contest!


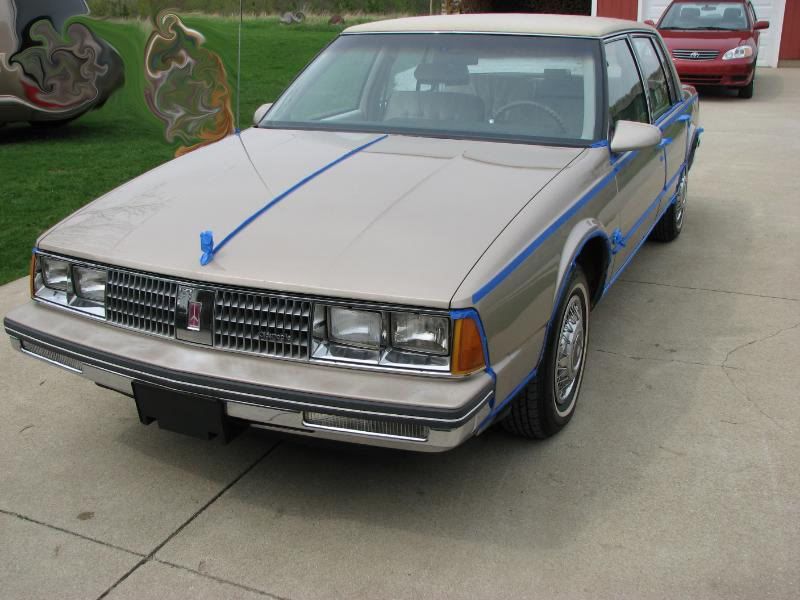
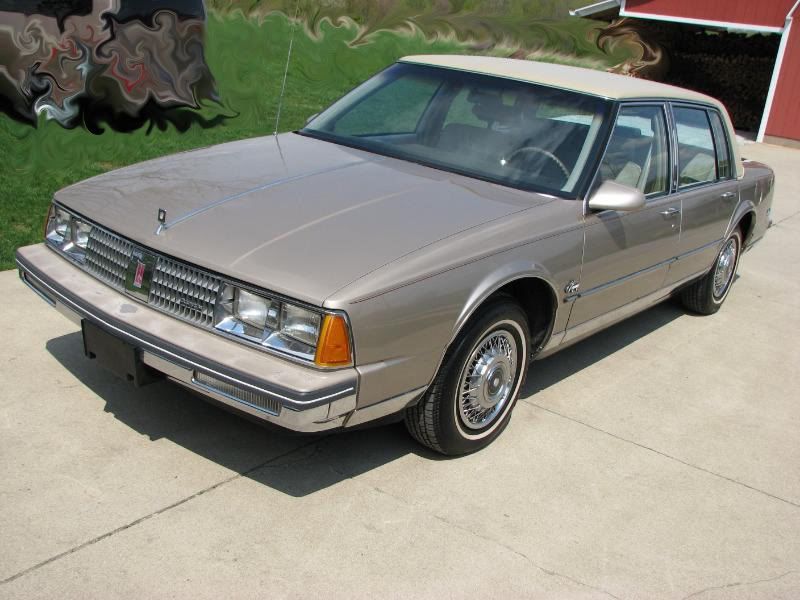
To enter contest you must have a full write up of how you worked your magic and the products you used! Also lots of pictures (I’m sure that won’t be a problem for anyone here, we all like to show off our work!!)

The whole reason of this contest is to show some of the newer member what can be done with the right products and the right knowledge!

When all the entries are in we will get it down to a few finalists and then turn it back to all of the forum members to vote for which one they think is the best! There will be one grand prize and prizes for second and third place.
Grand prize will be a Cyclo Polisher! Second prize will be valued at approximately $100 value and third will be approximately $75 value.

Main Points to Cover
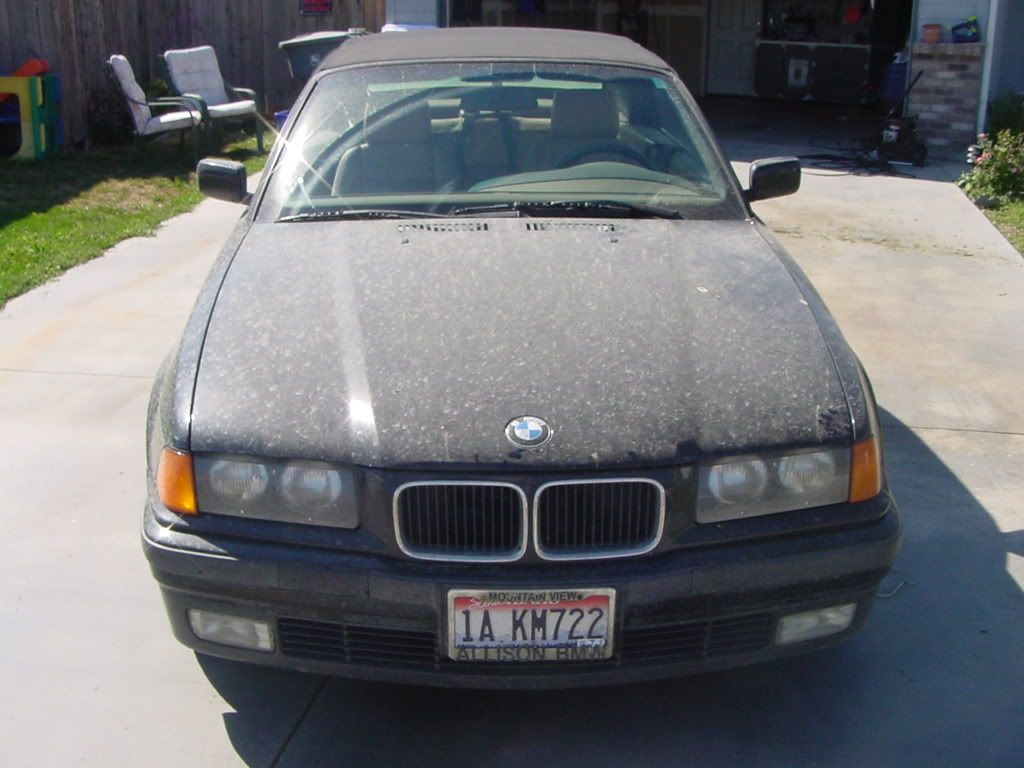
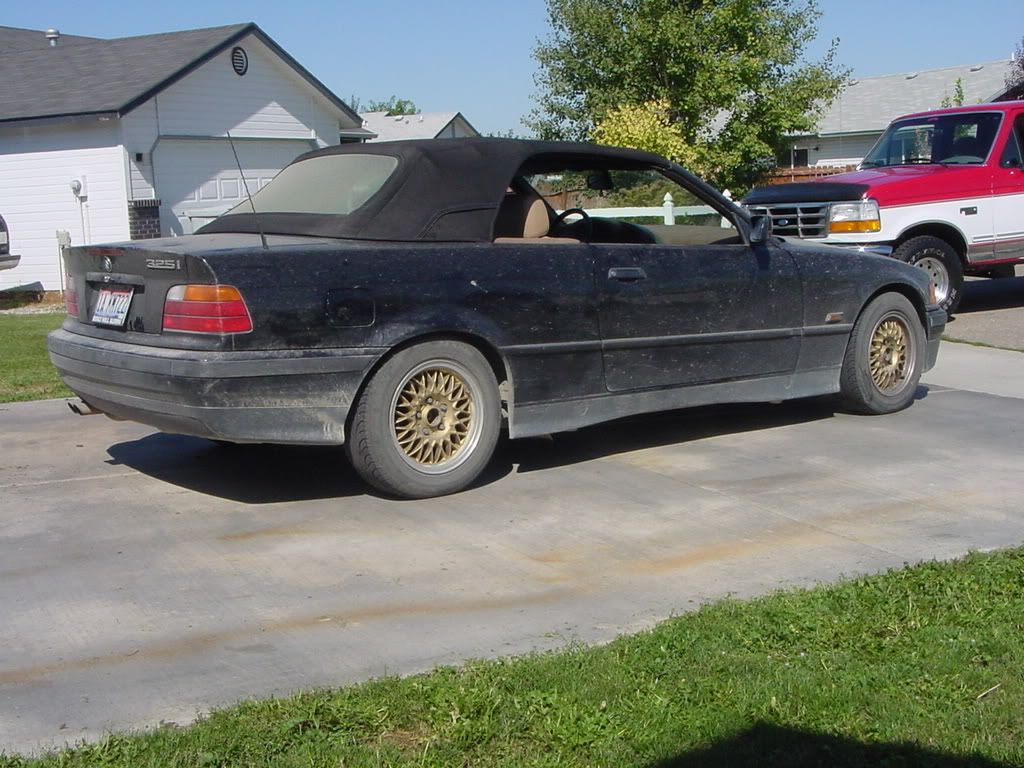
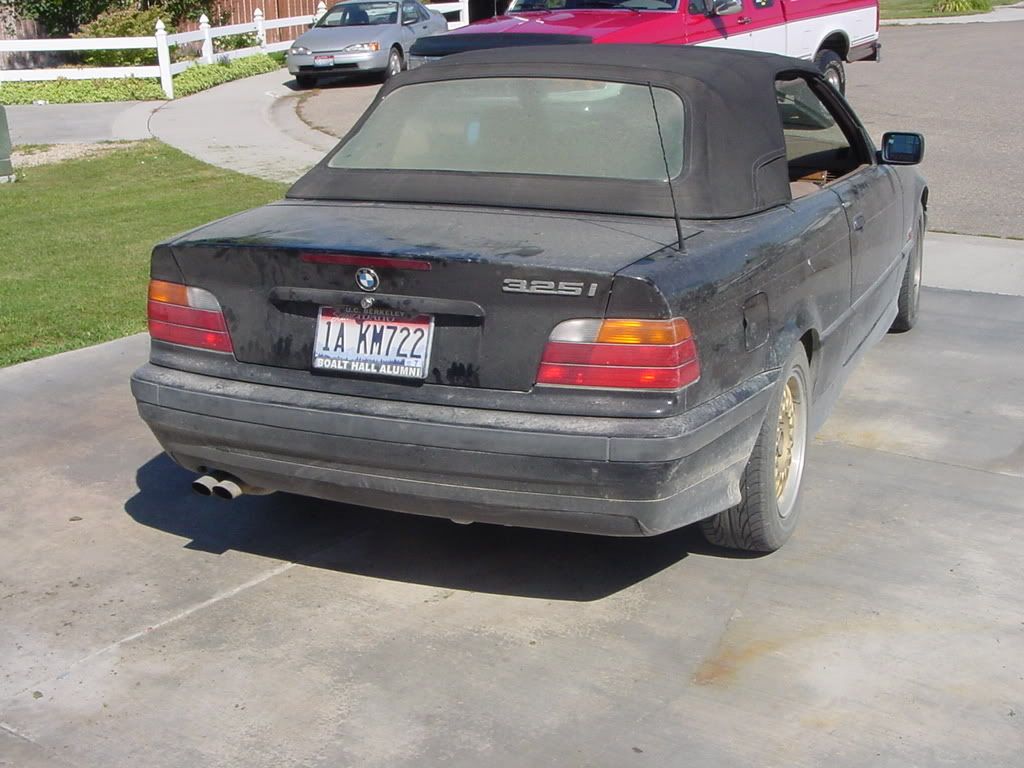
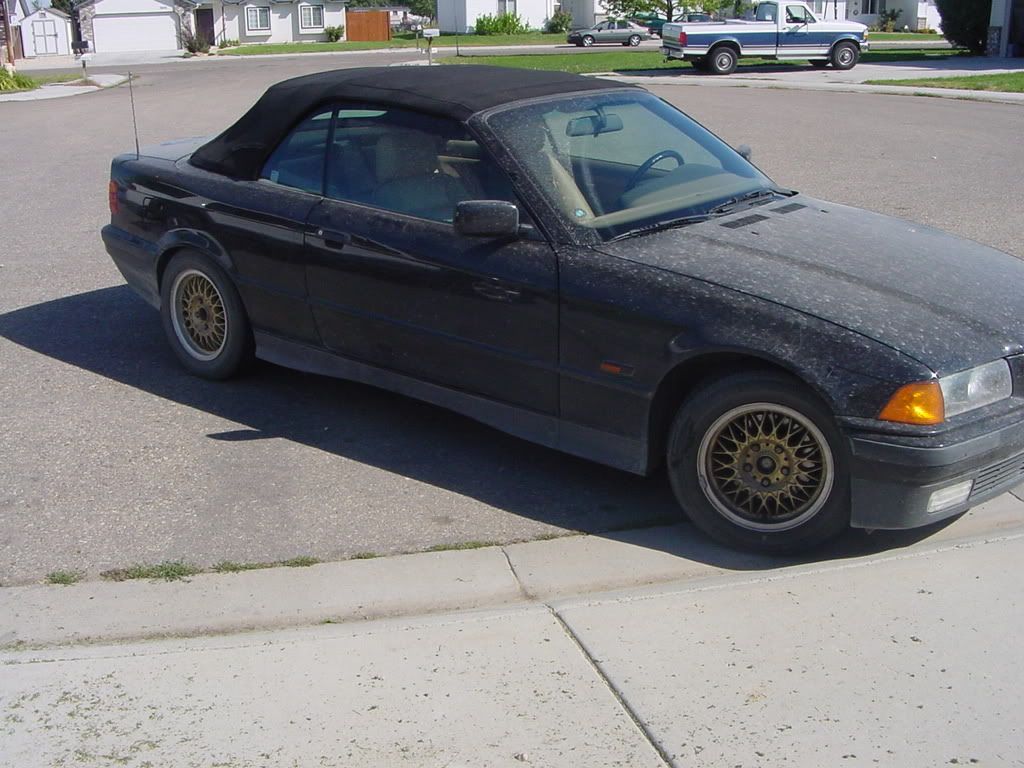
  • Exterior only on this contest
  • Must take before and after shots
  • List products and methods used, as full of a write up as you can provide please
  • If possible post picture of before then one of after right after to show the change
  • Contest will run until May 28th this will give a fair advantage to those members experiencing their second winter right now.
  • No comments will be posted in this thread; I will have a second thread for comments and questions.
  • On May 16th a poll will be put up so the members can judge the winner
  • If too many entries, staff will narrow down to top 10 to vote on
  • No maximum of photos, but please resize so they are not too large.
  • Please no duplicate pictures, try to pick out 15-30 of your best before and afters
  • Majority of products used must consist of Autogeek products
  • Use may only enter one detail for this contest
  • Exterior does not include engine bay for this contest
  • First place takes a Cyclo!
  • Can use machines
  • Open to professionals and amateurs.

Well what are you all waiting for go find that junker out in the field and get to work!

Please do not post in this thread unless you are entering. See the link below for "sound off" thread for you to post comments on.

http://www.autogeekonline.net/forum/show-n-shine/13051-sound-off-extreme-makeover-contest.html#post179202
 
Last edited:
I'm the first? Too much pressure....Sorry about the size of the photos. Im not very savvy with the computer.

Nice woman called me up, asking me to do a full detail on a 325I that she was putting up for sale. Sight unseen, I didnt quote her a price. When she arrived, I thought this thing got hit by a hurricane or two! Truly unbelievable, the condition this thing was in. I felt like calling the humane society but I dont think they deal in neglected 3-Series. The woman left, still without a quote from me. I continued with my orders, to make it look nice again. After it was washed (which took over an hour in itself) and I could actually see what bad condition the paint was in, I knew I was going to have a lot of time into it so I called the owner up and told her what I thought it would take to get it back to above average condition. This is when she told me to do all I could for $150. Ugghh...... Ok. I didnt have anything else planned that day so this is what $150 gets you with Dropkick Detail in Idaho.....rates have since been raised. Also, I my wife stole the camera after I snapped the befores so there are very few shots of the different phases I went through.

Process:
Pressure wash
Wash w/mf mitt and Production Wash & Wax
CB w/ Megs Mild CB
Re-wash
PB SSR 2.5 via PC & orange LC pad
Meg's 83 via PC & orange LC pad
106ff via PC & gray ccs
Menz FG via PC & white ccs
Natty's Blue by hand


I started out by degreasing the tires, wheels, and motor. I then pressure washed it to get rid of the top layer of filth.

BMWb4-1.jpg

BMWb4-6.jpg

BMWb4-5.jpg

BMWb4-4.jpg

BMWb4-3.jpg

BMWb4-2.jpg


While the customer was showing me around the car, she wanted to show me the scratches on the trunk her husband put in it with his softball bag so she started rubbing the dirt. It was like nails down a chalk board when I heard the dirt scratching on the paint.
BMWb4-7.jpg


Here's a couple of shots of the trunk after I washed it, clayed using Meg's Mild, then washed again using Productions Wash 'N Wax. You can see the wicked scratches. I did do some wetsanding on the back which you can see helped but didnt remove everything.

BMWtrunkb4.jpg

BMWtrunkb4-2.jpg


I started out by wetsanding with 2000g the stuff I thought would clear up then went over it with Menz PO 91E which took out the wetsanding scratches much better than I thought it would. Once that was complete I tried Meg's #83 with a flat orange PC pad and things started to clear up but I felt like I could get more out of it. I pulled out the SSR 2.5 (which I had just received from AG that day!) and I was getting the results I liked. After I did the entire car with SSR 2.5, I went around once more with Meg's #83 and another orange pad. Any paint correction that I was going to get done on this car was complete. (Oh, and I failed to mention that I busted my Makita backing plate the weekend before so all the correction done on this bimmer was done via PC). After the last pass with the #83, I went around the entire car once more with a 5.5" orange LC CCS pad and 106ff. Maybe it was overkill, but I had some more time so layed down some Menz finishing glaze with a white 5.5" LC CCS pad. Looked sharp, so I finished the paint off with a layer of Natty's blue by hand. Here is the final product. Again, sorry there were'nt more "during" pics.

BMWtrunkaft.jpg

BMWaft-6.jpg

BMWaft-1.jpg

BMWaft-7.jpg

BMWaft-3.jpg

BMWaft-2.jpg

BMWaft-9.jpg

BMWaft-8.jpg

BMWaft-5.jpg


I appreciate you letting me share. Thanks for looking.Feed back please
 
Last edited:
Products Used---

ONR
Sonus Green Clay
Menzerna SIP
Yellow Cutting Pad
Menzerna 106FF
White Polishing Pad
Poorboys Black Hole Glaze
Blue Finishing Pad
P21S 100% Carnauba Wax
Surf City Garage Beyond Black Tire Dressing
Optimums Instant Detailer
Stoners Invisible Glass
Poorboys Spray and Wipe


A couple of weeks ago I had the pleasure of working on our 1967 Porsche 911S. We had just got the car in about a week before and the car had very bad swirling and wet sanding marks across the car. We were displaying the car at our local Porsche concourse show that weekend so I had to get right to work.

First I reviewed the paint in the sun. It was very apparent that it was going to need a lot of work.


I then tried a test spot on the hood.
After on test spot---

50/50


Up close you can still see a few RIDS, but without a PTG I was not wet sanding any...


More pictures of the swirls...


As you can see here, the paint is somewhat dull with no depth...


After this I then pulled the car back inside and it was left for another day.


Day 2

I started by pulling the car out and giving it a full wash and clay.

I went panel by panel with ONR and green Sonus clay making sure to remove all contaminants on the paint.

Here is my ONR bucket ready to go with my new Lowes Proline Grout Sponge.


Here is the clay and a couple of drying towels.


I would wash one panel at a time, mist a bit of clay lube on top of the already pre-soaked panel, clay that panel, and then re-wash it with ONR.

Here I am making sure that every bit of the car is free of contaminants; even in between the badges.


Here is the clay after 3 panels.


Here is what the paint was left looking like today, as the polishing will wait for a later date.


Day 3

I then waited until the day before the show to get the paint correction done. I originally planned on taking many pictures of the paint correction but since I was short on time I only managed to take a few during pictures.

I used Menzerna SIP with a Yellow Cutting Pad for all correction.
After the SIP, I then followed up with Menzerna 106FF.

Befores---


Afters---


Last edited:
After all paint correction was done, I applied Poorboys new Black Hole glaze by machine with a blue finishing pad.

After the glaze I then applied P21S 100% Carnauba by hand.
The next morning we drove to the show. At the show I gave the car a simple wipe down with Optimums new Instant Detailer.
Here are some pictures from the show.


Even though the car was not being showed, only displayed, we did manage to win the peoples choice award!
 
Rims/Tires/Wells:
Rims were rinsed off, then treated w/Meg's Wheel Brite and agitated with a sponge and rinsed off. They got a QD wipe down and to get in btwn the smaller spokes. And a final coat of AW.
Tires were cleaned w/Awesome APC, agitated w/black schmitt. They got a coat of DP Tire gel, after it cured for hours, I put on a 2nd coat of D2G dressing.
Wells cleaned w/Awesome APC and dressed w/Fade2Black

CIMG2934.jpg

CIMG3020.jpg


Wash Process:
Rinsed off and then foamed w/Vroom foam gun. In the bucket I had Wash and Gloss with sponge. After car was washed and rinsed it was foamed up again and clayed w/Riccardo clay. Rinsed, foamed and washed one more time. For drying the car was sprayed down w/QD and dried w/WW drying towels.

Paint Correction:
There were some scratches on the trunk the customer wanted to know if I could get out... so I wet-sanded w/2000 grit, didn't even budge the scratches. Oh well.

I did 1-2 passes of Menz. PG via Flex and LC purple foamed wool pad.

1-2 passes of Menz. SIP via Flex and 5.5-6.5" LC yellow CCS pad

1 pass of System 1 via flex and white 6.5" Cobra flex groove, all were done with speed 6, except last pass of S1 went from 4-6-4.

After all the polishing, I did what I didn't want to do, I drove the car back out of the garage and re-washed it!!!!

CIMG2953.jpg

CIMG2982.jpg


CIMG2955.jpg

CIMG2958.jpg

CIMG2960.jpg


CIMG2963.jpg

CIMG2964.jpg


CIMG2969.jpg

CIMG2971.jpg


LSP:
Before I applied Fuzion I used Lusso Oro Creme via Flex and a black CCS pad to ensure I had a really clean surface to work with.

I ended up doing two coats of Fuzion... I was going to top Fuzion with Souveran but decided against it!!!
First night I did a coat using body line motions, buffed off. When I came out the next day I did a light QD wipe down to remove the dust. On the 2nd application of Fuzion I did the wax-on motion. Buffed off with a Tropi-care plush MF ( I LOVE THESE THINGS)

Others:
Polished out the pipes(No pics), grill and license plate frame w/Master Formula
All trim dressed w/VRP
Black honey comb grill got F2B
Windows SIG
3M green tape to tape off vehicle

CIMG2933.jpg

CIMG2994.jpg


CIMG2935.jpg

CIMG3009.jpg


CIMG2936.jpg

CIMG3004.jpg


CIMG2937.jpg

CIMG2998.jpg
 
Okay well I did a 1998 GMC Yukon todat the paint was extremely swirled but this was my first mobile detail and the weather in NC today has been awful but it was nice but cloudy where I was doing it.

Process:

Wash w/ Megs NXT
Meg's #4
Meg's #2
Meg's ColorX(polish)
Mother's SynWax

The wheels and wells were done with Meg's Super Degreaser

Befores
yukon08001.jpg


yukon08002.jpg


yukon08003.jpg


After Dressed with Meg's Hot SHine
yukon08029.jpg


The Interior was the real challenge couldn't get all the stains out

Before
yukon08004.jpg


yukon08005.jpg


yukon08008.jpg


yukon08009.jpg


yukon08014.jpg


yukon08016.jpg


yukon08022.jpg


Afters
yukon08023.jpg


yukon08017.jpg


yukon08015.jpg


yukon08026.jpg


yukon08025.jpg


yukon08024.jpg


Exterior Afters
yukon08027.jpg


yukon08028.jpg


yukon08033.jpg


yukon08034.jpg


yukon08035.jpg
 
I was the car constantly, so it's generaly clean.......
Before: notice all those gorgeous swirl marks??:mad:
swirledhood.jpg


2 orange LC pads, 1 white LC pad and 3 hours later, both the car and I are done.

Products used: (all products are pinnacle) Body Shampoo, Advanced Swirl Remover, Advanced Finishing Polish, SSII wax and the Crystal Mist. All applied with the PC 7424 and LC 5.5" orange (ASR), white (AFP), and grey pads (SSII). Applied as per directions on the respective bottles.

roofrack.jpg

profile.jpg

polishedhood.jpg

tailgate.jpg

100_1602.jpg


Robert
 
Last edited:
Here we have a 1985 Oldsmobile Ninety-Eight with 169,xxx miles. It was in need of some love. :)

Products:
Meg's Gold Class w/ foam gun and 2-bucket method
Giovanna Wheel Cleaner
Meg's Wheel Bush
Tire Brush from Wal-Mart
Giovanna Tire Gel
Clay Magic w/ Clay Magic lube
Cobra microfiber wash mitt
Pinnacle Bug/Tar Sponge
Cobra green Waffle-Weave drying towels
Cobra green microfiber towels (polish removal)
Rain-X 2-in-1 on exterior glass
Paint Correction:
Menzerna SIP/Orange 5.5" CCS/UDM
3M Ultrafina SE/White 5.5" CCS/UDM

Danase Wet Glaze
Poorboy's EX-P Pure Sealant

Here's how it looked before I started:

IMG_1001-1.jpg


IMG_1003.jpg


IMG_1004.jpg


IMG_1007.jpg


Wheels cleaned:

IMG_1011.jpg


The Olds was washed using the foam gun in combination with the 2-bucket method. Why use 2 buckets??...

IMG_1020.jpg


New clay:

IMG_1014.jpg


Upper panels were not too bad...

IMG_1015.jpg


As I got lower...

IMG_1016.jpg


IMG_1019.jpg


It was then time for a re-wash followed by drying with the Cobra Waffle-Weave towels. These things soak up a lot of water!

IMG_1021.jpg


Paint condition: :eek:

IMG_1027.jpg


Checking paint thickness to make sure it is safe to polish: The hood read anywhere from...

IMG_1031.jpg


To...

IMG_1029.jpg


Sides read a bit more...

IMG_1035.jpg


Time to tape!

IMG_1037.jpg


Taped:

IMG_1043-1.jpg
 
Last edited:
Test spot with Cobra MFs waiting:

IMG_1045.jpg


Before and after with the paint correction steps listed above:

IMG_1054.jpg


More afters:

IMG_1068.jpg


IMG_1069.jpg


Paint correction complete! And the sun is hiding...

IMG_1076-1.jpg


All done!

IMG_1085-1.jpg


IMG_1084.jpg


IMG_1087.jpg


IMG_1090.jpg


IMG_1091.jpg


IMG_1092.jpg


That's it! Im the MAN It's too bad it is developing rust and the clearcoat on the bumpers has vanished.
 
ALL ENTRIES MUST BE IN BY MONDAY, JUNE 2 2008!!! This is when winners will be chosen. Thanks!
 
Due to several circumstances I was not able to line up the vehicle I was planning on detailing for AGO’s Extreme Detail contest. It was going to be a 90’s Mercedes, dark blue that was very bad. Maybe things will pan out in the future, keep your eyes peeled. Anyways this is a detail that I did awhile ago but is worthy of this contest. It was in the worst condition that I have ever worked on at that point in time and probably even to this day. At that point I didn’t have too much experience with a rotary polisher but the Optimum polishes really saved me. They are so easy to use, don’t dust and have a very long working time. Just be careful not to use too much product, as the pads can gum up and cause buffer hop. Using a small amount of product and a cleaned pad works the best. The OHC cut through the swirls like butter and OP restored some shine and easily glided over the paint so I could create a hologram free finish.

Thankfully this was only a 1996 Toyota Corolla and not a Suburban or big SUV. The car was trashed and abused during its life of 184,000 miles. The detail was spread out over two days with several hours each day. I put less than 6 hours into the car and the results were very dramatic. I surely could have spent another 6 hours sanding and polishing but sadly the owner wouldn’t notice and the car would probably return to the condition it was in before.

Exterior Process:
Wash
Clay
Optimum Hyper Compound, rotary @ 1200-1500 RPMs, LC 7.5” orange light cut pad
Optimum Polish, rotary @ 1200-1500, LC 7.5” white polishing pad
Wolfgang Sealant, PC @ speed 3, LC 7.5” blue finishing pad

Before, not so bad right?
P1010001.jpg


Wrong!
P1010002.jpg


Heavy marring and deep scratches on the trunk:
P1010003.jpg


Poor paint blending:
P1010010.jpg


After the full sun inspection it was time for the halogens. For once a vehicle looked worse under the halogens than it did in the full sun! There was no shine to the vehicle and it was hard to tell what color it actually was. I knew that using a rotary polisher was the only way to restore this vehicle. This would have been a great candidate for wet sanding but unfortunately the car wasn’t worthy (to the owner):
P1010011.jpg


Out came the Optimum Hyper Compound (original), a Lake Country 7.5” pad and a HF rotary. After one pass here were the results:
P1010019.jpg


P1010021.jpg


P1010022.jpg


Some of the deeper RIDS remained since only wet sanding would have removed them, which wouldn’t have been worth it for this vehicle (184,000 miles … ):
P1010027.jpg


P1010036.jpg


P1010037.jpg

You can even see the metal flake :):
P1010040.jpg


And some side by side before and after shots:
P1010001.jpg


P1010041.jpg


And finally, the fender, wheel well, wheels and tires. The wheels (I mean hub caps) were a major PITA. The brake dust was embedded into the plastic and was virtually impossible to remove. I tried Eagle One Wheel and Tire cleaner but that only put a dent in it. Next I tried clay and KAIO to limited progress. Finally I used Poorboy’s ProPolish and a terry cloth towel and was finally, slowly removing the brake dust. The wheel wells were scrubbed and dressed with NoTouch tire dressing.
P1010004.jpg


P1010043.jpg


P1010026.jpg
 
Products

Nxt wax
Meg ultimate compound
Greasedlighning
Meg clay

Truck had water spots and white overspray from God knows where.
Didn't get a good shot of overspray. White fuzzy spots.
P1010052.jpg

Engine hadn't seen the light of day in a long time.
P1010049.jpg

Hood needed some attention also
P1010048.jpg

Wheels before
P1010046.jpg

Dull waterspotted finish
P1010055.jpg

Left side corrected.
P1010057.jpg

Back to life
P1010060.jpg

P1010061.jpg

P1010065.jpg

P1010067.jpg
 
Back
Top