From NEGLECTED to RESPECTED! 1985 Cougar Tunnel Hull Extreme Makeover at Autogeek

  • Thread starter Thread starter Mike Phillips
  • Start date Start date
M

Mike Phillips

Guest
From NEGLECTED to RESPECTED! 1985 Cougar Tunnel Hull Extreme Makeover at Autogeek


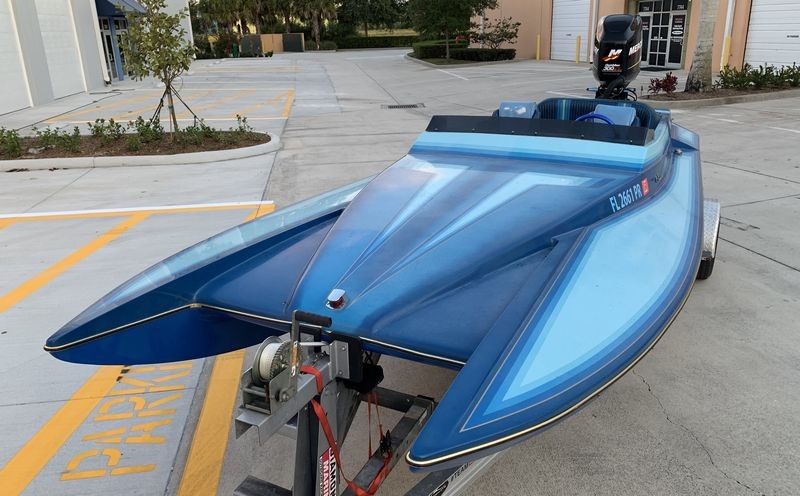
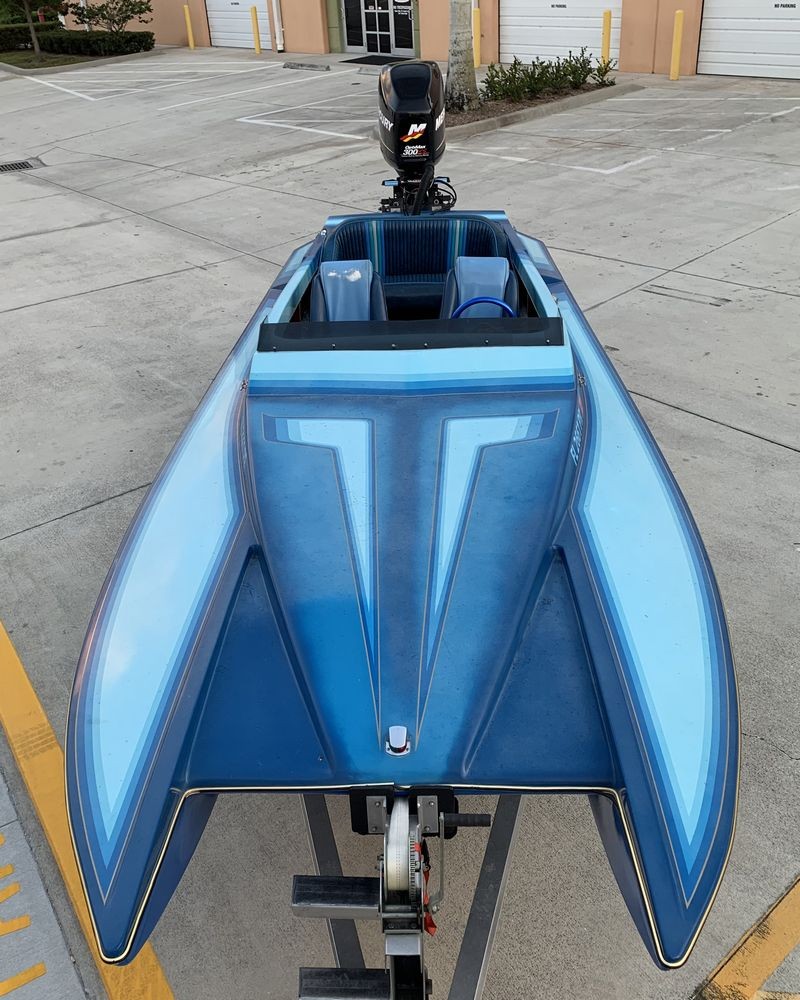
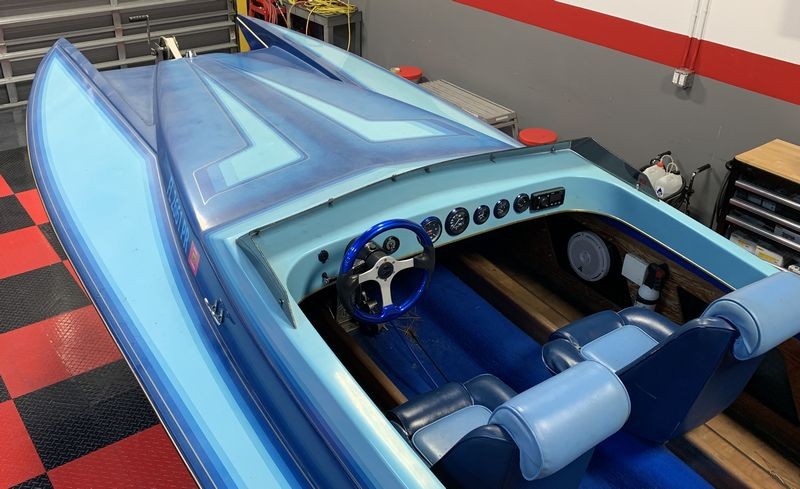
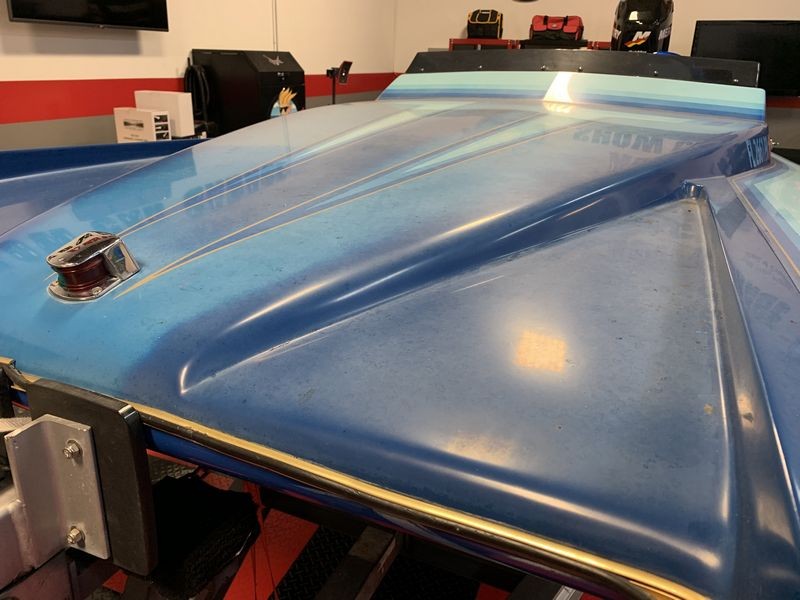
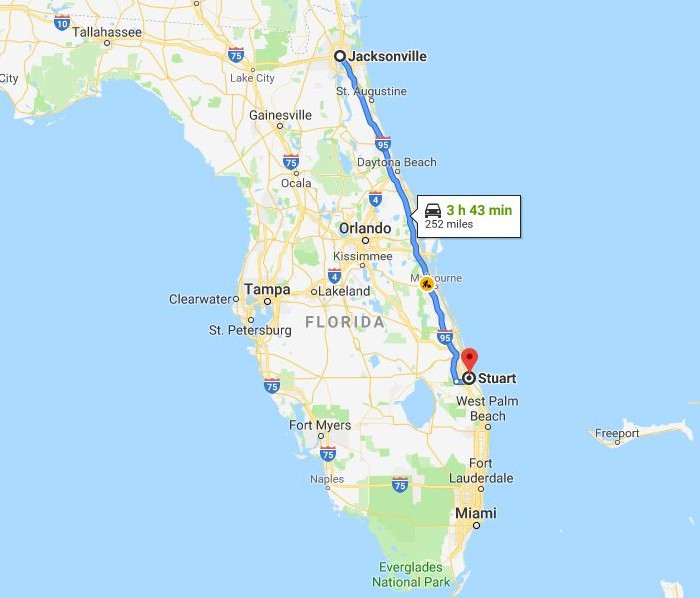
My good friend and pro detailer Russel Stender brought his customer's boat, a 1985 Cougar MTR Tunnel Hull all the way down from Jacksonville, Florida to Autogeek in Stuart, Florida for an extreme makeover.
a_Gelcoat_Ceramic_Coat_000.JPG


While working on this boat we also made a video to showcase many of the products in the Marine 31 line. There's about a dozen or so established marine brands on the market but you ever see any of these companies doing projects like we do here at Autogeek. In fact, we are the only company that holds a legit boat detailing class, at least a legit boat detailing class that you kind find pictures and videos from that shows real boats be detailed in a class environment using the Marine 31 brand of products.


So in keeping with our history of holding classes and providing both the products and the education to go with the products, below are the pictures I was able to take during this project showing the extreme transformation from and very cool but also very neglected 1985 Cougar Tunnel Hull with the original gel-coat, to what probably is as-good or better finish than when it left the Cougar boat manufacturing company in Lake Havasu City, Arizona.


PROCESS


Step 1: Wash with Marine 31 Gel Coat Wash & Wax with Carnauba

Step 2: Compound with Marine 31 Captain’s One-Step Compound & Polish with FLEX PE14 Rotary Buffers and Lake Country Wool Pads

Step 3: Polish with Marine 31 Captain’s One-Step Compound & Polish using the FLEX XC 3401 VRG 8mm gear-driven orbital polisher with Lake Country 6.5" Force Hybrid Foam Cutting Pads.

Step 4: Chemically strip with Marine 31 Gel Coat Prep Spray

Step 5: Seal the surface using Marine 31 Captain's Boat Coating


Here's the pictures, I was busy compound and polishing on the boat or shooting video with Yancy, so I don't have picture of everything but the video Yancy shot will have a lot of information and footage of technique.


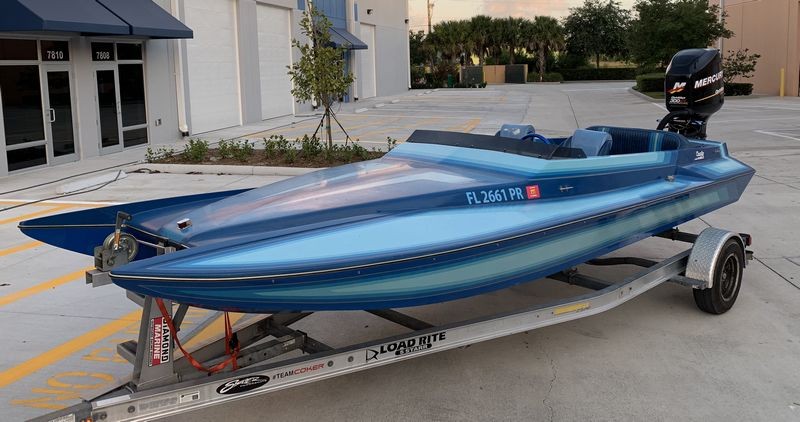
Here's late Thursday night when Russel arrived from Jacksonville, Florida


Arrival to Autogeek in Stuart, Florida
a_Gelcoat_Ceramic_Coat_001.JPG


a_Gelcoat_Ceramic_Coat_002.JPG


a_Gelcoat_Ceramic_Coat_003.JPG


a_Gelcoat_Ceramic_Coat_004.JPG


a_Gelcoat_Ceramic_Coat_005.JPG


a_Gelcoat_Ceramic_Coat_006.JPG


a_Gelcoat_Ceramic_Coat_007.JPG


Before

Here's some before pictures under the florescent lights after we moved the boat into the garage for safe-keeping overnight.

a_Gelcoat_Ceramic_Coat_008.JPG


a_Gelcoat_Ceramic_Coat_009.JPG


a_Gelcoat_Ceramic_Coat_010.JPG


a_Gelcoat_Ceramic_Coat_011.JPG


a_Gelcoat_Ceramic_Coat_012.JPG


Friday morning - After washing outside

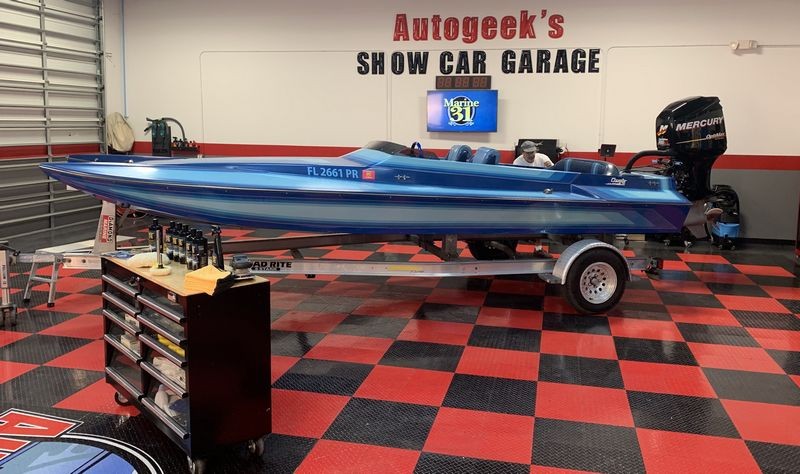
After washing the boat we moved her back inside and started staging for the video and the Test Spot.
a_Gelcoat_Ceramic_Coat_013.JPG


a_Gelcoat_Ceramic_Coat_014.JPG


Test Spot

For those that might be new to machine polishing, the Test Spot is where you test out teh product, tools and pads that you HOPE and expect to work (for whatever it is you're trying to do), to one small area and then inspect the results. If the results from the Test Spot look good and/or meet your expectations then you simply duplicate the process for the Test Spot over the rest of the boat or whatever it is you're working on.

If the results DON'T looks good, the first you'll be glad you only buffed a small area. Second you then try something else, maybe a different product, maybe a different pad, etc. You do Test Spots UNTIL you dial-in a process that works to your expectations. If you run into trouble, the start a thread on this forum asking for help, that's what this forum is about.


Our Test Spot

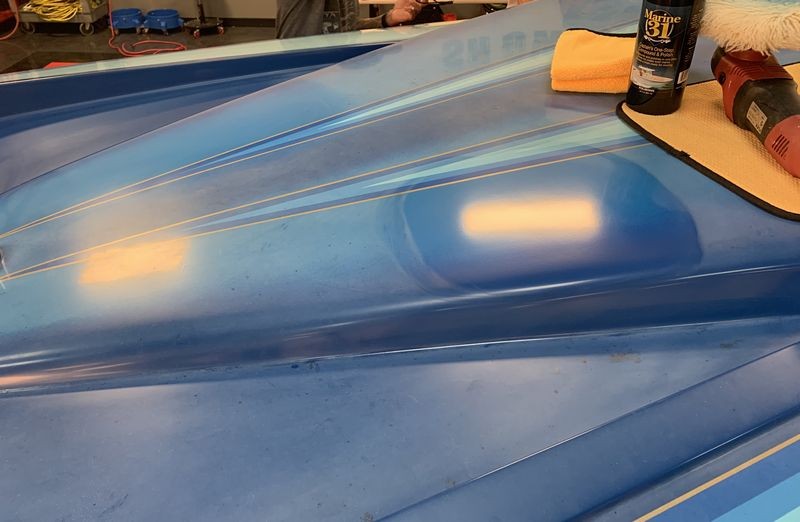
If this were my boat I probably would have machine sanded using Mirka Abralon #3000 grit followed by Abralon #4000 grit and then compounded and polished out. Because it isn't my boat I had to make a judgement call and while I think machine sanding would have been perfectly safe I also didn't want to run into a "Whoops" situation with the owner living 6 hours away. So we skipped machine sanding and used the traditional approach of compounding with a wool pad, rotary buffer and compound followed by polishing with an orbital polisher, foam pad and the same compound/polish. Below are the results....

a_Gelcoat_Ceramic_Coat_015.JPG


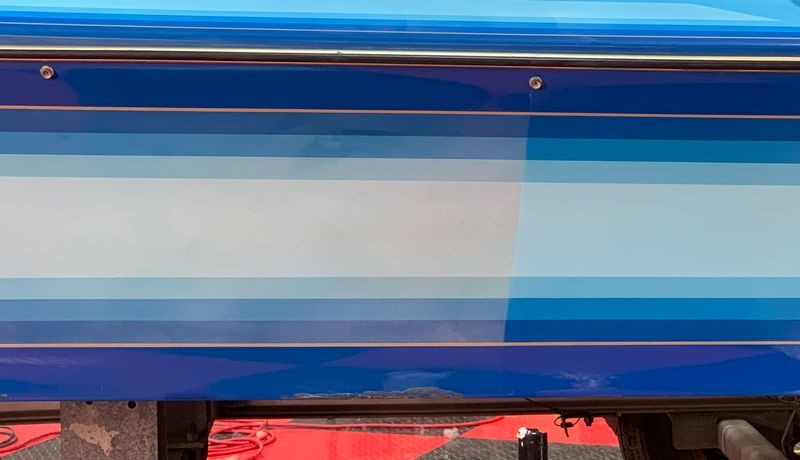
The appearance of 2 different colors IS how it's supposed to look, this is a fade light that is part of the color scheme.
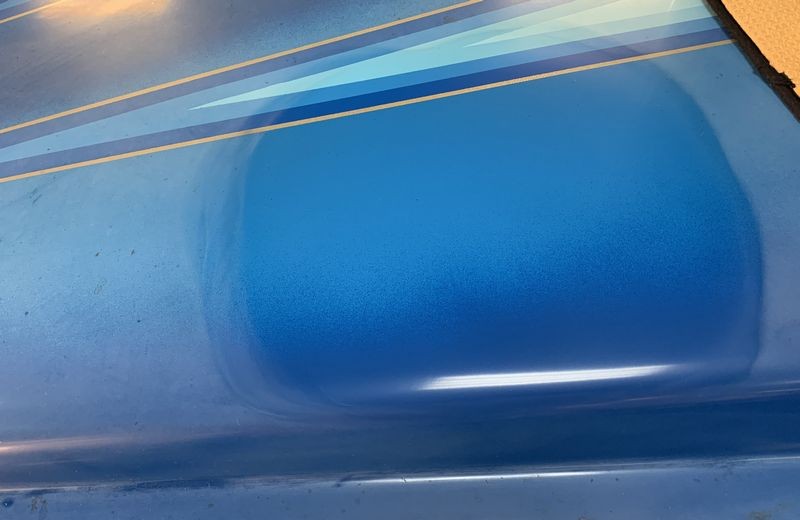
a_Gelcoat_Ceramic_Coat_016.JPG


Here's the overhead florescent lights shining down on the hull.

a_Gelcoat_Ceramic_Coat_017.JPG


a_Gelcoat_Ceramic_Coat_018.JPG


a_Gelcoat_Ceramic_Coat_019.JPG


a_Gelcoat_Ceramic_Coat_020.JPG


Gel-coat is polyester resin with pigment

Gel-coat is kind of like single stage paint. Gel-coat is polyester resin with pigment. In this example it's polyester resin with multiple blue pigments. It's completely normal to see the color of the hull coming off and onto your buffing pads and your microfiber towels. Marine gel-coats tend to be much thicker than automotive paints. For this reason you can usually get more aggressive with them when doing any correction work. You still have to use common sense.
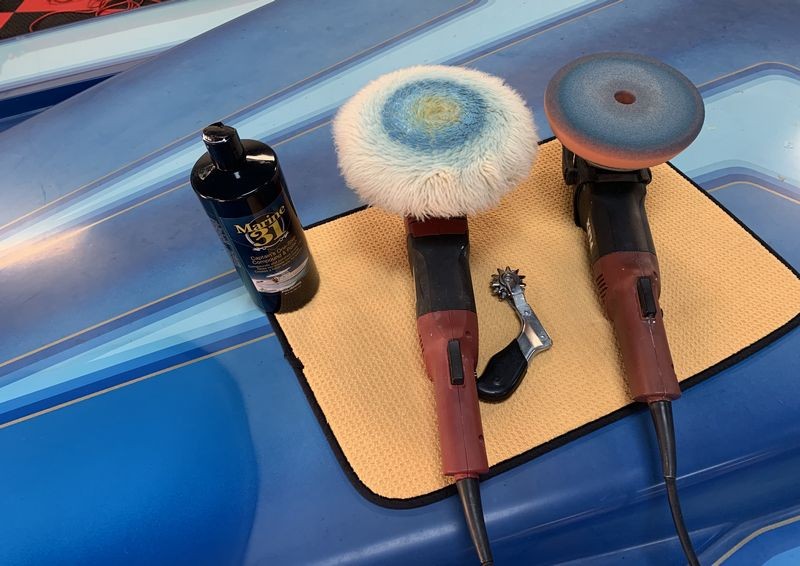
a_Gelcoat_Ceramic_Coat_021.JPG


Full speed ahead...

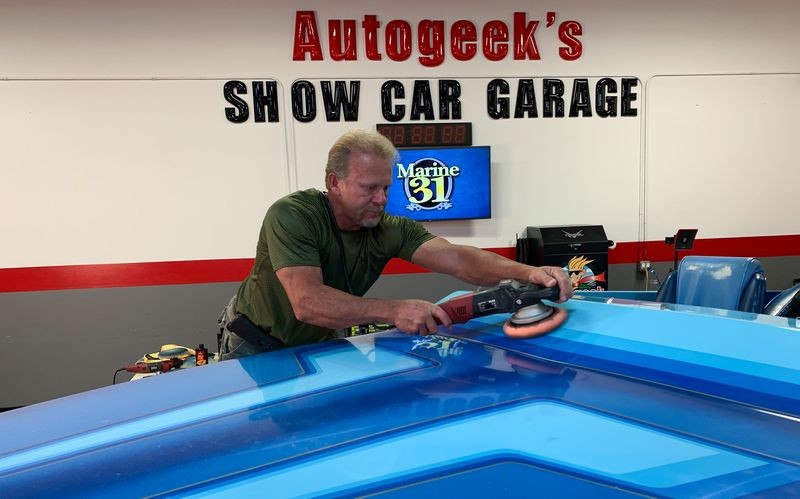
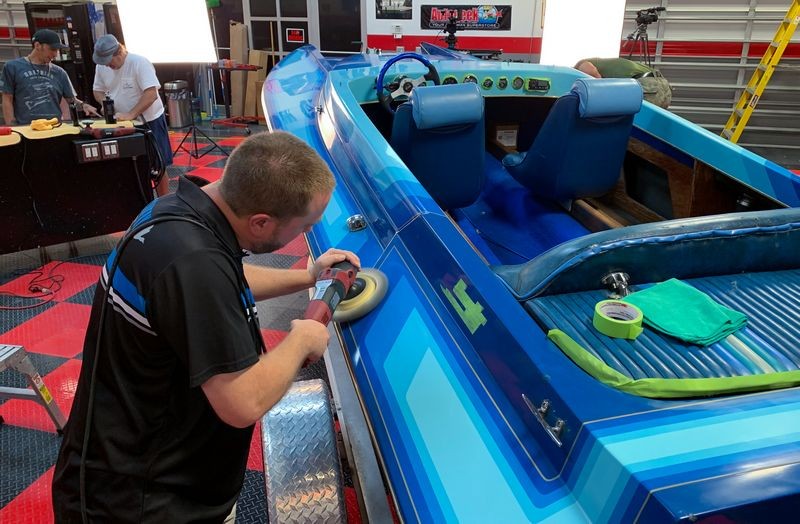
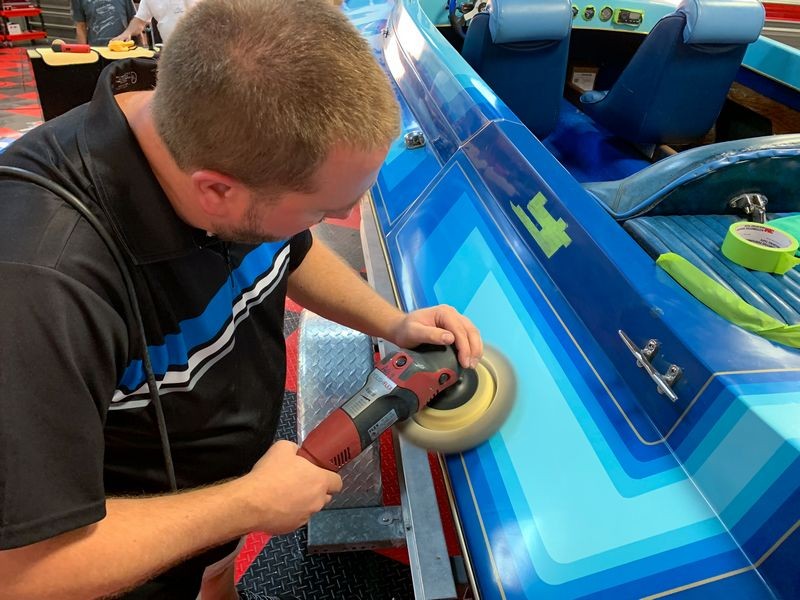
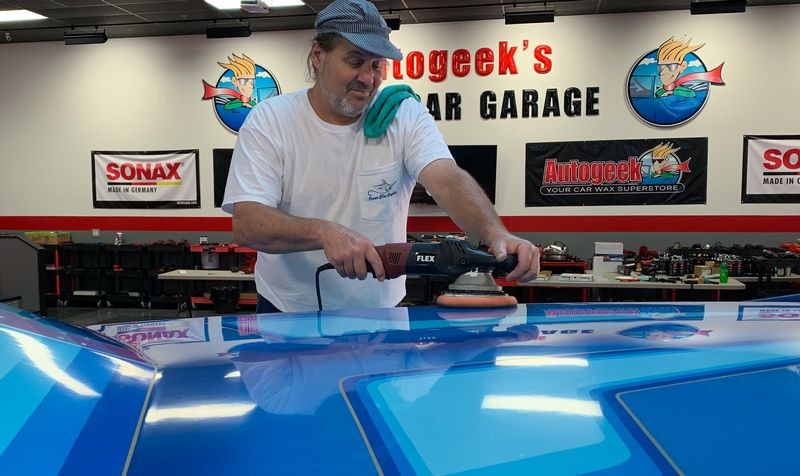
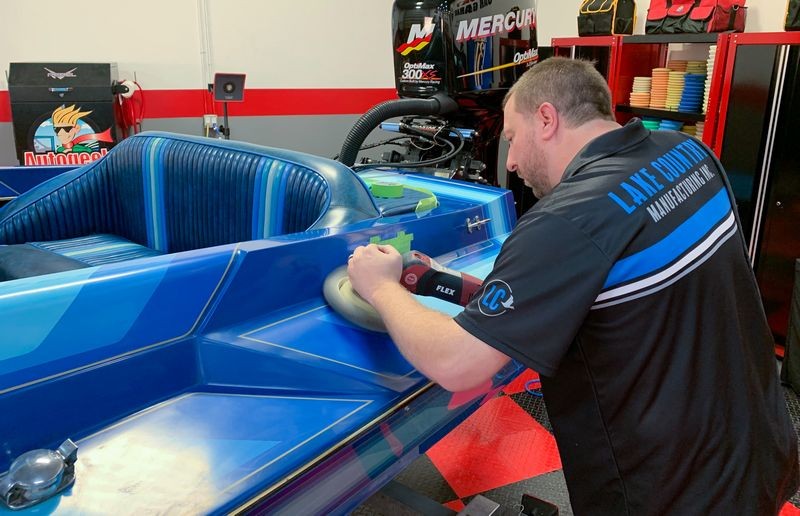
After the Test Spot, Russel, Rob, (in the foreground), Jason from Lake Country and I dove in head first and starting compounding the hull.

a_Gelcoat_Ceramic_Coat_022.JPG


a_Gelcoat_Ceramic_Coat_023.JPG


Here's Russel compounding the side of the hull...

a_Gelcoat_Ceramic_Coat_024.JPG


a_Gelcoat_Ceramic_Coat_027.JPG


Here's Jason from Lake Country machine compounding hard on the sides of the boat...
a_Gelcoat_Ceramic_Coat_028.JPG


a_Gelcoat_Ceramic_Coat_029.JPG


a_Gelcoat_Ceramic_Coat_030.JPG


Here's Rob, as in RobHarleydetailer.com machine polishing the sections I compounded...

a_Gelcoat_Ceramic_Coat_031.JPG


a_Gelcoat_Ceramic_Coat_032.JPG


a_Gelcoat_Ceramic_Coat_032c.JPG


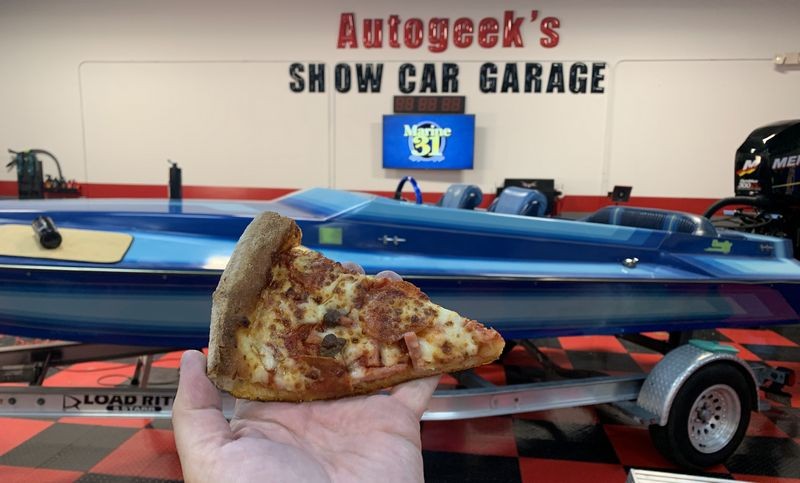
PIZZA BREAK

Can't buff boats without fuel

a_Gelcoat_Ceramic_Coat_025.JPG


a_Gelcoat_Ceramic_Coat_026.JPG


Staining and Oxidation

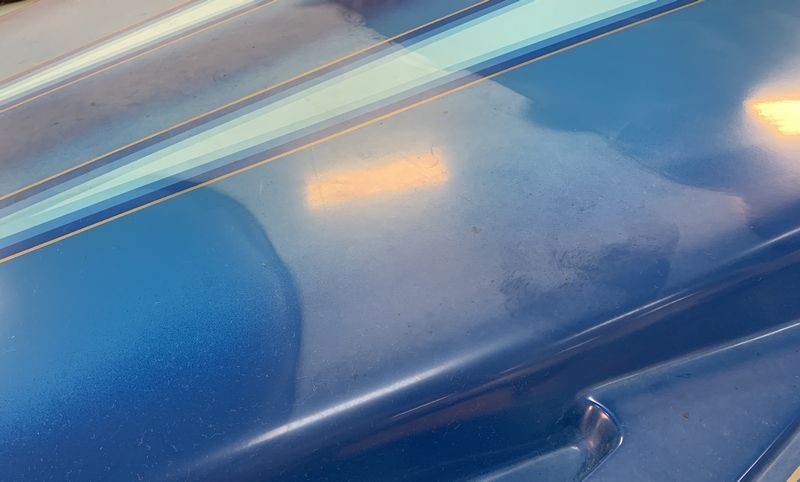
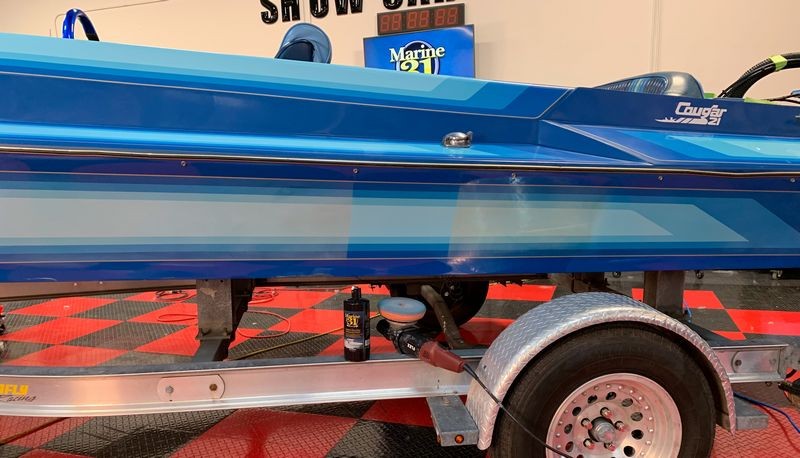
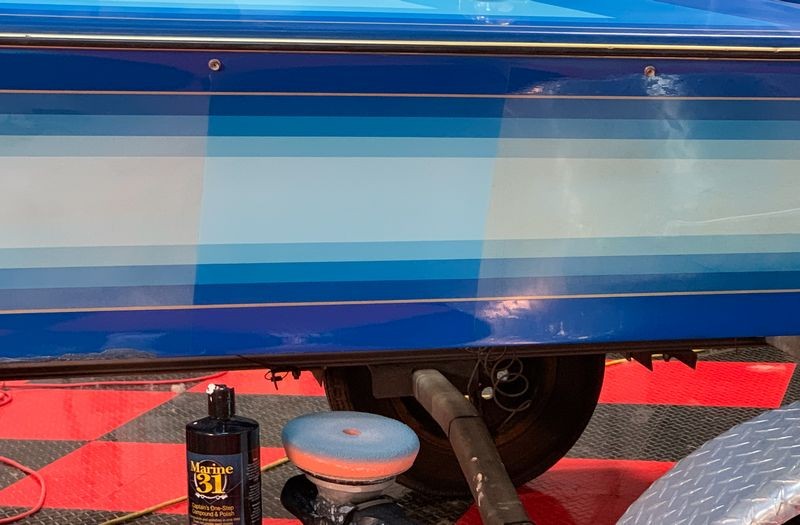
The sides of the hull were not only oxidized but they also had a lot of staining from contaminated water. You can see the staining and the oxidation in the below before and after pictures.
a_Gelcoat_Ceramic_Coat_034.JPG


a_Gelcoat_Ceramic_Coat_035.JPG


a_Gelcoat_Ceramic_Coat_035c.JPG


a_Gelcoat_Ceramic_Coat_036.JPG


After buffing out the entire boat it literally changed colors as you'll see in the AFTER pictures.

a_Gelcoat_Ceramic_Coat_037.JPG


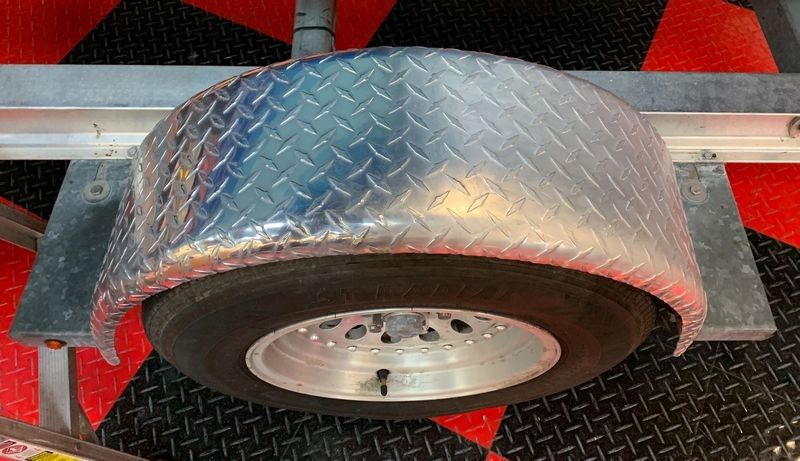
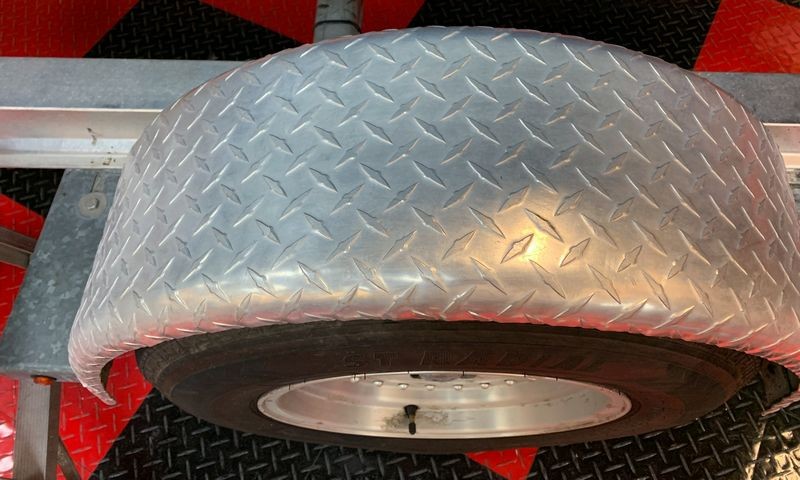
Oxidized Diamond Plate

Diamond plate boat trailer fenders are pretty common and un-coated aluminum oxidized easily. To remove the oxidation we machine polished using a wool pad on a rotary buffer with the Marine 31

a_Gelcoat_Ceramic_Coat_038.JPG


a_Gelcoat_Ceramic_Coat_039.JPG


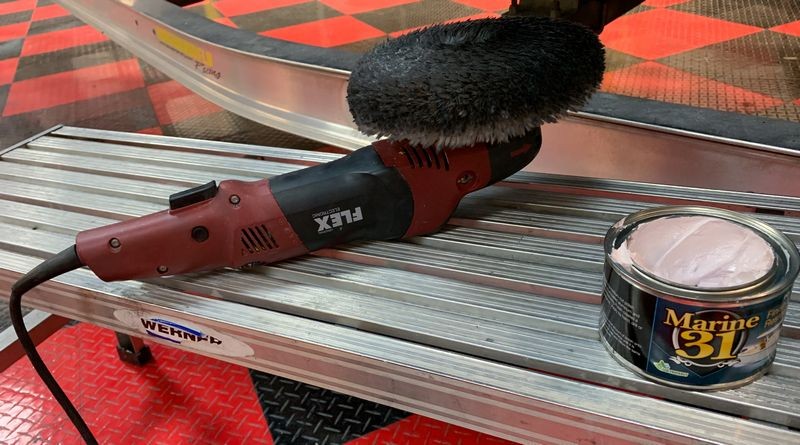
Aluminum Polishing Tip

Once you use a wool pad to polish aluminum,

A: Dedicate this pad for ONLY polishing aluminum moving into the future.

B: Don't EVER WASH IT - Use it until you feel you've obtained all your money's worth and the write-it off.


a_Gelcoat_Ceramic_Coat_040.JPG


Here's the area I polished - the polish residue is still on the fender.

a_Gelcoat_Ceramic_Coat_041.JPG


Here's the residue wiped-off...

a_Gelcoat_Ceramic_Coat_042.JPG


:)
 
Re: Remove Oxidation - Install Ceramic Boat Coating - 1985 Cougar Tunnel Hull Extreme Makeover at Autogeek

Continued....


Final Results!

And here are the results. I wouldn't say the gel-coat came out perfect but remember, it is 34 years old. Most recognized car clubs consider a car to be antique after it is 25 years old, I'd say this boat qualifies for antique status.

a_Gelcoat_Ceramic_Coat_043.JPG


a_Gelcoat_Ceramic_Coat_044.JPG


a_Gelcoat_Ceramic_Coat_045.JPG


a_Gelcoat_Ceramic_Coat_046.JPG


a_Gelcoat_Ceramic_Coat_047.JPG


a_Gelcoat_Ceramic_Coat_048.JPG


a_Gelcoat_Ceramic_Coat_049.JPG


a_Gelcoat_Ceramic_Coat_050.JPG


a_Gelcoat_Ceramic_Coat_051.JPG


Time to head for home...

I met Russel early Saturday morning so he could hook-up and haul the boat home. It's easily 3 hours plus back to Jacksonville, so getting an early start is the best plan.

a_Gelcoat_Ceramic_Coat_052.JPG


a_Gelcoat_Ceramic_Coat_053.JPG


a_Gelcoat_Ceramic_Coat_054.JPG


a_Gelcoat_Ceramic_Coat_055.JPG


There she goes....

a_Gelcoat_Ceramic_Coat_056.JPG


Thank you to everyone!

Huge thank you to Russel for taking his time to drive the boat down from Jacksonville and then help out with the project from start to finish.

Thank you!


We would also like to thank Jason from Lake Country Pads and Rob the Harley Detailer for all their hard work to transform this boat from neglected to respected.

Thank you!

A big thank you to the owner also for trusting Autogeek with his very cool race boat! Thank you!


Yancy and Nicole
Also a huge thank you to Yancy our Creative Director for all his hard work behind the camera and also to Nicole our new Social Media girl for lending a hand with this project.

Thank you!

a_Gelcoat_Ceramic_Coat_05.JPG


a_Gelcoat_Ceramic_Coat_058.JPG


Cougar Boat Manufacturing For Sale

To prep for this project I called the owner of Cougar Boats, Bernie. He was great to talk to. Now days he's living in Albuquerque, New Mexico and owns a salsa business. He told me he would like to sell the molds for all his various size and type of boats. If you're reading this and you would like to venture into the boat building business he's pretty easy to find via Google or you can reach out to me and I'll be happy to put you into contact with him.


Thanks for reading! Any comments, questions and/or feedback is always appreciated.


:)
 
Re: Remove Oxidation - Install Ceramic Boat Coating - 1985 Cougar Tunnel Hull Extreme Makeover at Autogeek

I was cleaning the garage and found a huge pile of Wool Dust Bunnies that had collected together to form a pile. I guess safety in numbers?

Wool_Dust_Bunnies_1.JPG


That dust you see isn't dust - it's old, oxidized gel-coat we compounded off the hull.

Wool_Dust_Bunnies_2.JPG


:)
 
Awesome turnaround Mike and gang!

What an amazing difference from the before and the beutieful clear and reflectioned finish afterwards. I bet with the smoother hull it's even faster in the water too LOL. The write up and pictures as always top notch.

Thanks for shareing your work Mike!

/ Tony
 
Awesome turnaround Mike and gang!

What an amazing difference from the before and the beutieful clear and reflectioned finish afterwards. I bet with the smoother hull it's even faster in the water too LOL. The write up and pictures as always top notch.

Thanks for shareing your work Mike!

/ Tony


Thank you Tony for commenting. With over 300 views it's kind of sad, at least to me that no one seems interested enough to even make a comment? Takes time to do the work, take the pictures and then do something with them that will endure time. So THANK YOU for taking the time to comment.

I sent the link to this thread to a number of "Captains of Industry" so to speak so they could see their tools, pads and people in action. I also sent the link to the owner of the Cougar Boat Manufacturing company. Most of these people are not "forum people" so while I'm sure they will enjoy the pictures and the write-up we'll never see anything from them.

As for the boat, Russel read this and like it, I replied to his e-mail and asked him what the owner of the boat thinks, looking forward to hearing what he has to say.


I shared with Russel that when I had my Sanger Drag Boat, kind of like this boat but probably launches harder and runs faster on the water, that every 2-3 years I would completely take the boat apart, EVERYTHING came apart. Then I would get some Semi Truck Tires and get a few buddies over and we would lift the boat off the trailer and place it upside down on the tires. Then I would compound, polish and seal the bottom of the hull with Meguiar's #20 Polymer Sealant. After that, flip the boat back onto the trailer and meticulously re-install all the running gear and the motor. I would use all brand new grade 8 and grade 5, American made nuts and bolts with lots of nylon lock nuts.

Assembling the boat myself, re-installing each nut and bolt that holds everything together gave me the confidence and the courage to take the boat and just NAIL IT! There was only one time I didn't take my Sanger over 100 miles per hour and after 20 years, that's a LOT of high speed fun on the water.

270SangerDragBoat.jpg


1970_Sanger_V_-Drive-Drag_Boat_006.jpg


Anyway, that's what I suggest for this Cougar Tunnel Hull. After this boating season is over, take that thing completely apart and completely clean and then re-assemble it from scratch with all brand new high quality nuts and bolts. While it's apart, flip it over and correct the bottom of the hull and then apply a ceramic coating to it.

The peace of mind if worth it.


:)
 
Nice job of recovering a very cool boat. I love some of the old fiberglass race boats. Great job on the write up as well.
 
The results are simply incredible. Thank you to all the folks that made this thread possible for powerboat fanatics like myself to enjoy. I was hoping to see a custom boat cover for the trip back up north but I guess not. Pity.

A stock 150 bolted to the transom would be a handful on that rig. I can't even imagine that 300 with its jack plate and custom prop. My one time running a tunnel @ 80+ with throttle to go almost resulted in a blowover as I passed under a bridge......I threw those pants away :laughing:

I fully agree that cleaning and sealing the hull would complete the hard work put in so far. He might even pick up a few MPH on the top end.
 
I have a question...for the wash process....why use a wash product with carnauba in it if you knew you were going to compound and polish it? Is that because the only two wash products in the McKees line are made/sold that way?
 
What a turn around It looks great! Thank you for the detailed write up, I definitely learned a thing or two.

I’m just getting into boat detailing and my first boat I did was an 2006 28ft Eliminator Daytona cat. If i knew how to post a picture I would!

I’ll have to give the marine 31 lineup a try for my next boat detail.


Sent from my iPhone using Autogeekonline mobile app
 
I have a question...for the wash process....why use a wash product with carnauba in it if you knew you were going to compound and polish it?


Great question and the honest truth is this boat is part of a video to showcase the Marine 31 line of products and in the Marine 31 line of products there's only one boat wash and it's a boat wash with Carnauba wax for gloss and protection.

There's a HUGE market of boat OWNERS that would want this type of product. There's not enough of a market of boat detailers that want a product like you described for PRE detailing or prep washing. And I'm a fan of the IDEA for Prep Washes.


Make sense?


:)
 
Mike and AG/LC Team - I can't imagine the SMILE on the customer's face when he/she saw their beloved boat looking like that!!!! It's too nice now to put in the water!

I used some of the products in the Marine 31 line last year, and was thoroughly impressed. More so, the staining that you removed from the hull absolutely gave the boat new life. Truly a testament to the products and the skilled team.

Wonderful job!

ScottH
 
Thank you Tony for commenting. With over 300 views it's kind of sad, at least to me that no one seems interested enough to even make a comment? Takes time to do the work, take the pictures and then do something with them that will endure time. So THANK YOU for taking the time to comment.

I sent the link to this thread to a number of "Captains of Industry" so to speak so they could see their tools, pads and people in action. I also sent the link to the owner of the Cougar Boat Manufacturing company. Most of these people are not "forum people" so while I'm sure they will enjoy the pictures and the write-up we'll never see anything from them.

As for the boat, Russel read this and like it, I replied to his e-mail and asked him what the owner of the boat thinks, looking forward to hearing what he has to say.


I shared with Russel that when I had my Sanger Drag Boat, kind of like this boat but probably launches harder and runs faster on the water, that every 2-3 years I would completely take the boat apart, EVERYTHING came apart. Then I would get some Semi Truck Tires and get a few buddies over and we would lift the boat off the trailer and place it upside down on the tires. Then I would compound, polish and seal the bottom of the hull with Meguiar's #20 Polymer Sealant. After that, flip the boat back onto the trailer and meticulously re-install all the running gear and the motor. I would use all brand new grade 8 and grade 5, American made nuts and bolts with lots of nylon lock nuts.

Assembling the boat myself, re-installing each nut and bolt that holds everything together gave me the confidence and the courage to take the boat and just NAIL IT! There was only one time I didn't take my Sanger over 100 miles per hour and after 20 years, that's a LOT of high speed fun on the water.

270SangerDragBoat.jpg


1970_Sanger_V_-Drive-Drag_Boat_006.jpg


Anyway, that's what I suggest for this Cougar Tunnel Hull. After this boating season is over, take that thing completely apart and completely clean and then re-assemble it from scratch with all brand new high quality nuts and bolts. While it's apart, flip it over and correct the bottom of the hull and then apply a ceramic coating to it.

The peace of mind if worth it.


:)

That's fast on water over 100mph! And with that speed it's totaly understandable you do those maintance on it to be safe and trust the parts and the boat. Can only imagine the adrenalin kick you get with that speed.

Where you competing in some kind of league or race events with your boat?

The fastest I have been on water is with a very good friend of mine on his See-Doo water scooter/jet ski those that you sit on. It has a 300hp engine and top speed is around 70-80mph. But it's more to cornering or how you would explain it. So fast up to speed than top speed. It where awesome to try it and since I was not used to any of high speed or that kind of acceleration. I had a big smile after been testing it. Think it's rated to just under 4 seconds 0-60mph. Then he took over and I was looking from the land and showed the cornering ability from it. Amazing is how it was at just looking how he could push it to the limit.

These boats are they more to go fast straight forward. Or is they also capable of takeing corners fast. Maybe with another setup than the dragster boat would have or it's maybe fast when cornering. Sorry don't have the right word for turning on the water so cornering was what seemed close to describe it.

Must be very informative for the "Captains of Industry" to see what can be done with a product line like Marine 31.
 
Nice job of recovering a very cool boat. I love some of the old fiberglass race boats. Great job on the write up as well.

Thank you. I appreciate your taking the time to comment. Makes all the hard work worthwhile.


The results are simply incredible. Thank you to all the folks that made this thread possible for powerboat fanatics like myself to enjoy.

I was hoping to see a custom boat cover for the trip back up north but I guess not. Pity.

The owner owns a Crane company, I know he recently purchased this boat so a boat cover may be in the plan for the future.


A stock 150 bolted to the transom would be a handful on that rig. I can't even imagine that 300 with its jack plate and custom prop.

I agree. Jason from Lake Country used the term,

And engine on a Potato Chip

:laughing:


My one time running a tunnel @ 80+ with throttle to go almost resulted in a blowover as I passed under a bridge......I threw those pants away :laughing:

I kited my boat ONE TIME - threw 7 of the 8 rods when she came out of the water. My hear stopped as the boat almost flipped over. When she landed upright - well lets just say I was happy to be alive.


I fully agree that cleaning and sealing the hull would complete the hard work put in so far. He might even pick up a few MPH on the top end.

Just taking it all apart, flipping her over and inspecting the bottom of the hull would give me more peace of mind.


What a turn around It looks great! Thank you for the detailed write up, I definitely learned a thing or two.

I’m just getting into boat detailing and my first boat I did was an 2006 28ft Eliminator Daytona cat. If i knew how to post a picture I would!

Get the TapaTalk App and use your phone. Pretty easy to figure out.


I’ll have to give the marine 31 lineup a try for my next boat detail.

The Captain's One Step Compound & Polish uses quality abrasive technology, it's far above most other marine compounds. This was a brand new formula for the Captains Boat Coating, application was easy. I hope to hear back from Russel how it hold up.


That's fast on water over 100mph! And with that speed it's totaly understandable you do those maintance on it to be safe and trust the parts and the boat. Can only imagine the adrenalin kick you get with that speed.

The fastest I clocked in the 1/4 mile was 111 miles per hour in 11 seconds. Very respectable for a car let alone a boat. The original owner clocked 122 miles per hour in 9 seconds and held the title in the Northwest in 1976. The guys name is Rick Baker. Haven't seen nor heard from him for years. He was an Engineer for Teledyne Wachang.


Where you competing in some kind of league or race events with your boat?

I belonged to the Columbia Speed Boat Club back in Oregon.


The fastest I have been on water is with a very good friend of mine on his See-Doo water scooter/jet ski those that you sit on. It has a 300hp engine and top speed is around 70-80mph. But it's more to cornering or how you would explain it. So fast up to speed than top speed. It where awesome to try it and since I was not used to any of high speed or that kind of acceleration. I had a big smile after been testing it. Think it's rated to just under 4 seconds 0-60mph. Then he took over and I was looking from the land and showed the cornering ability from it. Amazing is how it was at just looking how he could push it to the limit.

These water craft have come a LONG way since the Jet Ski was originally introduced. Russel used to race these things, told me all about it.


These boats are they more to go fast straight forward. Or is they also capable of takeing corners fast.

You could do either with mine. I raced straight line 1/4 mile. Other guys circle race. Mine was set up to turn left hand circles or go straight. I had it for 20 years and should have never sold it. Now I just regret it.


Must be very informative for the "Captains of Industry" to see what can be done with a product line like Marine 31.

I received a few text messages, phone calls and e-mails from everyone. All positive.

I think people would be surprised at the who in our industry reads this forum.


:)
 
Can't tell from the pics, Mike.

But did your boat have an Arneson drive to put "rubber to the road"?
 
Can't tell from the pics, Mike.

But did your boat have an Arneson drive to put "rubber to the road"?


My Sanger used a Casale V-Drive with 18% overdrive. Engine is a 402 BBC with small port closed chamber heads. Engine builder is Tim Briggs, means something in Oregon.

Carbs were 660 Center Squirters and Tim reground the linkage to make them progressive like a Double Pumper instead of all 8 barrels dumping at once. Some of you will know what this means.

Before modifying the linkage, when you put the pedal to the metal and all 8 barrels would dump at once, sometime the engine would backfire and it would throw a flame ball out the front of the scoop and past your ears.

Prop was a 17" pitch 2-blade - each time the prop makes one rotation it would propel the boat forward 17" - or that was the hope or theory.


:)

Thank you, Mike.

Talking my language right there. :)

Not many people left in this world that know what it's like to have to have to use a choke and precisely "pump" an engine to start it.

Besides the linkage mod, were there any jet mods to the carbs? Holley's, Right?
 
Hot Damn!!! :wow:

Now I knew this was gonna be a good turn around but Wow! You guys nailed it! :bowdown::bowdown::bowdown::bowdown::bowdown:

Beautiful workmanship team. Hahaha - “an engine on a potato chip” that pretty much sums it up. Hats off team, bravo! :props:


Aaryn NZ. :dblthumb2:
 
Mike and AG/LC Team - I can't imagine the SMILE on the customer's face when he/she saw their beloved boat looking like that!!!! It's too nice now to put in the water!

I've never met or talked with the owner. I appreciate he trusts the name Autogeek so much that he let his detailer borrow a company truck and then let him haul it all the way down here as well as catch the bill for Russel's hotel, gas and meals. That's pretty cool considering we've never met.

I e-mailed Russel and asked him,


What did the owner think?


Russel replied back last night with this,

He Loved it!!!!!


I used some of the products in the Marine 31 line last year, and was thoroughly impressed. More so, the staining that you removed from the hull absolutely gave the boat new life. Truly a testament to the products and the skilled team.

Wonderful job!

ScottH

The Captain's One Step Compound & Polish uses amazing abrasive technology. The other compounds and polishes are as good as anything on the market but they don't use the same abrasive technology as the Captain's One Step Compound & Polish. In my opinion, and what I wrote numeours times in my boat detailing book is the Captains Compound is WORTH the price. I think it's $60.00 bucks a quart but for the time savings and the finish quality, it's worth it.


Marine 31 Captain’s One-Step Compound & Polish


For those reading this into the future, we used the same techniques I cover in the chapter called,

Category #3 Mild Neglect

The boat condition was actually in Category #4 Severely Oxidized and Neglected but I chose to NOT wetsand this hull and that's what's covered in the chapter, #4 Severely Oxidized and Neglected.


Mike Phillips’ How To Detail Boats With Marine 31

300_5_book.jpg


:)
 
Back
Top