Getting Started

greenwa1

New member
Joined
Feb 5, 2012
Messages
7
Reaction score
0
I just purchased a 1969 Shelby GT350. It's been restored in the past but not sure what type of paint was used. It has some very light scratches from not being waxed correctly but the paint shines very well.

This is my first ever attempt to go beyond hand waxing so I need your help. How should I get started? Should I use a buffer to detail the car? If so what type? What type of polishes waxes should I use?

Please help me get started in the right direction.

William
 
A nice start is washing it such as a Citrus Wash + Gloss soap...if the paint is in good condition then a light cutting compound and a polisher. The wax is up to you depends on what is your preference
 
Aztec,

Thanks for the reply. The paint is in good condition. What light cutting compound should I use? When you say polisher do you mean a polishing machine? Like I said I'm new to this. Is there some material I can read up on?
 
Aztec,

Thanks for the reply. The paint is in good condition. What light cutting compound should I use? When you say polisher do you mean a polishing machine? Like I said I'm new to this. Is there some material I can read up on?

In my preference I use the Chemical Guys line of polisher and cutting compound. In example since your paint is in good condition you can use a light cutting compound (many manufactures have this) which removes light swirl marks. After completing the process you can use a polisher to get the shiny look. Most of this process is used by a DA (Dual Action) machine such as a Rupees or PC 7424XP. You can find those machines online if you like or do it the old fashion way by using a polishing pad and doing it by hand. I suggest to read up on using a machine and as well practicing on a hood (maybe get one from the junk yard). Here is some videos that may help you.

Steps:
-Wash your car
-Clay
-2nd wash (optional)
-Use a cutting compound
-Polish
-Paint Sealant
-Wax

[ame=http://www.youtube.com/watch?v=Et6Egpw-f-s]Mike Phillips demonstrates the proper techniques on using the Porter Cable 7424XP - YouTube[/video]

[ame=http://www.youtube.com/watch?v=zUHRnHsSXZU]Part 1 - How to remove swirls, scratches and water spots using a Porter Cable 7424XP Polisher - YouTube[/video]
 
Here are a bit more part to the videos

[ame=http://www.youtube.com/watch?v=fxwlWijdIxM]Part 2 - How to remove swirls, scratches and water spots using a Porter Cable 7424XP Polisher - YouTube[/video]

watch
 
Stick with Mike.Phillips and you can't go wrong

I read every thread he started here on AGO when I got serious about detailing.
 
Remember detailing your car takes hours in which I have spent 9 hours to do some simple swirl remover, polish, and wax for my brothers Mustang. If you really want to go full blown out you can take from 2-3 days depending on what you want. Just watch the videos and learn the techniques, as for products you can use the ones that you prefer. Some people may prefer Wolfgang, others Mothers, Melguiars, Pinnacle, Chemical Guys, and etc. Here is a video. When washing it is better to use water that is soft such as a softening system which reduces water marks!

https://www.youtube.com/watch?v=N9r5XS0xriI
 
I just purchased a 1969 Shelby GT350. It's been restored in the past but not sure what type of paint was used.

It's either single stage or basecoat/clearcoat and probably the latter, heres an article on how to test.

How to Test for Single Stage or Clear Coat Paint


It has some very light scratches from not being waxed correctly but the paint shines very well.

That's the norm for any show car. Most guys that own show cars don't actually know how to "touch" them, that is they don't know how to touch the paint and that's what it comes down to at the core.

Everything you do to the paint involves you "touching" it in some manner and if you don't touch it the right way you scratch it. If you touch it the correct way you either improve it or maintain it without harming it.

The way people wash and wipe cars is the culprit behind most swirls and scratches.

When I met the owner of this car everyone thought the paint looked great. I thought it looked like Dog Doo.

1939 Lincoln Zephyr - Swirls Removed - Modeled by Nicole


Before
1939LincolnZephyr016.jpg


After
1939LincolnZephyr066.jpg


This is my first ever attempt to go beyond hand waxing so I need your help. How should I get started? Should I use a buffer to detail the car? If so what type? What type of polishes waxes should I use?

Please help me get started in the right direction.

William

The 1939 Lincoln Zephyr was done with Pinnacle polishes and waxes. So was this 1967 Mustang.

1967 Mustang GTA Fastback - Pictures & Comments Thread

1967_Mustang_Fastback_Autogeek_Mike_Phillips_019.jpg


Aztec,

Thanks for the reply. The paint is in good condition. What light cutting compound should I use? When you say polisher do you mean a polishing machine? Like I said I'm new to this. Is there some material I can read up on?

The video linked to above with Bruno Massel and me is very complete and thorough. It walks you through each step you want to do starting with washing your car, or in your case wiping it clean.

Then inspecting for swirls and scratches and also doing the Baggie Test.

Here's an article I wrote that also walks you through every step you want to do and the ORDER to do them.

Don't let the title fool you, I wrote that for Google search engine indexing. The info works for ANY car of ANY age whether it's a cool car like your GT 350 or a mundane transportation car.


How To Detail Your Brand New Car by Mike Phillips


And cool car by the way. I think I took a picture of one at the car show last night.


:)
 
If you haven't done this already, do it. It's called

The Baggie Test

Please come back to this thread and tell us what you felt before you put the bag on your hand and after you put the bag on your hand when you did the test.

Be sure to wipe the paint clean with a spray detailer so you don't rub loose dirt over the paint.

Just use a light touch when you do the baggie test.


And "yes" even cool show cars need to be mechanically decontaminated, inf fact all most ALL the show cars I work on are contaminated.

:)


The Baggie Test - How to inspect for above surface bonded contaminants


After washing and drying your car, the next thing you want to do is to inspect the paint for what we call,

Above Surface Bonded Contaminants

These contaminants can be,
  • Tree Sap Mist
  • Industrial Fallout
  • Overspray Paint
  • Air-borne Dirt and Dust
  • Pollution
  • Road Grime
You can check for above surface bonded contaminants by feeling the horizontal surfaces with your clean, bare hand using your sense of touch to detect what will feel like little bumps or surface texture on the finish. This type of inspection works well and is a good general indicator of above surface bonded contaminants.

The Baggie Test
If you really want to feel what's going on at the surface level of your car's paint or your customer's car's paint, then use "The Baggie Test" when inspecting the paint for above surface bonded contaminants.

Better yet, if you want to share with your customer one of the problems with their car's paint that you're going to correct, let them also do "The Baggie Test" with you. The average car owner doesn't know what detailing clay is, how to use it or the benefits of using detailing clay to clay automotive paint, let alone how to test for above surface bonded contaminants.

Sharing this little tidbit of knowledge with your customer will demonstrate to them that you really know your business and later, after you've finished the job, letting them feel the now smooth and slippery paint will solidify their trust in your expertise. This can help you to retain their business and potentially led to referrals via word-of-mouth advertising.

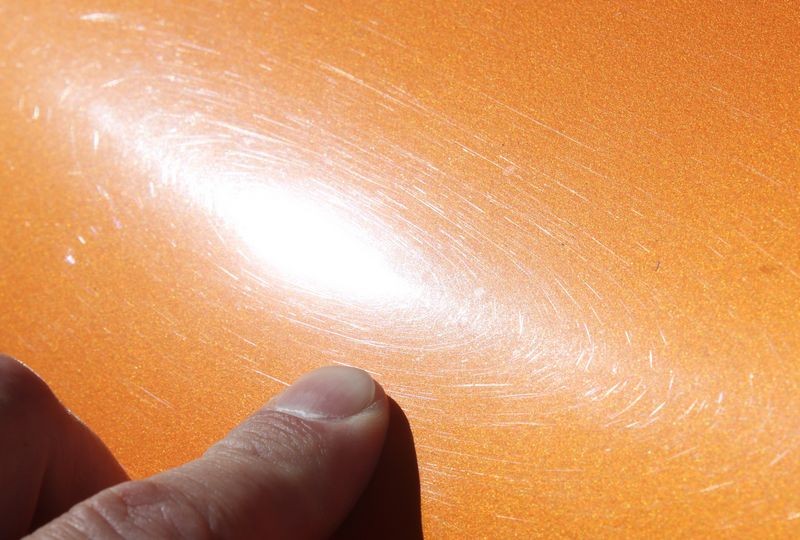
To do "The Baggie Test", simply use a clean sandwich baggie by placing your hand inside the baggie and then feeling the horizontal surfaces like the hood, roof and trunk lid. The film of plastic acts to intensify the surface texture created by contaminants bonded to the paint making it more dramatic to your sense of touch when you feel the paint through the baggie.


The Baggie Test
PaintCleaningByHand021.jpg


PaintCleaningByHand022.jpg


You can also inspect the vertical panels and if you detect above surface bonded contaminants on these areas then they should be clayed also. Generally speaking, air-borne contaminants will land and settle on the horizontal surfaces but drift past the vertical panels where they will land on the ground. The main exception to this rule is any air-borne contaminant that is sticky, like Tree Sap Mist or Overspray Paint.


Resources

The 2 primary benefits of using detailing clay to clay paint


Show Car Garage Videos

How detailing clay works and how to use detailing clay to remove above surface bonded contaminants


:xyxthumbs:
 
Back
Top