Grit guard ... who needs em

It's a very safe method but you have to be very careful not to hit the foam gun on the paint. Coordinating two things at once is not as easy as it looks. Also grit guards remove some dirt and grit...NOT all. Swiping a mitt across plastic is not going to remove all the dirt.

I like that Larry thinks outside the box. His hydrate product is the best product I've ever used for drying and conditioning the paint in one step.

And his paste wax...off the charts.
 
I think the Grit Guard reduces the chance of marring a little bit, so it is nice to use it. For over 20 years I have rinsed the mitt thoroughly with the hose before putting it back into the bucket. At the end of the wash, the wash water is almost as clean as when I started, except for a few small pieces of dirt at the bottom. I have only used one bucket. I think that has served me well.

I then started using a boar's hair brush very lightly for the first wash, and then a chenille mitt for the second one. It is my belief that a brush more safely removes the large dirt.
I use a chenille mitt for the later wash, because you can't push hard with a brush to get the fine dirt or the bird dropping or bugs off, and if you try, you will scratch the paint.
Twice is usually enough, but once I had to wash a car 3 times with the mitt, because the owner was the only one to wash the car before me for years, with only water, no soap.

After that, it took a lot of clay to get it clean.

I got a foam gun 3 years ago, and now I have been rinsing, foaming, let sit, rinsing again, and then foaming, then washing with the brush and bucket, then rinse, then foam, then wash with the mitt and the bucket, then rinse, then rinse with filtered water, then dry with waffle weave.

With my method using car wash soap alone, I have never met a bug I couldn't remove easily. The foam gun soaking, plus a little elbow grease, takes care of that.
I always wash the big dirt off before removing bugs, otherwise you scratch the paint trying to remove the bug with the big dirt still on.

I used a rinse bucket when I did a client's black Mercedes, as a type of insurance, after rinsing the mitt with the hose.

I am considering foaming the car BEFORE I rinse it, in the belief that the soap will be more effective at loosening the dirt, since it is more concentrated, and will run off the car less.

I have used the foam gun on the brush method, and believe it is the best for using a brush. I spray just ahead of the brush and through the front bristles a bit.

I like the brush because it gets into the crevices well and does a really nice overall light cleaning, getting all areas well, like emblems, very quickly.
 
what i said originally was:


this way you limit the amount of contaminants that enter the rinse bucket as much as possible

Why not just hose the mitt out? By not using Grit Guards, any grit that is in either bucket would be dispersed throughout the bucket from all the dipping, instead of sitting on the bottom isolated from the turbulence by the Grit Guard and it's fins.

The Grit Guard not only creates a mechanical barrier preventing your mitt from falling to the bottom of the bucket (where the majority if the dirt will fall), but it prevents the bottom of the bucket section from any turbulence in the water that can kick the grit throughout the bucket. This is why the Grit Guard has vanes on it, and merely isn't just a screen.

Your methodology seem to be to work with the water at the top of the rinse bucket (likely cleaner) and rinse the mitt well (3x). I also read that you are ringing it out (at least the 1st time) outside the bucket, in hopes any dirt will exit the mitt into the ground

This sounds perfectly fine and sound, I just don't get the part of the Grit Guard(s) in the bucket being "no good". You could do the same exact thing with Grit Guards and help trap the dirt that DOES get into the rinse bucket (some is inevitable) on the bottom of the bucket. Unless, if course, you believe the whole theory behind the Grit Guard's mechanism of action is not sound.

If you don't believe grit settles at the bottom of the bucket, just look at the inside of your rinse bucket the next time you empty it. Watch the lowest point of the bucket as you pour the rinse water out. There will be some grit or dirt there, no matter how fastidious you are with rinsing or dipping only in the top part of the bucket.

Grit or dirt is not completely soluble, and it does not have a suspending agent. It wants to fall to the bottom. If you don't believe me, just pour some rocks in a bottle of water and see where they end up - on the bottom of the bottle. The grit guard helps isolate the mitt from the bottom mechanically, and it also helps stabilize/isolate the portion of water below the guard from movement.

That's why some oil pans have baffles in them. To help prevent the oil from undesired movement when the car is stopping, starting, and going around turns. The oil "stays still" compared to if there where no baffles in the pan it would then be swishing everywhere, which can be an undesirable trait. The Grit Guard is in a sense baffling or helping to hold the water below it still, so it doesn't commingle with the cleaner water above.

It just sounds like a lot of labor (ringing the mitt out 3x) to wash a car. I understand this, as I am picky about it as well. What I don't understand, is why you just wouldn't throw a Grit Guard into the bucket as even more added protection, as the time/labor/cost to do that is almost nil.

I still feel Grit Guards do serve major purpose and the theory behind them is sound. They do prevent water (to an extent) from swishing around in the bottom of the bucket (below the guard) which will help in keeping the dirt down there isolated.

It just seems for ten bucks they are a no brainer and contain a proven mechanism (at least one in the rinse bucket). I don't see how you are saying using a Grit Guard is not "optimal for paint" when one could perform your method Grit Guards or not.

Like I mentioned, I do something somewhat similar, but instead of the 3x ringing and 3x dipping - and the fact that some dirt will get in the rinse water, at least on the first rinse dip - I just hose the mitt out before putting it in the rinse water. Which is fine, but IMO Grit Guards to work and help.
 
Grit guards also make very nice drying racks for your pads after you clean them..
 
Swan's 2nd paragraph sums it up, period! I have yet to try the GD method but I will, some day but that paragraph is sooooo full of fact!!

All I know is this, using my Aqua sponge when doing a rinseless wash, with all of its extra pores and softness, works great for me, never have had an issue when using it with my favorite rinseless wash product!

Sent from my SPH-M930 using AG Online
 
My grit guard is used whenever I employ the GDWM with rinseless. I recently did my entire car with 2 16x16 MFs, not including wheels or my "drying" MF. I was able to use all sixteen eighths by carefully folding to a clean eighth and resting it clean eighth up on my GRIT GUARD while I dried a panel. I would then scoop up some more solution with a cupped hand and added it to my still clean towel.

I will continue to use my inexpensive GRIT GUARD for 2BM. Dunking and wringing in clean water lacks the agitating effect you get with a GRIT GUARD.
 
I don't really think grit guards do much either. They do create a barrier so the wash mitt can't fall to the bottom where all the suspended particles settle, but I never keep my wash mitt sitting in the dirty rinse. Also to truly rinse a mitt you need agitation and that agitation will disturb all the the dirt in the bottom that will then contaminate your media. The baffles help but they are not foolproof.

I prefer the Dean method where I foam the car, power wash it down, foam again then use the fluffiest microfibers I own to wash a section at a time. Once a section is done the towel goes in an empty bucket full of grit guards (have to do something with them) to drain. A dirty towel never sees the paint again and it seems quicker since I don't have to worry about rinsing.
 
Not a fan of grit guards either. The 2 bucket method and a proper rinse is enough for me. Anything in the rinse bucket ends up floating near the top anyways and won;t have enough time to full settle on the bottom. Just what I have noticed
 
Chris@Optimum;906277]Just use several clean towels in one bucket and never return a dirty one to the bucket. No risk of marring from introduced dirt, no extra buckets, no grit guard, lots of less water wasted. Thanks to Garry Dean for simplifying wash technique with a little common sense

Agree 100%. Plus +1000
 
I am glad we have choices so every can do what they want.
 
I think that a grit guard in a bottom of a big bucket is not enough for when you move the water in that bucket it makes the dirt go in suspension too easily, i think it really start to be a good tool if you put 2 grit guard per bucket...

a little test so you can see the difference between 1 vs 2

https://www.youtube.com/watch?v=m4RGoQ6c50w
 
if in doubt use grit gaurd.mine stay in my buckets regardless
 
I think that a grit guard in a bottom of a big bucket is not enough for when you move the water in that bucket it makes the dirt go in suspension too easily, i think it really start to be a good tool if you put 2 grit guard per bucket...

a little test so you can see the difference between 1 vs 2

https://www.youtube.com/watch?v=m4RGoQ6c50w

You're going to convince me to buy another grit guard. Stop making me spend more money.
 
Interesting thread...


I've been using Grit Guards in my buckets ever since I discovered them and at a minimum they won't cause any harm and considering how much time and energy goes into removing scratches out of scratch-sensitive clear coat paints, if any abrasive particles are trapped at the bottom instead of being cross-transferred to the next panel they they are worth their price.

As far as detailing tools go in general, they are one of the least costly tools to add to your arsenal of detailing tools.

I only see an upside to using one or two Grit Guards in a wash bucket, no downside.

Healthy dialog is always good, in fact I've posted that I've seen more new technology introduced in the last few years then ever before and this is a great benefit.

It used to be you actually had to have some experience, talent and skills to create a show car, swirl-free finish yet we all see people getting professional results here on this forum the first time they tackle a project.

Like Al aka bunky posted,

bunky said:
I am glad we have choices so every can do what they want.


I agree.

The OP joined the forum and his first post starts out...

Grit guard ... who needs em


And then goes on to state his case. You can see from all his posts, he's very passionate about detailing cars and sharing his passion with others. Nothing wrong with that in fact I'm kind of like that.


:xyxthumbs:
 
Just to add another great use for the Grit Guard for those of you who do the more advanced paint polishing aspects of this craft such as wetsanding.

Here's another place I use Grit Guards, and that's when wetsanding with any type of sanding paper or disc that needs to be soaked in water.


When sanding, one of the biggest problems when machine sanding are what are called Tracers.

Tracers are caused when a small abrasive particle, usually coming off your sanding paper and get trapped between you sandpaper and the paint. The straightline, back-n-forth action of your hand while sanding grinds the abrasive particle DEEPER into the paint causing usually a series of straight line scratches that will now require more work to remove.

By adding a Grit Guard or two to your bucket or buckets, you increase the chances that any abrasive particles are trapped on the bottom of the bucket instead of being transferred to the paint you're sanding.

I always use a Grit Guard in my water buckets when wetsanding. Like this,


Basic Hand Sanding Techniques

Soak your papers at least 15 minutes before use.
The Nikken Finishing papers have a latex rubber impregnated paper backing that is waterproof and this prevents the finishing paper from breaking-down into pulp from over soaking. I've personally soaked these paper in water for over 2 years with no visible sign of deterioration. (This was by accident as I lost a sealed Tupperware container filled with water and Nikken papers I used to take with me to demonstrations)

It's possible for grit particles to enter into your water source so if you can, use Grit Guards in the bottom of your bucket.

If you want to get really D.O., you can place your papers in dedicated buckets and also use dedicated backing pads for the different grits. The idea is to avoid instilling deeper scratches as you work upward to less aggressive products and to avoid any kind of abrasive particle trapped between your sandpaper and the finish to avoid Tracers.

Dedicated buckets for specific grits of paper. Grit Guard Inserts in the bottom of each bucket.
(You could theoretically use 2, even 3 Grit Guard inserts in each bucket for even more protection)
WetSandingExperiment1002.jpg


Try to place your papers in water and soak them at least 15 minutes before sanding. I usually soak my papers overnight and sometimes a few days before sanding.
WetSandingExperiment1003.jpg


Place different grit papers in their own dedicated water bucket
WetSandingExperiment1004.jpg


Final sanding should be done with the highest quality grit particle size paper you can obtain. At this time with Nikken that's #3000 grit.
WetSandingExperiment1005.jpg


Add just a few drops of a quality car wash soap to help add lubricity to your water. If you're working on Fresh Paint and/or in a Body Shop, (Fresh Paint Environment), then you want to make sure you're using a body shop safe soap.
WetSandingExperiment1006.jpg


Add fresh, clean water. Also be sure to wash and rinse out your buckets before starting, everything must be surgically clean before placing your papers into the buckets.
WetSandingExperiment1007.jpg


It's normal for your papers to roll up like this,
WetSandingExperiment1008.jpg


WetSandingExperiment1009.jpg


WetSandingExperiment1010.jpg


Mark you buckets so you can quickly and easily identify which buckets hold which papers.

WetSandingExperiment1011.jpg


Thee's more to this article on hand sanding techniques, if you want to read more click the link I included at the beginning of this post.


:)
 
The above post was about actual sanding "paper", which is one type of sanding tool that needs to be soaked in water.

Here's another type of sanding tool, the Mirka Abralon Sanding "discs".


When sanding, one of the biggest problems when machine sanding are what are called Pigtails.

Pigtails are caused when a small abrasive particle, usually coming off your sanding disc, gets trapped between you disc and the paint. The oscillating action of the machine grinds the abrasive particle DEEPER into the paint causing a squiggly scratch that will now require more work to remove.

By adding a Grit Guard or two to your bucket or buckets, you increase the chances that any abrasive particles are trapped on the bottom of the bucket instead of being transferred to the paint you're sanding.

I always use a Grit Guard in my water buckets when wetsanding. Like this,


Machine Sanding the Joker Truck painted by Cory St. Clair

AbralonSystem001.jpg


AbralonSystem002.jpg


AbralonSystem003.jpg


AbralonSystem004.jpg


AbralonSystem005.jpg


AbralonSystem006.jpg


AbralonSystem007.jpg


AbralonSystem008.jpg


AbralonSystem009.jpg


AbralonSystem010.jpg


AbralonSystem011.jpg


AbralonSystem012.jpg


AbralonSystem013.jpg


AbralonSystem014.jpg


AbralonSystem015.jpg


:xyxthumbs:
 
Here's yet another advanced technique in the general "craft" of detailing, usually more at body shops but all top detailers usually come across this at some point in their career.

Removing runs, sags and dirt nibs

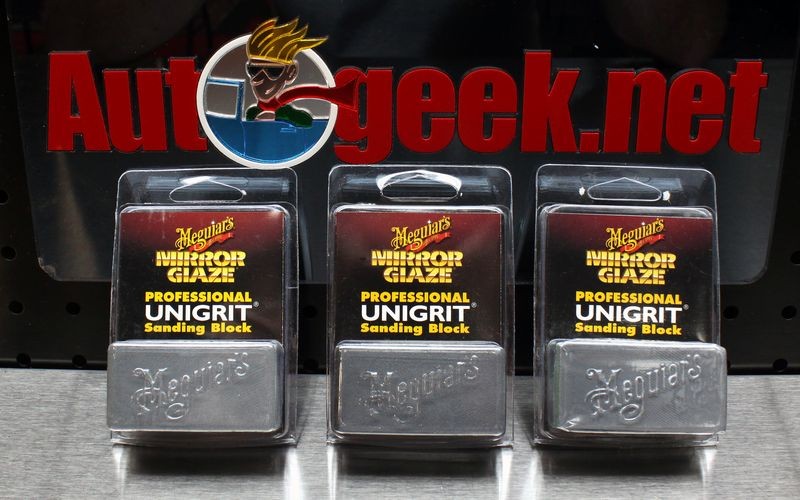
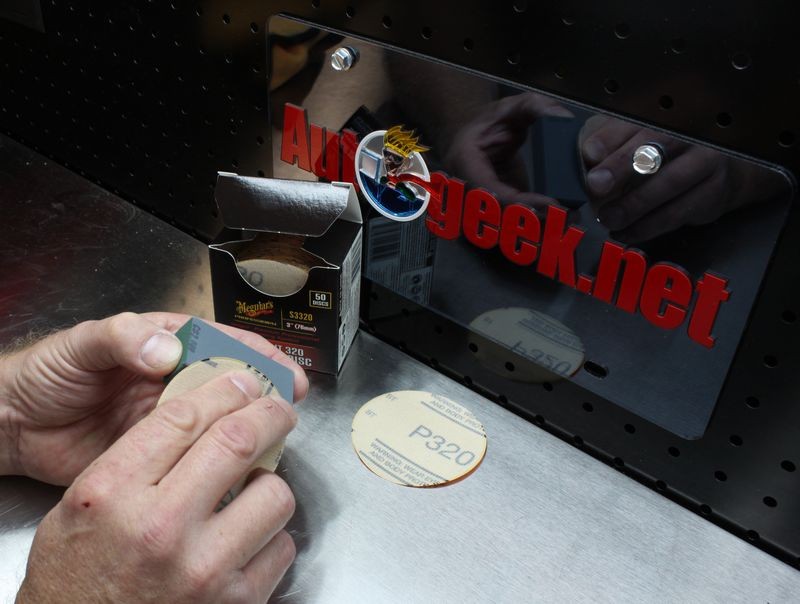
How to use Meguiar's Unigrit Sanding Blocks to remove runs and dirt nibs in paint


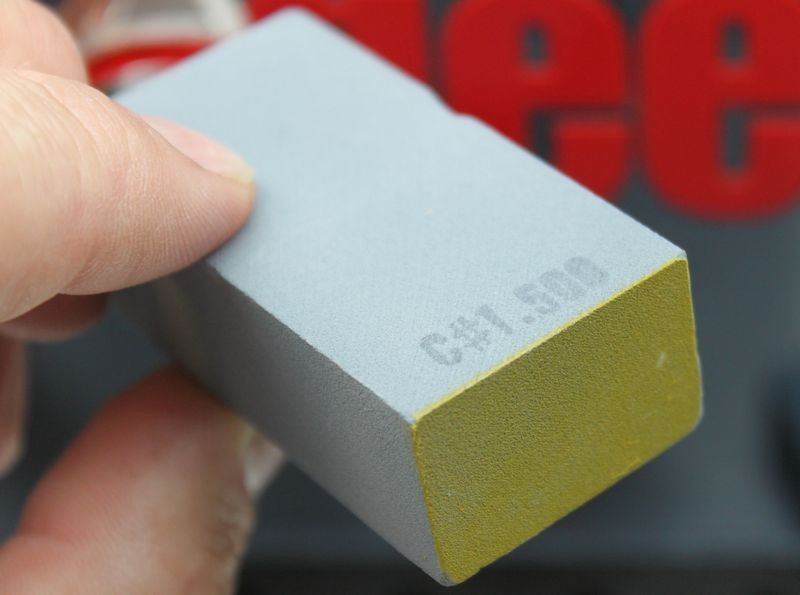
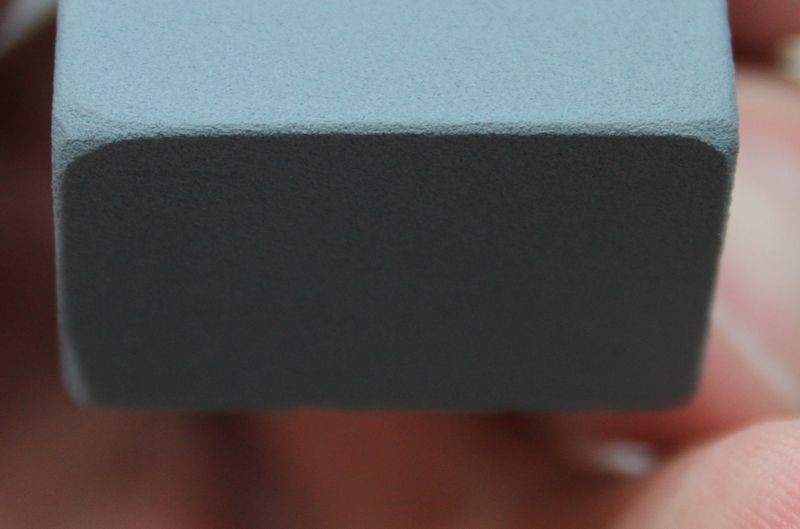
Meguiar's Unigrit Sanding blocks are solid blocks of precise, uniform grit particles that can be used to remove above surface paint defects like runs, sags and dirt nibs protruding out of the paint.

Dirt nibs = dirt particles or other contaminants that land or lodge into fresh paint before it hardens to dust free or tack free.

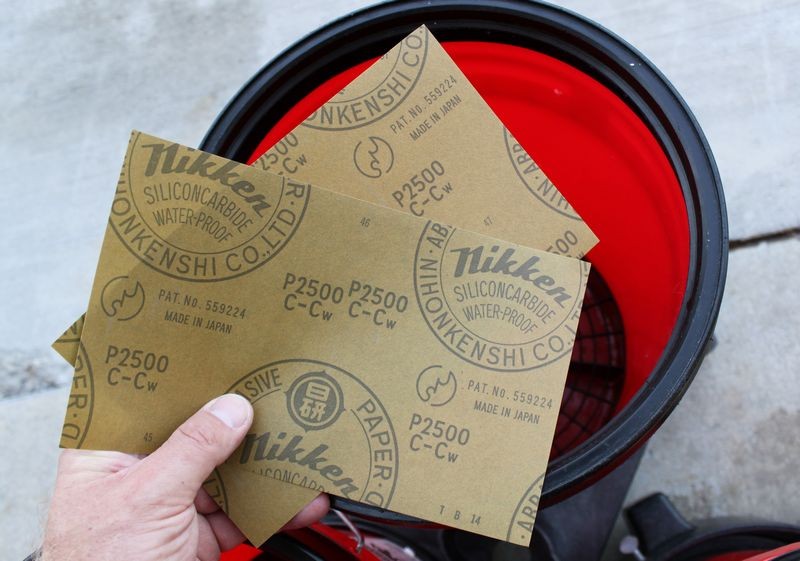
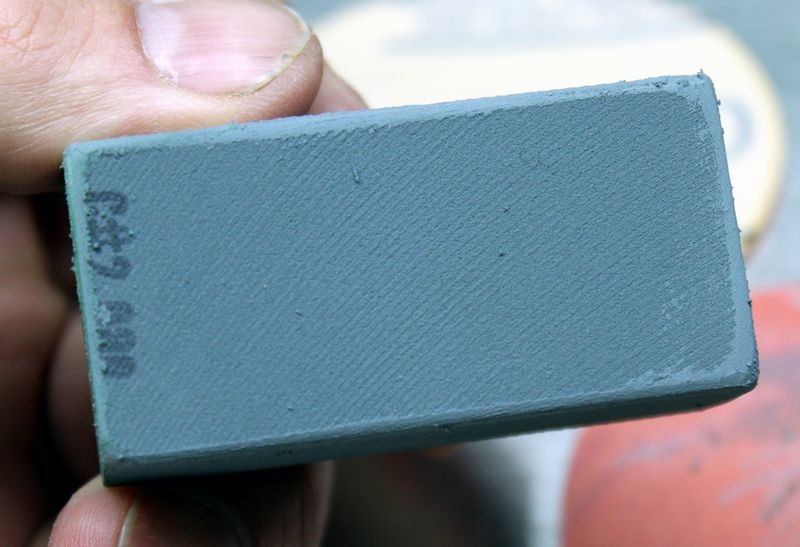
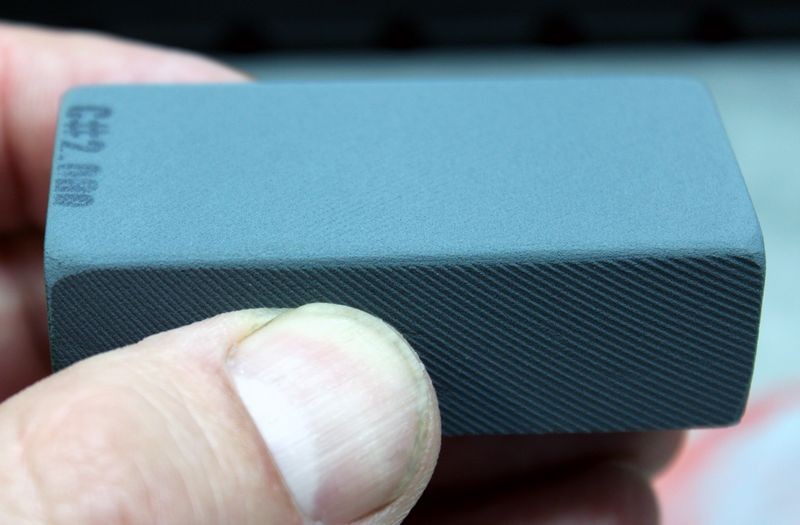
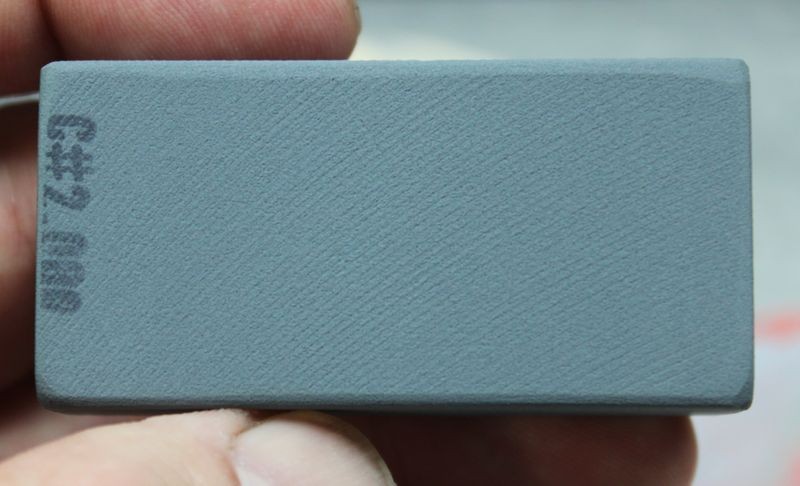
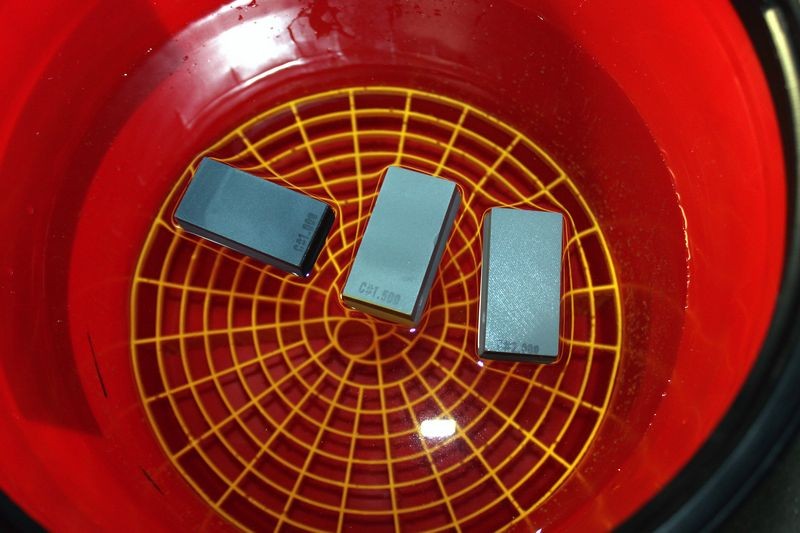
Meguiar's Unigrit Sanding Blocks are available in 3 different levels of aggressiveness.

#1000
#1500
#2000

MegsSandingBlock011.jpg


MegsSandingBlock014.jpg


MegsSandingBlock015.jpg


MegsSandingBlock016.jpg


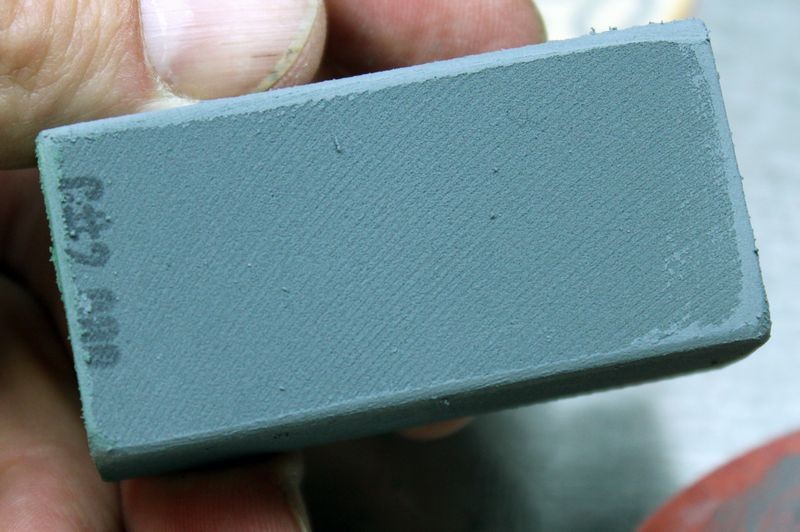
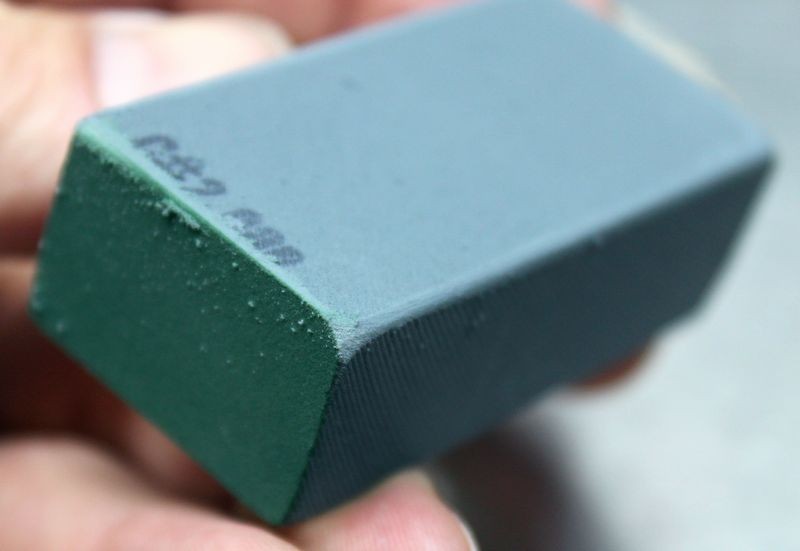
Dressing or shaping Unigrit Sanding Blocks
Before using a Unigrit Sanding Block, knock down the sharp edges by rounding them off this will prevent you from gouging or scratching the paint. Remember, if you're working on fresh paint, (whee these sanding blocks are normally used), the paint will tend to still be soft as it hasn't fully dried and hardened.

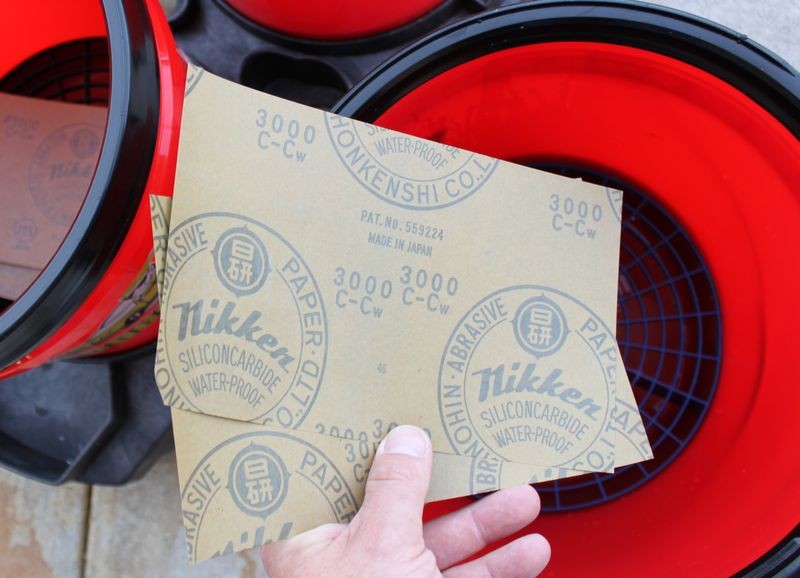
To dress your Unigrit Sanding Blocks you can use a more aggressive sheet of sanding paper to round the edges.

MegsSandingBlock019.jpg


MegsSandingBlock021.jpg


MegsSandingBlock022.jpg


MegsSandingBlock023.jpg


MegsSandingBlock024.jpg


MegsSandingBlock025.jpg


MegsSandingBlock026.jpg


MegsSandingBlock027.jpg


Rinse off grit particles
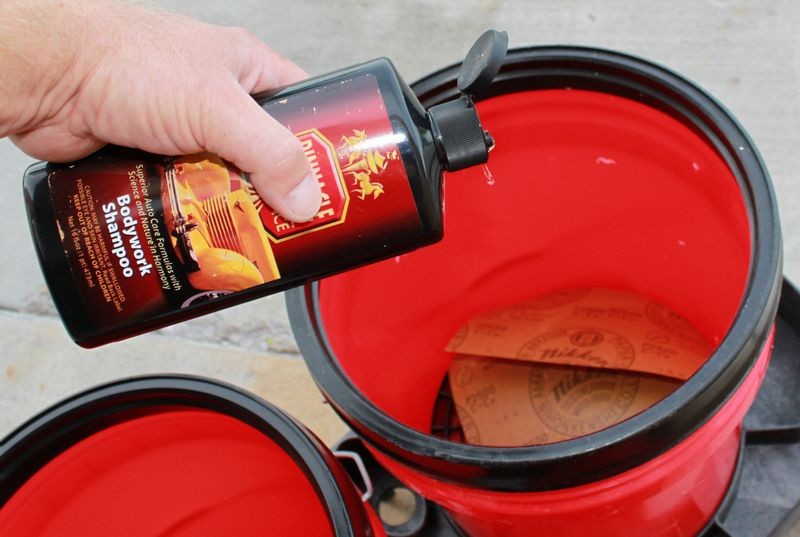
After dressing your Unigrit Sanding Blocks, it's a good idea to rinse them off before placing them in your bucket of water to prevent contaminating your water source.
MegsSandingBlock028.jpg


MegsSandingBlock029.jpg


MegsSandingBlock030.jpg


MegsSandingBlock031.jpg


Soak before use
Before using Meguiar's Unigrit Sanding blocks first soak them in clean water until they sink. This is a sign that the blocks have completely saturated throughout with water.

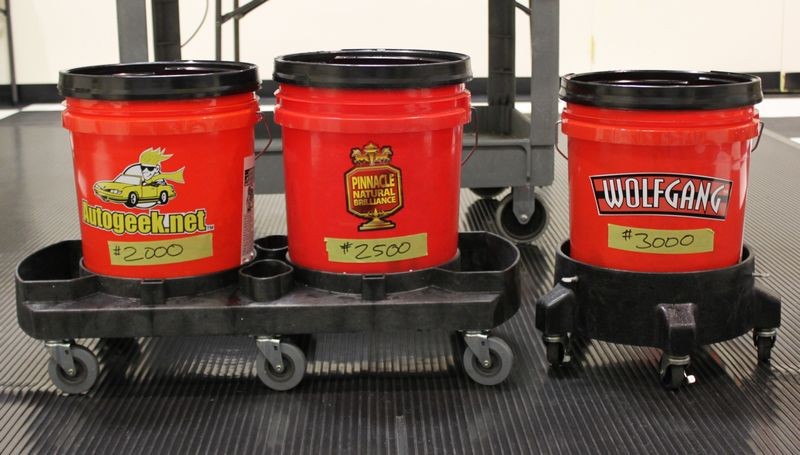
Keep your Unigrit Sanding Blocks in a bucket of water when using them so you can quickly and easily dunk the blocks into the water and rinse any particles off as you're using them. When not in use, Meguiar's Unigrit Sanding Blocks can stored in water to keep them saturated with water and ready to use. Change your water often to help prevent contamination.


Lubrication
You can add a few drops of soap to increase lubricity in the water. If working in a body shop (fresh paint environment), be sure to use a body shop safe soap.
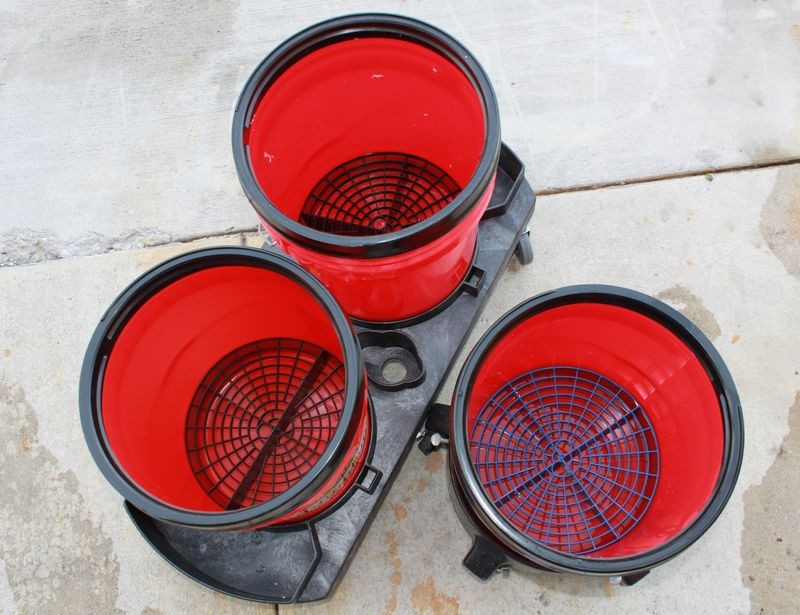
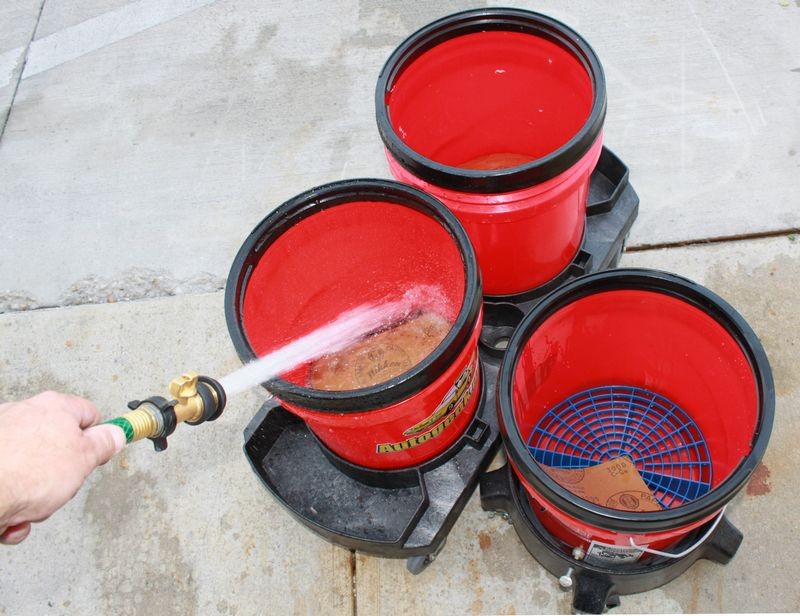
MegsSandingBlock017.jpg


Grit Guard Inserts
To trap any loosened particles of paint or grit particles that wear off the Unigrit Sanding Blocks you can place a Grit Guard Insert in the bottom of your bucket. Some people even use two Grit Guard Inserts to help ensure any abrasive particles on the bottom of the bucket don't migrate.

MegsSandingBlock018.jpg


How to remove a run or paint sag
To remove a run, you want to use the side of the block and only sand on top of the run. If the run is thick, you can place tape on the sides of the run to prevent you from sanding on surrounding paint while knocking down the run. At some point you'll have to remove the tape and at this point focus on the task at hand and hold the block in such a way as to only sand on the high points of the run.

MegsSandingBlock000.jpg


MegsSandingBlock001.jpg


MegsSandingBlock002.jpg


Back and forth direction
Holding the Unigrit Sanding Block firmly, use a fast back and forth motion to sand the run down flat.
MegsSandingBlock003.jpg


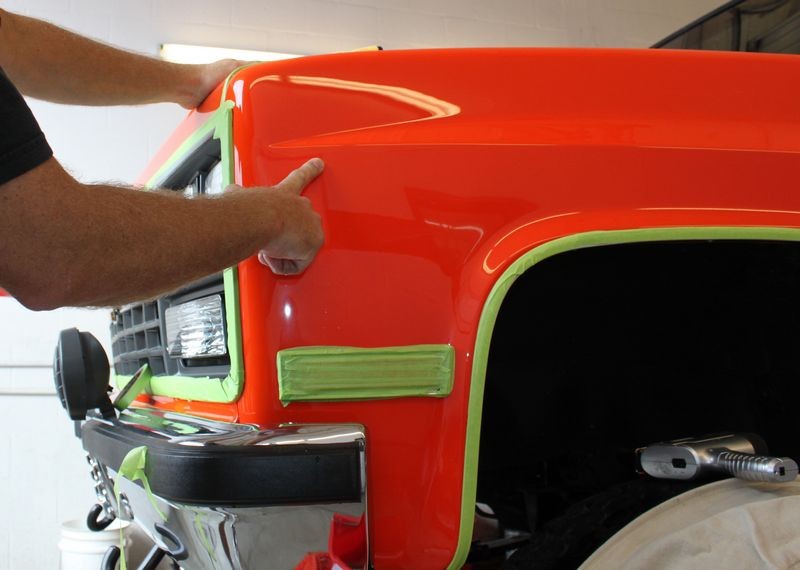
Use fingers as a guide
On the panel below, the run was just below a raised body line. The run was too close to the raised body line to use tape to cover the body line so instead I placed my fingers on the raised body line and used my fingernails as a guide or bumper to prevent my hand motion from running the sanding block over the paint on the raised body line.

MegsSandingBlock004.jpg


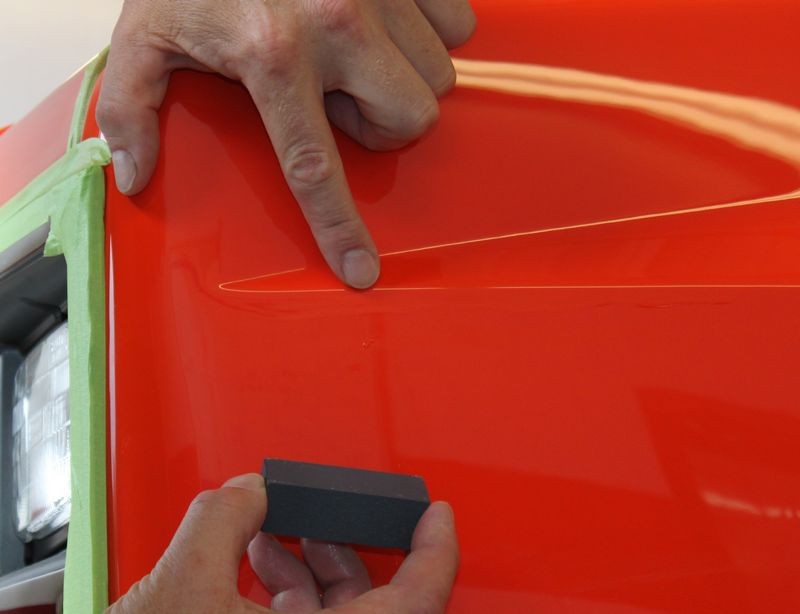
Here I've sanded just a little and then stopped to take this picture as the sanding marks have made the run easier to see and capture on film.
MegsSandingBlock005.jpg


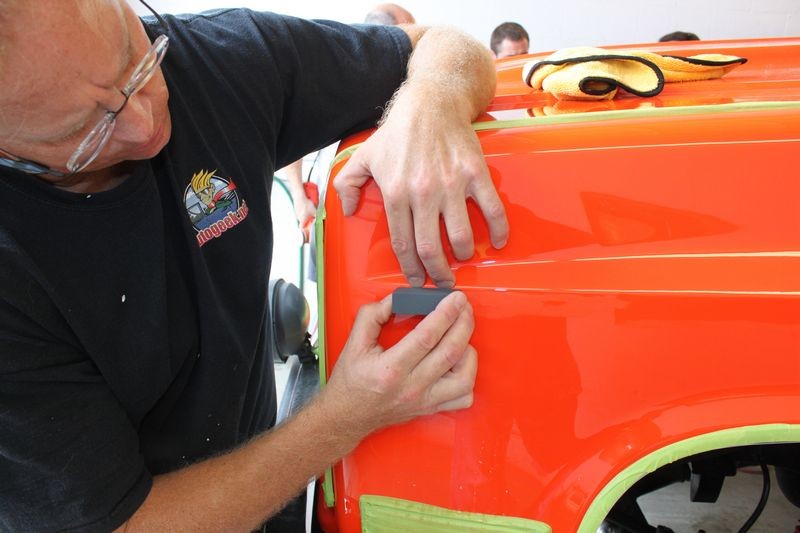
The section above was sanded flat and then the sanding marks were buffed out using a compound and a wool pad on a rotary buffer. Next I continued to move down the fender sanding the run flat.
MegsSandingBlock006.jpg


After the majority of the run has been sanded flat I re-sanded the entire area using a Meguiar's 3" #3000 Unigrit foam backed sanding disc on a Griot's Garage 3" Mini Polisher to refine the sanding marks left by the Unigrit Sanding Block to a more shallow depth to make removing faster and easier and without generating as much heat.
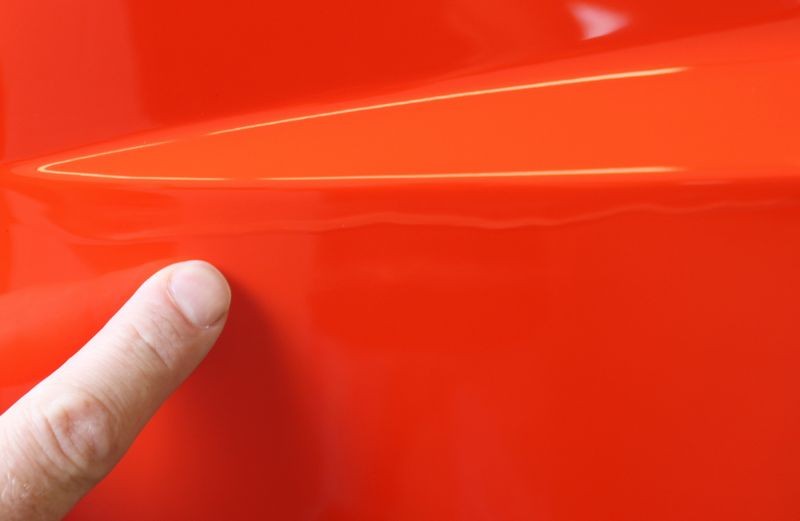
MegsSandingBlock007.jpg


End results...
After the orange peel, runs and dirt nibs were removed, the paint was compounded and machine polished and after 30 days air dry the paint was sealed.

jaysk505.jpg


I always use Grit Guards in my bucket when use sanding blocks to remove runs, sags and dirt nibs.


:)
 
I've only washed my new-to-me truck twice since I've owned it mostly because I wipe it down almost every day, if not every other day to keep it clean and shiny. But when I wash my truck, I use Grit Guards in my bucket.

They also work great in the Grit Guard Universal Pad Washer and we we have projects or detailing classes here at Autogeek we always use the Grit Guard Universal Pad Washers.


They are a well thought-out tool that have helped hundreds of thousands of car enthusiasts do a better job of safely washing their cars since they were introduced.

Of course, each person can find a way that works best for them and if they feel so inclined, share their method a on forum like this one where everyone can discuss the topic till a forum consensus is reached and then move on to the next topic.


:xyxthumbs:
 
Back
Top