Help buffing original single stage paint on 1981 Mustang and 1964 Rambler?

Joined
Dec 5, 2022
Messages
51,004
Reaction score
7
Help buffing original single stage paint on 1981 Mustang and 1964 Rambler?


Anytime I get questions via e-mail, a PM or a FB message I prefer to invest my typing time where

A: It's easier for me to share links, pictures and videos.

B: More people can read and thus benefit from the information. (no just one set of eyeballs)


So I get an e-mail asking,


Mike

I have an 81 mustang with single stage original paint. And I also have an original paint 64 rambler.

Using my paint Correction system with my flex I am unable to correct the paint using the new school methods. When trying to correct either it smudges very bad and I cannot bring out a correction.

Being in business detailing cars I have had to go-to my old school methods of a high speed compounding and then I have had to use a polish with fillers to bring the paint back. It looks great but I know it's not fully corrected.

Using my system with clear coats is not an issue and I have had great success. Am I doing something wrong? Have you ever experienced this?

Thank you in advance!!

Jay


Hi Jay,

What are you using for compounds and polishes?


Pictures of the Mustang and the Rambler would help.

I know back in the 1980's the FACTORY single stage paint were lousy. So it could be the paint is simply past the point of no return.

If the Rambler has the factory paint, this would be REAL paint, as in probably an enamel and it should polish up real good if it's not past the point of no return.

What colors are these two cars and again, what do you have for compounds and polishes?


:)
 
Hey Mike! Thread jacking for some similar information. Brand new to the world of machine detailing, and was wondering what precauations/special steps I would need to take for correcting 2000's era single stage paint? I've watched and read pretty much everything you've put out for normal, multistage paint correction, but I've personally got a 2000 Toyota 4Runner with single stage. I'd love to tackle that thing and bring some of what shine it still has, back to life.
 
Hey Mike! Thread jacking for some similar information. Brand new to the world of machine detailing, and was wondering what precauations/special steps I would need to take for correcting 2000's era single stage paint? I've watched and read pretty much everything you've put out for normal, multistage paint correction, but I've personally got a 2000 Toyota 4Runner with single stage. I'd love to tackle that thing and bring some of what shine it still has, back to life.


Is the paint chalky and dull, turning whitish?


Or does it currently have a smooth shiny surface?


:)
 
It's still got a fairly smooth, shiny surface. Some definite imperfections that need to be pulled out, but overall it's still in halfway decent shape.
 
It's still got a fairly smooth, shiny surface. Some definite imperfections that need to be pulled out, but overall it's still in halfway decent shape.


Then start by polishing or if you feel confident in the paint, your products and yourself, the start by compounding and then polishing.


The #7 rub down technique is really for antique original paint that is dull and chalky. You can rub the paint down with the #7 first and then tackle it - it's up to you and the key word is,

Important

That is how important is it to you to do everything you can to save the original paint?


Heck you could even take a one-step cleaner/wax like 3D HD Speed to your 2000 Toyota 4Runner and probably get amazing results.

Do you have a polisher?

How about compounds, polishes or cleaner/waxes?


:)
 
Here's an extreme makeover we did to a 1998 Isuzu Rodeo that is roughly about the same age as your 4Runner and back then would have used similar paint technology. We did do the #7 rub-down treatment to this rig but the paint was dull and chalky looking.


1998 Isuzu Rodeo Extreme Makeover! - Single Stage Paint


Couple of pictures to put this transformation into perspective....


Before

watermark.php


After

watermark.php


Before

watermark.php


After


watermark.php


watermark.php


Before
watermark.php


After
watermark.php


:xyxthumbs:
 
Hey Mike, can you expand on why the 1980s factory paint was lousy?
 
Then start by polishing or if you feel confident in the paint, your products and yourself, the start by compounding and then polishing.


The #7 rub down technique is really for antique original paint that is dull and chalky. You can rub the paint down with the #7 first and then tackle it - it's up to you and the key word is,

Important

That is how important is it to you to do everything you can to save the original paint?


Heck you could even take a one-step cleaner/wax like 3D HD Speed to your 2000 Toyota 4Runner and probably get amazing results.

Do you have a polisher?

How about compounds, polishes or cleaner/waxes?


:)

I just put in my order on Wednesday for the GG6, Ultimate Pad and Polish kit. Comes with a couple 6" pads, pad conditioner/cleaner, and the Griot's Compound/Polish/Wax trio. I also ordered the Griot's fallout remover, the Pinnacle Ultra Poly Clay kit, a clay mitt, Griot's 3-In-1 Wax, the Griot's 3" backing plate/pads.

I feel confident enough in myself and the current condition of the paint to hit it with some light compounding prior to polishing, but I'm unfamiliar with the #7 rub down technique you speak of..do you happen to have a link to that as well? I take a lot of pride in my personal vehicles, especially after I've put a couple thousand into modifying and maintaining it..so it's pretty darn important to do everything in my power to make it shine the way it deserves to. I'm more than willing to tackle it for hours on end to get it back to it's original shine, if not better.

Also, I know when compounding a multistage paint during a full correction, you want to make 6-8 passes over the paint before moving on to polishing. I'm assuming with single stage, I'd want to be slightly less aggressive in that manner. Would that be more of a 3-4 pass type job?
 
Hey Mike, can you expand on why the 1980s factory paint was lousy?


My guess (from experience being in the industry when the paint systems changed, not just fluffy thoughts), is that our friend the EPA increased regulations and restrictions for Volatile Organic Compounds emissions or V.O.C.s into the environment and as such paint manufactures were forced to make changes to their paint formulas to meet the regulations and restrictions and the results were crappy paint.


I just put in my order on Wednesday for the GG6, Ultimate Pad and Polish kit. Comes with a couple 6" pads, pad conditioner/cleaner, and the Griot's Compound/Polish/Wax trio. I also ordered the Griot's fallout remover, the Pinnacle Ultra Poly Clay kit, a clay mitt, Griot's 3-In-1 Wax, the Griot's 3" backing plate/pads.

That's a great starter pack. Heck most body shops, car dealerships and hack detailers don't have this high caliber of tools, pads and products thus all the hologram hack work we see and read about all the time.


I feel confident enough in myself and the current condition of the paint to hit it with some light compounding prior to polishing, but I'm unfamiliar with the #7 rub down technique you speak of..do you happen to have a link to that as well?

Do I have a link? I lots of links.... here's the one you need to read...


The #7 Rub Down Technique by Mike Phillips


Here's the link to my collection of #7 articles.... heck I don't even work for Meguiar's and I have more articles on their products than any of their employees.... :laughing:

All Mike Phillips #7 Show Car Glaze Articles in one place


I take a lot of pride in my personal vehicles, especially after I've put a couple thousand into modifying and maintaining it..so it's pretty darn important to do everything in my power to make it shine the way it deserves to. I'm more than willing to tackle it for hours on end to get it back to it's original shine, if not better.

The key word there is important and too many Facebook experts when referencing this product, this technique, my articles and me just don't get it. That's okay, most of those guys have ZERO articles on anything. :laughing:

If you click on this link your eyes will be drawn to the word important. I made it bold and red for the experts to more easily fine. My guess is they don't read anyways...


Also, I know when compounding a multistage paint during a full correction, you want to make 6-8 passes over the paint before moving on to polishing. I'm assuming with single stage, I'd want to be slightly less aggressive in that manner.

Would that be more of a 3-4 pass type job?


3-4 passes just gets the compound or polish working.... I'd shoot for at least 6 section passes.


Looking forward to the before and after pictures.

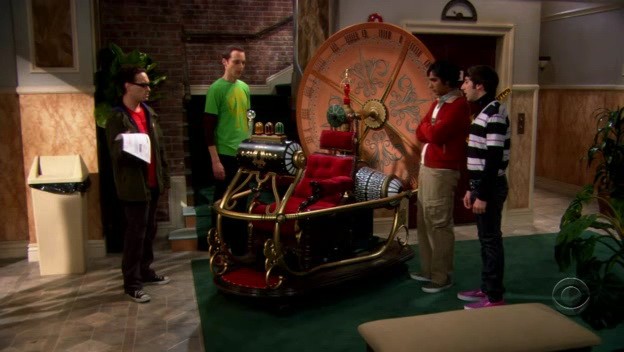
Note: The before pictures are the most important. If you don't take any you can never go back into time to get them. At least not until Sheldon invents the Time Machine.


Time2.jpg


:)
 
Sit back, relax and watch this video. This video will explain all the concepts and techniques you need to know in order to safely and correctly buff uot your car.

The video shows the Porter Cable 7424XP but the Griot's 6" DA is basically a more powerful version of the Porter Cable tool.


Then read these articles. I'd highly recommend reading the first one before starting and avoid all the common mistakes most people make when first starting out by getting HEAD KNOWLEDGE FIRST.


DA Polisher Trouble Shooting Guide


Video: Mark your backing plate to make it easy to see pad rotation


Downward Pressure....What is "Moderate"? --> another guy started this thread by the actual "how-to" information is something I wrote back in 2004 --> original source

How to divide larger body panels into smaller sections for machine buffing


How To Do a Test Spot


:)
 
That's a great starter pack. Heck most body shops, car dealerships and hack detailers don't have this high caliber of tools, pads and products thus all the hologram hack work we see and read about all the time.

Do I have a link? I lots of links.... here's the one you need to read...

Here's the link to my collection of #7 articles.... heck I don't even work for Meguiar's and I have more articles on their products than any of their employees.... :laughing:

I did quite a bit of research prior to jumping on a machine, and decided that for my current skillset and game plan, the GG6 would be the perfect fit for me. Until I gain more experience and knowledge, and hopefully turn this from a hobby to more of a side business. Then once I start bringing in more and more clients, then I can step up to their larger throw machines. I have a lot of trust in their products and machines so far. Once I hone my skills in with their products, I may eventually step my game up to Pinnacle products, pair up with my GG machines. I have an almost OCD type knack for a clean surface, in almost any manner. A smooth defect free granite counter top, my concrete slab back patio after a fresh pressure wash, and of course a smooth, glossy, defect free paint job. So I definitely feel like detail work/paint correction is going to be almost a second nature process for me.

And thank you for the links to the #7 process, I'm always interested I learning pretty much anything I can to help benefit me.


3-4 passes just gets the compound or polish working.... I'd shoot for at least 6 section passes.

Looking forward to the before and after pictures.

Note: The before pictures are the most important. If you don't take any you can never go back into time to get them. At least not until Sheldon invents the Time Machine.

6 passes it is. Of course I'll start off with my test spot and see how well that fairs on my particular paint before I move on.

Before and after photos will definitely be taken. Not only to see for my own personal satisfaction, but also to educate others in my world and hopefully start bringing in work for myself.


Sit back, relax and watch this video. This video will explain all the concepts and techniques you need to know in order to safely and correctly buff uot your car.

The video shows the Porter Cable 7424XP but the Griot's 6" DA is basically a more powerful version of the Porter Cable tool.

Then read these articles. I'd highly recommend reading the first one before starting and avoid all the common mistakes most people make when first starting out by getting HEAD KNOWLEDGE FIRST.

Downward Pressure....What is "Moderate"? --> another guy started this thread by the actual "how-to" information is something I wrote back in 2004 --> original source

Oh trust me, I've watched that exact video at least three times this week, and actually taken notes while doing so every time :laughing:
I've also watched every other video in that series at least twice; from engine bay cleaning, to glass polishing, to the rinseless/waterless washes. On top of those I also watched some of the DeTalks Series from The Rag Company Guys.
I've been doing enough research, video watching, and reading for a person on the outside to probably think I've lost my mind, and almost become obsessed. :laughing: But in my opinion, you can never have too much knowledge. Hell, I would love to come down for one of your Boot Camp classes, because I'm very much a hands on learner..but at the moment financially, that's not quite in the cards. :cry:
 
Subscribe to these two threads, maybe we'll be in your area in the future.


2017 Schedule for All Autogeek Detailing Classes

2018 Schedule for All Autogeek Detailing Classes


:)


Fingers are crossed for that! I'll have to check those links later..can't open them at work. Thank you for all of your help though!

OH!..one more question! Looks like the 4Runner had a protective film added to the lower part of the rear doors as well as the forward portion of the rear fender flares. Let's just say, these films have seen better days. Any tips/product recommendations for removing them without destroying anything??

2q0r0c5.png
 
Back
Top