Holograms, Swirls, Super Hard CC, Wet Sanding, the works... (Your thoughts will be appreciated while I proceed)

hernandez.art13

New member
Joined
Apr 8, 2013
Messages
6,958
Reaction score
0
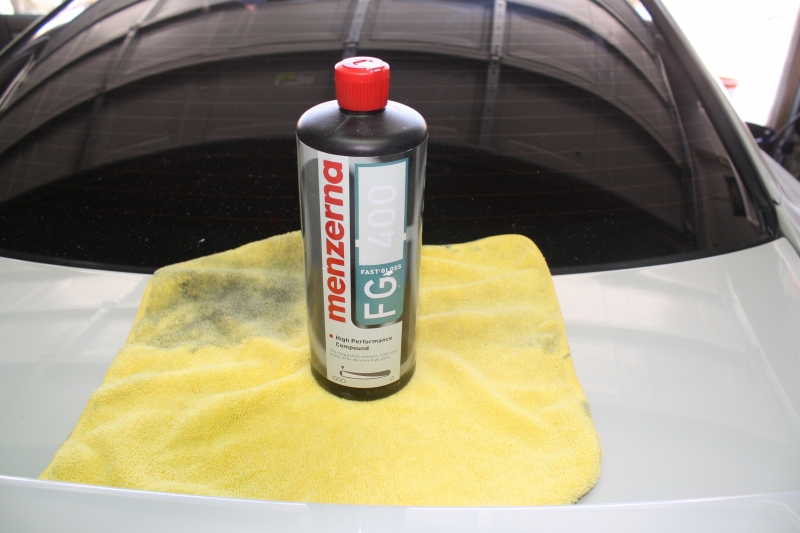
Well this has been very hard CC and I tried everything... Even for Rotary polishing, I used my Rotary, a wool pad, FG400 but in the end it seemed more aggressive then wet sanding and buffing them out because it did very little correction, and didn't want to keep digging and digging away with my Rotary.

Here is
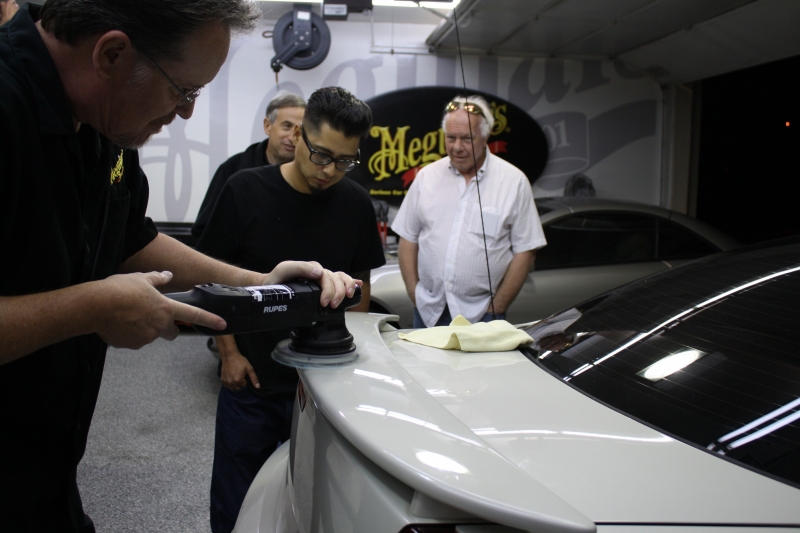
Michael Stoop using the Rupes 21 with 5" backing plate, Meguiar's mf xtra cut and M100. (M100 was designed for Rotary but used on a DA that night, so go figure on the other member's 3M thread :dunno: )

IMG_52301.JPG


IMG_7498.JPG


^ My cousin doing a test spot with Wool Pad, Rotary and FG400, and did almost no correction. So we decided to sand the the swirls out, and the swirls were :nomore: lol

IMG_7593.JPG


IMG_8099.JPG


IMG_8109.JPG


IMG_8214.JPG


IMG_8469.JPG


Here are some before and after to show the 1500 and 3000 sanding marks,

IMG_8276 - AutogeekOnline Gallery

IMG_8277.JPG


IMG_8278.JPG


IMG_8279.JPG


^ that's 3000

and here is the job so far, but still not done yet. IMO the more difficult stuff is done now, wet sanding and buff with my Rotary polish, wool pad, etc.., glad the more advanced stuff is over :dblthumb2:


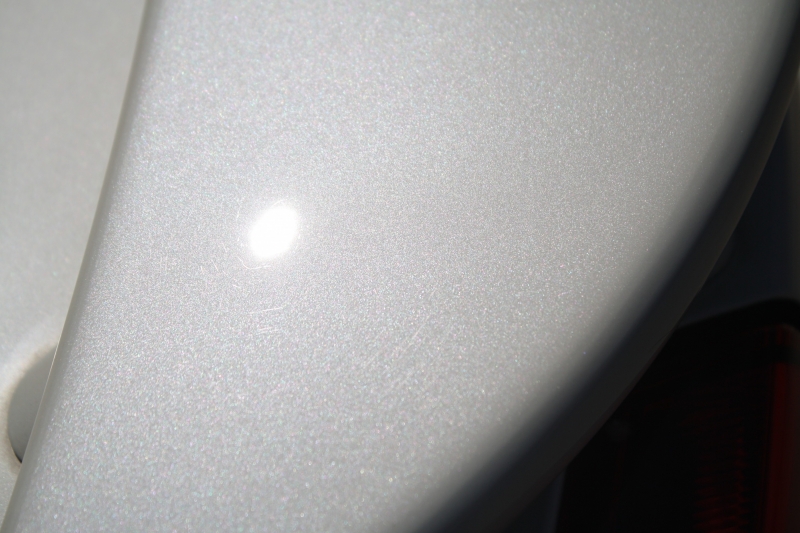
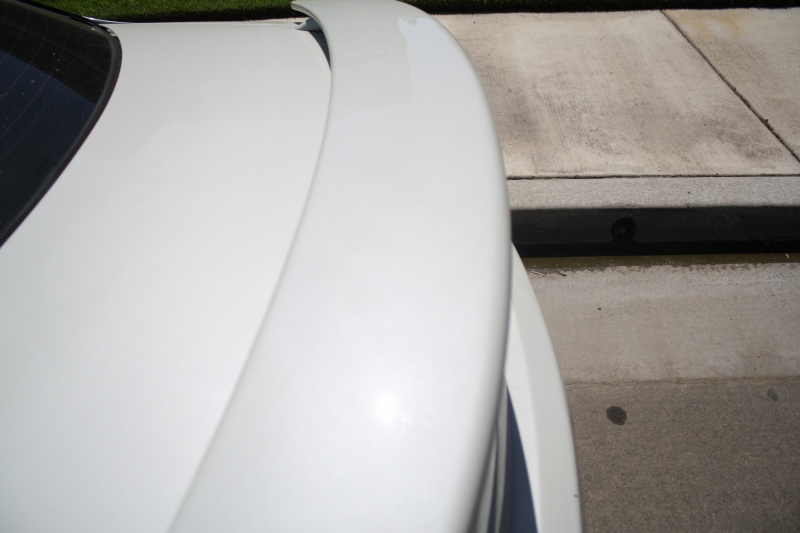
And here are the glamor shots of all the hard work done so far :laughing:, also this spoiler has only gotten wet sanded, and buffed using a Rotary, wool pad and FG400, no polishing yet so I am not surprised to see the holograms. And pretty confident my Rupes 21 will easily take them out. So not to worried about that.

IMG_90382.JPG


IMG_90392.JPG


IMG_90401.JPG


IMG_90411.JPG


IMG_9042.JPG


IMG_90461.JPG


IMG_90431.JPG


My question is Should I use my Rupes with an Orange cuting pad and compound next, then white polishing pad and say M205, then red waxing pad with 4500 to get that final polish.

or should I skip the orange pad and compound and just go to white pad and polish?

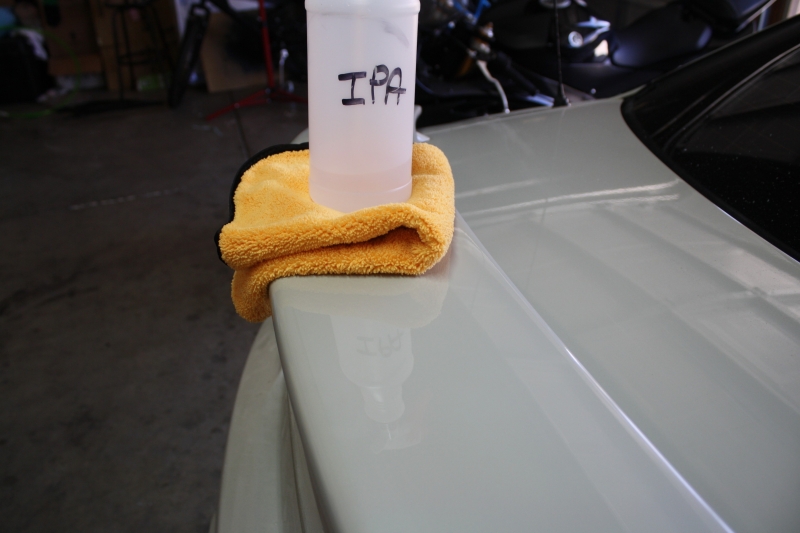
I don't really have experience removing holograms, so wanted to see what is advised to proceed with next, Since I already wet sanded and compounded and the paint is not metal I am not able to measure with my PTG. Also the spoiler is OEM so I am trying to remove as little as possible CC from here.

I do remember Michael Stoops saying to me months back, something like "If your not removing the swirls then your not removing the clear coat" and nothing removed the swirls but wet sanding and the other member creating steam, smoke on a Rupes and that to me was scary to see, especially on my car do I tried to avoid that route. lol

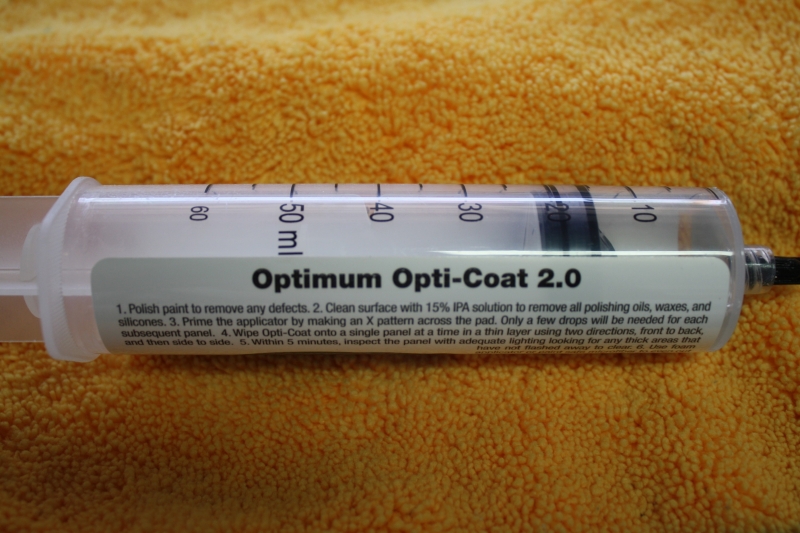
I plan on opti coating the spoiler in the end btw,

Thank you very much Mike and everyone else for reading

So this is " Project Daring" lol
 
If all you need to remove are holograms I find a red pad with 4500 to be sufficient.


My old stomping grounds... :D They painted the walls since I left, they use to be Meguiar's Gold.


My question is Should I use my Rupes with an Orange cuting pad and compound next, then white polishing pad and say M205, then red waxing pad with 4500 to get that final polish.

or should I skip the orange pad and compound and just go to white pad and polish?

IN most cases you should be able to remove the holograms using a polishing pad and a medium to fine cut polish.

What it takes to remove holograms depends on how deep they are and how deep they are depends upon,

  • Type of compound
  • Type of pad
  • Technique
About technique....

A person pushing down HARD throughout the entire buffing cycle while compounding will leave deeper holograms than a person that finishes out with a light touch.


I don't really have experience removing holograms,


Holograms are a below surface paint defect. If you have removed normal swirls and scratches it's the same idea.


:)
 
Yeah they have a picture of you in the corner. That says "Mike's Old Stomping Grounds." :joking: :p


So this should be pretty easy then, FG400 Finished out so well then just a polish and final polish should be good to go.

I'll do a test spot first though,

Thanks and I'll report back :props:
 
All done... man that was easy..., The sanding and Rotary part is the more difficult part. I sanded some swirls that were missed and then proceeded to remove them with my Rotary, TufBuf wool pad and FG400.

Picture Time!

IMG_9051.JPG


IMG_9055.JPG


IMG_90581.JPG


^ Buffed with my Rotary, FG400 and TufBuf wool pad.

IMG_90611.JPG


IMG_90631.JPG


IMG_90641.JPG


IMG_9065.JPG


IMG_90681.JPG


^ Driver's side not polished yet, I wanted to take a 50/50 shot for you guys too see.

IMG_90701.JPG


IMG_90711.JPG


^ Drivers side all polished and final polished

IMG_90741.JPG


IMG_90761.JPG


^ That is the reflection shot of my IPA spray bottle after I did the IPA wipedown

IMG_90781.JPG


IMG_90792.JPG


IMG_9080.JPG


IMG_90811.JPG


^ You can see the high spot in the reflection of the light, I waited then I buffed it off with my MF towel.

IMG_90822.JPG


^ more high spot

IMG_90832.JPG


IMG_90841.JPG


IMG_90851.JPG


IMG_9087.JPG


IMG_90911.JPG


Sun shots with opti coat applied. The stuff is really easy to use. I suggest anyone considering coating there car that they do it.

My eyes see that Opti Coat does add gloss to the paint once it is applied. It makes it look like glass.

Thanks everyone for reading, watching and helping me out.

Mike thank you very much,

Art:xyxthumbs:
 
What kind of car is that Art? Glad to see you got all those defects out, looks real nice with the Opti Coat.


Sent from my iPad using Tapatalk
 
Thanks guys, it's a 2003 Dodge Stratus Coupe. Yeah I really like the look Opti Coat gives.
 
oh yeah... forgot that I wanted to mention something...

So I practiced picking up the bead using my Rupes 21 while I was using the 6" backing plate. I think I might have figured out how to do it too. Not sure if anyone has mentioned doing it.
 
I still see sanding marks in the 3rd to last picture.

You may also want to consider using something more aggressive and inexpensive than FG400 to remove your sanding marks -- such as M100. I have found that FG400 is a bit low on cut compared to most compounds.
 
I still see sanding marks in the 3rd to last picture.

You may also want to consider using something more aggressive and inexpensive than FG400 to remove your sanding marks -- such as M100. I have found that FG400 is a bit low on cut compared to most compounds.

Those aren't sanding marks they are swirls, I didn't want to chase every swirl or RIDS, since I already sanded with 1500 on OEM paint. Since it is my DD and parked outside 24/7 and not a show car or garage queen.

If I wanted to go more aggressive I could have. I have 3M Heavy Duty Rubbing Compound but knew that FG400 would finish out nicely and remove the sanding marks because I did a test spot and I needed to have something that finished out really nicely, to make the polishing stages easier since the CC is so hard on my spoiler, but thanks for the heads up... :props:
 
I still see sanding marks in the 3rd to last picture.

You may also want to consider using something more aggressive and inexpensive than FG400 to remove your sanding marks -- such as M100. I have found that FG400 is a bit low on cut compared to most compounds.

I thought I was the only one who saw that but I believe it is the 4th to last pic. But great work art sounds like it was a real beast.

Edit: you responded while I was typing. But great work and I understand the not chasing everything.
 
No worries and thanks guys for helping out.

Sure I could have taken picture miles away so it looks awesome from far away or could have used different settings on my camera to hide the remaining swirls and showed a 100% finish, But the pictures are shown as they got taken and unedited.

I felt like I accomplished a good amount of work and just wanted to share with everyone and thank everyone that helped throughout too. From Meguiars, Michael Stoops AutogeekOnline, Mike Phillips, even Detailer Buddies on FB.

The car was previously neglected, so was swirled out everywhere. Plus I couldn't measure the paint with my PTG because it is not metal.

So I went ahead and sanded hoping not to strike through the CC and then buffed with a Rotary and wool pad on top of that. So hoping the Opti
Coat application holds up what is left. I'm sure when I go to Meguiars garage I'll notice even more because their lights are brutal lol.

If anything I could have always taken it to my families shops and gotten it repainted at either one of their shops too 3 uncle's work at 3 different shops, oh and my Dad works at another one too lol, but was trying to avoid that So I let my skills guide me.

For For my DD that was previously neglected and is 11 years old. I think I did pretty good.

I think I'm going to change the name to Project Geronimo!
:laughing:
 
oh yeah... forgot that I wanted to mention something...

So I practiced picking up the bead using my Rupes 21 while I was using the 6" backing plate.

I think I might have figured out how to do it too. Not sure if anyone has mentioned doing it.

First thing I did when I received my first RUPES was test out how to pick up a bead of product because this style of working is what comes naturally to me. While it does work you have to be very careful as it's too easy to sling product. I think it's good for people that are already experienced with how to pick up a bead of product using a rotary buffer like yourself but for most people and especially newbies it's much better to simply place three nickel sized drops of product on the face of the pad.


As to your query about using the picking up a bead of product technique, here's a post about it when Eric visited AG this time last year and I showed him the technique.


You actually have a post in the below thread, see post #8


Posted on 07-26-2013

Rupes 21 & Flex 3401 Comparison + Detailer's Paint Coating


Major Correction Step
Here's Eric using the Rupes Quarz Gloss Medium cut polish with their green aggressive foam polishing pad to remove the swirls, scratches and oxidation.


Picking up a bead of product using a Rupes polisher
Note he's going to use a my modified version of picking up a bead using the 10 @ 10 Technique only he's picking up the bead using the 10 @ 7 technique. This is the first time Eric has used the Rupes polishers.


1932_Ford_Phaeton_063.jpg


1932_Ford_Phaeton_064.jpg


1932_Ford_Phaeton_065.jpg


1932_Ford_Phaeton_066.jpg


1932_Ford_Phaeton_067.jpg


1932_Ford_Phaeton_068.jpg


1932_Ford_Phaeton_069.jpg


1932_Ford_Phaeton_070.jpg


1932_Ford_Phaeton_071.jpg


1932_Ford_Phaeton_072.jpg


1932_Ford_Phaeton_073.jpg


1932_Ford_Phaeton_074.jpg


Looking much better
There's still some deeper tracers in the paint left by the guy that did the wetsand, cut and buff the first time. I'll remove these later, for right now I just want to let Eric test out some tools and go over some techniques in the process.

By the way we do all of this in my detailing boot camp classes and "yes'" on cool cars like this one...


1932_Ford_Phaeton_075.jpg


And nice work on the Dodge Stratus Coupe and nice photography work. I'm so glad you've learned how to use the AG Gallery. I see so many people using Photobucket to host their pictures and they don't understand that inevitably they're pictures on this forum are going to disappear.

:dblthumb2:
 
That's a long bead to pick up with the Rupes. (Nice to see it being done :) ) First thing I did when I got my Rupes was to try and pick up the bead. Like the in the pictures you posted above but at 10 @ 10.

And yep slinged everywhere like you described lol.

I try to avoid applying the 3 pea sized dots to the pad method as much as I can because If you were doing an entire car. There is time that could have been saved, the way I see it.

Plus I'm used to work at faster speeds, the ironic thing is at Meguiars, they told me that I work fast (fair enough) However, at the body shop they tell me I work slow. Lol So go figure.... :laughing:

So you all have seen my videos picking up the bead with my Rotary, PC and now will make one using my Rupes.

With the 3401 it's easy to do you just have to do it backwards. Just don't have a 3401.

Its a bit modified of the 10@10 technique, didn't think about the 10@7, so will be trying that out to.

Who knows might be even better.

As far as the pictures go. While it would be nice if I could just grab a bunch of pictures and dump them like we can on Photobucket or FB. Once they are loaded, it's nice to know that they are there permanently stored.
And thanks for the compliment Mike.
 
This is very interesting how the different machines work/how they are used :xyxthumbs:
 
Funny you bring up that old thread mike, it was what I was thinking of too when Art mentioned picking up the bead. Art, it was only such a long bead because I didn't listen to Mike when he said the length of a pencil, so he had to take some of the polish back off the paint, hence the funny looking bead you see in the pictures.

So... 10 at 10 for the rotary
10 at 7 for the Rupes and
10 at 2 for the Flex 3401 (it spins the opposite way).

I still usually put the product right on the pad when I work, mostly I think for consistency since you can't really pick up a bead too effectively on a vertical panel.

I just picked up a Rupes 15 (still love my 3401 though and really glad I own one) and I'm eager to put it to work, maybe I'll revisit picking up a bead.


Sent from my iPad using Tapatalk
 
Oh that's you lol,

No worries I flinged product yesterday. If this job doesn't come up. I am going to go to Meguiars 101 this Saturday, just cause.

Well there some slung product on my rear windshield lol, I thought about leaving it there so Michael can see it and be "what the...!" Lol

My New camera is coming today! Yay! Lol

So will be incorporating it in my upcoming videos. Don't care for my GoPro to much. So bought a camcorder.

I'll make a video of the idea I came up with to hear everyone's thoughts and my DIY 3M Sun gun came in too.
 
Good stuff man.

Can you elaborate?

"Plus I couldn't measure the paint with my PTG because it is not metal."

thanks

No worries and thanks guys for helping out.

Sure I could have taken picture miles away so it looks awesome from far away or could have used different settings on my camera to hide the remaining swirls and showed a 100% finish, But the pictures are shown as they got taken and unedited.

I felt like I accomplished a good amount of work and just wanted to share with everyone and thank everyone that helped throughout too. From Meguiars, Michael Stoops AutogeekOnline, Mike Phillips, even Detailer Buddies on FB.

The car was previously neglected, so was swirled out everywhere. Plus I couldn't measure the paint with my PTG because it is not metal.

So I went ahead and sanded hoping not to strike through the CC and then buffed with a Rotary and wool pad on top of that. So hoping the Opti
Coat application holds up what is left. I'm sure when I go to Meguiars garage I'll notice even more because their lights are brutal lol.

If anything I could have always taken it to my families shops and gotten it repainted at either one of their shops too 3 uncle's work at 3 different shops, oh and my Dad works at another one too lol, but was trying to avoid that So I let my skills guide me.

For For my DD that was previously neglected and is 11 years old. I think I did pretty good.

I think I'm going to change the name to Project Geronimo!
:laughing:
 
Good stuff man.

Can you elaborate?

"Plus I couldn't measure the paint with my PTG because it is not metal."

thanks


I'll try :)

Well my Ebay PTG reads metal and not other material, i.e. plastic, rubber, carbon fiber. Well the spoiler on my car is not metal like the rest of the car. So since my PTG reads only metal, (from my understanding, PTG I mean) It won't take readings of the spoiler on my car...
 
Back
Top