Honda Civic 8-day marathon wetsand n buff

zckid

New member
Joined
Mar 29, 2010
Messages
352
Reaction score
0
Hi friends

When you care for something, you want only for it. My buddy is of that breed. He came to see me as he wanted me correct his ride, a sporty Honda Civic. We then set a tentative date. His brother brought the car 2 days in advance. I was not at home.

001.JPG


The ride was well taken care of overall although with the alternate sun and rain prevailing, you can’t expect cars to be dirt-free.

002.JPG


003%2520%25282%2529.JPG


I started the next day. A close inspection of embedded dirt revealed these.

004.JPG


005.JPG


007.JPG


009.JPG


010a.JPG


The boss gives a meticulous demonstration, the job with his detailing brush, a toothbrush and Surfex diluted.

011.JPG


012.JPG


013.JPG


014.JPG


015.JPG


016.JPG


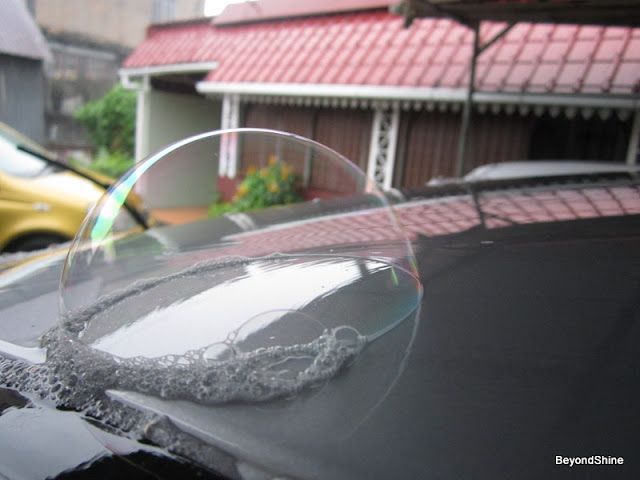
It starts raining heavily.

018.JPG


Washing in a bubble!
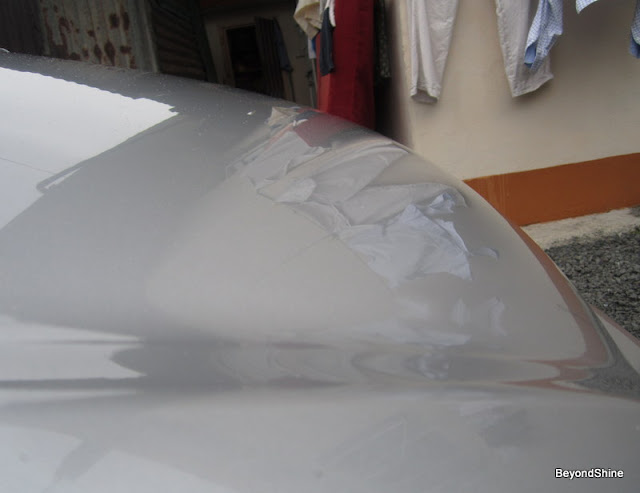
017.JPG


Claying
The real benefit of using clay is actually trying it out!

020.JPG


021.JPG


022.JPG


These are from 3 sections of a well kept car. Without claying, it would have been impossible to see the bonded contaminants!
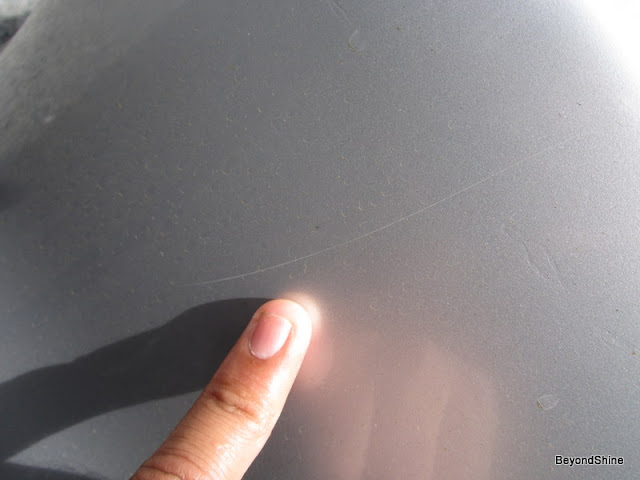
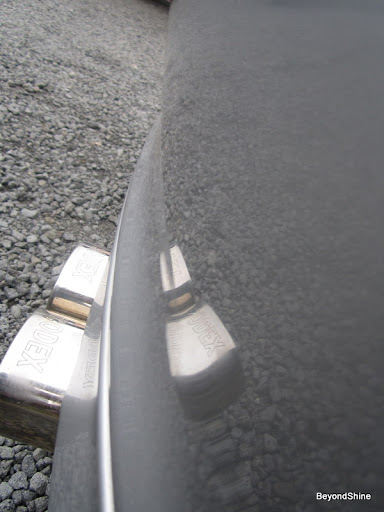

To the defects now:

023.JPG


Lacking definition and depth

024.JPG


025.JPG


026.JPG


029.JPG


Extreme close-up

029.JPG


031.JPG


030.JPG


035.JPG


037%2520closeup.JPG

038.JPG
 
The rear bumper
027.JPG


The vertical panels

033.JPG


058.JPG


Orange peel city, helped by silver color! Not easily noticeable


Deep Scratches

042.JPG


Closer look

041.JPG


Flake-offs

039.JPG


046.JPG


056.JPG


057.JPG


I’d be very much grateful to know if anyone among you performs these touch-up repairs without using the kit.


Space conquest!

Ladies and gentlemen, fasten your seat belts.

130420112GOLDSCHMIDT.jpg


We are going to land on the moon!

036.JPG


047.JPG


048.JPG


049.JPG


050.JPG


053.JPG


A whole side filled with moon craters and hills!

These need re-spray of course.


Surface prepping


Wetsanding using Megs sanding block and Mirka sandpaper - 1500, 2000, 2500 depending on the severity of defects

061.JPG


062.JPG


063.JPG


068.JPG


At this stage, the owner would be shocked/shocked seeing his car gone from bad to worst!


070.JPG


Final Wash n Clay


071.JPG


072.JPG


It’s taken me so many days to reach here, the paint being so uneven!
 
Ready for Fun :buffing:

073.JPG


My friends

Makita 9227, Flex 3401 (I’ve started to love the Flex but this hasn’t decreased my love for the Makita)

Polishes: Optimum Hyper Compound, Menzerna ( PG (the ol’ one), 203S, and PO85rd)

Pads: Optimum Wool pad, Lake Country (FWP, White and Black)

Sealant: Menzerna Powerlock

Glass: Menz PG, DP Glass Polish

Plastic trims: CG new Look Trim Gel


My first players

074.JPG


I used both alternatives for the first step to compare. But it’s like comparing bread and apple.

So far Menzerna PG has worked fine for me but it dries so fast and lacks the friendly touch of OHC or Menzerna 203s. Optimum HC slings but the finish is so nice. Sometimes, I felt I needed no need for refining. (Wished I had Menzerna FG500 to try and compare it with OHC)

078.JPG


077.JPG


079.JPG


My pal

080.JPG


My pal and its allies

081.JPG


Just need refining now

082.JPG


I wanted to go the least aggressive way. Without a PTG, My strategy was: sand a little, machine-polish and inspect. Resand if improvement needed.


065.JPG


It cost me so much time, but the outcome was beyond what was expected.


Wait! Wait! It’s not easy to be a moonwalker!

064.JPG


New paint bulges appeared on this panel after I wetsanded. I wanted to get a more level surface but this cycle continued so I let it go. I explained to my friend that this panel needs respray. He told me that the guy who did the paintjob sprayed the paint and clear after without letting the primer cure properly. Still, one has to look very carefully to notice them. Silver colored car!


After polishing and refining

083.JPG


086.JPG


Unfortunately, I could take many pics. I had to move back and forth wetsand, polish, see results and improve. It is so difficult to find the lesser defects on silver-colored car.


Deep scratches remained

091.JPG


Feed back please

Dear friends, how you manage with deep scratches in the absence of paint touch-up repair kits. I mean if you only have the clear coat, hardener, custom paint (of same color) from automotive paint shops?


Glass

The windows were polished with Menzerna PG and LC orange pad. Around the corners, I used Detailers Pride Glass Polish with LC orange applicator pad. Results were very nice thanks God. The water spots disappeared.

088.JPG


After being polished, it has still to be wiped. I then cleaned it, in and out with Stoner Invisible Glass.
 
The Headlights

The headlights were wetsanded, 1000,1500,2000 and 2500 grit. Then they were compounded and refined using Menzerna polishes


LEFT SIDE
Before


093.JPG


After


094.JPG


A month later

094a.JPG


RIGHT SIDE

Before


095a.JPG


Its condition appeared same as the right but it was worse.


095.JPG


Close up

096a.JPG


A small hole at the corner, water’s entrance


096.JPG


097.JPG


098.JPG


It was clear, but the glare was there. I couldn’t take the right shot. It still had some water drops inside.


100a.JPG


Tail lights


089.JPG


It remained to be buffed with a microfiber

The glass, lights and paint were all cleaned with ONR and sealed with Menzerna Powerlock Sealant. Plastics were treated with CG New Look Trim Gel.

The work was finished at 7 in the evening, 8 days work per 7-8 h.


The only finishing pic I managed:

101.JPG


Almost a month later, my friend came to see me. I was focusing on the car. Yes it had changed since it first came here.

118.JPG


The right headlight is filled with moist and water.

102.JPG


103.JPG


105.JPG


Compared with what she looked before

027.JPG


Now

106.JPG


107.JPG


108.JPG


Craters invaded by shine

From this


050.JPG


To

109a.JPG


close-up

110.JPG


111.JPG


111a.JPG
 
The roof

Before


024.JPG


After

112.JPG


The hood

Before


023.JPG


After


114.JPG


The side


116.JPG


117.JPG


Thanking Almighty for having made this possible. I was exhausted in the end, but couldn't complain. :iagree:


If you made it this far, thanks so much for reading :props::

Looking forward for your thoughts and words of advice

Thanks so much :dblthumb2:

Zaid
 
Awesome!!! :xyxthumbs:
Was really an extensive project with amazing results!

Loved the moon crater thing! :D
 
another awesomely documented detail Bonjour

thanks for taking so much of yr time to snap & share
 
Awesome!!! :xyxthumbs:
Was really an extensive project with amazing results!

Loved the moon crater thing! :D

thanks for your kind words Sohail.

It's taken me so many days to land there :xyxthumbs:


As many friends pointed out that, the paint bulges need respray, once you try to flatten these, they become craters. I could wetsand to a certain point only. A completely flat surface will require a proper paint job.


another awesomely documented detail Bonjour

thanks for taking so much of yr time to snap & share


Thanks bro! it's the start of a long journey. so much still to learn, so much to conquer and it it requires s little ... and a lot of passion as u say :props:


Wow...very impressive.

thanks for your encouraging word buddy, still learning! :dblthumb2:
 
Wow! that re-spray looks nasty! Whoever painted the car before he got it did a horrible job.

Good thing you were able to salvage it. Im guessing from the amount of days you worked on it the entire car was resprayed?
 
impressive turn around for the craters.

Wow! that re-spray looks nasty! Whoever painted the car before he got it did a horrible job.

Good thing you were able to salvage it. Im guessing from the amount of days you worked on it the entire car was resprayed?

Thanks for your encouraging words buddies. much appreciated. :xyxthumbs:
 
You did a great job or removing the orange peel and creating a clear, smooth finish and just as good a job documenting it with words and pictures.

I tested FG 500 against M101 and M105 and M105 left the best looking finish. M101 cut the fastest but M105 still finishes out nicer, at least on the black paint I tested them all on.


:dblthumb2:
 
Back
Top