How "Least Aggressive" Do You Get When Doing A Test Spot?

  • Thread starter Thread starter Kappy
  • Start date Start date
K

Kappy

Guest
I have a lot of swirls from the dealer in the black paint on a new Nissan Murano. There's a sticker under the hood that says "Hard Clear Coat", but I think all that means is that I don't have the self-correcting paint, whatever that is.

I recently bought a Griot's DA, still in the box, some LC 5.5" orange and white flat pads, still in their wrappers, and couple of bottles of M105 and M205. I've seen several recommendations for using M105 with an orange pad, followed by M205 with a white pad, but if doing a test spot, and trying the least aggressive approach first, does that mean the M205 on the orange pad, or the white one? I know that the orange is more aggressive, but wasn't sure if a white pad with M205 would be used in this situation. I know. That's what the test spot is for, but there must be some sort of recommended way to do this.

Speaking of test spots, I have a cultured marble counter top in my bathroom, that has some type of clear coat loaded with swirls. When I moved into the house several years ago, I was told I could buff them out with sandpaper and car wax, and remember having zero success, so I left it as is. Would this be something that would be good for practicing with a DA before I attack the car? I realize that there's no comparison in the clear coat on the counter top to the one on the car, but I was thinking it would give me a feel for using a DA, and that way I could splatter polish all over the bathroom when I forget to rest the pads on the counter before turning it on and off. :-)
 
M205 and a white pad. my paint is soft and sometime that approach works best.
 
Nissan paint is somewhat hard. Start with the white pad and the lightest cut polish. Do 2 pass and see what happens, then another to get an idea of how quick the pad and polish are cutting or not at all.
Then I would do the following tests.
Light polish orange pad
Compound White pad
Compound orange pad.
Buff off and check the level of correction after each pass flashes out.
If you want to practice with your DA get a hood from the junkyard. Make sure your taking it off of the car so you have make, model, year and if you can find it on the car the paint code. That way you know what you are working with. If you have a beater like me then use that.
If I'm understanding this correctly, you're not suggesting that I try each combination, but only move down the list to the next one if the one I'm trying isn't working. Correct?

I like the suggestion of experimenting on a real car part, but I don't have access to a junk yard, or getting a part home. I was considering working on a neighbor's car in the middle of the night, but I think the DAs make too much noise. :)
 
Kappy, do you have a 5.0" backing plate? The Griot comes with a 6" backing plate and you have 5.5" pads.
 
Kappy, do you have a 5.0" backing plate? The Griot comes with a 6" backing plate and you have 5.5" pads.

Yes, thanks for checking. I ordered the smaller plate when I bought the Griot's DA.
 
If I'm understanding this correctly, you're not suggesting that I try each combination, but only move down the list to the next one if the one I'm trying isn't working. Correct?
Definitely stop at the one that begins showing promise.
 
Yes. Try the least lightest cut polish and pad combo and work your way to the heaviest cut polish and pad combo. Remember that pad and polishing compound both have an effect on the cut.

The pad and polish combo is going to be influenced by the paint the damage you are trying to repair and the polishes you are working with.

I was lucky enough to be able to practice on my beater and run tests and experiment on it with polishes and pad combos. I have spots all over my car that are in different stages of correction.

Search for Junkman's paint correction video here. He uses 105 and 205 with white and orange pads. It would be good for you to watch. You can search him on youtube I think under Junkman2000. He can teach you a lot.
 
I usually do a test spot by hand first with a MF applicator and usually with a swirl remover and if this doesn't work, I use a heavier compound with the other unused side of the MF applicator pad. If the defects can be taken out by hand, I know it is soft.

This way, I don't need to waste pads which is important for me because I am not a professional detailer and I have only a limited supply of pads.
 
I have a lot of swirls from the dealer in the black paint on a new Nissan Murano. There's a sticker under the hood that says "Hard Clear Coat", but I think all that means is that I don't have the self-correcting paint, whatever that is.

Just to comment....

As the manufacturer states, the clear probably is a hard clear, but it can still be corrected and polished and your question about how to do the test spot is a good question.

Most important is you're going to test first and dial in a system that works and then buff out the rest of the car. I can't count how many people have not followed this safe approach.


I recently bought a Griot's DA, still in the box, some LC 5.5" orange and white flat pads, still in their wrappers, and couple of bottles of M105 and M205.

I've seen several recommendations for using M105 with an orange pad, followed by M205 with a white pad, but if doing a test spot, and trying the least aggressive approach first, does that mean the M205 on the orange pad, or the white one?

I know that the orange is more aggressive, but wasn't sure if a white pad with M205 would be used in this situation. I know. That's what the test spot is for, but there must be some sort of recommended way to do this.

Great questions...

While it's important to test the least aggressive approach, and the reason for this is to remove the defects while leaving the most paint on the car to last over the service life of the car, as explained here.


The above being true, there still a measure of common sense that needs to be used when buffing out a car and in this case, here's what I would do if it were my car...

Use a tape-line and do a test spot on the hood as it's best to test on a horizontal surface you can look down on. The hood also tends to have the worst and most defects and so any system approach you dial in that works on the hood is very likely going to work over the rest of the car.

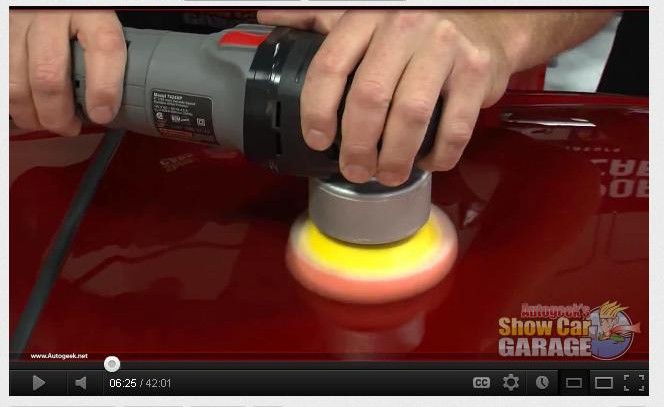
Next, test the white pad with the M205 on the 5-6 speed setting. On the 6 setting, the Griot's DA Polisher works like a safe version of a rotary buffer, since you're new to using machine, this is why I'm telling you to consider just starting on the 5 setting till you get use to the machine, you can alway go full bore as your comfort level rises.

Map out an area about the size of a microfiber towel and then do about 6 section passes, stop and inspect. Compare the area you buffed to the paint around it that you have not buffed and gage the level of defect removal.

If you're happy with the results then you can probably use this over the entire car.

If you're happy with the results but you still see some room for improvement, then you know you can re-test only this time make up to 8 section passes and crank that baby up to the 6 setting.

Be sure to move the polisher slowly over the surface and mark your backing plate like I show in this video.


How to check for pad rotation

[video=youtube_share;QM8PnDooZP8&hd=1"]How To Check Pad Rotation on a DA Polisher -...[/video]​

How to do a Section Pass
[video=youtube_share;Q70g83mnTn4"]YouTube- How to do a "Section Pass"...[/video]​


If you're not seeing the results you want or it's taking to long to get them, then switch over to the orange pad and the M105 and do a NEW test spot in a different section.

Again, only make 6 section passes as by doing less than 8 section passes, (the norm), you can gauge the amount or percentage of defect removal. You know if after 6 section passes the majority of defects are removed that you can always do a few more section passes to get those remaining deeper, stubborn defects out.

Important
Keep in mind that sometimes the really deep defects will remain and will now stick out like a sore thumb. Don't try to remove ALL defects and his can mean removing a lot of paint and the clear layer of paint on your car is thinner than a 3M Post-it Note, so learn to live with the deeper defects especially on a daily driver. See this article,

RIDS - The Definition of RIDS and the story behind the term...


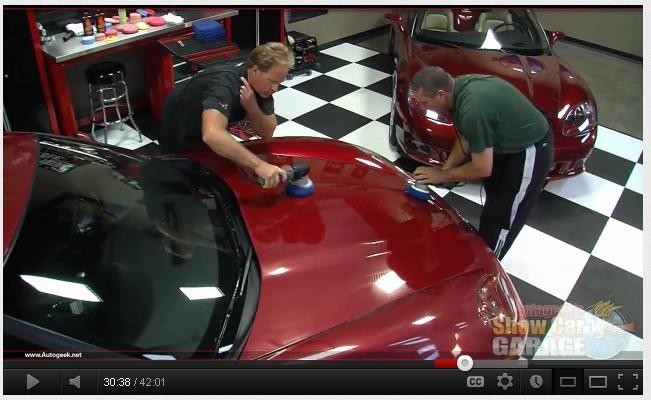
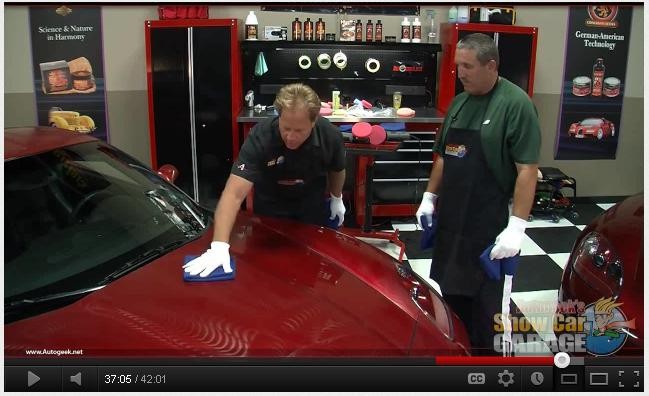
This video we shot a few years ago goes over a TON of tips and techniques for buffing out a car with s DA Polisher. Everything is covered. Don't let the title fool you as in this video I go over everything you want to do to your car.


Video: How to remove shallow RIDS and how to machine apply both a paint sealant and a finishing wax


In this video, you'll see how to inspect and remove RIDS or Random Isolated Deeper Scratches using 4" Spot Repair Pads on a Porter Cable 7424XP DA Polisher.


How to remove shallow RIDS and how to machine
apply both a paint sealant and a finishing wax
[video=youtube_share;3xJH_MGgbLw&hd=1"]How to remove shallow RIDS and how to machine...[/video]​


This how-to video also covers,

  • RIDS - Random Isolated Deeper Scratches
  • Removing watches and any jewelery
  • Using a DA Polisher without the handle
  • Placing cord over shoulder
  • Priming the pad on a DA Polisher
  • Speed settings for removing isolated defects
  • Downward pressure needed for removing isolated defects
  • How to clean a pad on the fly
  • Where and why to mark your backing plate with a black mark
  • Rotating the body of the tool to keep the pad flat to a panel
  • Why to allow the pad to stop spinning before lifting the pad off the paint
  • How to swap backing plates from a 3.5" to a 5"
  • Machine waxing using 5.5" Hydro-Tech Crimson Finishing pads with Menzerna Power Lock
  • The "Kissing the Finish" Technique
  • How to do the Swipe Test to check if a wax or paint sealant is dry
  • How to remove dried paint sealant using a microfiber bonnet on a dry pad on a DA Polisher
  • How to clean a microfiber bonnet on the fly with your fingernails
  • How to apply a paste wax by machine - Souveran Paste Wax
  • How to carefully wipe a WOWO wax off by hand using Microfiber Gloves and plush Microfiber Towels
  • How and why to fold a microfiber towel 4-ways to wipe wax off
  • How to break-open a coat of wax and then creep out to carefully wipe off a coating of wax
  • How to do the "Final Wipe"
Screenshots
RIDSvideo01.jpg


RIDSvideo02.jpg


RIDSvideo03.jpg


RIDSvideo04.jpg


RIDSvideo05.jpg


On Autogeek.net

Porter Cable 7424XP Dual Action Polisher
Pinnacle Advanced Finishing Polish
Pinnacle Advanced Swirl Remover
Lake Country 5.5" Hydro-Tech Pads
Pinnacle Souveran Paste Wax
4" CCS Spot Repair Pads
Indigo Microfiber Bonnets
Microfiber Gloves
Brinkmann Swirl Finder Light
Menzerna Power Lock
4" Hydro-Tech Pads
3" Hydro-Tech Pads


And you're going to need this video...


Video: How to clean your pad on the flyHere's a technique I've been showing for years on how to clean your pad quickly so you can get back to buffing out your car.


How to clean your pad on the fly
[video=youtube_share;NuyrBrqz_YU&hd=1"]How To Clean Your Pad On The Fly - YouTube[/video]​


:D
 
Yes. Try the least lightest cut polish and pad combo and work your way to the heaviest cut polish and pad combo. Remember that pad and polishing compound both have an effect on the cut.

The pad and polish combo is going to be influenced by the paint the damage you are trying to repair and the polishes you are working with.

I was lucky enough to be able to practice on my beater and run tests and experiment on it with polishes and pad combos. I have spots all over my car that are in different stages of correction.

Search for Junkman's paint correction video here. He uses 105 and 205 with white and orange pads. It would be good for you to watch. You can search him on youtube I think under Junkman2000. He can teach you a lot.

When I discovered this forum, after searching online for some suggestions on how to remove a small mark in my paint, it was watching the Junkman videos that got me interested in attempting my own car detailing and paint correction. That's where I first saw the M105/orange, M205/white combo being used, and it's Junkman who I blame for my new obsession and rapidly growing collection of supplies. :)
 
Just to comment....

Great questions...

While it's important to test the least aggressive approach, and the reason for this is to remove the defects while leaving the most paint on the car to last over the service life of the car, as explained here.


The above being true, there still a measure of common sense that needs to be used when buffing out a car and in this case, here's what I would do if it were my car...

Use a tape-line and do a test spot on the hood as it's best to test on a horizontal surface you can look down on. The hood also tends to have the worst and most defects and so any system approach you dial in that works on the hood is very likely going to work over the rest of the car.

Next, test the white pad with the M205 on the 5-6 speed setting. On the 6 setting, the Griot's DA Polisher works like a safe version of a rotary buffer, since you're new to using machine, this is why I'm telling you to consider just starting on the 5 setting till you get use to the machine, you can alway go full bore as your comfort level rises.

Map out an area about the size of a microfiber towel and then do about 6 section passes, stop and inspect. Compare the area you buffed to the paint around it that you have not buffed and gage the level of defect removal.

If you're happy with the results then you can probably use this over the entire car.

If you're happy with the results but you still see some room for improvement, then you know you can re-test only this time make up to 8 section passes and crank that baby up to the 6 setting.


If you're not seeing the results you want or it's taking to long to get them, then switch over to the orange pad and the M105 and do a NEW test spot in a different section.

Again, only make 6 section passes as by doing less than 8 section passes, (the norm), you can gauge the amount or percentage of defect removal. You know if after 6 section passes the majority of defects are removed that you can always do a few more section passes to get those remaining deeper, stubborn defects out.

Important
Keep in mind that sometimes the really deep defects will remain and will now stick out like a sore thumb. Don't try to remove ALL defects and his can mean removing a lot of paint and the clear layer of paint on your car is thinner than a 3M Post-it Note, so learn to live with the deeper defects especially on a daily driver.

Mike:

Thanks for all of the feedback. Over the past few weeks I have read, bookmarked and reread, every article you've referenced and watched all of the videos several times. It might seem that I'm overly cautious, but I'm in no hurry to dive in, and I especially don't want to turn some minor swirls that most people won't notice, into a more serious paint correction problem.

If not seeing the best results, you suggest moving from the M205 with white pad to M105 with orange pad and doing another test. Others in this thread have suggested moving up the aggressiveness scale in stages. Do you see any problems or benefits of doing it that way, other than going through a number of clean pads and having to wash all of them?
 
and I especially don't want to turn some minor swirls that most people won't notice, into a more serious paint correction problem.


Or as I say, you don't want to turn something as simple as washing and waxing your car into rocket science...


If not seeing the best results, you suggest moving from the M205 with white pad to M105 with orange pad and doing another test.


My recommendation is in the context of the product you stated you have already.

If M205 on a white polishing pad with a Griot's DA Polisher on speed 6 using GOOD technique is NOT removing the defects, then it's my guess from experience that the paint is in fact hard as the manufacturer states.

IF that is the case, then if it were my car I would go ahead and do my next test spot using the M105 with the orange cutting pad.

M105 is a SMAT product, that means you can stop at any time during the buffing cycle. It's not like you're using a compound that will leave the paint looking scoured.

You don't want to spend all day getting the defects out. If M205, which is a FINE CUT POLISH together with a LC white polishing pad, (no slouch on its own), on the most aggressive or powerful DA Polisher in its category, isn't working fast enough or effective enough for you then you might as well upgrade to a safe compound and a safe foam cutting pad and get the job done.

You can try the M205 with the orange cutting pad, or the M105 with the white polishing pad but FIRST do the test I recommended and tell us what you're seeing?

That is test on a section using the M205 with the white polishing pad for about 6 section passes.

This test would tell me real fast if the paint is hard or soft and tell me what my next step would be. If you share what you're seeing the this forum community can more easily make a recommendation based upon the results you share with us.

Point being, even though M105 does have the potential to be an aggressive compound, because it's SMAT it's also very gentle, or better said, only as aggressive as you make it.

So do some testing and let us know what you're seeing.

Plus keep in mind, after you buff a few sections with ANY foam pad, as the pad becomes wet, it becomes softer and less aggressive than when you started out and it was dry. A clean, dry pad is more aggressive than a wet pad. So as you move around the car the cutting pad becomes less effective or in other words you are become less aggressive.

One cure to this issue is to purchase extra pads and switch out often. I always tell people to let their budget be their guide.

You never know, the combination of a white polishing pad and the M205 might surprise you! I was lucky to be one of the first people to test M205 and when I tested it I was working on a 1966 Batmobile with single stage black paint and it worked awesome.


Others in this thread have suggested moving up the aggressiveness scale in stages.

Do you see any problems or benefits of doing it that way, other than going through a number of clean pads and having to wash all of them?

No problems doing that either, it's a good practice and your time. The key is to test and dial in a process that makes you happy with the results and the speed it takes to get the results.

In a perfect world, the M205 with the white polishing pad will remove the defects and leave you with an LSP ready finish. This way you only have to go around the car twice. Once to remove the defects, once to wax the paint.

If it isn't working, then you'll likely have to go around the car three times,

  1. Once to remove the defects
  2. A second time to polish the paint to a clear, high gloss
  3. A third time to apply the wax.
Factor in all the wiping time after each step and that's an all day project.


Been there, done that a few times...


So please, do some testing and let us know what you're seeing...


:)
 
I generally start with a gray pad and sf4500. If that does not work I bump up to a white pad and sf4500. If that does not work I bump to orange pad with IP2000 or SI1500. If that does not work MF cutting pad and FG400. If that does not work 3000 grit sand paper.
 
Mike,

Just a quick question...

If M205 on a white pad after 6 well performed section passes doesn't give you the results desired, can i try M205 on an orange pad and bump up the aggression slightly with the pad density but retain the softness of the product? I'm just thinking that i could tweak up the aggression of the removal by upping the pad density rather than taking a more agressive step to M105?

Just a thought and will yield to your expertise on this.

Now that is not to say that if i don't see much change at all after M205, then yes, a more aggressive approach might be needed but if it gets it to 60-80% corrected maybe just that little bump up to an orange pad might be all it needs.

Thanks for all your invaluable help with these questions. I have appreciated every single one over several years!
 
Mike,

Just a quick question...

If M205 on a white pad after 6 well performed section passes doesn't give you the results desired, can i try M205 on an orange pad and bump up the aggression slightly with the pad density but retain the softness of the product?


The answer to your question is "yes" but notice the part I make bold in your above post...

If M205 with a white polishing pad and 6 well performed section passes doesn't give you the results you're looking for then chances are really good you need to increase the cutting ability of your liquid product and put more bite to the paint. In the context of this thread, the OP is using M105 which is a SMAT product and SMAT technology throws a Monkey Wrench into the old use the least aggressive product philosophy in that you can stop working the abrasives at any time in the buffing cycle, (unlike DAT products), and thereby make the product only as aggressive as you need it to be.

That is, instead of drudging along with a fine cut polish and an aggressive pad, jump right onto a more aggressive product and get the job done. Buffing out a car already takes a long time, you don't want or need it to take any longer and the results from your first test spot wasn't getting the job done.

For most people, you will want to follow a more aggressive pad and a more aggressive product with a second polishing step using a less aggressive product and pad. For some though, especially on a light or white colored car, the paint will look good enough with some of these new compounds hitting the market that some might go straight to their LSP of choice. We had a thread on this topic just this week.


Now that is not to say that if i don't see much change at all after M205, then yes, a more aggressive approach might be needed but if it gets it to 60-80% corrected maybe just that little bump up to an orange pad might be all it needs.

M205 is a fine cut polish, not medium cut, it was designed to clean up any swirls left by M105 and a wool pad on a rotary buffer in a body shop environment and M105 when used correctly is a low or shallow swirl product, therefore it doesn't require an aggressive cutting polish after it's use to reach the goal of customer pleasing results.

Thanks for all your invaluable help with these questions. I have appreciated every single one over several years!


Your welcome and thank you for the kind words, I do my best to post accurate, detailed and helpful information and not simple one-liners.


:)
 
Perfect, thanks again Mike. Great info once again. I understand exactly what you are saying.
 
Back
Top