Mike Phillips
Active member
- Dec 5, 2022
- 51,004
- 6
How to remove tiny pinhole pits in glass windows using a rotary buffer
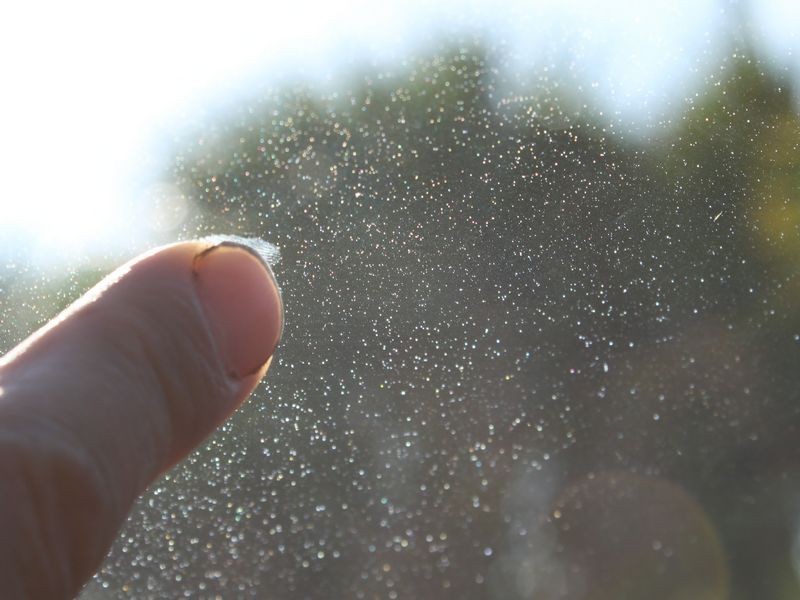
Here's a project I tackled this last Monday morning. In order to see the tiny pinhole pits in the glass you have to inspect for them early in the morning or late in the afternoon when the sun is out and low in the sky to expose the defects on the surface of the glass.
I used the finger technique explained here to capture the pinhole pits...
How-To capture swirls, scratches, etchings and other surface defects with your camera
Not sure how the tiny pinhole pits got into the glass but using my finger to enable the camera to focus on the glass surface you can see them here...
Tiny tiny tiny pinhole pits in the glass
Glass Polishing is VERY MESSY
All the glass polishes I've used are water based and best results are achieved when you use a rotary buffer. Rotary buffers tend to throw splatter dots via inertia with any liquid, especially if you over use the product but it's even more of a problem with a very liquid product and that applies to glass polishes.
One of the reasons is that since glass polishes are water based and rotary buffers generate heat, the water evaporates fairly quickly while you still have good abrasives still on the glass. To get more use out of the abrasives I mist on some water and continue buffing and the addition of the water re-liquefies the polish but also causes splatter dots to sling off the glass polishing pads and discs.
Take my word for it, if you ever do any glass polishing with a rotary buffer you want and need to cover all adjacent panels or you'll be wiping abrasive glass polish off all these surfaces when you're finished.
Soft Autogeek Cover Up Towels with painters tape used to cover and protect the paint

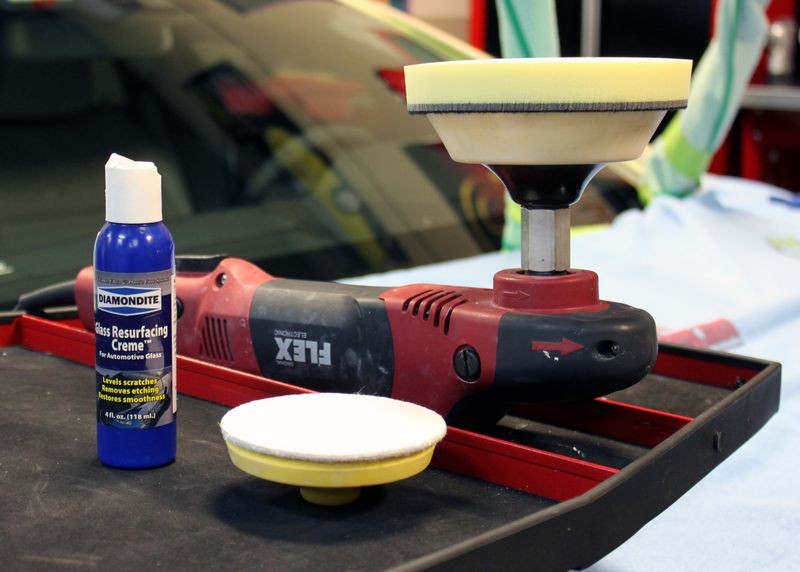
To remove the pits out of the glass I used some of my personal stock of Diamondite Glass Resurfacing Creme, which we're currently out of stock. To apply the Glass Resurfacing Creme I used
Lake Country 5.5" Glass Polishing Pad
Lake Country 5 Inch Glass Cutting Pads 3 Pack
Flex PE14 Rotary Buffer
Flex-Foam HD Rotary Backing Plate
Note: The Glass Cutting discs are hard and thin, that's their characteristic, just an observation, not a negative or positive comment. The point is they are thin and hard and glass is hard so one thing that helps a lot when buffing glass is to use the glass cutting discs with a flexible backing plate which helps make the buffing process smoother.
I buffed the glass twice, the first time with the thin class cutting discs on around 1800 RPM and lots of firm downward pressure. The wiped the glass clean and re-buffed using the foam glass polishing pad at 1500 RPM starting with firm downward pressure and then lessening the downward pressure for the last have of the polishing process.
Clarity restored
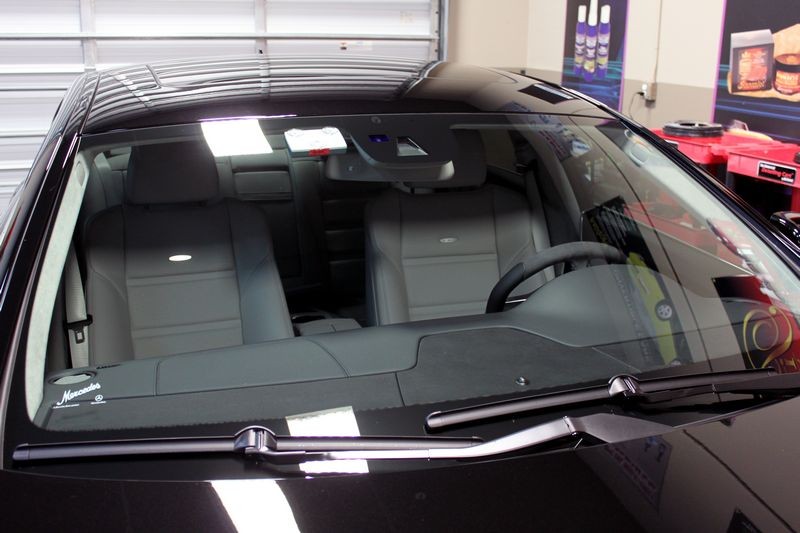
After removing all the protective toweling I wiped the car down with Pinnacle Souveran Liquid Spray Wax

Don't learn the hard way... anytime you do any glass polishing, cover and protect the paint on the car you're working on and any car parked next to the car you're working on.
")
Here's a project I tackled this last Monday morning. In order to see the tiny pinhole pits in the glass you have to inspect for them early in the morning or late in the afternoon when the sun is out and low in the sky to expose the defects on the surface of the glass.
I used the finger technique explained here to capture the pinhole pits...
How-To capture swirls, scratches, etchings and other surface defects with your camera
Not sure how the tiny pinhole pits got into the glass but using my finger to enable the camera to focus on the glass surface you can see them here...
Tiny tiny tiny pinhole pits in the glass
Glass Polishing is VERY MESSY
All the glass polishes I've used are water based and best results are achieved when you use a rotary buffer. Rotary buffers tend to throw splatter dots via inertia with any liquid, especially if you over use the product but it's even more of a problem with a very liquid product and that applies to glass polishes.
One of the reasons is that since glass polishes are water based and rotary buffers generate heat, the water evaporates fairly quickly while you still have good abrasives still on the glass. To get more use out of the abrasives I mist on some water and continue buffing and the addition of the water re-liquefies the polish but also causes splatter dots to sling off the glass polishing pads and discs.
Take my word for it, if you ever do any glass polishing with a rotary buffer you want and need to cover all adjacent panels or you'll be wiping abrasive glass polish off all these surfaces when you're finished.
Soft Autogeek Cover Up Towels with painters tape used to cover and protect the paint
To remove the pits out of the glass I used some of my personal stock of Diamondite Glass Resurfacing Creme, which we're currently out of stock. To apply the Glass Resurfacing Creme I used
Lake Country 5.5" Glass Polishing Pad
Lake Country 5 Inch Glass Cutting Pads 3 Pack
Flex PE14 Rotary Buffer
Flex-Foam HD Rotary Backing Plate
Note: The Glass Cutting discs are hard and thin, that's their characteristic, just an observation, not a negative or positive comment. The point is they are thin and hard and glass is hard so one thing that helps a lot when buffing glass is to use the glass cutting discs with a flexible backing plate which helps make the buffing process smoother.
I buffed the glass twice, the first time with the thin class cutting discs on around 1800 RPM and lots of firm downward pressure. The wiped the glass clean and re-buffed using the foam glass polishing pad at 1500 RPM starting with firm downward pressure and then lessening the downward pressure for the last have of the polishing process.
Clarity restored
After removing all the protective toweling I wiped the car down with Pinnacle Souveran Liquid Spray Wax
Don't learn the hard way... anytime you do any glass polishing, cover and protect the paint on the car you're working on and any car parked next to the car you're working on.


