I failed my first time polishing and waxing

Bigmivi

New member
Joined
Sep 5, 2011
Messages
10
Reaction score
0
Hi All,

This is my first time posting and first time I tried to work on my mom's 1999 pathfinder. I used the following products and it is in order:

1. Two bucket washing method.
2. Turtle's bug and tar removal.
3. Meguiar's ULTIMATE COMPOUND
4. Mothers FX Synwax
5. Meguair's gold class wax

The outcome is unacceptable. Please find the picture attached. It seems there are still a lot of spots on the car. What can I do to fix it!? Am I using the right product?

Many thanks in advance~ I really want the car to shine~
 
Did you do it by hand or by machine? It kind of looks like there is a rotary hologram left behind but also looks like a bit of paint transfer left as well. The spots look to me like stone chips which will need to be filled with something like Dr.Color Chip.
 
Many thanks in advance~ I really want the car to shine~[/QUOTE]

Dave touched on an important point; are you working by hand or using a machine?

Some of the defects look deeper than swirls and marring. These may require a more aggressive approach and possibly some wet sanding but try a less aggressive approach first.

Mike Phillips did a nice article on the art of wet sanding...

http://www.autogeekonline.net/forum...fing/21974-basic-hand-sanding-techniques.html

Compounding and polishing by hand is difficult at best and requires allot of arm and shoulder strength as well as a ton of time.

Meguiar's Ultimate Compound works pretty well for an over the counter product but it may not be aggressive enough.

A dual action polisher, the appropriate foam pads will yield better results much much quicker and give consistency to the process. Other compounds might also help.
 
I just finished my first cut/polish and left many flaws behind as well. Most was due to technique (lack thereof) and inexperience. If I were to do it again right now, I'm sure the results would be much better, but I have a good idea of what I did wrong (lack of pressure for the most part, I was too soft during the cut).

2nd time around, I plan on possibly wet sanding some of the big flaws, definitely grabbing a Dr. Colorchip Kit, and thorough cleaning of the compound/polish residue. Those along with experience gained from the first run should provide much better results.
 
I also made a lot of mistakes. I am sure I will also do some in the future. The important thing is we care for our rides and will do everything to be better in it. I commend you for asking help from the pros and experienced detailers here. Keep detailing!
 
My guess is you need to use a more aggressive compound on a rotary polisher. Looks like your 99 Pathfinder's been exposed to the elements.
 
I'm PRETTY sure UC uses diminishing abrasives so you have to work it long enough to make sure all the abrasives have broken down to leave a marr -free finish. A DA will really help! :) Good luck
 
you didn't fail. you're just not done. ultimate compound uses SMAT abrasives that do not break down. keep working on it. it's a lengthy process working with a machine, let alone by hand. go back to the compounding step and keep working until the finish is how you want it to look. then apply your waxes or sealants. just keep going.
 
Thanks guy... I'll work on the car again today! I really appreciate all your advice and it helped to get my confidence back. Hopefully Ill post some good photos soon.
 
Forgot to mention... poor lighting, another problem I had. Without the proper lighting, I wasn't able to properly gage my progress, so I really didn't have a good idea of what kind of progress I was making during the process. I just sort of timed myself on each area without visual inspection. Obviously not a good thing, especially with a black car.
 
This is why I always stress the need for a test area. Start small, formulate a plan, then continue.
 
This is why I always stress the need for a test area. Start small, formulate a plan, then continue.


I agree.

Test your pads, products and process to one small area and make sure the combination of products plus your skill and technique are creating the results you're looking for and hoping for before tackling the rest of the car.

If you can make one small area look GREAT then this will give you the confidence to tackle the rest of the car with the assurance you'll get the same results.

If you're not getting the results you were looking for and hoping for... you'll be glad you didn't buff out the entire car.

Then come back to the forum, share what you're seeing and the rest of us will do our best to tweak your technique and/or process and see you through to success.


:xyxthumbs:
 
Sorry I forgot to answer the question. I used Simoniz Cordless Car Polisher and now I hate it. I live in a place where I have to use a cordless wax/polisher. I don't see a lot of cordless polisher on the market, can anybody suggest a good one (If there is anything in the autogeek store?)

I already returned the polisher twice in 1 week. First time the battery included does not charge and the second time when I push the polisher down it stopped... Its really frustrating...I am going to ask for a refund tomorrow.

Mike~ I'm a big fan of yours. Those videos are really helpful!
 
What do you mean when you say that where you live dictates that you have to use a cordless? Do you just mean that dual action polishers arent available on the shelves of your local stores? Order yourself one from auto geek! ;)
 
Is it possible for a polisher to run on battery? Maybe it's only a wax spreader. Let me guess why you can only use cordless there is no power outlet where you park your car.
 
Let me guess why you can only use cordless there is no power outlet where you park your car.

Wow, I must be at the end of a 12 hour night shift to have missed that possibility... lol
 
Sorry I forgot to answer the question. I used Simonize Cordless Car Polisher and now I hate it.

Ah.... herein lies the reason for your disappointment in the results you achieved. The Simonize Cordless Car Polisher is a GREAT idea, problem is it doesn't have the power to go up against the swirls in a modern basecoat/clearcoat paint system.

The paint is too hard for this type of tool to abrade it effectively. I have an article on a similar tool that you plug-in and it's too underpowered also. Pretty much all these types of tool are good for is spreading out a layer of wax to paint that is already in excellent condition.

There's HUGE difference between spreading out a layer of wax and physically removing swirls out of the paint.


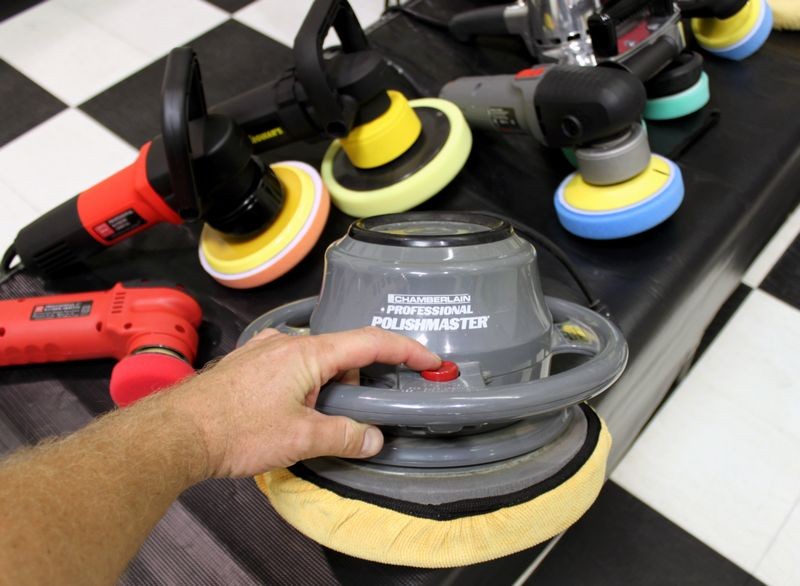
The Traditional Orbital Buffer aka The Wax Spreader

WaxSpreader02.jpg


Take heart, you can do the job by hand. In fact you're hand has more power to remove swirls than any traditional style orbital buffer it's just going to require some perspiration on your part.

The trick to removing swirls out of an entire car by hand is to tackle like you would eat an elephant. You can't eat an elephant in one bite. But bite by bite you can eat an elephant.

Translation: To remove the swirls out of an entire car by hand you want to only work a small section at a time and then when you move onto a new section you want to overlap a little into the previous section.

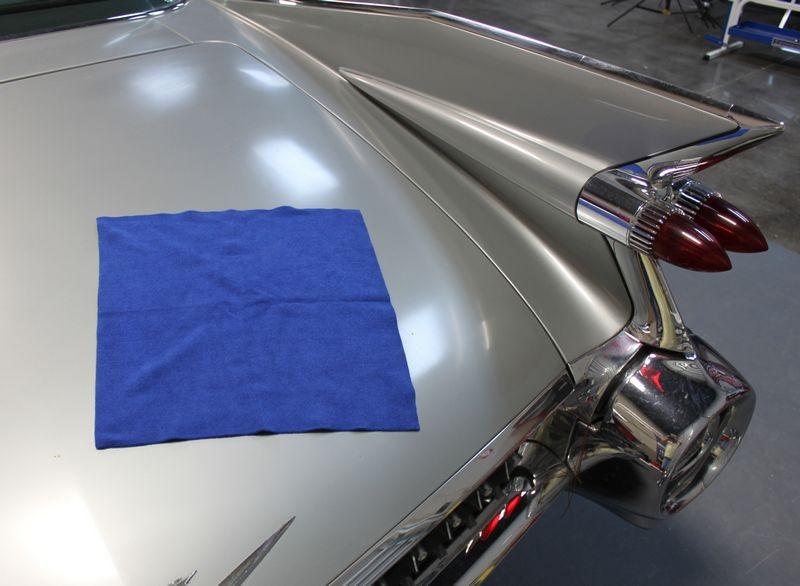
When removing swirls by hand the size you want to tackle is small, about the size of a 16" square microfiber towel laid out flat. You can go bigger than this is the swirls are shallow and coming out easily or if the paint is soft and the swirls are coming out easily, but if the swirls are deep and the paint is hard then you would need to adjust the size you work downward.

Imagine tackling the trunk lid of this 1959 Cadillac working only a section as large as the microfiber towel you see laid out flat on the paint.

How to correctly fold and use a Microfiber Towel
MicrofiberTowel001.jpg


You can do it... but it will take some time and what I call,

Putting a little passion behind the pad

The reason why you can only tackle a small section at at time is because as you rub the paint with pressure you will get tired and your effectiveness will fall off with time, as in seconds to a few minutes depending upon how good a shape you are. By tackling a small area you can usually maintain equal downward pressure and uniform hand movements for the small section and thus get good results.

Then take breather and start the new section, this little breather will allow your muscles to regroup and get ready for the next section.

Here's your job... read these articles, not the one where I removed the sanding marks by hand I did that using a Medium Cut Polish, I could have done it faster and more effectively using a true compound. (I like to challenge myself)


Here you go... these are all in my article list by the way under the section,

Polishing Paint by Hand

Man versus Machine <--- This one

How to use a hand applied abrasive polish or paint cleaner by hand <--- This one

Removing Scratches By Hand <--- This one

Foam Applicator Pads at Autogeek.net

Priming your pad when working by hand

How To Remove Paint Transfer

How to clay, clean and wax paint by hand with Pinnacle Paintwork Cleansing Lotion and Pinnacle Signature Series II Carnauba Paste Wax

1-Step versus 3-Step Process by Hand


I live in a place where I have to use a cordless wax/polisher. I don't see a lot of cordless polisher on the market, can anybody suggest a good one (If there is anything in the autogeek store?)

I already returned the polisher twice in 1 week. First time the battery included does not charge and the second time when I push the polisher down it stopped... Its really frustrating...I am going to ask for a refund tomorrow.


Don't waste your time on a cordless polisher or any type of traditional polisher like you see in the above picture. The minimum machine needed to effectively remove the swirls out of a clearcoat finish is the Porter Cable DA Polisher or one of the variants of this tool.

Mike~ I'm a big fan of yours. Those videos are really helpful!

Ah shucks.... I'm just lucky to have such a swell job...


:)
 
On many occasions I have run both DA and rotary polishers using a DC to AC power inverter hooked to my car's battery. A 750watt continuous unit is plenty to run a polisher on. It may be a little hard on the alternator if used all the time but it works just fine from time to time.

Something to think about anyway.
 
Back
Top