embolism
New member
- Dec 8, 2010
- 2,322
- 0
So the idea for these tests came from this thread:
http://www.autogeekonline.net/forum/show-n-shine/38044-iron-x-meets-neglected-civic.html
where we were wondering how much bleed we would get if a panel was clayed before iron x. The proper procedure as per Avi is to Iron X before claying. Dissolving any iron contamination first not only makes claying easier and faster but makes your clay last longer.
Another point was brought up though, about organic deposits possibly covering iron contamination, not allowing the iron x to reach it. This made a case for claying first to remove any organic bonded contamination (shaving off any embedded iron in the process) then getting any residual iron embedded in the clearcoat with the iron x afterwards.
Doug (dougaross) has mentioned previously that he didn't notice much bleeding from his car after trying Iron x but he probably follows a regular claying schedule. Audi clear is pretty hard too so maybe that makes a difference in terms of how easily iron gets embedded into and/or removed from the surface.
So with these points in mind maybe the order process should differ depending on the car. For well kept cars with harder clearcoats, the process should be clay, then iron x. You wouldn't expect much bleeding except where the clay missed or exposed some iron contamination. Your clay might get a bit more contaminated but the chances of there being residual iron after the iron x step would be reduced by removing all organic contamination first, fully exposing the surface for the subsequent iron x step.
However, if the car hasn't been cared for or has a softer clearcoat (and potentially more embedded iron), then you want to iron x first, then clay. Keep in mind that this is all conjecture on my part and I haven't done any testing to confirm this. It is sort of difficult to test Iron X since most of the cars I have access to are black, including mine. Perhaps today's tests will help shed some light on the subject.
So this is my coworker's car, a 2010 mazda 3 in pearl white bought new Jan '10 and driven directly from the dealer to the rust proofers.

Her garage is kinda full so it sits outside most of the time except for winter. Thankfully it is garaged at work but she only started driving in recently. It's gotten exactly 3 washes since she purchased it ( I thought she used touchless but during the "interview", she confirmed she did it herself at the coin op). Not sure how hard the clear is but if I had to guess I'd say it is on the softer side. Should be plenty contaminated for this test!
Products used:
Dawn wash
Mineral spirits (tar remover)
Optimum Power Clean 3:1
Iron X
Mother's clay
ONR lube
KAIO
Duragloss 501
Collinite 845
Zep citrus 4:1 for the wheels
GG6, white 5.5in LC flats
Temperature was a balmy 30C
The test itself was pretty simple, clay part of the car before iron x and see how much residual iron was left afterwards when the entire car was iron x'ed. Getting to that point took some work though. Entire process from start to finish was 4 hours, half of which was just the washing!
Before pics:
My coworker said she bought white this time b/c it was supposed to hide dirt. Marring, yes -- dirt? not so much...
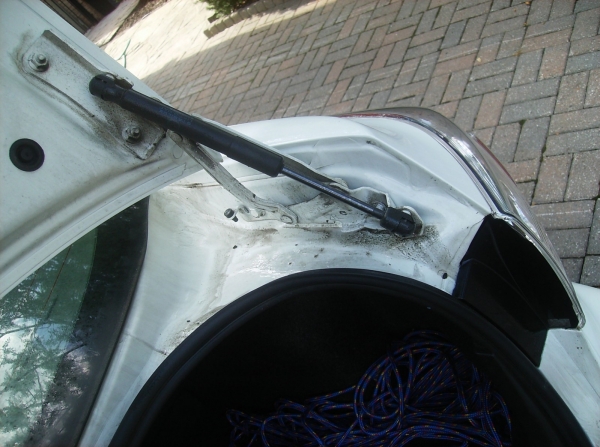
it seemed that oil from the rust proofers was everywhere

bumper rash from parking against the wall at work

no words


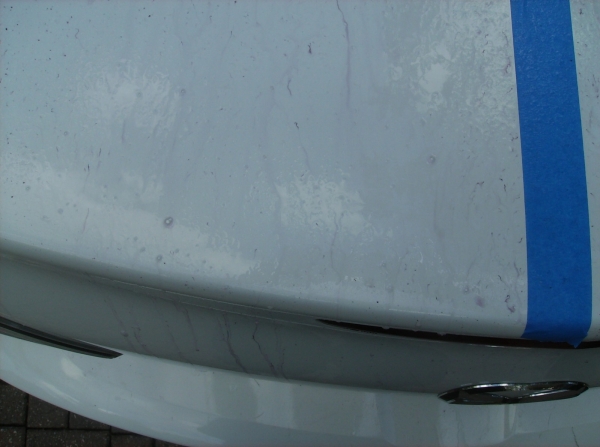
apparently, my coworker got sunscreen overspray on the trunk lid recently and it turned black so at the next fill up, she used the squeegee at the gas station to scrub it off! Those residual brown spots are not rust but some leftover sunscreen that has baked on...

When I put my ear close to the front emblem I could have sworn I heard the car crying...

Now would have been a good time for a good foam gun presoak but I don't have one (yet) so I pulled out the pressure washer which didn't do a thing to the dirt! Had to pull out the big guns and did a 3:1 OPC presoak. Went through about 35 ounces for the entire detail, including the door jambs and trunk hinges.
hmmm, I seem to have missed a spot...

kinda looks like kc's sister's half-opticoated car non?

Before we get to the main event, how about some before and afters?


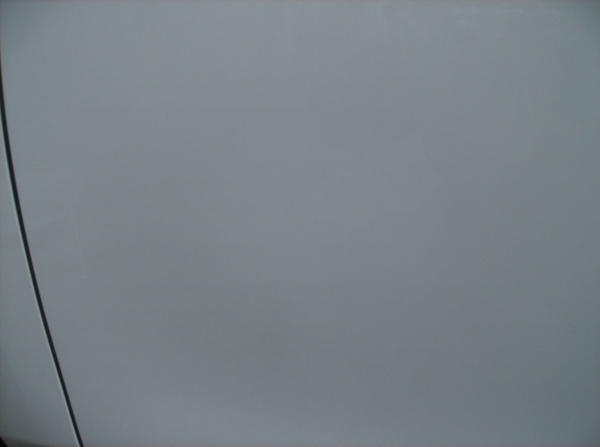
Iron rust spots

Same panel after Iron X
Believe it or not, this is the paint rinse water bucket after all the foam was scooped out.

Thought I would add a few things to the test just for the fun of it so here is what I came up with:
Prepped 2 large horizontal panels (hood and trunk lid) by taping them off into the following areas:
Hood
1. Nothing
2. KAIO by hand (without claying first, hopefully I don't mar the paint further haha)
3. Clay with mother's and ONR lube
4. Clay with mother's and ONR lube followed by DG501 by hand
Trunk lid
1. Clay with mother's and ONR lube
2. Nothing
I really wanted a full length tape line on either the trunk or hood for picture comparison contrast and figured there was probably more iron on the trunk vs the hood. Also wanted to see if a chemical paint cleaner (KAIO by hand -- didn't want to risk it by machine) would do anything to reduce iron contamination.
In terms of my process, I didn't bother with claying one section a set number of times. If there were obvious rust spots on the section, then I worked them until they were visibly gone. After the panels were prepped came the moment of truth. I gave each section 5 sprays of iron x and let it dwell for 5 minutes. Here we go:

Nothing

KAIO by hand

Clayed

Clayed and DG501 by hand

Here is the hood again from another angle (taking a cue from Bill, highlight to reveal):
Clayed

KAIO by hand

Nothing

Clayed and DG501 by hand

(hint, that poor fly that landed in a pool of squash scented iron x, found out the hard way that it wasn't as yummy as squash juice...)
For those who think KAIO lays down any kind of meaningful protection, think again. Not sure if you can see it but after I rinsed off the iron x from the hood, there was only one section of the 4 that showed any beading and it wasn't the KAIO section:

Here is the trunk (looks like there was more embedded iron here):
Nothing

Clayed
to be cont'd...
http://www.autogeekonline.net/forum/show-n-shine/38044-iron-x-meets-neglected-civic.html
where we were wondering how much bleed we would get if a panel was clayed before iron x. The proper procedure as per Avi is to Iron X before claying. Dissolving any iron contamination first not only makes claying easier and faster but makes your clay last longer.
Another point was brought up though, about organic deposits possibly covering iron contamination, not allowing the iron x to reach it. This made a case for claying first to remove any organic bonded contamination (shaving off any embedded iron in the process) then getting any residual iron embedded in the clearcoat with the iron x afterwards.
Doug (dougaross) has mentioned previously that he didn't notice much bleeding from his car after trying Iron x but he probably follows a regular claying schedule. Audi clear is pretty hard too so maybe that makes a difference in terms of how easily iron gets embedded into and/or removed from the surface.
So with these points in mind maybe the order process should differ depending on the car. For well kept cars with harder clearcoats, the process should be clay, then iron x. You wouldn't expect much bleeding except where the clay missed or exposed some iron contamination. Your clay might get a bit more contaminated but the chances of there being residual iron after the iron x step would be reduced by removing all organic contamination first, fully exposing the surface for the subsequent iron x step.
However, if the car hasn't been cared for or has a softer clearcoat (and potentially more embedded iron), then you want to iron x first, then clay. Keep in mind that this is all conjecture on my part and I haven't done any testing to confirm this. It is sort of difficult to test Iron X since most of the cars I have access to are black, including mine. Perhaps today's tests will help shed some light on the subject.
So this is my coworker's car, a 2010 mazda 3 in pearl white bought new Jan '10 and driven directly from the dealer to the rust proofers.
Her garage is kinda full so it sits outside most of the time except for winter. Thankfully it is garaged at work but she only started driving in recently. It's gotten exactly 3 washes since she purchased it ( I thought she used touchless but during the "interview", she confirmed she did it herself at the coin op). Not sure how hard the clear is but if I had to guess I'd say it is on the softer side. Should be plenty contaminated for this test!
Products used:
Dawn wash
Mineral spirits (tar remover)
Optimum Power Clean 3:1
Iron X
Mother's clay
ONR lube
KAIO
Duragloss 501
Collinite 845
Zep citrus 4:1 for the wheels
GG6, white 5.5in LC flats
Temperature was a balmy 30C
The test itself was pretty simple, clay part of the car before iron x and see how much residual iron was left afterwards when the entire car was iron x'ed. Getting to that point took some work though. Entire process from start to finish was 4 hours, half of which was just the washing!
Before pics:
My coworker said she bought white this time b/c it was supposed to hide dirt. Marring, yes -- dirt? not so much...
it seemed that oil from the rust proofers was everywhere
bumper rash from parking against the wall at work
no words
apparently, my coworker got sunscreen overspray on the trunk lid recently and it turned black so at the next fill up, she used the squeegee at the gas station to scrub it off! Those residual brown spots are not rust but some leftover sunscreen that has baked on...
When I put my ear close to the front emblem I could have sworn I heard the car crying...
Now would have been a good time for a good foam gun presoak but I don't have one (yet) so I pulled out the pressure washer which didn't do a thing to the dirt! Had to pull out the big guns and did a 3:1 OPC presoak. Went through about 35 ounces for the entire detail, including the door jambs and trunk hinges.
hmmm, I seem to have missed a spot...
kinda looks like kc's sister's half-opticoated car non?
Before we get to the main event, how about some before and afters?
Iron rust spots
Same panel after Iron X
Believe it or not, this is the paint rinse water bucket after all the foam was scooped out.
Thought I would add a few things to the test just for the fun of it so here is what I came up with:
Prepped 2 large horizontal panels (hood and trunk lid) by taping them off into the following areas:
Hood
1. Nothing
2. KAIO by hand (without claying first, hopefully I don't mar the paint further haha)
3. Clay with mother's and ONR lube
4. Clay with mother's and ONR lube followed by DG501 by hand
Trunk lid
1. Clay with mother's and ONR lube
2. Nothing
I really wanted a full length tape line on either the trunk or hood for picture comparison contrast and figured there was probably more iron on the trunk vs the hood. Also wanted to see if a chemical paint cleaner (KAIO by hand -- didn't want to risk it by machine) would do anything to reduce iron contamination.
In terms of my process, I didn't bother with claying one section a set number of times. If there were obvious rust spots on the section, then I worked them until they were visibly gone. After the panels were prepped came the moment of truth. I gave each section 5 sprays of iron x and let it dwell for 5 minutes. Here we go:
Nothing
KAIO by hand
Clayed
Clayed and DG501 by hand
Here is the hood again from another angle (taking a cue from Bill, highlight to reveal):
Clayed
KAIO by hand
Nothing
Clayed and DG501 by hand
(hint, that poor fly that landed in a pool of squash scented iron x, found out the hard way that it wasn't as yummy as squash juice...)
For those who think KAIO lays down any kind of meaningful protection, think again. Not sure if you can see it but after I rinsed off the iron x from the hood, there was only one section of the 4 that showed any beading and it wasn't the KAIO section:
Here is the trunk (looks like there was more embedded iron here):
Nothing
Clayed
to be cont'd...
Last edited:


 rops:
rops:")