Makita 9227C gets a makeover...

Looks good! Much better equipped to go toe-to-toe with the Dewalt 849x. I miss my 9227, that thing was indestructible.
 
Looks good! Much better equipped to go toe-to-toe with the Dewalt 849x. I miss my 9227, that thing was indestructible.

I agree. Would be cool to see head to head! 849x vs. 9237CX2!

I have an 849x I can compare it to if AGO would like to send over the Makita for an in depth review...:xyxthumbs:

What happened to your 9227?
 
I know a lot of people who had Makita's as their workhorse before shifting to newer Flex PE-14 or the Dewalt 849x, so I wonder what they'll think of this refresh. Would love to see a new head to head as well.
 
Very cool! I was wondering when Makita would refresh their rotary. I like using my 849x, but I would definitely love to get my hands on this new Makita to see how it compares.
 
i'm surprised (makita) they haven't come out with a new DA comparable to the likes of the rupes, flex, etc,...
 
Bump.

Would like to see a head to head against it's main competitor. The 849x.


Looks like it's time to do a new comparison....

Here's the comparison I wrote 2 1/2 years ago (time stamp = 05-24-2012, 02:42 PM) and if you look at the features I showcased for the DeWALT and the corrosponding negative aspects of the Makita, it almost looks like used this article as a guide to make their improvements.


DeWALT DWP849X vs Makita 9227C Rotary Buffers


DeWALTvsMakita000.jpg


First both tools are exceptionally well built, strong performers for their class which is Full Size Rotary Buffers. This article is just to give you a close-up look at each tool with high resolution pictures, resized for easy viewing on any computer monitor. The goal of this article is to simply let you see up close, what each tool looks like and offers in the way of design, fit and finish.

If you attend any of the classes offered here at Autogeek you are always encouraged to take both of these tools as well as all the tools we carry for a test drive and see for yourself, which tools fits you best.


Left: DeWALT DWP849X Right: Makita 9227C Rotary Buffers
DeWALTvsMakita001.jpg


The DeWALT DWP849X
DeWALTvsMakita002.jpg


The DeWALT comes with a soft rubber cap over the head of the polisher. This serves two function,

1. It makes gripping and holding onto the head comfortable and secure.

2. It acts as a bumper to prevent scratching or marring if you accidentally bump the head of the polisher into any painted surface an other components.
DeWALTvsMakita003.jpg


DeWALTvsMakita004.jpg


Soft Rubber Tool Rest
There is as soft rubber horizontal tool rest across the top of the DeWALT at both the front and the back. This keeps the tool from sliding off a smooth surface or even scratching it should you lay the polisher down when not in use.

DeWALTvsMakita005.jpg


Below you can see the rear soft rubber tool rest and also note the speed selector is recessed to help prevent accidental changes in speed while using the tool.
DeWALTvsMakita006.jpg


Recessed Lock Button
The drive gear lock button is also recessed to prevent you from accidentally pressing the button when gripping the head of the unit while running the buffer.
DeWALTvsMakita007.jpg


Wool Ingestion Shields
The fresh air intake has a wire mesh shield to help prevent wool fibers and other debris from being sucked into the motor and body cavity.
DeWALTvsMakita008.jpg


DeWALTvsMakita019.jpg


The Makita 9227C
DeWALTvsMakita009.jpg


Powder Coated Head
The head unit of the Makita Rotary Buffer comes with a powder coating that is corrosion resistant.
DeWALTvsMakita013.jpg


Metal Tool Stands
Their are two raised metal tool stands at the head of the polisher stable when placed upside down and not in use.

DeWALTvsMakita010.jpg


At the end of the tool there is a hard plastic tool stand and the variable speed dial is exposed.
DeWALTvsMakita011.jpg


Semi-Recessed Lock Button
The locking button for the drive gears is semi-recessed with a raised ring surrounding the button to help prevent accidental engagement while operating the buffer.
DeWALTvsMakita012.jpg


Side Air Vents
DeWALTvsMakita013.jpg


DeWALTvsMakita020.jpg


Product shots for dimension reference
DeWALTvsMakita014.jpg


DeWALTvsMakita016.jpg


DeWALTvsMakita017.jpg


:dunno:
 
I agree. Would be cool to see head to head! 849x vs. 9237CX2!

I have an 849x I can compare it to if AGO would like to send over the Makita for an in depth review...:xyxthumbs:

What happened to your 9227?

I gave away my 9227, got the 849x from Mike Phillip's Bumble Bee comparison above. I do all my grunt work with the Dewalt and use the Flex PE-14 for tight area. For boat work, the 849x can spin a 8-10" wool pad all day
 
I have an older 9227c from like 2002. That thing is a work horse. At the time the dewalt rotary was a little different. And I liked the Makita slow start feature. Either way you can't go wrong with a Makita or Dewalt.
 
Looks like it's time to do a new comparison....

Outstanding Mike!

Will be on the lookout for the review.

I gave away my 9227, got the 849x from Mike Phillip's Bumble Bee comparison above. I do all my grunt work with the Dewalt and use the Flex PE-14 for tight area. For boat work, the 849x can spin a 8-10" wool pad all day

That was a great in depth review provided by Mike showing the differences. Soon its time for round two. This time the Makita looks better equipped to rival the Dewalt.

I do have an 849x I purchased as well because of his review but I don't use it as much now as since acquiring a PE14.

But I agree with your statement. I would keep the PE14 regulated for paint and the heavier 849x for spinning massive wool on Gelcoat.
 
Rotaries are not dead!


Rotary buffers remove defects, or remove paint, faster than any other tool as of today.

It's the most efficient way to remove sanding marks after wetsanding a car period. Sometimes it's just plain the fastest way to knock a car out no matter what the paint issues.

Here's two cars I did in the last year that I started with a rotary buffer to simply remove the swirls and scratches fast.

2000_Lotus_Esprit_012.jpg


Full sun....

2000_Lotus_Esprit_021.jpg


watermark.php


watermark.php


There is no one single perfect tool... there's the right tool for the job....


If no one has ever claimed that statement as a quote I'll take it...


:D
Awesome! :props:
 
Rotaries are not dead!

No way! Rotaries are still superior for:

1) Polishing mirrors, headlights, and narrow pillars.
2) Grunt work on nasty or large vehicles like boats, trailers, planes, ect.
3) Jeweling
 
No way! Rotaries are still superior for:

1) Polishing mirrors, headlights, and narrow pillars.
2) Grunt work on nasty or large vehicles like boats, trailers, planes, ect.
3) Jeweling
How about cars, too? :props:
 
No way! Rotaries are still superior for:

1) Polishing mirrors, headlights, and narrow pillars.
2) Grunt work on nasty or large vehicles like boats, trailers, planes, ect.
3) Jeweling

Don't forget about removing sanding marks after a vehicle has been wet/damp sanded. :dblthumb2:
 
Like I said on another thread, I've been a rotary man for many years. First was a B&D commercial 2800 rpm, wore out a Makita variable speed which I really liked then a few years ago went into my local paint store and came out with a cheap Vector variable speed delayed start that I can't seem to wear out. I want a Flex PE14, for less weight on my aching joints.

Try putting a soft 100% wool bonnet with an old thin foam finishing pad between it and the rubber plate that comes with the buffer. Then put a thin coat of one of the hardest sealers or waxes like Klasse Sealant Glaze and walk off and let it dry completely. Any one that has used these know how hard they are to remove. Dampen the wool pad with the product and let it dry.

I can't explain why this works but it will buff to a brilliant shine with no swirl marks. After two or three layers of Klasse , white and other light colors take on a rainbow like blue cast in bright light. Results are amazing and long lasting. The wool bonnet takes it off completely dry with little effort and no dust or build up on the bonnet with almost no heat. Put it aside and don't wash it so you can use it again for that product only. I occasionally fluff the bonnet with a spur. It's one of the most enjoyable and rewarding technics that I use.

Come again?

Rotary+dry wool=rainbow like halograms.
 
Try putting a soft 100% wool bonnet with an old thin foam finishing pad between it and the rubber plate that comes with the buffer.

I remember wool bonnets, for the old orbital buffers and they were also sold for use on early rotary buffers, they had a string running through the perimeter so you could pull it tight and then tie it off.

We don't have any wool bonnets here at AG but we do have some cotton and microfiber bonnets for the old orbital buffers. They have been relegated to being wax spreaders now days....


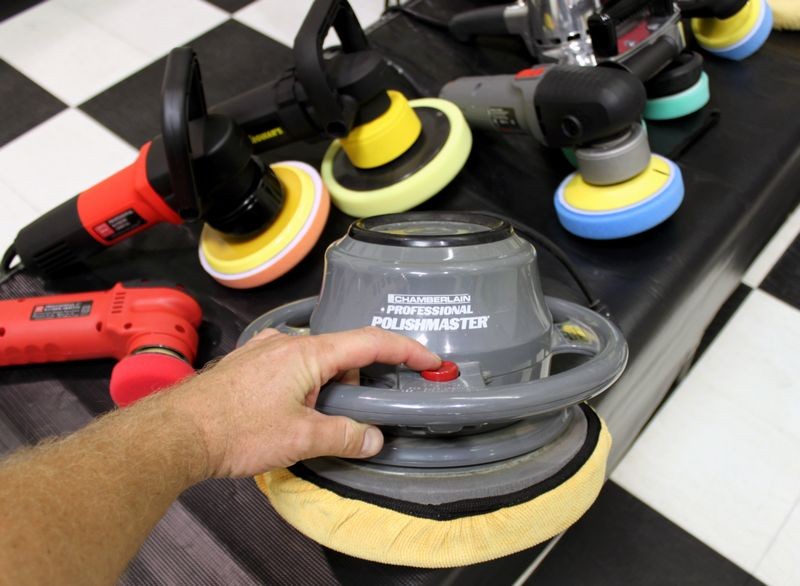
The Traditional Orbital Buffer aka The Wax Spreader

WaxSpreader02.jpg


Then put a thin coat of one of the hardest sealers or waxes like Klasse Sealant Glaze and walk off and let it dry completely. Any one that has used these know how hard they are to remove.

Yep... if you apply anything but a THIN coat of KSG you will break your arm trying to wipe it off and probably scratch your paint in the process.

I wrote an article for KSG but I didn't use the brand name in the article because I didn't want to scare anyone away from using it... instead a I wrote a generic tip that if a person reads the info and follows the tip it will prevent them from making a mistake.


A tip for working with waxes, paint sealants or coatings that are new to you


Tip: Test to small area first
Anytime you're going to use a wax, paint sealant or coating that is a product you've never used before, especially if you're planning on applying it to the entire car... to get a feel for how the product applies and most important, how it wipes off, first test the product to a small area.

This way you'll be familiar with the application and wipe-off characteristics for the specific product before applying to the entire car.


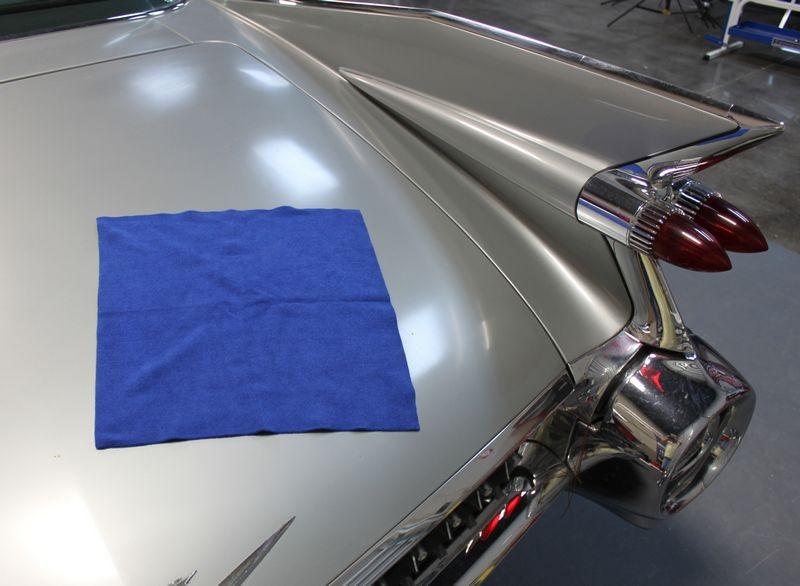
A small area = about a foot squared
The average size square microfiber towel is 16" by 16", which is a little larger than a foot squared. So for your test section, lay a clean microfiber towel out flat, like this,

MicrofiberTowel001.jpg


Then use this area as a guide as to how large of an area to apply the product onto in order to get a good feel for both the application and wipe-off characteristics of the new-to-you product.


Follow the manufactures directions
Manufactures know their product formulas best so take a moment to read the directions for application and removal on the label and then follow them as recommended.

Waxes and Paint Sealants that dry
If the directions state that you should allow the product to dry to haze before removal then allow the product to dry before removing it.


The Swipe Test
Here's a handy test to check and see if a wax or paint sealant is dry and ready to remove, The Swipe Test


Wipe-on, wipe-off waxes and paint sealants
Some products are formulated to be removed before they dry, these are called wipe-on, wipe-off waxes. If you're using a wipe-on, wipe-off wax then immediately after applying the wax to the entire car go ahead and remove it.


Products vary and climatic conditions vary
The chemistry between products can be very different; some products wipe off a tick on the difficult side while some products wipe off incredibly easy.

Products perform differently in different environmental conditions; a product that applies and remove easily in a humid area may apply and wipe off with great difficulty in another geographical location that's hot and dry.


The idea behind this tip is for you to become acquainted with a product you've never used before in your specific geographical, environmental and climatic location.


For some people, what this may teach them is the importance of applying a thin coating and if you're new to the world of detailing in general and waxing by hand in specific, you might not know 100% exactly what is meant by a thin coating and you don't want to learn what thin means the hard way.


Dampen the wool pad with the product and let it dry.

Dampen the wool bonnet over the foam finishing pad?


Try putting a soft 100% wool bonnet with an old thin foam finishing pad between it and the rubber plate that comes with the buffer.


Just trying to make sure I've reading your correctly.


I can't explain why this works but it will buff to a brilliant shine with no swirl marks.

I trust your Gary, sounds like you've been buffing with a rotary buffer longer than me but I do have to say, from my experience, if we're talking about any type of WOOL bonnet or pad, that is something with individual fibers being pressed against paint in a single, rotating direction, then my experience is the fibers themselves will cut the paint and leave behind swirls or holograms.

I test everything on clearcoated black paint and then inspect in full sun like this and again, from experience, it's not the product you mention but the fibers themselves that can and will impart a scratch pattern. You might not see it on white or light colors but you will see it on black in full sun.

It's possible the KSG is filling the scratches in and creating the illusion of a swirl-free finish.


After two or three layers of Klasse , white and other light colors take on a rainbow like blue cast in bright light.

That's interesting... never seen that before...


Results are amazing and long lasting. The wool bonnet takes it off completely dry with little effort and no dust or build up on the bonnet with almost no heat.

Put it aside and don't wash it so you can use it again for that product only. I occasionally fluff the bonnet with a spur.

It's one of the most enjoyable and rewarding technical that I use.


And that last sentence.... that's really the only thing that's important. That is... your technique works for you.

I'll have to try your technique sometime. I don't have any wool bonnets but next time I see one I'll snag it and test out your technique.


:xyxthumbs:
 
Back
Top