Mercedes Benz SL55 AMG - 600 hp and Saphire Black Perfection - AutoLavish

jlb85

New member
Joined
Mar 31, 2008
Messages
734
Reaction score
0
5451960251_e1390ac3c0_b.jpg


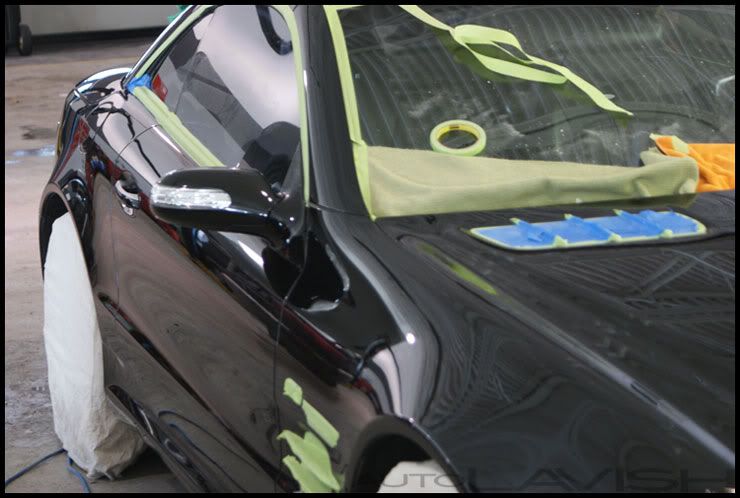
Thanks to a referral from a top detailer, we were contacted to refresh this nicely modified SL 55 AMG. Saphire Black can look stunning, but without proper clarity, the paint doesn't show in the sense that it should; deep reflective black with brilliant metallic flakes when seen with a direct light source.
In addition to requesting paint correction, the interior also needed some attention after 75,000+ miles of fun driving, and when you're going to work on the exterior and interior, you might as well properly show off the engine bay too!

Though the owner lived over an hour away, we were lucky enough to be invited to Motor Werks: a local shop that specializes in German vehicles. To work on this beautiful car was a priviledge, but to work on such a beauty with many other beautiful cars (CL600, 500E, S63 AMG, 355, RS4, etc) around made the work that much more pleasurable.

5452660242_8d30044628_b.jpg


Arriving on day one, we began with the interior and the summer wheels. A leather repair specialist was due to fix some damage on the driver's seat, so thoroughly cleaning the interior (including the seats) would help to make sure the repair would match perfectly.

DSC06055.jpg


As usual, we started with the vacuum.

DSC06065.jpg


DSC06086.jpg


To include the small, hard to reach areas like around buttons and inside the door panel's pocket:

DSC06067.jpg


DSC06070.jpg


Once loose debris was removed, hard surfaces were cleaned and protected with 1Z Cockpit Premium.

DSC06074.jpg


Leather cleaning was achieved using Leather Master Strong Cleaner and a toothbrush. While there are seats with a lot more build up than these had, the difference was still quite noticeable. I sectioned off the front of the seat to show the difference made.

DSC06090.jpg


DSC06094.jpg


DSC06096.jpg


Even sectioned off a part of the side bolster to show the nice subtle difference:

DSC06102.jpg


Here is one last shot to show how even perferrated leather can come back with careful and patient care.

DSC06105.jpg


As I finished working on the leather seats, Jacob moved his attention to the forged wheels used for summer driving. Already somewhat clean, he removed tar specs, shredded rubber, and light build up with a combination of Meguiar's 105 and 3M Adhesive remover.

DSC06106.jpg


DSC06108.jpg


DSC06110.jpg


DSC06112.jpg


The convertible top inserts and windscreen were the last interior items that could use some love, but they too were cleaned for a nice fresh look.

DSC06331.jpg


This concluded the first day of work. A few weeks laster, we returned to dial-in the exterior. It was a bit dusty to say the least, but the real problem was the condition of the paint.

DSC06250.jpg


DSC06251.jpg


The license plate was removed prior to beginning to make sure all exterior surfaces would be cleaned properly.

DSC06257.jpg


Jacob began with the door jambs while I started with the wheels, calipers, and engine bay.

DSC06284.jpg


DSC06285.jpg


DSC06286.jpg


DSC06287.jpg


DSC06291.jpg


Foamed and washed, and then clayed to remove contamination that normal washing will not.

DSC06301.jpg


DSC06296.jpg


On the left is the clay Jacob used on the passanger side of the vehicle, on the right is the clay I used on the driver's side and lowers. Notice the red overspray that the clay removed (on left), and the amount of tar that was removed from the lowest sections of the vehicle (on right).

DSC06300.jpg


After claying, the vehicle was rewashed, rinsed, and dried.

DSC06304.jpg
 
Now it's time for true inspection of the vehicle's paint. Let's take a look...

DSC06313.jpg


DSC06314.jpg


DSC06323.jpg


To add to the degree of difficulty, half the vehicle had been repainted, and half of it was original. Paint thickness measurements helped to identify potentially problematic areas.

DSC06336.jpg


DSC06343.jpg


Very thin original paint...

DSC06345.jpg


DSC06347.jpg


We were expecting to need two different polishing combinations: one that worked best on the repainted sections, and one that would effectively clear-up the thin original paint. While we began taping off anything that could potentially be damaged by a high speed buffer, we also made note of some of the most dangerous sections so we could proceeed with caution.

DSC06357.jpg


DSC06358.jpg


The importance of doing things right: thickness measurement of 217 microns on the driver's side rear fender but only 99 microns a few inches away... who do you trust with YOUR car?

DSC06363.jpg


DSC06362.jpg


Enough talk: let's make a nice difference!

DSC06417.jpg


DSC06411.jpg


DSC06421.jpg


DSC06374.jpg


DSC06376.jpg


DSC06377.jpg


Before:

DSC06378.jpg


After:

DSC06379.jpg


DSC06381.jpg


After, no flash:

DSC06384.jpg


DSC06395.jpg


DSC06398.jpg


Front grill done by hand:

DSC06406.jpg


DSC06407.jpg


Coming along...

DSC06423.jpg


DSC06425.jpg


DSC06427.jpg


Still not done...
While the paint looked great by all means, we wanted to achieve a higher level of clarity. Using Menzerna's Final Polish (PO87), we further worked the paint with a blue Lake Country pad to achieve a higher level of gloss. In the following photo, you can make out the very slight line between the two lights, and the heightened clarity on the left side.

DSC06434.jpg


As a finishing touch, the good fellows at Motor Werks helped to swap the winter wheels for the summer ones. The forged Carlson wheels surely helped give the SL a better look for the photographer who would arrive shortly.

DSC06458.jpg
 
DSC06461.jpg


Onto the following final wash, crevise cleaning, dressing, and a protective layer of Blackfire for additional gloss and slickness.

DSC06466.jpg


Right on time, Andy Perry arrived to lend his talents to capture the outcome as we were finishing up applying sealant and completing the final touches.

DSC06470.jpg


DSC06469.jpg


DSC06472.jpg


DSC06475.jpg


5451961913_d5bf14f539_b.jpg


Blackfire applied:

5452584230_61c85f99da_b.jpg


Engine dried:

5452704578_fd6af8ae9d_b.jpg


Wiping off the set Blackfire Wet Diamond sealant, the brilliant shine was revealed.

5451979321_6bbd73b11f_b.jpg


5452612506_47df337cbf_b.jpg


5452023135_1f0abe8af5_b.jpg


5451995109_039942094b_b.jpg


5452012807_cf65e4ce5d_b.jpg


5452032107_930f524af9_b.jpg


5452631426_7e24b17658_b.jpg


5452638468_453d7d0453_b.jpg


5452598966_2078f04ded_b.jpg


5452615326_4033ddba80_b.jpg


5452037307_0473d653a6_b.jpg


Thanks for taking a look!
-Marc and Jacob from AutoLavish, Luxury Car Detailing in Michigan

5452652300_168e4f2d23_b.jpg
 
Great photography ! Did you completely avoid the areas <100 um and < 85um or did they get a finish polish?
 
Awesome work. IMO, you guys have THE BEST write ups in the industry.

Did you take any paint readings after polishing? I'm curious as to how the thinner sections would have reacted if treated like the rest of the car.
 
Great work on a great car! You guys are real pros:dblthumb2:
 
Thank you Gentlemen!

Professional Photography is from the same guy who shot our '29 Ford, Andy Perry.


Great photography ! Did you completely avoid the areas <100 um and < 85um or did they get a finish polish?

Awesome work. IMO, you guys have THE BEST write ups in the industry.

Did you take any paint readings after polishing? I'm curious as to how the thinner sections would have reacted if treated like the rest of the car.

The thinner sections got only very light polishing. In one area - the trunk, it was reduced about 5 micrometers IIRC. I don't have all the pics on me right now (external drives) so I can't say for sure. But the trunk was one area where were really hesitant to push further. The stuff on the doors even at 99um was not as bad. The 80's stuff got only jeweling which did not change the thickness enough to be measurable. Some of the deeper stuff will remain.

But this was hard paint. We went at it with Surbuf + M105 plus two more finishing stages IIRC. Made it easier to correct being so thin. Still, each section was "verified" against the finishing polish first since panels were repainted. It was pretty consistent overall.
 
Dang that's a nice write up, great job on the car and thanks for sharing the process :)
 
Thanks for reading!
:dblthumb2:
 
Great work once again Marc/Jacob!


I always love seeing your write ups....especially when you bring in a pro photographer to help showcase the quality work! :props:
 
great work guys! beautiful car that needed people that REALLY KNOW what there doing. im sure the dealer was more than happy. he just earned a extra 5k on the car :)
 
As always, amazing work! I love when AutoLavish posts a thread because they are always great!
 
Back
Top