My never ending project: New paint on my 5.0

Vortech5.0

New member
Joined
Mar 2, 2014
Messages
139
Reaction score
0
Hey guys,
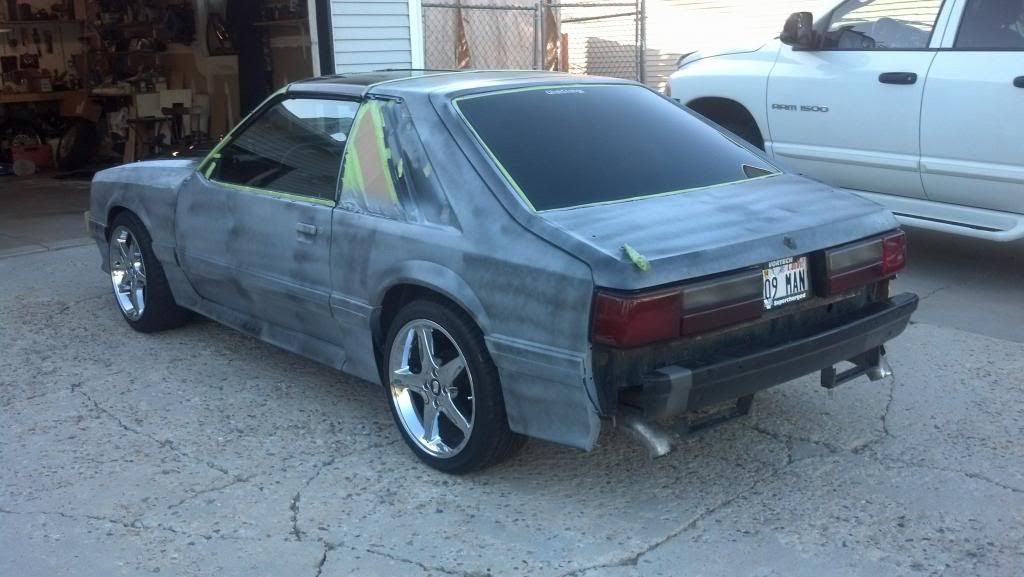
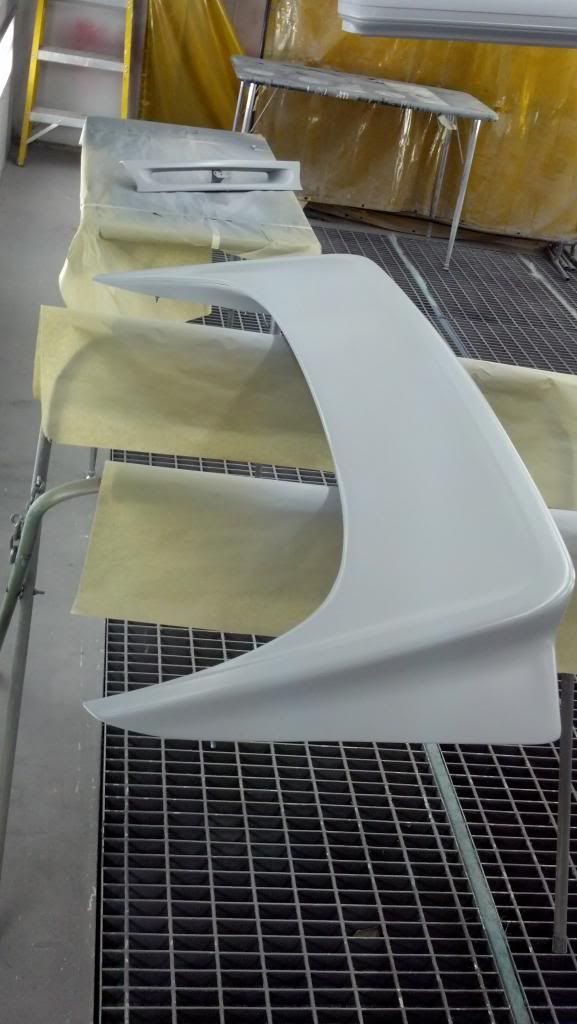
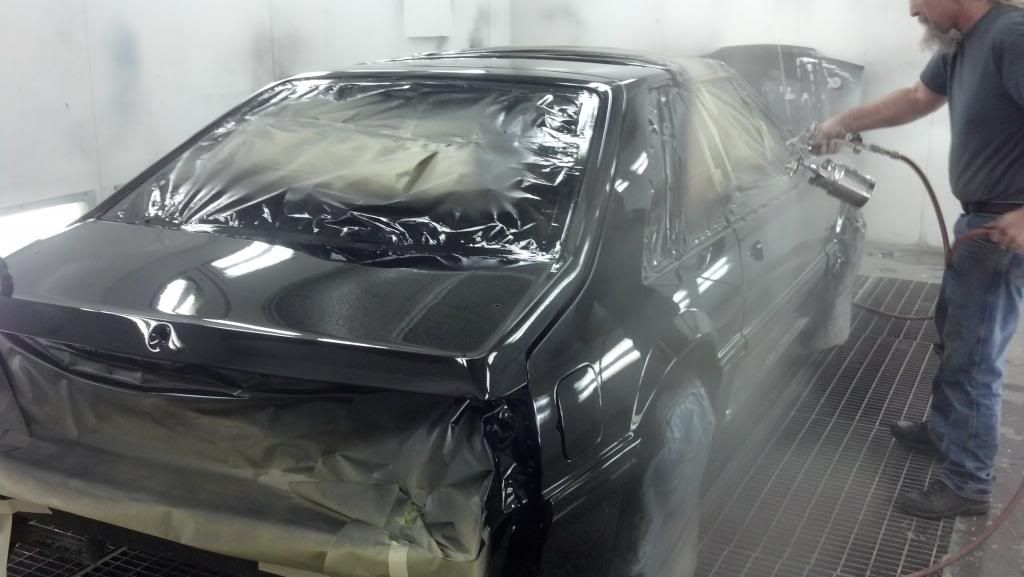
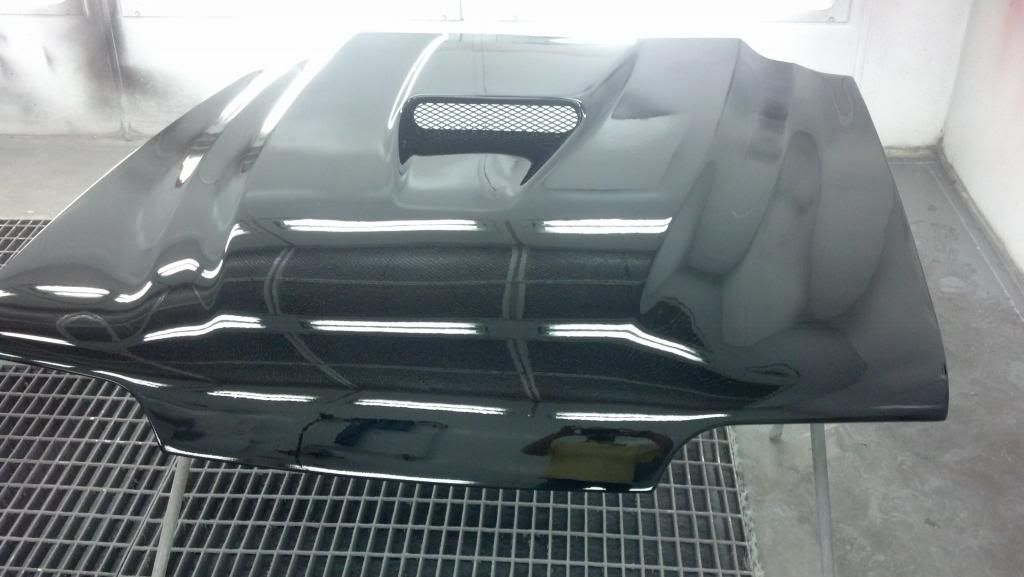
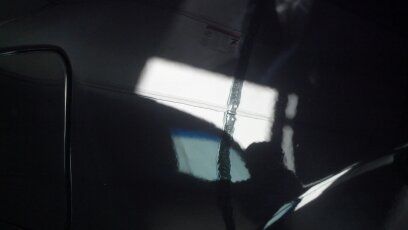
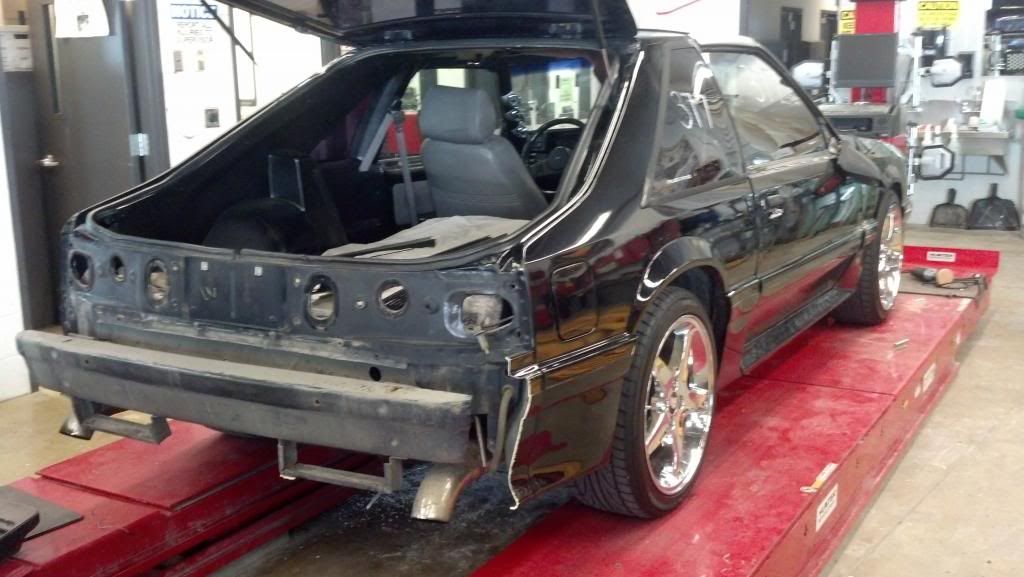
I've been working on this project for what seems like forever now and am just about finished up with it. Figured I'd throw some pics up and share my project. I took an auto body class and did a new paint job on my mustang. I started way back in late August of last year and have done most the work myself. I haven't done any of this before so it was a major learning experience. But thats why I did it myself rather than just paying some one to do it. The only part I didn't do was the actually spraying of the paint and clear coat. Now on to the pics....It may take a few posts to bring ya'll up to speed.

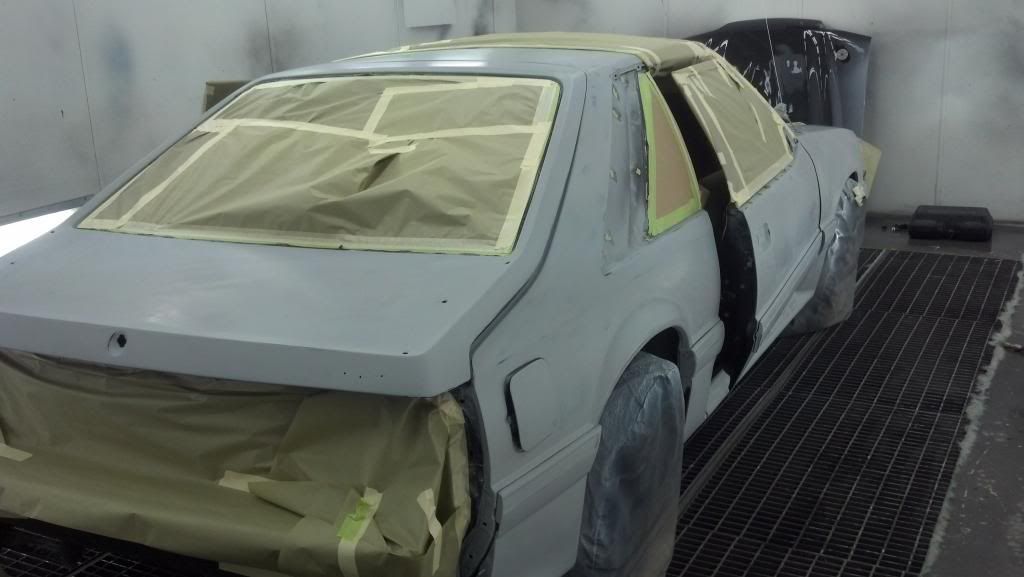
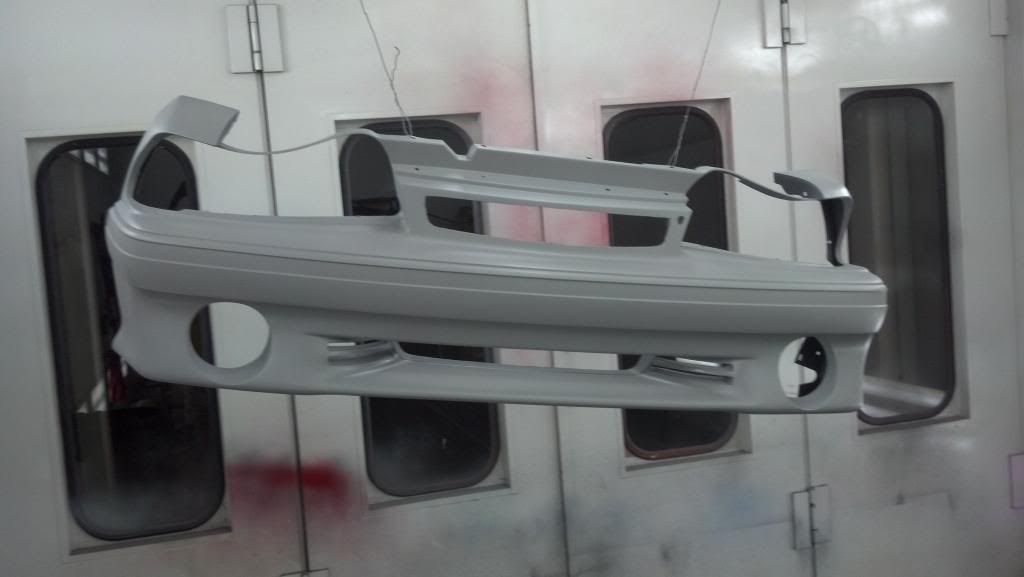
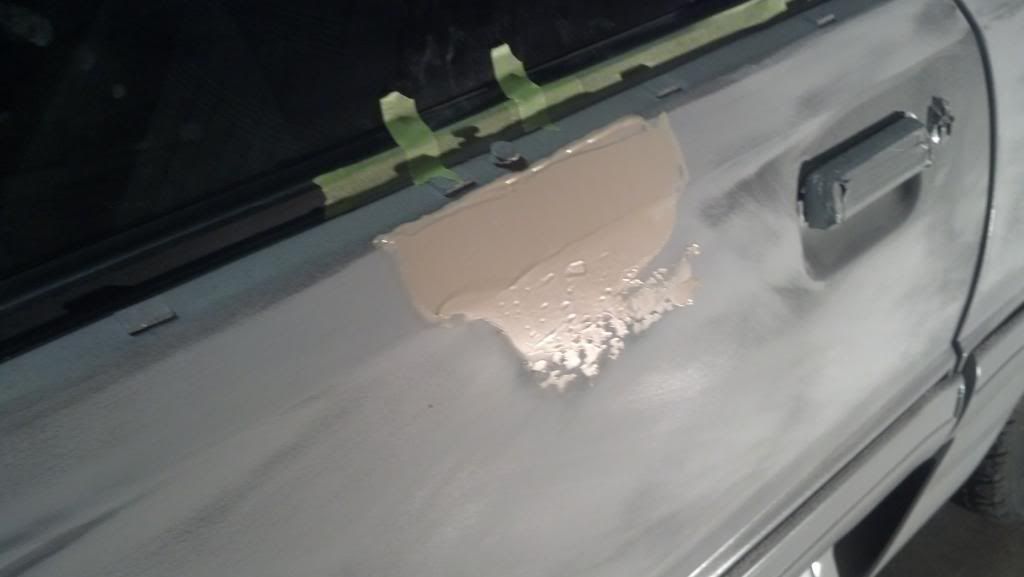
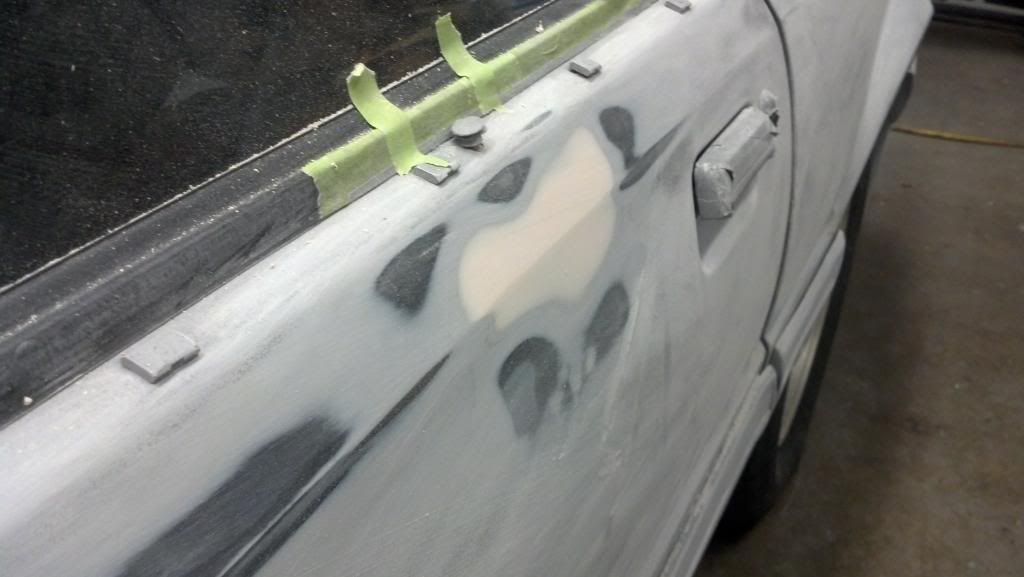
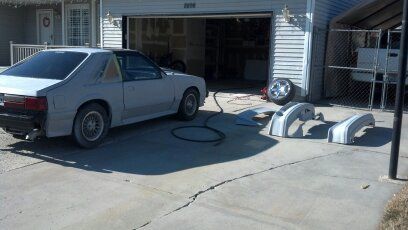
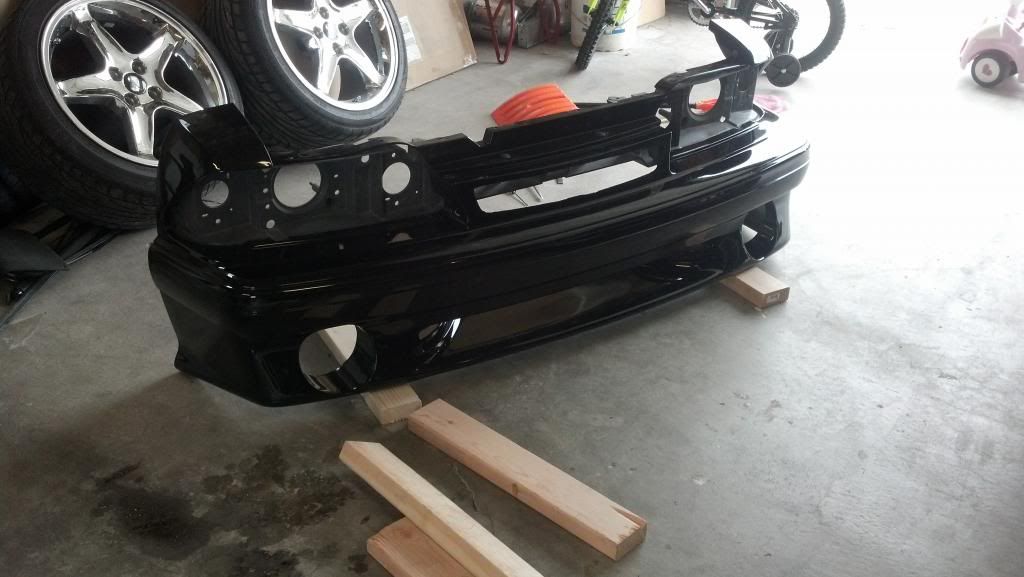
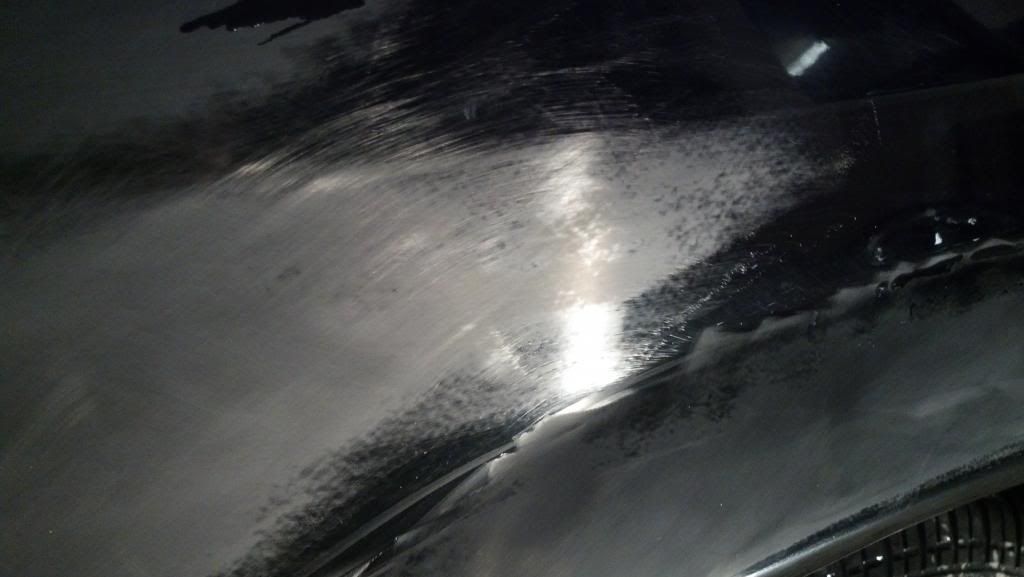
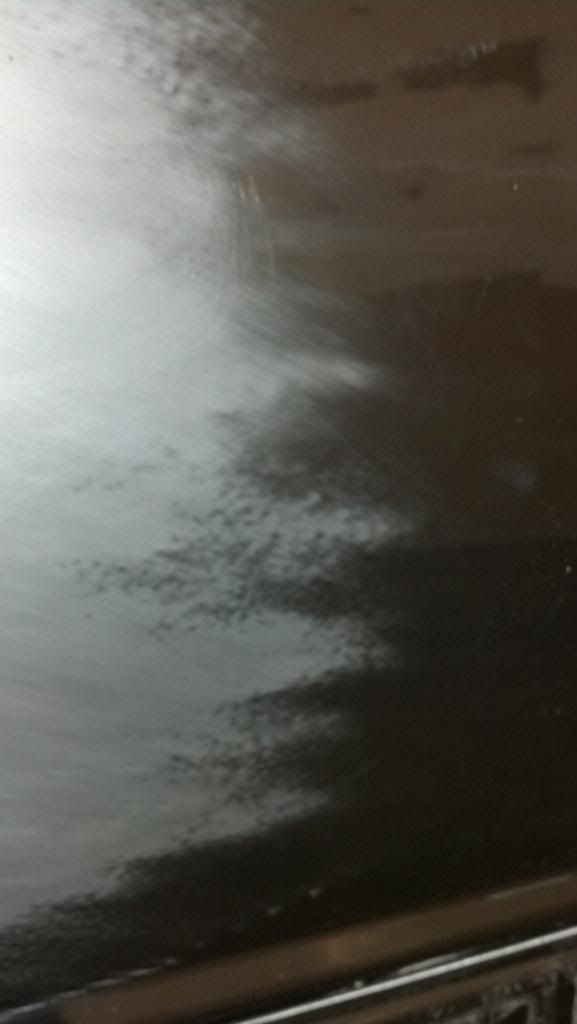
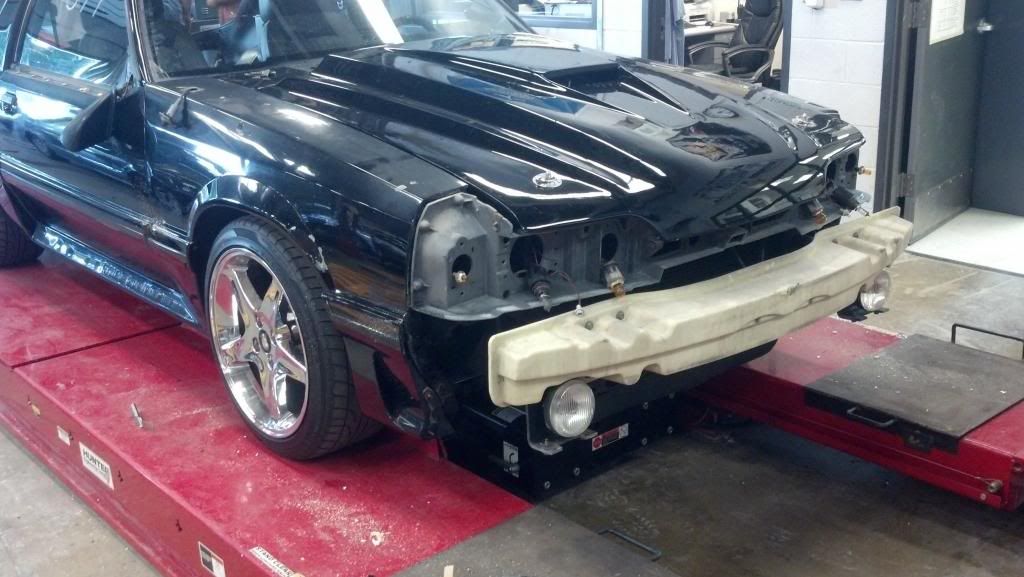
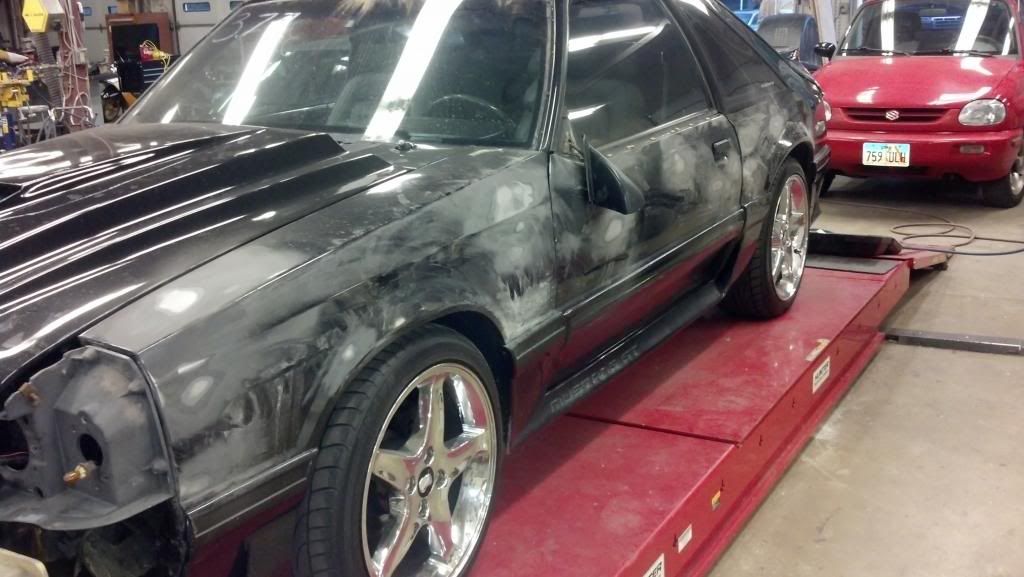
I started by removing the front and rear bumpers, lights and all the trimming. Then started sanding. For the most part the car was pretty straight, a few spots I had to fill.
IMG_20130905_182321_769_zps28db5420.jpg


IMG_20130905_182353_100_zpsf11e19b2.jpg


IMG_20130905_195400_503_zpsc9bf5c23.jpg


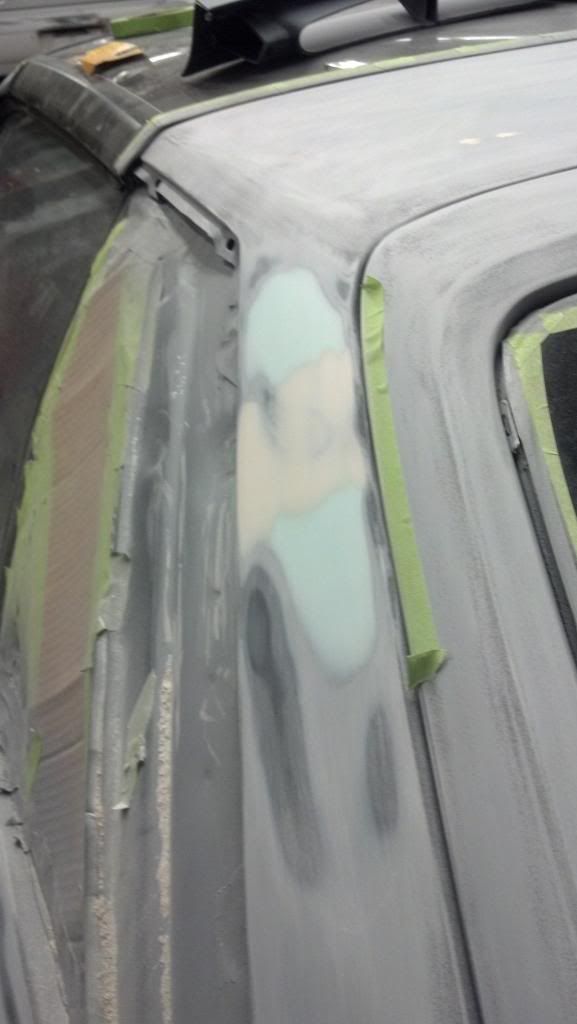
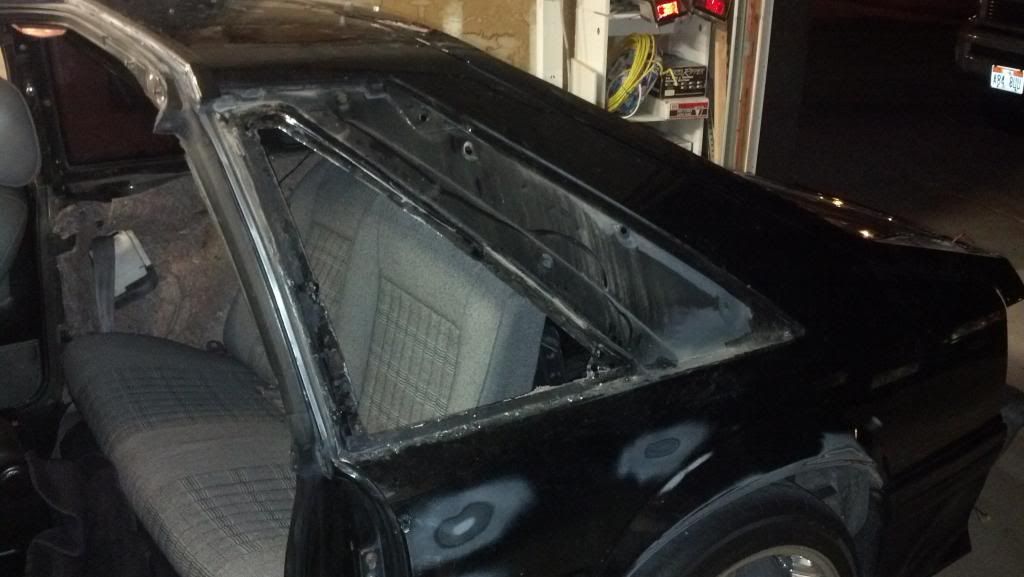
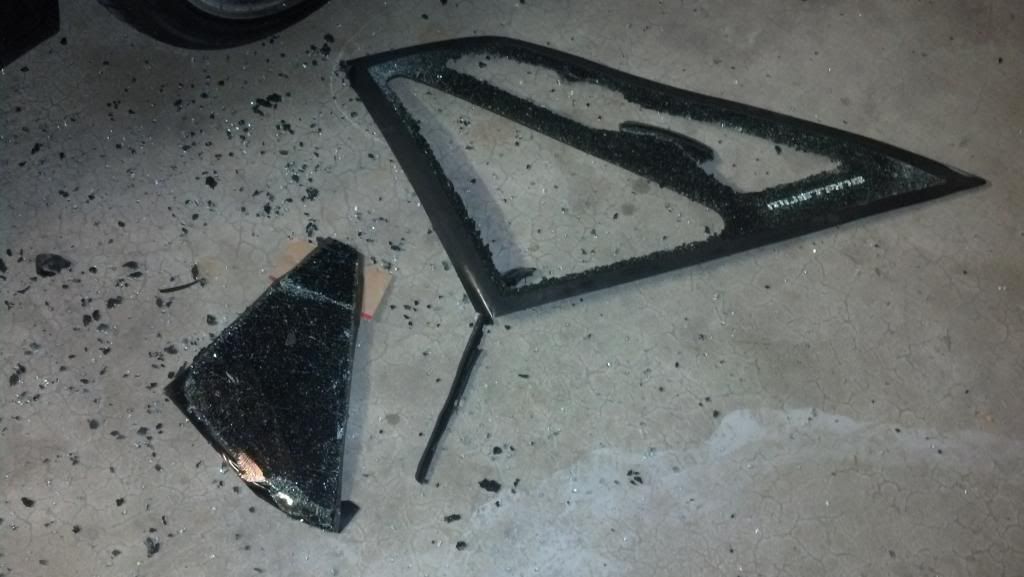
Had my share of ups and downs along the way. I removed the rear quarter windows so that I could redo the trimming around them. But it didn't go too well. The trimming is attached to the window itself and cannot be replaced.

IMG_20130909_214407_764_zpsa9bdc471.jpg


IMG_20130909_214419_934_zps5fe1710a.jpg


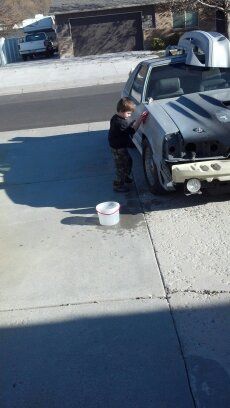
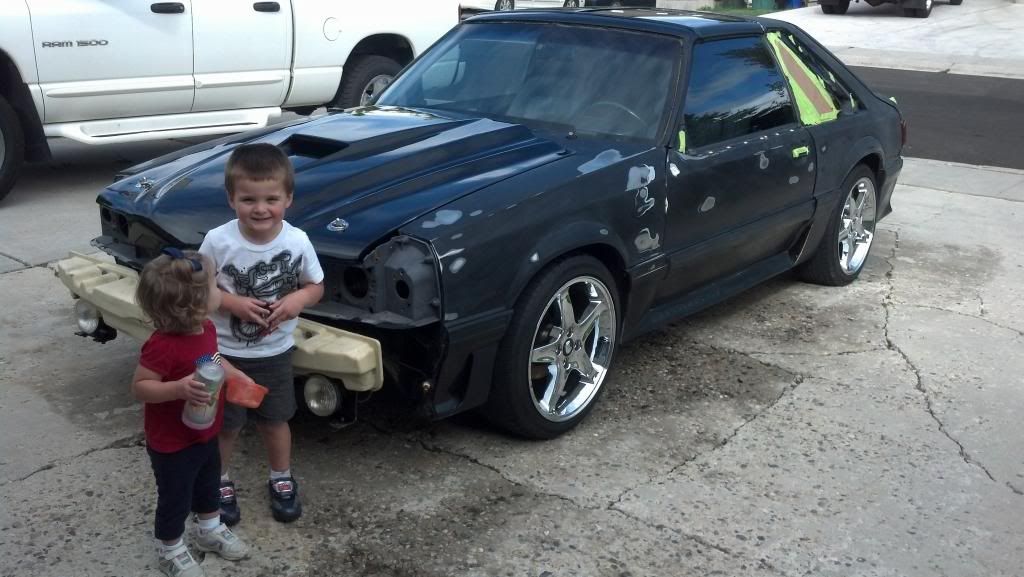
Getting it washed up and ready for primer, had my wonderful "helpers" helping me out. lol

IMG_20130914_164434_965_zpsbe4e8850.jpg


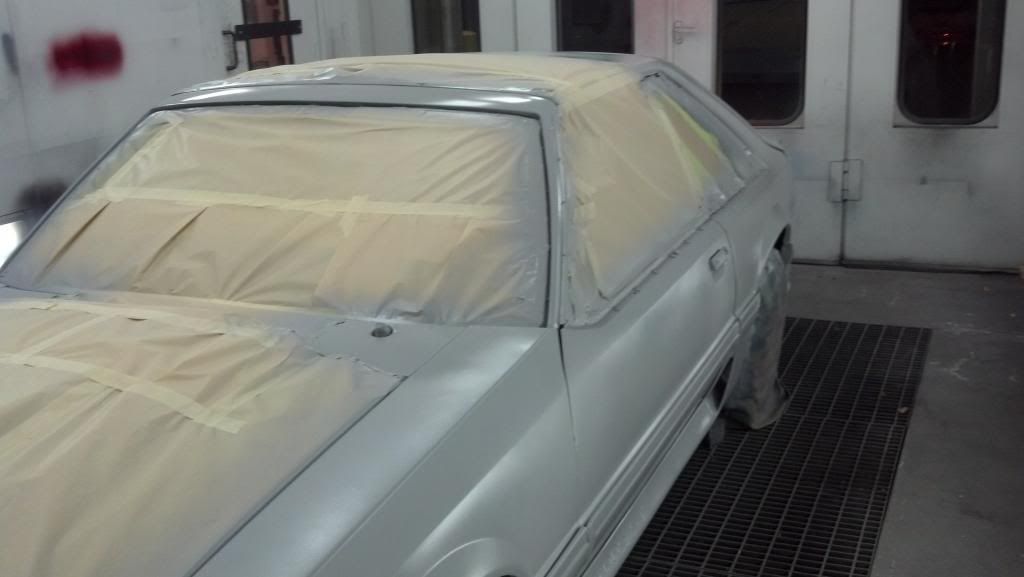
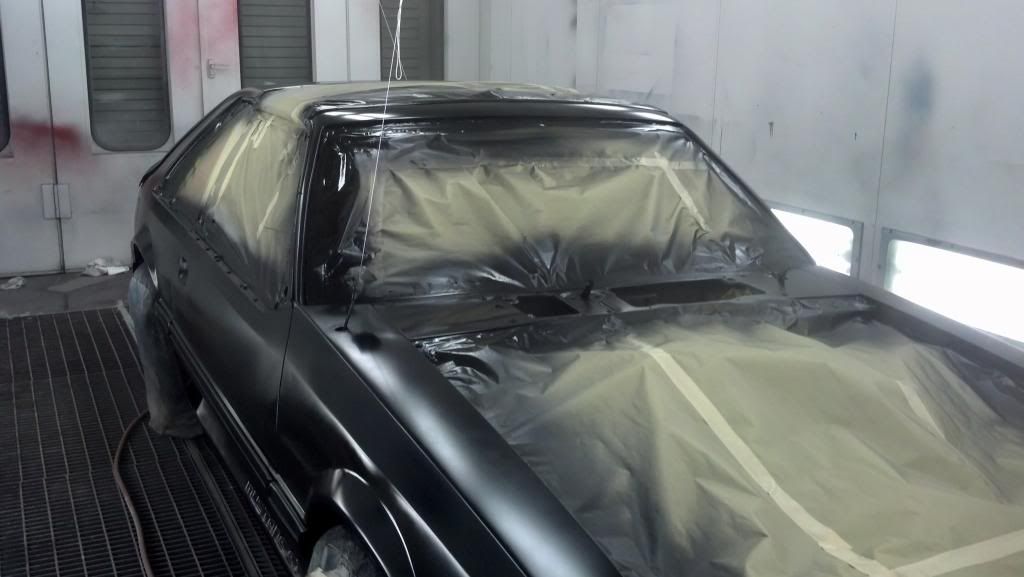
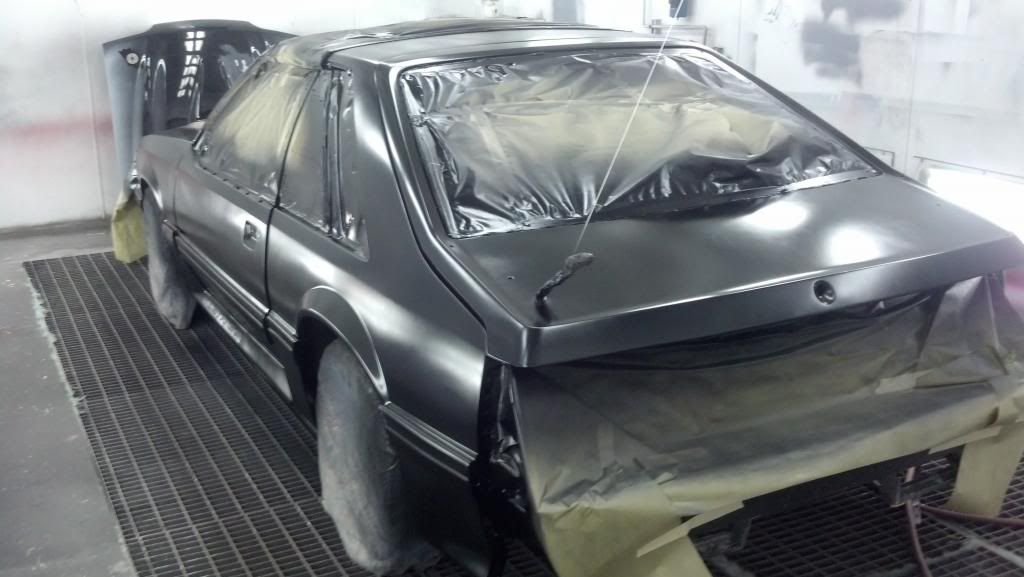
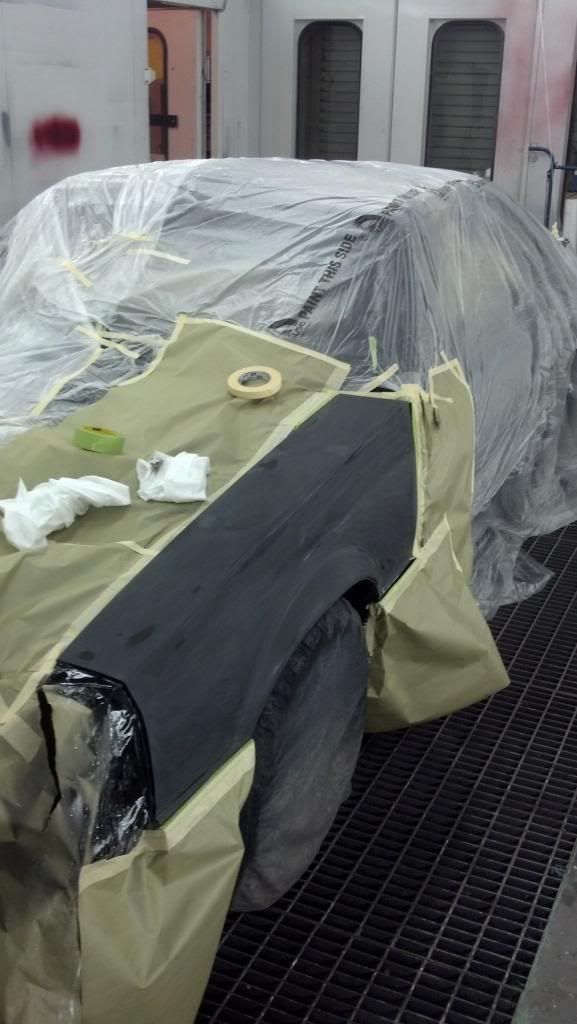
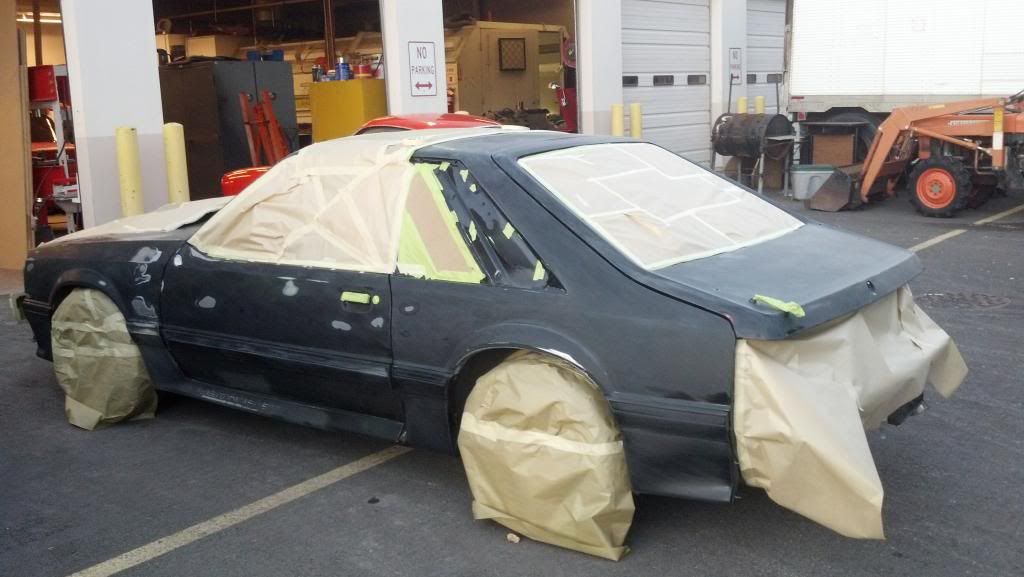
All masked off and ready for first coat of primer.

IMG_20130919_192544_885_zps4820f9a3.jpg
 
It is looking great its fun to have a car project once in a while and even though it seems like forever when its done you will reminisce kinda wishing for those times..good luck on your project
 
It is looking great its fun to have a car project once in a while and even though it seems like forever when its done you will reminisce kinda wishing for those times..good luck on your project

Thanks, I try to keep reminding myself that I really do love this stuff. The "time" has been the hardest part about this project. I've spent many late nights out in the garage after the kids go to bed. Just turn on some tunes and go to work.
 
I did 3 coats of primer with a guide coat each time. Each time being wet sanded and working down those high and low spots.

IMG_20130920_183153_816_zps54fdbd7e.jpg


IMG_20130926_195058_051_zps2f8d2da9.jpg


IMG_20140127_190150_834_zps59b97c1a.jpg


Got a new front and rear bumper as well.

IMG_20130926_211318_995_zpsd0b81f78.jpg


Here's the spoiler and the Cobra front bumper insert.

IMG_20130926_211336_661_zpsc7793808.jpg
 
Had a few spots to fill but nothing major. Only had one spot on the passenger door that had some rust. I also used two different colors of hardener in my filler so that if I had to go over the same spot twice I could see my progress better.

IMG_20130927_214128_038_zps50a1fc22.jpg


IMG_20131003_201351_674_zpsacd0d5cc.jpg


IMG_20131003_201331_252_zps46f381ee.jpg


With 3 coats of primer I had hours and hours of wet sanding. Had some help of course. Is this child labor? ha ha. I wish I would've kept track of my hours through the hole project. I bet I've got easily over 100 hours of just sanding.

1385844785084_zps910bb968.jpg


Getting everything all washed up and ready for paint.

1390675127499_zps78fd5bc9.jpg
 
Cant wait to see the final product!
 
Paint day!! We put on two coats of color and 3 coats of clear. I ended up removing all my door handles, key locks and every piece of trim that I could. I wasn't going to at first but I'm glad I did.

IMG_20140127_201533_815_zps851b2b95.jpg


IMG_20140127_202711_775_zpsf78977e7.jpg


IMG_20140127_210457_104_zpsc50a515b.jpg


We had some issues with this front fender. On the second coat of clear, some condensation drops somehow dribbled out of the air hose connection onto the paint. We let it dry and I tried sanding them out but they went too deep. I ended up having to sand down the fender again and re-spray.

IMG_20140203_184550_956_zps0419600e.jpg


IMG_20140203_210035_362_zps09e76a8f.jpg
 
I also ended up getting a new hood. Its the same as the one that I had but my old one was pretty beat up. It had some major spider web cracks in the fiberglass. I did some test sanding spots on the cracks but they were too deep in the fiber glass to really be able to fix. This was an expense that I wasn't looking forward too as the hood cost 500 bones. O well. Love this hood though.

P1301230_zps9161d5c2.jpg


IMG_20140304_195516_298_zpsbd4160da.jpg


Heres the new front bumper all painted and ready for install.

IMG_20140215_142305_548_zpsf84c8553.jpg


And the new rear bumper after install

IMG_20140215_142325_675_zps6ccba574.jpg
 
I am constantly trying to get people to believe me when I say that it is not the brand of paint that makes a paint job. It's all in the preparation.

I think I will just send a link to this thread in the future.

First rate job you are in the middle of :dblthumb2:
 
Very nice work. Need more pics!

Thanks, There's tons more. I've kinda been rushing through these so that I can get caught up and get to the good ones, the detailing ones.

I am constantly trying to get people to believe me when I say that it is not the brand of paint that makes a paint job. It's all in the preparation.

I think I will just send a link to this thread in the future.

First rate job you are in the middle of :dblthumb2:

Thanks that really is nice to hear, kinda makes it all worth it. The one frustrating thing now, is I wish I would've known back then what I know now. There are a ton of things that I would've done different that I think would've made it turn out even better. But owell, Hind sight is 20/20. Thanks for the comment though.
 
What are those things that you wish you had known? Help us not to make the same mistakes!

This is coming along great, I can't wait to see the final product.
 
What motor and mods are you running in it? Looks awesome man. Very cool project and when its done it will be a super proud moment. You can then sit in the garage, have a cold one or a few, and just look at it! Right after you burn the first set of tires off of it
 
What are those things that you wish you had known? Help us not to make the same mistakes!

This is coming along great, I can't wait to see the final product.

Keep in mind I did this in a class I took so I was at the instructors mercy for everything. I didn't know any better at the time.

The biggest thing I wish I would've done different is sand my last coat of primer with a finer grit sand paper. My final sanding was wet sand with 400 grit (per the instructors instructions). Now that my paint is crystal clear every once in a while in the right light I can see through the paint and see some light sanding marks. I told my instructor a million times that I was willing to do whatever it took to make everything turn out awesome, even if it was something small and tedious. But his response to this was "oh it'll turn out fine"

The other thing I wish I would've known is to take care of any fish eyes right away during the spraying process. There were about 4 or 5 on the hole car. I noticed them and pointed them out to the instructor but he didn't seem to concerned. His response was "oh it'll buff out". That was his response to everything. HA, well I know now that not everything "buffs" out.

The other main thing is I wish I had more of a knowledge of what orange peel was and how to deal with it. Wet sanding is so much more easy to do when the clear coat is still soft. If I could've attacked it in those first couple days it would've been easier to get rid off.

And of course more knowledge of how to use a rotary buffer, DA polisher, what the difference was between a compound and a polish, and yada yada yada. But hey, thats why I did all this, to learn for myself and gain experience. I have learned more about painting, sanding, buffing and body work in these past 8 months than I ever could've from reading books or watching videos. Not saying I didn't watch 1000 hrs of youtube videos and everyone of mikes videos on here, but it wasn't until I got out and tried it for myself that I really got it.
 
What motor and mods are you running in it? Looks awesome man. Very cool project and when its done it will be a super proud moment. You can then sit in the garage, have a cold one or a few, and just look at it! Right after you burn the first set of tires off of it

Thanks man, and speaking of burning tires....ha ha

carstensphone386_zps6114eea7.jpg


As far as the motor mods: Heads, cam, full intake and exhaust, Mass air conversion, upgrade fuel system with 40 lb injectors and a few other goodies. But the main thing is just last winter I slapped on a Vortech supercharger. It's rad. Gained over 200 HP with it.

This was during the install, for some reason I don't have a pic of it all finished up. I'll have to get one.

P1261070_zps878d7b74.jpg
 
Very cool! Any suspension mods? I know those cars have trouble hooking up stock. If you can get that to hook it will break your neck! What tranny are you running?
 
Very cool! Any suspension mods? I know those cars have trouble hooking up stock. If you can get that to hook it will break your neck! What tranny are you running?

I just recently put on some eibach lowering springs and also swapped out the shocks and struts. The shocks and struts aren't anything special though. I'd love to get some coil covers and adjustable control arms but the funds are a little low right now. I did modify the suspension a little to allow me to fit a fatter tire, now I just gotta wait till my current ones are toast.

I've also got the 3:73 gears in there which were perfect before. Now they're a little too steep with boost. I've got some 3:55 ready to go in, just gotta find the time. My first and second gear are pointless right now but 3rd gear is a blast.

Stock tranny and rear end. With this power i know its just a matter of time.

You must know a lot about these cars....at least you know all the right questions to ask lol.
 
After getting the bumpers back on, it was at this stage in the project that I really didn't know what to do. The class I took was over so I didn't have anyone to guide me. I also wasn't to happy with the way the paint turned out, meaning it had a ton of orange peel in it. I new I couldn't live with it but didn't really know what to do about it. So, I began researching like crazy. I woke up really early one saturday morning and couldn't go back to sleep because I couldn't stop thinking about it. That's when I got up (4 am) and began searching the internet for solutions to this orange peel crap. And that's when I stumbled upon the Auto Geek forum. I signed up that day and it has been a HUGE help. My car wouldn't have turned out half as good if it wasn't for all of your help and knowledge. Thank you all. Anyways, here's some pics of the orange peel and the beginning of sanding my life away....again. Did a 3 stage sanding on it, 1500, 2000, 3000.

It's really hard to capture the orange peel in a pic but you can kind of see it around the reflection of the window. The lines are all distorted.

1394931400663_zpsacbaee4f.jpg


This was the very beginning stages of sanding. But you can see what I was dealing with.

IMG_20140315_214844_758_zps3d9e6a4a.jpg


IMG_20140315_185755_789_zpsfe66705f.jpg


This was my first time ever sanding clear coat. Like the rest of this project I just had to kind of learn as I went. I stayed away from the edges and body lines pretty well. But it wasn't until the buffing stage that I really learned in more detail where and where not to sand.
 
Back
Top