Newb, First time with PC

techdad

New member
Joined
Dec 8, 2015
Messages
5
Reaction score
0
So with all the recent deals, I just picked up a PC with 6" pads, MF bonnets, AutoScrub 6", HD Poxy to just name a few. I just wanted to do a nicer job on my daily driver, which is a '15 Altima, Super Black. Since we've had so much warm weather, I wanted to give all the goodies a try. So, I started off using a rinse less wash from megs, did the baggie test, was shocked at how rough it was, pulled out the autoscrub. That went pretty well. My first question is, the autoscrub after washing is now EXTREMELY sticky. Did I not use enough shock when using it, or is that normal?

I had a nasty scratch that I was able to get out with some Meg's scratch x 2.0 and ultimate polish, or at least made it less obvious, which was my goal for today.

Then on the HD Poxy. Directions said to put 6 pea size dots on the pad (used a red one that came free with the PC kit I bought). I was having a REALLY hard time getting the pad to spin. I was on speed 2. I had to lift up on the PC to get it spin for most of the time. Again, is that normal? Second of all. I used about 8 oz of Poxy, and when I cleaned out the pad it seemed to NEVER stop coming out. Did I use too much? For each section, I did the 6 pea sized dots.

I let it sit for about 45 min, did the swipe test, looked to be ready for removal. I put on the MF bonnet over the sheepskin pad, put the PC on speed 5, and again, I had a really hard time to keep the pad spinning. I eventually just finished off with a MF towel that also came in the kit for removal. To get to it spin, again, I had to lift the PC so not all of it's weight was on there. Since I'm new I feel I'm doing something wrong. I've watched the videos several times, but I feel I'm missing something.

Any thoughts?

Overall I think the end result was pretty good, sorry no pics, but it's no where near as impressive as others work that I've seen on here.
 
The PC is very under-powered and is not designed to do lots of correction. It works best on flat surfaces at higher speeds like 5. It might take some manipulation to get it to spin of curves. It will stop and not rotate because it is a safety feature so people won't burn paint on corners and curved surfaces.

If you want to get heavy damage out I wold suggest using a more appropriate machine or taking it to a professional and you could do the finishing work yourself?

Hope this helps. -Andrew
 
You just need to work on your technique. The PC is more than capable of doing full paint corrections. You just have to take your time and practice. As for 8 ozs. of HD Poxy, yes that was way way way too much. But that's okay, you're just starting out. You should be able to do an average size vehicle with about an ounce or so of Poxy. Keep in mind as you add more while you're doing the job the pad becomes saturated.

As for removal, ditch the bonnet approach, the best way to remove polishes and LSP's is with quality micro fiber towels. Product builds up when removing so with mf towels you flip to clean parts of the towel. Keep practicing and you'll get it in no time. Maybe pick up some HD Speed and practice your polishing with that. It's a very user friendly All in One and can be topped with Poxy. With all HD products less is better, a little goes along way.
 
Since the PC is underpowered you will get the best performance from it by installing a 5" backing plate and using 5.5" low profile pads like the new Megs Thin pads or the new LC ThinPro pads.

Great info from custmsprty--an oz or less of POXY, it spreads really well and Speed is a smart polish to start with--you can proceed without getting into much trouble and it has a fair amount of cut with something like an orange pad or Megs maroon pad and use speed 5 or 6 on the PC.

If you give Speed a try remember "less is more" with HD products--prime the pad with 5-6 pea sized drops on the outer edge of the pad then 2-3 for each additional section.
 
8oz is way too much product.

Speed 2 with 6" pads on a pc is too low to get any type of correction done. It's a capable machine, even with 6" pads, but good technique needs to be used. I agree with the others here about switching to a 5" system for best possible results. I actually prefer the pc over machines like the flex 3401 and duetto for cutting and polishing.

When correcting, I like to have at least four pads available. I wouldn't try to polish a car with one pad.
 
My first question is, the autoscrub after washing is now EXTREMELY sticky. Did I not use enough shock when using it, or is that normal?
The 6" Autoscrub is a great product. It sometimes feels lightly sticky to the touch when wet, but it should never feel sticky when on the paint. It should glide very effortlessly. If it is bogging down, then you aren't using enough lube and could potentially introduce some marring to the paint. Really easy to fix this. Just use a very generous amount of lube. The more, the better. I go through quite a lot on one vehicle with with my Autoscrub. If you're worried about cost or anything, just pick up some ONR and dilute it to clay lube form. It's a great clay lube for the price.
 
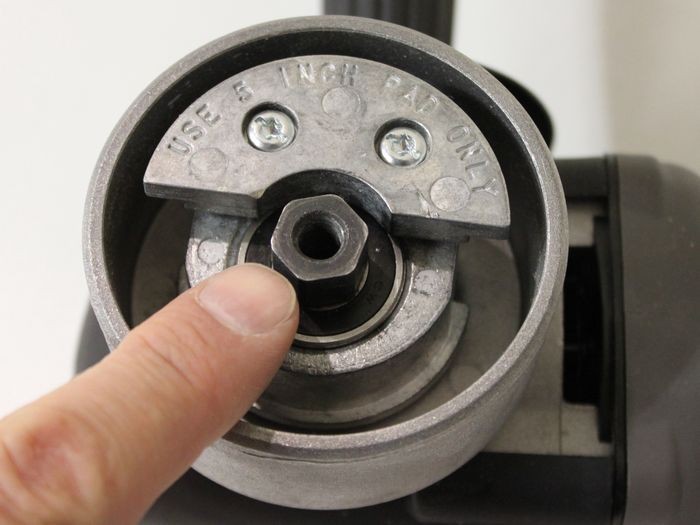
Don't forget to make sure your spacer is installed on your backing plate. I have watched my spacer fall off easily and fortunately saw it as it was falling off. Without the spacer it will not perform properly.
 
I wasn't doing any correction. I just used speed 2 for Autoscrub nanosecond and spreading the Poxy. Speed 5 with the bonnet for removal. I'll double check the spacer. How tight should the backing plate be attached to the PC? I did just past finger tight and it free wheels when I spin by hand (which I thought was correct)

Thanks guys!!!
 
Also the scratch I removed by hand with a white ccs pad that looks like a sponge. That turned out satisfactory for now. My initial goal was to make it less noticeable which I accomplished. I didn't want to go too far with my first time out etc.
 
The PC is very under-powered and is not designed to do lots of correction.

I was working as a Trainer for Meguiars when the Porter Cable was introduced from the wood sanding world to the paint polishing world.

Since that time I would guess millions of cars have been completely corrected and de-swirled using it and I know I've done a few myself.

Actually taught hundreds of classes on how to use the PC over the years when besides the rotary buffer and the Cyclo, that's all we had. The Flex 3401 and RUPES polishers had not been invented yet. In fact, had a LOT of car guys from the various car clubs in San Diego come to my classes at Meguiar's in Irvine to learn how to use the PC from 2002 to 2009. That's 7 years of teaching people how to use the Porter Cable to remove swirls and scratches for a show car shine.


It works best on flat surfaces at higher speeds like 5. It might take some manipulation to get it to spin of curves. It will stop and not rotate because it is a safety feature so people won't burn paint on corners and curved surfaces.

Yep... that sounds about right. I think I've written the above a few times somewhere too...


If you want to get heavy damage out I wold suggest using a more appropriate machine or taking it to a professional and you could do the finishing work yourself?

Hope this helps. -Andrew

That's good advice for some people but this brand new to machine polishing forum member sounds like he wants to learn how to do it himself and he's in the right place, (AGO), and with a little help and some tweaking of his technique he can make the Porter Cable do everything he needs to get done.


:)
 
Don't forget to make sure your spacer is installed on your backing plate. I have watched my spacer fall off easily and fortunately saw it as it was falling off. Without the spacer it will not perform properly.


You're right. If a person attaches a backing plate without the compression washer it will make a lot of noise, the rotating assembly will bind up and if you do somehow run it without noticing the excess noise it will generate a lot of heat and probably destroy your backing plate.

Here's an article with some pictures to show what we're talking about.


Don't use your polisher without it!


That is... the Compression Washer
5inchbackingpatesonDAPs013.jpg


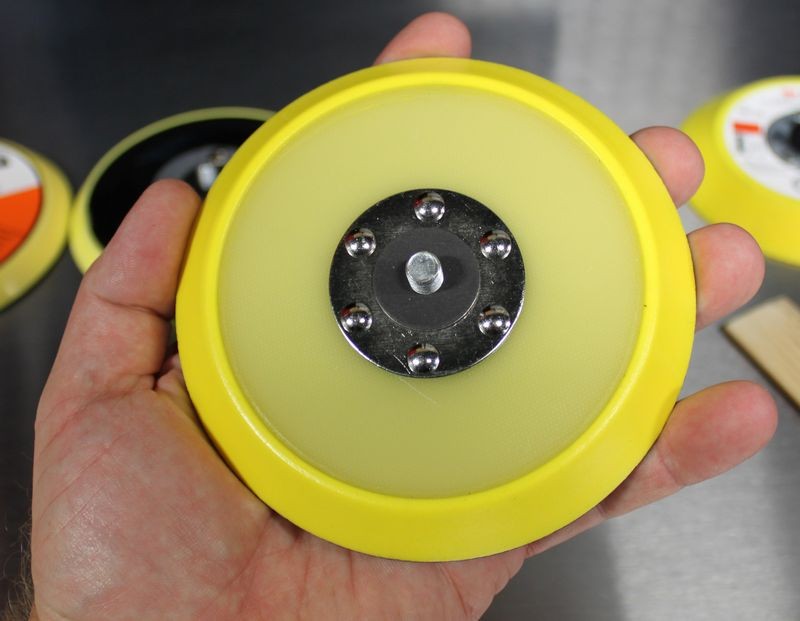
If you don't use a compression washer, the rivets on the backing plate attachment base will come into contact with the counterweight assembly on your DA Polisher.

Damage caused by not using the Compression Washer
DamagedCounterweight01.jpg


Damaged and Gouged Metal
The rivets have gouged the metal because the compression washer was left off. Not only does it gouge the metal it will usually make a horrible noise and that should be your first clue to turn the polisher off and inspect for issues.
DamagedCounterweight02.jpg


Treat the compression washer like GOLD. Don't lose it.


Keep the little rubber nut to lock it into place when not using that backing plate. It's probably more likely you'll own more backing plates into the future than less likely.

The Rubber Nut - Keeps the Compression Washer from getting lost and protects the threads when the backing plate is not in use.
5inchbackingpatesonDAPs012.jpg


I have scads of backing plates in drawer in the studio and it's nice reaching for a backing plate and having the spacer washer intact with the backing plate.


The Purpose of the Compression Washer

The compression washer performs multiple functions,


Crushable Interface
The compression washer provides a crushable or malleable interface between two pieces of metal that are going to see a lot of pressure from being tightened together with a wrench and my guess is a lot of punishment from the operator. I punish all my tools... so it's not a reach to think others are going to punish their's too. Add to the above mix, the violent oscillating action of the tool on the highest speed setting and add to that t-i-m-e...

By time, I mean putting your polisher to work buffing out a car section-by-section, panel-after-panel. As Pros know and anyone that wants to get the job in a decent amount of time, when you start buffing out a car you have to keep the tool running and buffing on paint. There's no breaks. That's time of endured punishment.

Point being is you want and need the crushable interface between two pieces of metal on an electric tool capable of running at high OPM's.


Spacer
They also act as an actual spacer between the arbor or stud seat where there are the raised heads of a type of rivet or brad that anchors the arbor base to the the backing plate and the threaded portion of the Free Rotating Spindle Bearing Assembly.


Free Rotating Spindle Bearing Assembly
FreeRotatingSpingleAssembley004.jpg


Here you can see a compression washer seated at the base or seat of the 5/16" arbor or stud where it's attached into the backing plate surrounded by the raised heads of the rivets or attachment anchors.
5_0BackingPlates06.jpg


So keep track of both the compression washer and the rubber nut and don't use your DA Polisher, be it a Porter Cable, Meguiar's or Griot's without it.


Compression washers do wear out with use, that is if you remove and replace backing plates often you're going to wear your compression washer out.


Autogeek carries replacements...

Lake Country Compression Washers 5-Pack


:)
 
So with all the recent deals, I just picked up a PC with 6" pads, MF bonnets, AutoScrub 6",

Are the 6" pads THIN pads or thick pads?

Makes a huge difference when it comes to making the Porter Cable work effectivley.

Years ago I coined a term,

Thin is in

It means thin pads rotate better than thick pads on tools like the PC and it's ONLY when the pad is rotating that you can remove paint and the way you remove belwo surface defects like swirls and scratches is by removing a little paint.

No pad rotation. No defect removal.

I wrote this in 2010 when the new thin Hydro-Tech pads were introduced...

Thin is in...

NewHydroTech02.jpg


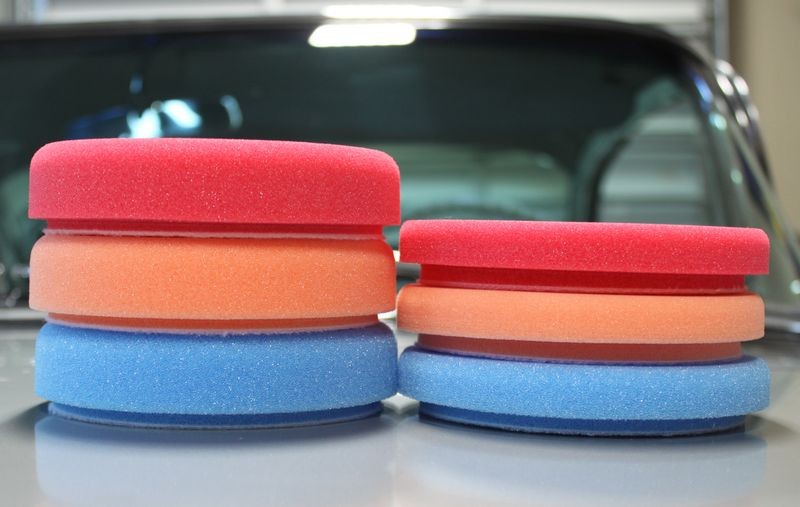
Now you have the choice of either ThinPro pads by Lake Country or Meguiar's thin foam discs. The ThinPro foam pads are available in 5.5 and 6.5" diameters and both rotate well on the PC but the smaller 5.5" pads fit the body panesl of newer cars better hant large pads.

See pictures of them in this thread,


Lake Country ThinPro Foam Buffing Pads exclusively at Autogeek


Thin_Pro_pads_001.jpg


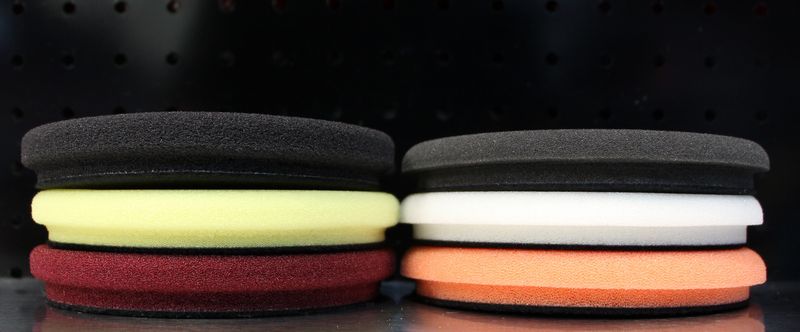
Thin pads do rotate better than thicker pads but even the simple, 5.5" Lake Country flat pads at 3/4" thin are actually very good pads with a little more cushion than the ultra thin pads and thus to me a safer choice for anyone new to machine polishing.


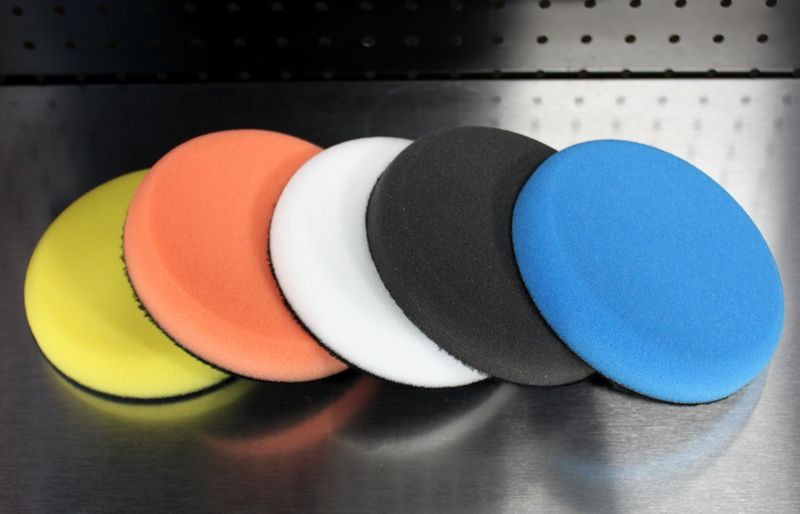
Lake Country

5.5" Flat Pads

In order from the most to the least aggressive

Yellow = Cutting pad (most aggressive)
Orange = Light Cutting Pad
White = Polishing Pad
Black = Finishing Pad
Blue = Waxing Pad (softest)

5_5FlatPads01.jpg


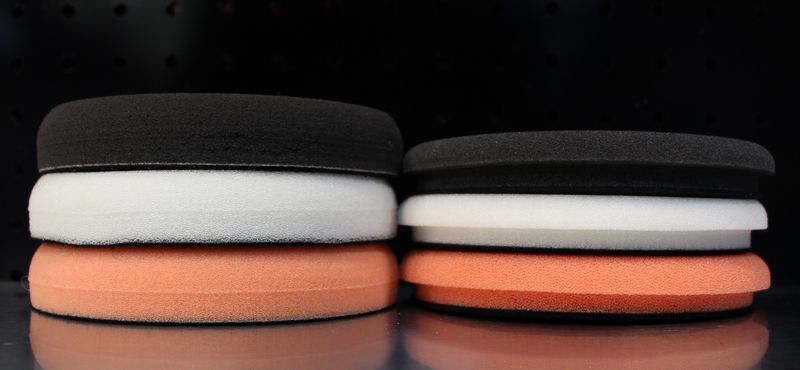
Lake Country 5.5" foam flat pads on the left and Lake Country ThinPro foam pads on the right. It use to be all foam pads were about 1 1/2" thick! So in comparrison, even the pads on the left are considered THIN.

Thin_Pro_pads_002.jpg


did the baggie test, was shocked at how rough it was,

A very enlightening test.

The Baggie Test - How to inspect for above surface bonded contaminants


I've shown this test on "My Classic Car" with Dennis Gage for years now. I can only imagine how many guys after watching an episode went out into their garage and did the Baggie Test on their toy/project.


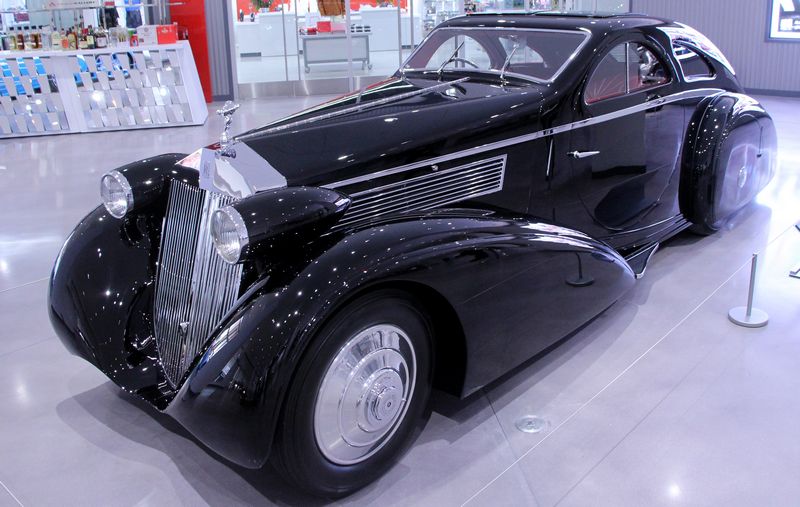
A.J. shows it on our new TV show on Kyle Tucker's 1970 Chevelle and on the 1925 Rolls Royce Round Door car.

The Round Door Rolls - Competition Ready TV on Velocity Channel

1925_Rolls_Royce_Round_Door_012.jpg


pulled out the autoscrub. That went pretty well. My first question is, the autoscrub after washing is now EXTREMELY sticky. Did I not use enough shock when using it, or is that normal?

That's normal from my experience. I have about 20 of the Autoscrub pads, mitts and towels in the Show Car Garage for my classes and they are all sticky.

Just find a way to keep them clean and dry when not in use and when in use use plenty of lube.


I had a nasty scratch that I was able to get out with some Meg's scratch x 2.0 and ultimate polish, or at least made it less obvious, which was my goal for today.

Success! Congrats. :xyxthumbs:


Then on the HD Poxy. Directions said to put 6 pea size dots on the pad (used a red one that came free with the PC kit I bought). I was having a REALLY hard time getting the pad to spin. I was on speed 2.

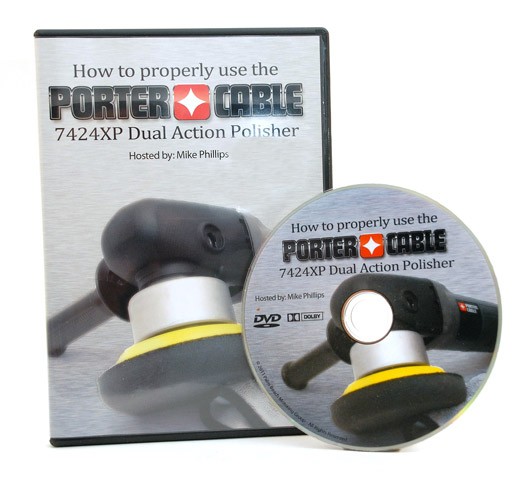
You need to be on speed 6. I cover this in my how-to book, on this forum and in this DVD. This DVD will show you everything you need to know to become an expert with the Porter Cable. The next best thing is to take my class.


How to Properly Use the Porter Cable 7424XP Dual Action Polisher Updated!
PorterCableDVD.jpg


I let it sit for about 45 min, did the swipe test, looked to be ready for removal. I put on the MF bonnet over the sheepskin pad, put the PC on speed 5, and again, I had a really hard time to keep the pad spinning. I eventually just finished off with a MF towel that also came in the kit for removal. To get to it spin, again, I had to lift the PC so not all of it's weight was on there. Since I'm new I feel I'm doing something wrong. I've watched the videos several times, but I feel I'm missing something.

Yes. You need to be on speed 6 with the Porter Cable. Also, when using a bonnet to remove wax two things,

1. The layer of wax must be THIN.

2. The layer of wax MUST be DRY.
Missing out on either or both of the above and you won't be able to remove the wax with a bonnet on a foam pad on a PC and again... the pad must be thin and dry to use a bonnet. I've probably been teaching people how to use a PC as long and in most cases longer than anyone breathing today including how to use a bonnet to remove dired wax.


Any thoughts?


Be sure to read this thread,

Video: Mark your backing plate to make it easy to see pad rotation


Then, just keep reading this forum, asking questions and practicing. I normally don't recomend people to practing on cars that are important to them, especially black cars. At least until you get some time behind the tool.

:xyxthumbs:
 
This is actually a very in-depth resource for using the PC and pretty much doing every procedure there is for exterior car detailing.

If you read it from cover to cover you'll know more than most detailers that don't hang out on a forum like this.

The Complete Guide to a Show Car Shine!

[video=youtube_share;Z34ApdBPH1g"]Detailing How To Book[/video]


:xyxthumbs:
 
Thanks for the feedback! I really appreciate it. I double checked, and the washer is on the backing plate. All my pads are the CCS Lake Country pads, I bought the PC with the kit on AGO that includes 5, then bought 6 more of the same different colors. The red pad I used is the ones that came as a free gift that also included your book, so I'll be looking thru that as well. So the red pads are 5.5, not sure what brand or anything, just that it came with the package. Sounds like most of my issues come from using low speed (thought I saw on a video that you use a low speed for applying wax) and technique.

Re: starting on a black car.... Yeah, def hear that. It's my daily driver, and wasn't my first choice in color, but the price was right. Paint is in good shape, and I just want it kept looking decent. Went with the PC as a step up from doing by hand and felt it will keep me rather safe from causing too much damage, etc....
 
Hi Techdad...sorry I am late to the thread. I have the PC7424 XP and I still use it. I just read where you used Speed setting 2. My suggestion is bump up the Speed setting to 5. Additionally, the Backing Plate should have a black mark on the BP so you can gauge to see if your BP is spinning.
cstmsprty is correct...you need to improve your technique. IMO I do not think you need to buy another DA until you master the PC which is very doable.

I would also suggest getting Mike Phillips book on the "Art of Detailing" or his newer book Show Car Detailing.

This alone will give you tremendous insight on how to get better at what you do.

I still will glance through a couple of sections just to make sure I am still "in-tune" with my technique.

Additionally, always assume you need to know more and never get "comfortable" with your technique...still become that sponge for knowledge....

Happy New Year and I hope I helped...I know that when Mike Phillip responds...that is a good thing.
 
AMEN to everything Mike said.

BOO to the PC7424XP bashers! That is a fine tool, that can do almost everything a detailer needs including correcting paint.
 
It's all good. I'm not looking to make this business, just do better on my cars and make it easier to maintain. Definitely appreciate everyone's input. Hoping to be able to exchange my CCS 6" pads for thinner.
 
Yeah, the PCXP is a great machine that is more than capable of correcting. Yes, other machines can do better, but it's still a capable machine. I use mine exclusively with 3" pads now in tight spaces.
 
AMEN to everything Mike said.

BOO to the PC7424XP bashers! That is a fine tool, that can do almost everything a detailer needs including correcting paint.

Absolutely on both counts!

I try and refrain from answering questions posted to this section, but (especially when on the app) forget to check the sub foum....

And yes, my pc has been a reliable, solid machine. I have one more on the way, and another here locally someone is selling that I may pick up too. I'll end up with four of them... Two for my "shop", and two for the road.
 
Back
Top