Newbie First Time Detailing Question

bluevanken

New member
Joined
Jul 22, 2010
Messages
7
Reaction score
0
Hello everyone. This is my first time detailing and I was wondering if I could get some advice concerning the type of polish and pad to use. I just recently purchased the Porter Cable 7424XP with some of the Lake Country 6.5" CCS pads. I have a dark blue 2002 Honda Civic EX and the paint is in great shape but is looking a little dull with some very minor swirling probably caused from the washing and drying over the years. I am thinking of using the Pinnacle combination of Advanced Swirl Remover along with the Advanced Finishing Polish.

Should I start out with using the Advanced Finishing Polish only along with a white pad since the Finishing Polish does contain abrasives? Then if needed, use the Advanced Swirl Remover with a white pad to remove only certain areas?I don't want to start out with something too harsh that may damage the paint. I am looking to polish the whole car.

Also, the Honda Civic also has plastic body work around the front and back of the car. Is it ok to use the PC 7424XP to polish and wax these areas since it is plastic? Should I only use the PC on metal only? There is also some plastic trim that goes around the sides of the car that has the same paint as the rest of the car...can I use the PC on this trim as well?

Thank you in advance for any advice you may have.
 
Last edited:
Hello everyone. This is my first time detailing and I was wondering if I could get some advice concerning the type of polish and pad to use.

Welcome to AutoGeek!

I have a dark blue 2002 Honda Civic EX and the paint is in great shape but is looking a little dull with some very minor swirling probably caused from the washing and drying over the years. I am thinking of using the Pinnacle combination of Advanced Swirl Remover along with the Advanced Finishing Polish.

2002? I would clay the car first for sure.

I would bet that the swirls are a little more serious then you think. Can you post a couple pictures? Also a couple pictures with the sun shining directly in the center of the picture if possible.

I have not used these polishes personally. Did you already purchase them?
If not the Wolfgang Swirl Remover 3.0 and Finishing Glaze are terrific for beginners.
If so, I am sure somebody will give you some tips soon.


Should I start out with using the Advanced Finishing Polish only along with a white pad since the Finishing Polish does contain abrasives? Then if needed, use the Advanced Swirl Remover with a white pad to remove only certain areas?I don't want to start out with something too harsh that may damage the paint. I am looking to polish the whole car.

Ok, I just looked up the advanced finishing polish and the swirl remover. I am betting you will need to get more aggressive then the white pad with a finishing polish but without seeing the paint its best to go with the least aggresive first. Go ahead and tape off an area on the hood and do a test spot with the lesser agressive combination. If it comes out how you want it repeat the process across the car. If it doesn't then do another test spot with a more aggressive combination. Repeat testing untill you find the right combo/process to get the paint how you want it. At that point duplicate that process across the entire vehicle.

Also, the Honda Civic also has plastic body work around the front and back of the car. Is it ok to use the PC 7424XP to polish and wax these areas since it is plastic? Should I only use the PC on metal only?

Just to be clear you are talking about plastic panels that have the same paint color and gloss as the rest of the car right? Under that assumption then yes you can polish those areas as well. Some cars are almost all plastic or fiberglass panels!

One thing I have read but not experienced is that when polishing plastic panels if the paint gets too hot you can twist the paint a little. I don't think this is going to happen anytime soon with your PC and some common sense. I use the Flex 3401 on plastic panels plenty and never have an issue. Just don't hold it in one spot and you'll be fine.

There is also some plastic trim that goes around the sides of the car that has the same paint as the rest of the car...can I use the PC on this trim as well? Thank you in advance for any advice you may have.

:Picture::Picture:

I hope I helped a little.
 
Oh, one more thing.... Don't worry! As long as you use common sense it would be pretty difficult to hurt your paint with your PC.
 
Great advice from Corey. There are some great videos here that show you the proper technique for a test spot. As Corey said, spend some time working out what combo of pad and polish work best for your car under your conditions. Don't make the mistake of rushing through the entire car to discover you are not getting the results you expect.

Make sure to clean your pads often, especially since you are running 6.5 inch pads. When the need arises for new pads, I would suggest 5.5 for your pc.

Good luck, have fun, welcome to AG and post pictures so folks can try and help you out

Jon, are you back from the reunion?
 
Thank you for everyone's great advice! That was a big help!
Attached are some pics of my car. I apologize for the detail as they were taken with a cell phone. Hopefully they will give you an idea of the condition.

Thanks again.
 
Also, I have not purchased any swirl remover or finishing polish yet. That Wolfgang Swirl Remover and Finishing Glaze 3.0 CEE DOG recommended looks like some really good stuff!

Yes, CEE DOG the plastic panels are the plastic panels that have the same paint color and gloss as the rest of the car. There is also a strip that runs down both sides of the care in the middle that also has the same paint color and gloss.

MCHESS, are there advantages to using the 5.5" CCS pads as opposed to the 6.5" CCS pads?

Thanks again.
 
Attached are a couple more pictures of the current condition of the car. It is hard to get a good detailed picture in this Florida sun! However, you can tell the paint consists of mostly the spider webbing type of swirls with no major scratches.

I am going to use the Wolfgang twins for polishing followed by the Wolfgang sealant. I plan to go through the following steps:

1) Wash
2) Clay (Pinnacle Ultra Clay)
3) Wash
4) Wolfgang Total Swirl Remover 3.0 with a white 5.5" Lake Country CCS pad. May need to use an orange pad depending on the results.
5) Wolfgang Finishing Glaze 3.0 with a white 5.5" Lake Country CCS pad.
6) Wolfgang Deep Gloss Paint Sealant with a red flat 5.5" pad. After sealant sets for 45 minutes I may use a microfiber bonnet or a microfiber towel to remove.

Since this is my first time, does this sound like a good approach? Should I skip using a white pad with the Swirl Remover and just go with the orange pad? Or, should I skip the Swirl Remover step altogether and just use the Finishing Glaze only with a white pad based on the condition of the paint?

Thank you in advance for any advice you may have.

I plan to take lots of high detail before and after pictures :xyxthumbs:
 
MCHESS, are there advantages to using the 5.5" CCS pads as opposed to the 6.5" CCS pads?

Thanks again.

Smaller diameter pads = less surface area and what this means is a DA Polisher can more easily keep the pad rotating under pressure and it's when the pad is rotating under pressure that swirls and scratches are removed.

The 7424XP can rotate a 6.5 pad, just be sure to keep the pad flat to the surface, don't tilt the polisher and put more pressure to the edge of a pad as this will slow the rotation down and can even stop the rotation.

I was in the Show Car Garage Studio testing products for the last two days during the day and part of the testing included using 6.5" pad and I had no problem keeping the pads rotating.

Just to note, to remove defects you want to be on the 5.0 to 6.0 speed setting with the 6.0 working best for correction work or polishing work.

If you're simply applying a finishing wax then you can bump the speed down to the 4.0 range.


Attached are a couple more pictures of the current condition of the car. It is hard to get a good detailed picture in this Florida sun!

Here's some tips... this article can be found by clicking the "Articles List" in my Signature Line and looking under the heading,

Photography and Working with Pictures on the Internet

How-To capture swirls, scratches, etchings and other surface defects with your camera


bluevanken;338429]
However, you can tell the paint consists of mostly the spider webbing type of swirls with no major scratches.

I am going to use the Wolfgang twins for polishing followed by the Wolfgang sealant. I plan to go through the following steps:

1) Wash
2) Clay (Pinnacle Ultra Clay)
3) Wash
4) Wolfgang Total Swirl Remover 3.0 with a white 5.5" Lake Country CCS pad. May need to use an orange pad depending on the results.
5) Wolfgang Finishing Glaze 3.0 with a white 5.5" Lake Country CCS pad.
6) Wolfgang Deep Gloss Paint Sealant with a red flat 5.5" pad. After sealant sets for 45 minutes I may use a microfiber bonnet or a microfiber towel to remove.

Since this is my first time, does this sound like a good approach?

[/quote]

Everything sounds good, do a "Test Spot" first and dial in a process that works to your expectations and then tackle the entire car or a portion of the car.

For an average size car, if you start your day by washing and drying the car, then claying and then the entire detailing process it will take you between 6 to 12 hours... (kind of depends on how fast you work, how many breaks you take, what level of perfection you're trying to achieve). 6 hours would pretty optimistic.... :D That's why some people will like to tackle just a portion of the car in a single detailing session, for example maybe the roof and front clip one weekend and then the doors, rear fenders and trunk lid the next weekend...


bluevanken;338429]
Should I skip using a white pad with the Swirl Remover and just go with the orange pad? Or, should I skip the Swirl Remover step altogether and just use the Finishing Glaze only with a white pad based on the condition of the paint?
[/quote]

Do a Test Spot, that is test out the least aggressive pads and products together with your technique, (Good technique is a HUGE factor no matter what pad or product you use), and make sure you can make a small area look GREAT! Once you dial in a process that works for one area then simply duplicate that over the rest of the car.
 
How To Remove Swirls, Scratches and Water Spots using a PC 7424XP, Meguiar's G110v2 or Griot's Garage 6" Random Orbital Polisher

Using a DA Polisher - Part 1
[video=youtube_share;zUHRnHsSXZU]- How to remove swirls, scratches and water spots using a Porter Cable DA Polisher[/video]

Using a DA Polisher - Part 2
[video=youtube_share;fxwlWijdIxM]- How to remove swirls, scratches and water spots using a Porter Cable DA Polisher[/video]

Using a DA Polisher - Part 3
[video=youtube_share;9objUFdpsG4]- How to remove swirls, scratches and water spots using a Porter Cable DA Polisher[/video]


Most Important...

Here's how to do a "Section Pass" when trying to remove swirls, scratches and other below surface paint defects.

How to do a Section Pass
[video=youtube_share;Q70g83mnTn4]- How to do a "Section Pass" with a Porter Cable 7424XP[/video]


The Definitive How-To Article for Removing Swirls, Scratches and Water Spots Using a Porter Cable 7424XP, G110v2 or Griot's Garage Polisher


:)
 
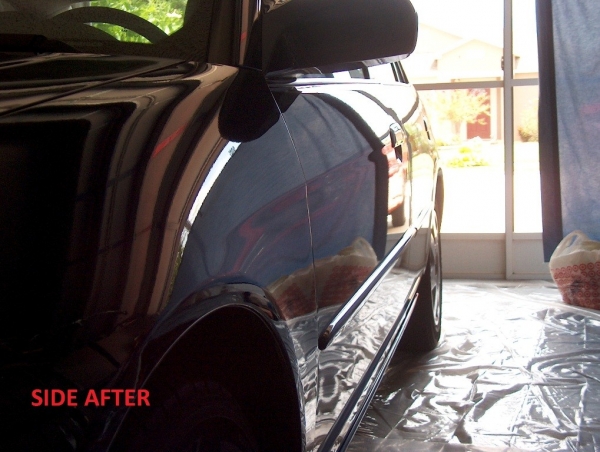
Ok, attached are the after pics! :dblthumb2:

I have to say, I am very happy with the results for my first time detailing! I will definitely be a Wolfgang and Pinnacle customer for life!

Here are the steps I did:

1) Wash
2) Clay using Pinnacle Ultra Clay with Pinnacle lubricant. First time claying so it was nice to feel how smooth it made the car's surface.
3) Wash to remove any leftover clay, etc.

Parked in Garage for the night. Began polishing the next morning. Taped areas and moldings I did not want polish to go on with blue painters tape.

4) Used an Orange 5.5" Lake Country CCS pad with Wolfgang's Total Swirl Remover 3.0 with a couple of squirts of Pinnacle's Foam Conditioner on the pad between each panel. The morning sun really revealed the swirls so I decided to go with the orange pad instead of starting with the white pad. Did the trunk, hood and passenger side of the car. Got a little bit of caking specks/dusting that I had to wipe off. I am thinking, being the first time, I may have just had too much product on the pad from re-applying causing the caking specks/dusting.
5) In the evening, I used a white 5.5" Lake Country CCS pad with Wolfgang's Finishing Glaze 3.0 with the Pinnacle Foam Conditioner. Did the same panels as in step 4 above. Got caking specks/dusting as well, probably from from re-applying the product with product still deep in the pad.

Applied paint sealant the next morning after wiping down the caking specks/dusting and windexing the windows.

6) Wiped down all the dust and specks left over from the polishing with a microfiber towel. Applied Wolfgang's Paint Sealant 3.0 with a Red 5.5" flat foam pad on PorterCable setting of 3. Once again, got a little bit of dusting along with tiny white wax dots. Fortunately, they wiped up when I buffed the sealant after letting dry for 45 minutes. I then let the sealant "cure" for about 16 hours in the garage before driving.

Overall, the process went very well for my first time! The only thing I would do different in the future is to work on maybe 1 or 2 panels at a time. This way, I can go over each panel multiple times and get it looking even better! Trying to do the whole car at once just takes too many hours! I still need to do the passenger side of the car along with the front and rear bumper another day.

Has anyone else had the caking specs/dusting from using these products? If so, what methods did you use to eliminate it? Between each panel when I re-applied product, I would do a ring around the outer edge of the 5.5" pad along with a few squirts of Pinnacle Foam Conditioner.

I also accidentaly got a little polish on the black vinyl moldings around the top and windows of the car from wiping with a microfiber towel with a little product still in the towel. Does anyone have any suggestions on how to clean these black moldings?

Thank you in advance to any other advice you may have.
Hope this post helps any other Newbies out there ! :xyxthumbs:
 
Looking good blue! Some dusting is normal but caking with WG sounds suspect. You are probably using too much polish. If using the conditioner you definetly don't need any after the initial spritzing. It is for a completely dry pad. As soon as you start spreading product it will moisten your pad and when you do your next section you don't need to place as much polish on the pad anymore. Also every other section you can "clean the pad on the fly" with a cotton terry towel as Mike P describes.
Also important, please review thie thread at this link to learn how to post pictures on autogeek. It is much easier for people to see them this way. Glad to see you are getting right into it. Keep up the good work.

Oh yeah, griots rubber cleaner, a small brush, and dress with 303 AP afterwards got rid of a polish stain for me. Another time I had to use ARO on some trim that was near the bottom of a car.

http://www.autogeekonline.net/forum...d-photo-into-your-autogeek-photo-gallery.html

http://www.autogeekonline.net/forum...age-your-photo-gallery-into-your-message.html

http://www.autogeekonline.net/forum...hen-using-porter-cable-style-da-polisher.html

More great articles: http://www.autogeekonline.net/forum...ke-phillips/23722-articles-mike-phillips.html
 
Here are your images... Do you have a camera for future shots?

attachment.php


attachment.php


attachment.php


attachment.php


attachment.php
 
I would suspect caking may be caused by not cleaning or changing the pad enough. It only takes a few panels especially if you use more than needed and it does not break down completely.
 
Good info. I have the same WG kit. The last time I waxed with WG deep gloss sealant, I was having problem removing the dried sealant (after 45 min) with a microfiber towel. Is this normal for the WG sealant? Thanks.
 
Thanks for all the great advice! Thanks for posting my pictures CEE DOG!

When I begin working on the rest of the car I will definitely try cleaning the foam pads "on the fly" before I add more WG product. I have also invested in additional pads so I can use multiple pads between panels and see if this also helps to eliminate the caking specs/dusting. I will keep everyone posted on the results.

I have also taken some high definition pictures during the process with a quality digital camera under a 1000 watt halogen bulb work light which really show the differences of before and after. I will get these posted shortly.

I have already gotten the car wet and seem to have some water spots mostly on the hood that seem stubborn to get up during washing. It really takes some elbow grease with a microfiber waffle towel to get each one up. Does anyone know of a product I can use to get these up easier? I have the WG Sealant on the hood and don't want to use too strong of a product that will remove the sealant.

Kuhan, when I applied the WG Sealant, I made sure to apply it very thin. I was also in the garage where it was out of the sun. It seemed to come up rather easy after 45 minutes of drying using a microfiber towel. Some areas where it was thicker seemed to take a little more elbow grease with circular motions to get up. I do remember shaking the WG Sealant bottle quite a bit between applications to make sure it was mixed up good.
 
I would suspect caking may be caused by not cleaning or changing the pad enough. It only takes a few panels especially if you use more than needed and it does not break down completely.

Good point, it's very important to clean your pad often. Whenever I type this people then say, how often is often?

Clean your pad at least every other application of product, or every other section pass... If you really want to be thorough then clean your pad after each section pass, here's why...

Anytime you're abrading a painted surface you have two things building up on the face of your buffing pad,

  1. Spent product
  2. Removed paint

As the abrasives and any carrying agents are worked they become spent or used-up but they are still a residue that needs to be removed.

As you abrade the paint small particles of paint are coming off the surface and it's not easily visible because most people are working on clear coat paints and it's also mixed in with the spent residue. Both these substances build up and you want to remove them so they don't contaminate fresh product applied to the pad.

Cleaning your pad on the fly is a technique that's simple and effective and most important can be done quickly so you can get back to work. That's the meaning behind the term/words on the fly...

Small terry cloth towels work best for this...


Good info. I have the same WG kit. The last time I waxed with WG deep gloss sealant, I was having problem removing the dried sealant (after 45 min) with a microfiber towel. Is this normal for the WG sealant?

Thanks.

The most important factor for removing any wax or paint sealant is to apply a thin, uniform coating, this usually takes a little practice and in my opinion is best done using a DA Polisher.

Another important factor is how you wipe off a coating of wax or paint sealant...

In these two videos, I demonstrated,

"How to break open a coating of wax or paint sealant"

Then how to remove the wax or paint sealant by creeping out from the shiny spot you create taking little bites or making little swipes instead of trying to take off huge swaths of product at one time.

It truly does work and the reason it works is because when you only try to take a little portion of wax or paint sealant off at one time your wiping cloth has more leverage over the surface adhesion between the coating and the paint.

When you try to take off huge swaths of product, the surface tension between the layer of wax or paint sealant is greater by the shear surface area as compared to what your hand and a wiping cloth can convince to release and pull away.

If that makes sense...

Little bites... with little bites any wax or paint sealant is easy to remove and you reduce the potential for inflicting any toweling marks...

Here's the vids...

How to apply a Carnauba Wax by Hand using the Straightline Technique by Mike Phillips

Part 1 - How to apply a Carnauba Wax by Hand using the Straightline Technique
[ame=http://www.youtube.com/watch?v=X4zXem8SxkI]YouTube - ‪Part 1 - How to apply a Carnauba Wax using the Straightline Technique‬‎[/video]

Part 2 - How to apply a Carnauba Wax by Hand using the Straightline Technique
[ame=http://www.youtube.com/watch?v=LVE7lBFrGNY]YouTube - ‪Part 2 - How to apply a Carnauba Wax using the Straightline Technique‬‎[/video]


Part 1 - How to apply a synthetic paint sealant by hand without instilling swirls
[ame=http://www.youtube.com/watch?v=HMI4jmsH87s]YouTube - ‪Part 1 - How to apply a synthetic paint sealant by hand without instilling swirls‬‎[/video]

Part 2 - How to apply a synthetic paint sealant by hand without instilling swirls
[ame=http://www.youtube.com/watch?v=pbxddL93sUY]YouTube - ‪Part 2 - How to apply a synthetic paint sealant by hand without instilling swirls‬‎[/video]

Part 3 - How to apply a synthetic paint sealant by hand without instilling swirls
[ame=http://www.youtube.com/watch?v=faPaztk8uqI]YouTube - ‪Part 3 - How to apply a synthetic paint sealant by hand without instilling swirls‬‎[/video]


:)
 
Ok, here are a couple of high quality before and after pictures:


HPIM62692.jpg


HPIM62912.jpg


HPIM63262.jpg


HPIM61892.jpg


HPIM62562.jpg
 
Night and day difference! Great job! :dblthumb2:

Mark
 
Back
Top