Paint abrasion, horrible touch up job

brentech

New member
Joined
Apr 23, 2012
Messages
188
Reaction score
0
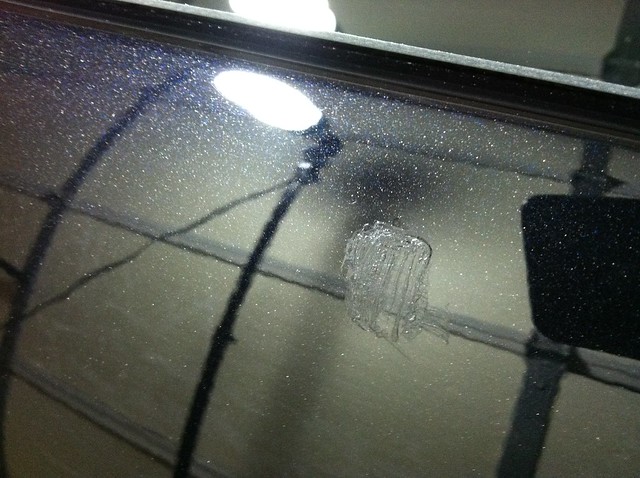
So, I had a little abrasion on the rear of my car. Tried to fill it with my VW paint pen, but it took forever to get the paint to start coming out, and when it did, it rushed the surface.
I tried to take off some excess, but it dried much faster than expected and I definitely made the whole situation worse.

I'm not sure how to smooth it out, if I even can at this point.

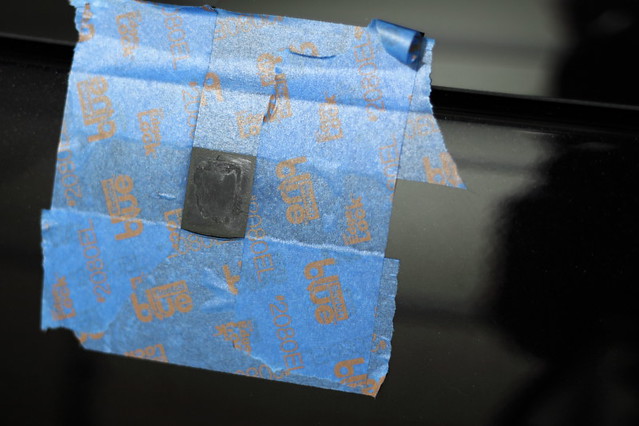
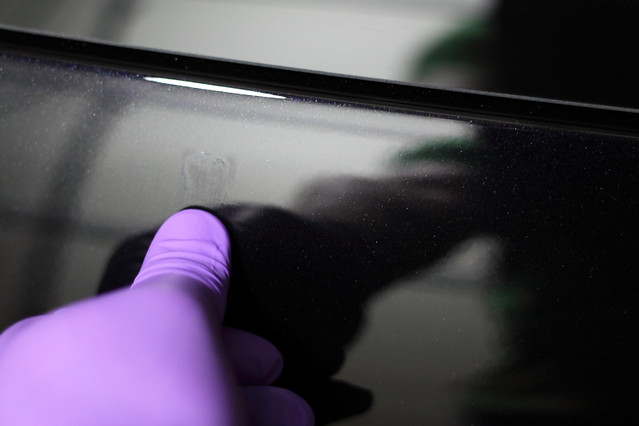
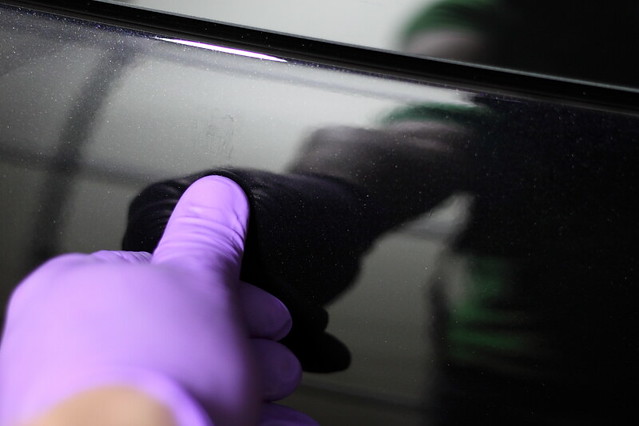
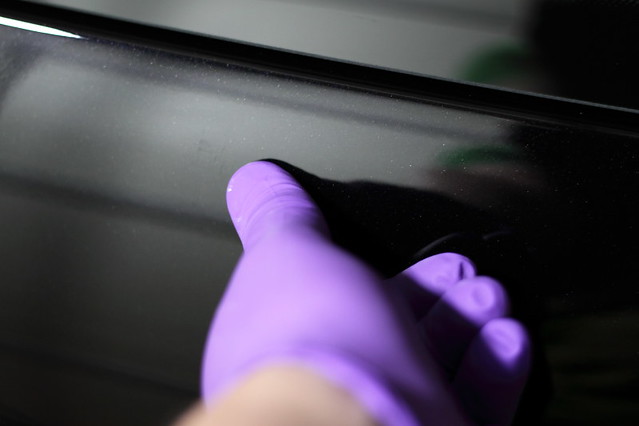
Here's how it looks now (about the size of a thumbnail)

7342103490_b0f0e8ee85_z.jpg


7342104218_c2d1c78cdc_z.jpg


Anyone have some advice. I'm kind of depressed that it looks so much worse.
 
If your comfortable with it, I'd try wet sanding it level. You should then be able to polish it back up.

Sent from my PG86100 using Tapatalk 2
 
If the paint is relatively fresh you might even be able to wipe it off with a solvent. I've used IPA on stuff like this before. Usually it takes quite a while for touch up paint to get hard enough to wet sand anyway.
 
With a sanding block, I'd start off with 600 grit wet/dry paper and concentrate on leveling out the high spots. As you approach the clear coat be careful not to be too aggressive. Once there you might want to switch to 1500 grit, finish leveling then compound and polish...
 
Guess I don't know a whole lot about wet sanding. Will need to read up and see if I can do this. New car, afraid to mess it up further.
 
If your comfortable with it, I'd try wet sanding it level. You should then be able to polish it back up.

Sent from my PG86100 using Tapatalk 2


Just a note about wetsanding it level...

You have to be very careful to try to keep all your sanding marks on the touch-up paint and not on the factory clear paint.

Why?

Because the touch-up paint will be soft and the factory paint will be hard. When you go to buff out your sanding marks the sanding marks in the touch up paint will buff out quickly and easily. Might not work that fast or easy on the factory paint.

You could try placing painter's tape around the touch-up paint when you do your initial sanding to knock down all the excess material but at some point you'll have to remove the painters tape and then you'll be putting sanding marks into the factory paint.

Another problem happens if you use a rotary buffer to compound out the sanding marks. When working on a small area like this it's real easy to heat up the paint and the panel. What can happen then is the touch-up paint will simply pull off the panel and then you'll be back to where you were when you started only now with thinner factory paint where you sanded and possibly still remaining sanding marks.


Ugh...

I feel your paint - Bill Clinton
I feel your paint... Mike Phillips


If you lived close by I would be more than willing to help you with it...


:)
 
Looks like I have some reading to do, and sandpaper to buy. Will update when I get the nerve to go at it.
 
Something you might consider...

How to use Meguiar's Unigrit Sanding Blocks to remove runs and dirt nibs in paint


Here's just an excerpt from the above article..

Here's Robert DiTerlizzi of Impressions Fine Detailing sanding out a run on the high side of the rear fender body line.
MegsSandingBlock009.jpg


After sanding the run flat Robert will dampsand using a Meguiar's 3" #3000 Unigrit foam backed sanding disc on a Griot's Garage 3" Mini Polisher and the buff the area using a compound with a wool pad on a rotary buffer.
MegsSandingBlock010.jpg


Then for removing your sanding marks, use M105 or UC by hand to remove the majority of the sanding marks and the do clean-up by machine to avoid heat issues.


:)
 
Ugh...

I feel your paint - Bill Clinton
I feel your paint... Mike Phillips


If you lived close by I would be more than willing to help you with it...


:)
Man, if only.

Although maybe that'll happen one day. My wife is a big Disney World fan, and to my surprise, would be happy to have me go to your boot camp the next time we make a trip to Florida. That could happen sometime next year (won't work this year since our anniversary is just a few days prior to your Sept dates. Already got a trip planned).


Anyways, I might be giving this a try today. Sandpaper has been soaking for a while now. Going to re-read some things and when my nerves are solid, I'll make a go at it.
 
You may be able to check around the forum and see if there are any detailers in your area who wetsand. You may come out cheaper just doing it that way once you consider the time and materials used.
 
Man, if only.

Anyways, I might be giving this a try today. Sandpaper has been soaking for a while now. Going to re-read some things and when my nerves are solid, I'll make a go at it.

Remember, what you're trying to accomplish is to sand down as much of the touch up paint as possible WITHOUT damaging or removing any of the surrounding paint.

Get some 2" wide painters tape, or 1" will work, and tape off the area around the affected area in order to protect it. Tape out approximately 3 inches either side of the area to be sanded.

Because the area is wide open you might ant to start off with your sandpaper wrapped around a fairly rigid or stiff block to concentrate your efforts on the high points only. This will tend to remove most of the unwanted or extra paint allowing you a much easier time and fixing this.

If you're careful and take your time this should come out pretty nice! :props:


Perfect advice.


You can also cut the sandpaper into small pieces and use your finger to lightly sand the area.

2600_nikkensandpaperpieces.jpg


And to be extra careful, work the sanding marks out using either M105 or Ultimate Compound using a small piece of terry cloth with your fingers.

:)
 
Considering the way it looks right now I seriously doubt wet-sanding it will make the situation worse. If you focus (as Mike said) the sanding on the touch-up paint'ed area itself; even levelling it will make it look 200% better.

From my perspective your approach needed some minor adjustments but overall I believe once you have the spot leveled out and polished it will be much better. You just need to move from step to step slowly. Lack of patience will show very quickly.

Lastly, what cannot be assessed right now is how the touch-up paint will blend with the rest of the car. I wouldn't worry about that though since this approach is the cheapest approach to fix the problem.
 
Okay, here it is. I think it went pretty well for the most part. Still can be seen from the right angle, but is mostly hidden. Yeah, it's always going to bug me to a degree, but maybe in the future with some different tools at my disposal (just a PC7424XP at the moment) I'll be able to really flatten it out. While I'm trying to keep the car as good as possible, it's not like it's a show car.

Here we are, just taped around it as you last saw it:
7345476512_d1b33e02ab_z.jpg


Wet sanded to where I felt safe:
7345476398_d3dab7931d_z.jpg


Used Meg's 105 on tangerine pad:
7160267877_579c50653e_z.jpg


More work was still needed towards the top and left side, tiny bit more wet-sanding, then M105 a second time:
7160267651_511ba1b2d3_z.jpg


Meg's 205 used on a white pad:
7160267555_33cc3067b8_z.jpg


A picture using a photography daylight constant as a sun, if not done from the right angle, the metallic in the paint makes it almost impossible to notice:
7345475880_a41dfdeb58_z.jpg


Opened garage for real lighting and took a few steps back:
7345475762_46d1ea60b0_z.jpg


Last picture here is centered on the abrasion:
7345475586_d86c481f88_z.jpg


So, while its still there in a bit, the paint did fill with the color. If viewed from the correct angle, you can see it, but otherwise it's not a total eyesore as it was.
I still have yet to re-apply some WG DGPS to it.
 
wow fantastic !!!!

This forum has some amazing advice !

That looks excellent. no joke.
 
I had a GTI and I know what you mean about those touchup pens. They are the worst in the industry.

Nextime get the DR.Colorchip road rash kit. Its so easy to use. I've used it about 10 times on the front end of my S4.
 
Thanks. Was very nervous about going at it with sandpaper, but something had to be done.

And yea, I think a kit would better serve me in the future.
 
Back
Top