Pictures: The Art of Polishing Paint Advanced Detailing Classes

Joined
Dec 5, 2022
Messages
51,004
Reaction score
7
Pictures: The Art of Polishing Paint Advanced Detailing Classes

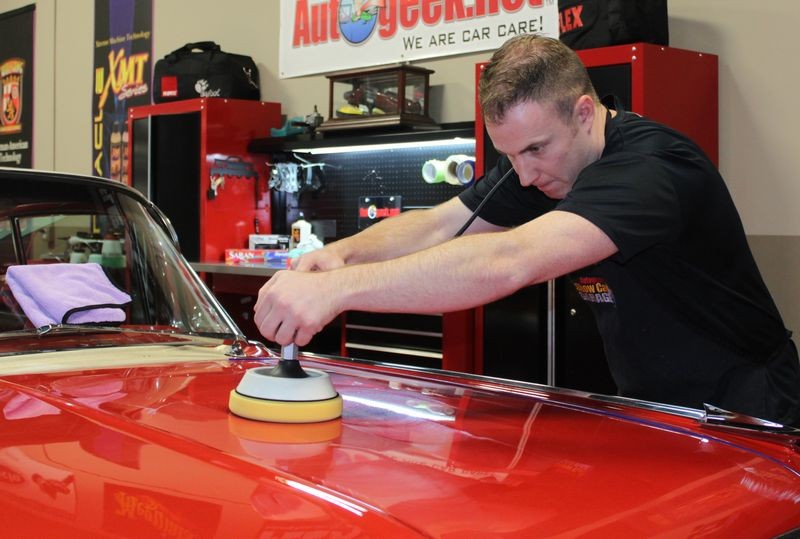
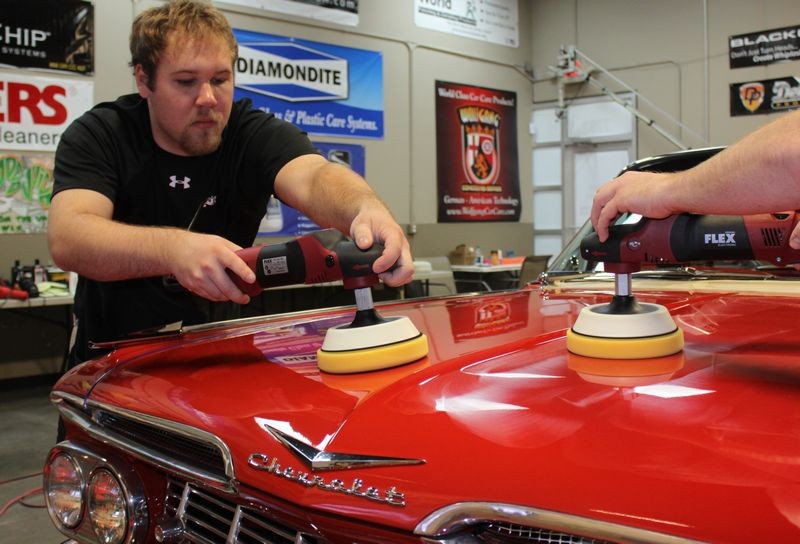
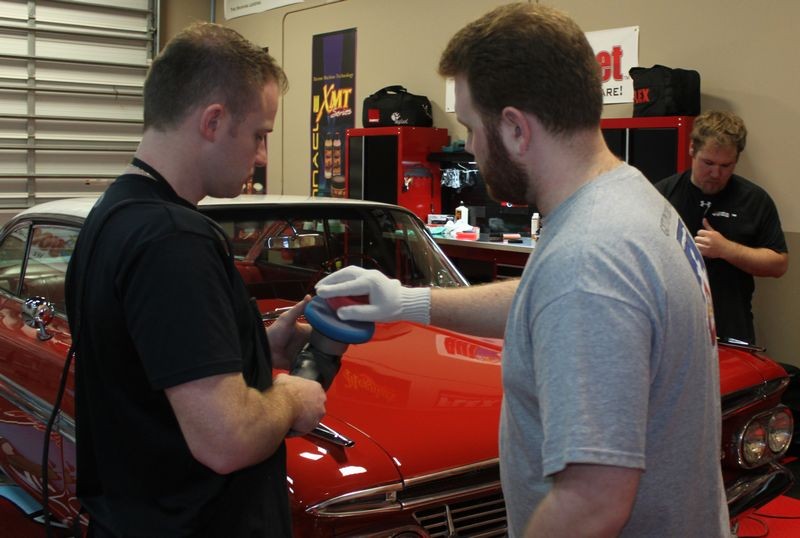
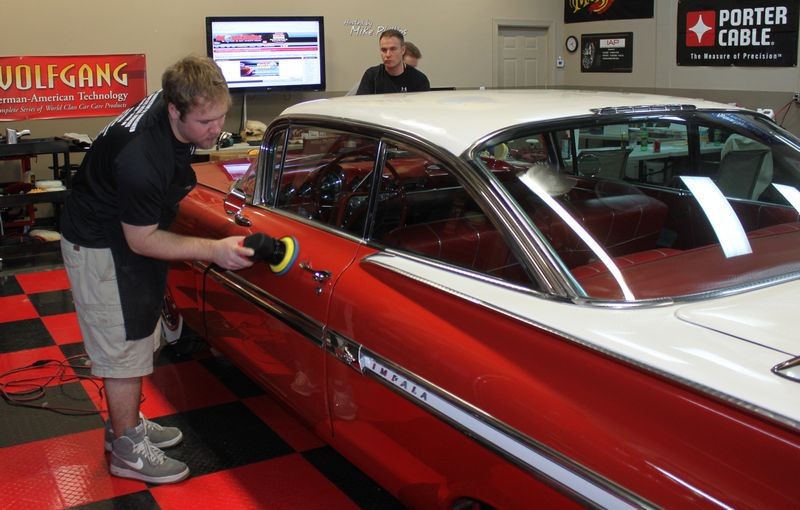
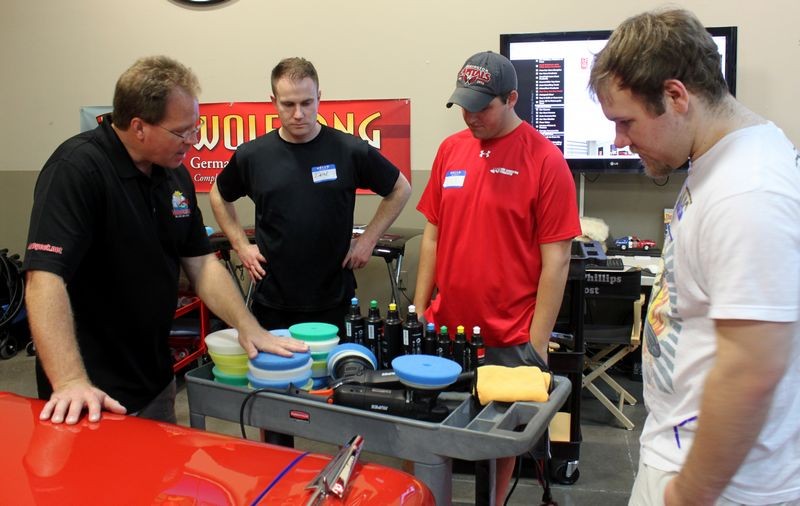
These classes are totally focused on the art of polishing paint. The focus is on all aspects of polishing paint from doing production work to maximize profits to show car paint polishing to how to wetsand by hand and wetsand by machine for a true show car finish. These classes must be reserved in advance for small, private groups. If you want to be placed on my contact list for the next advanced class, send an e-mail to:

[email protected]


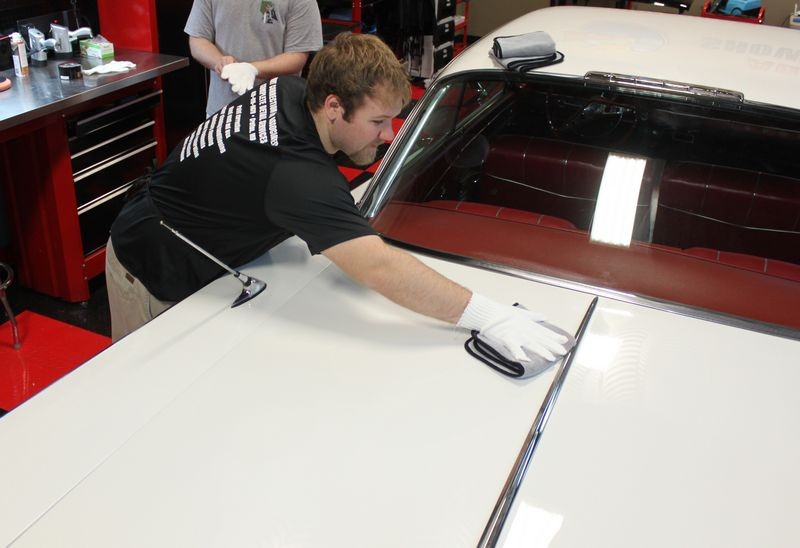
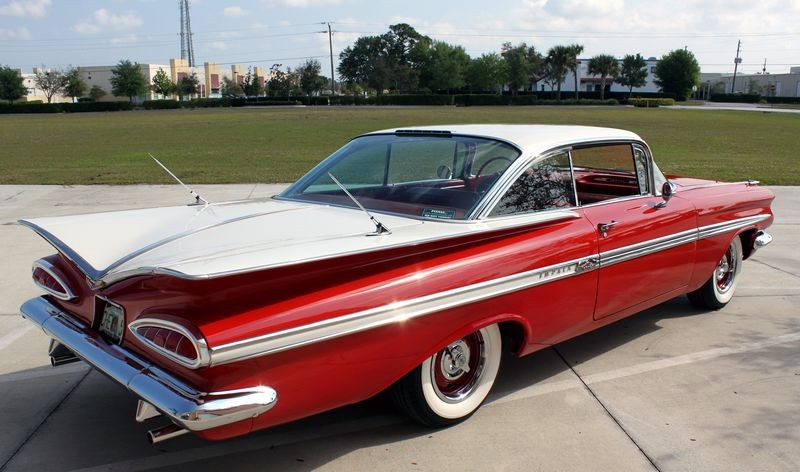
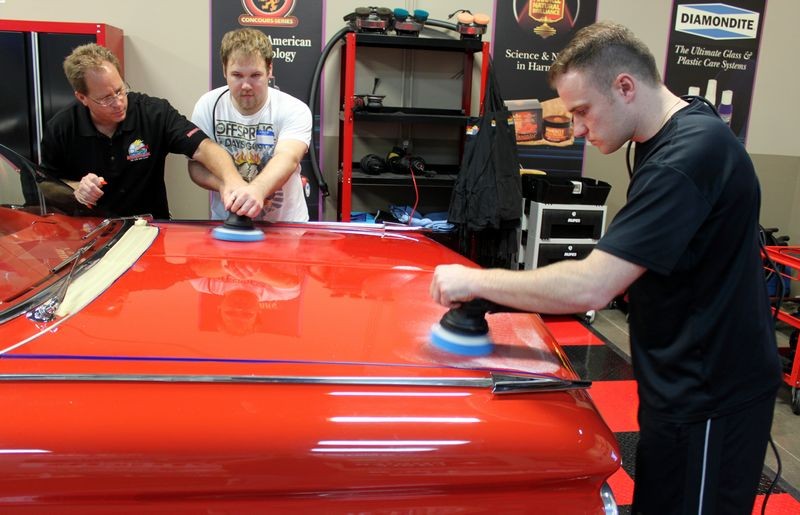
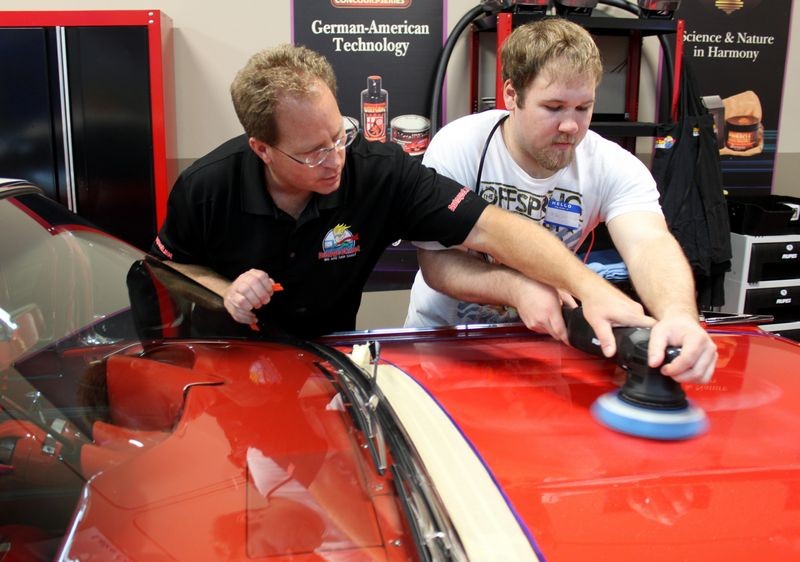
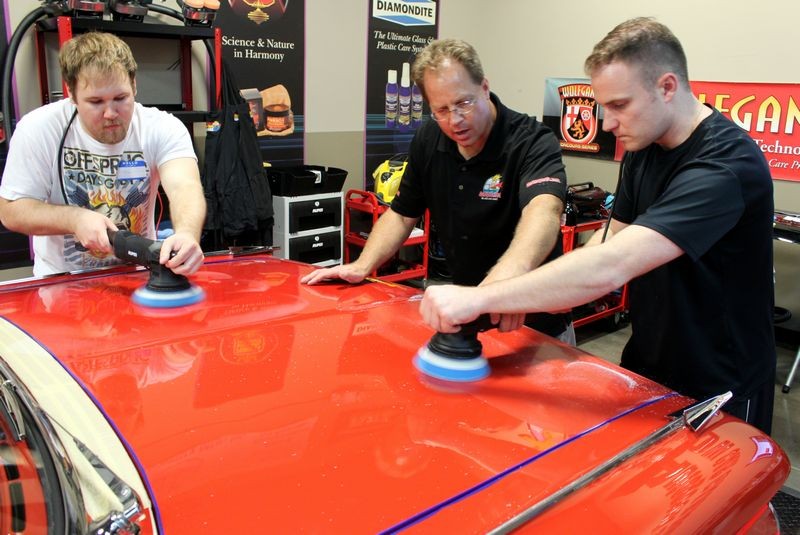
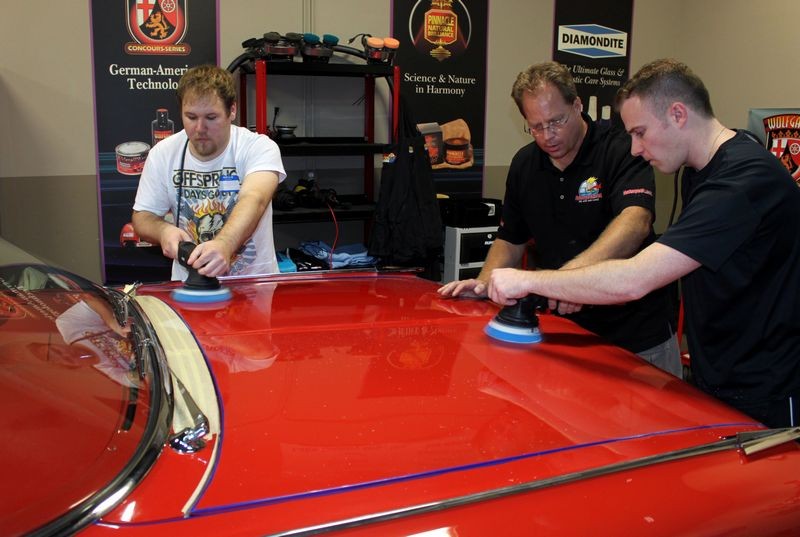
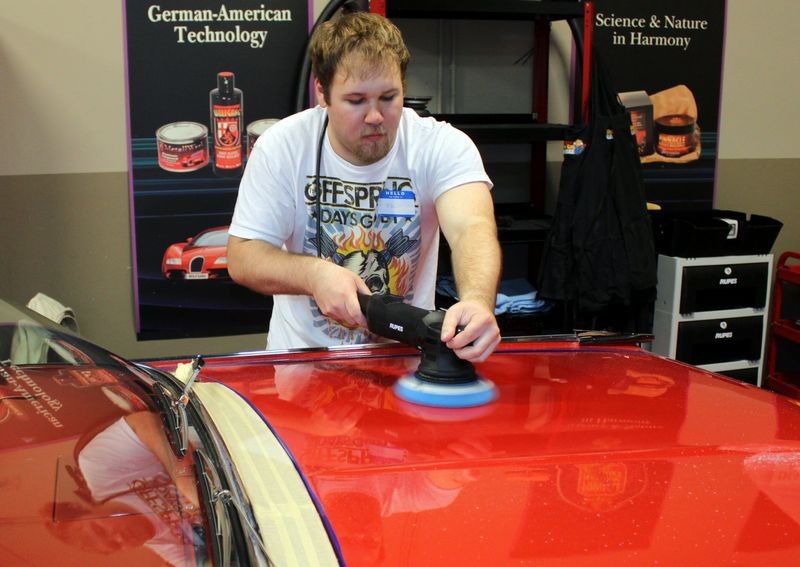
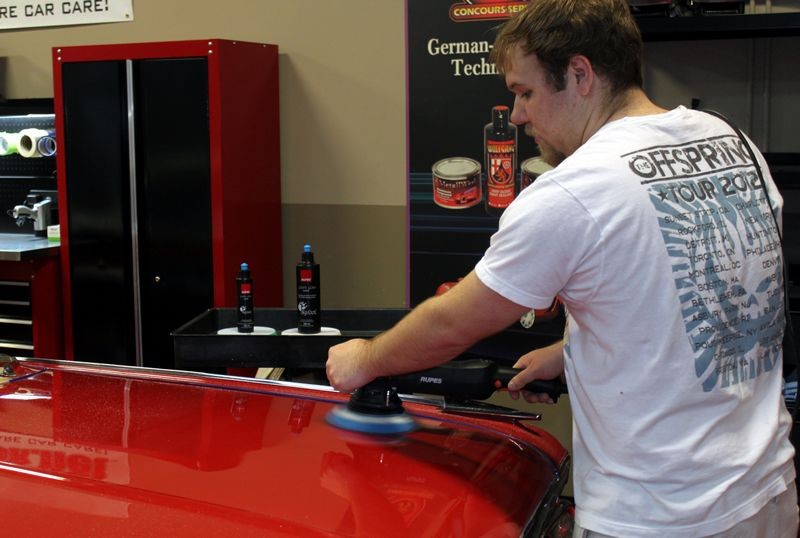
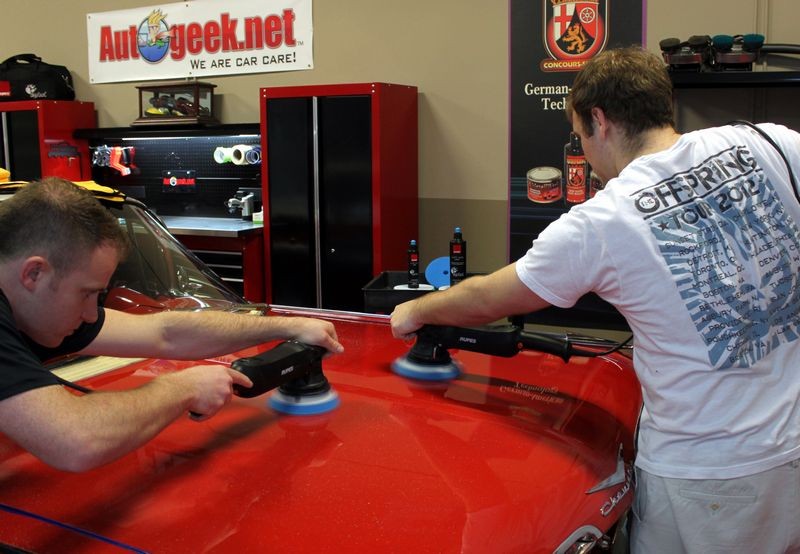
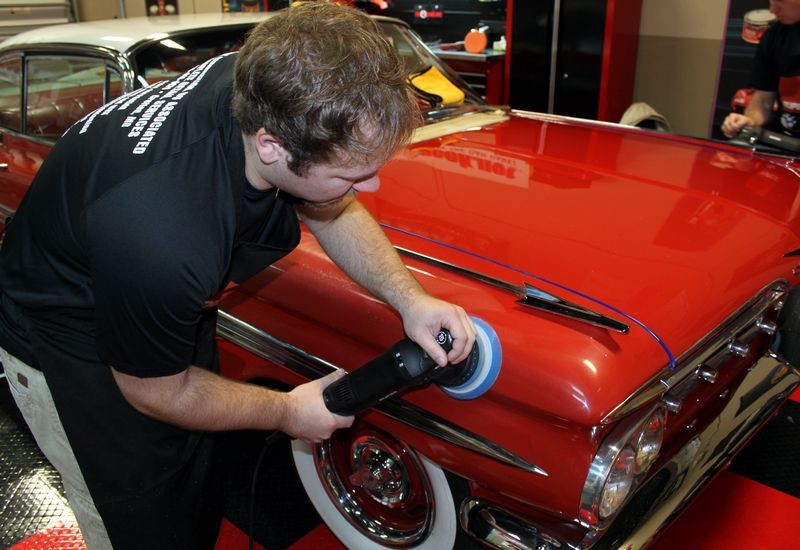
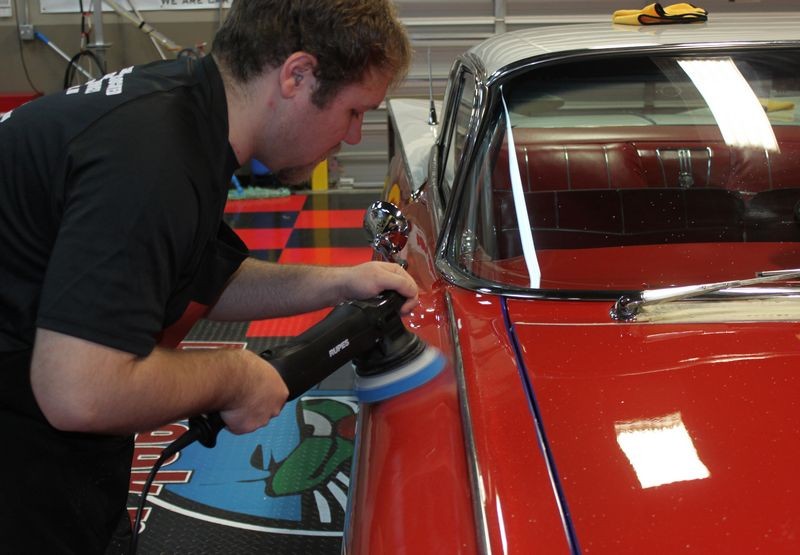
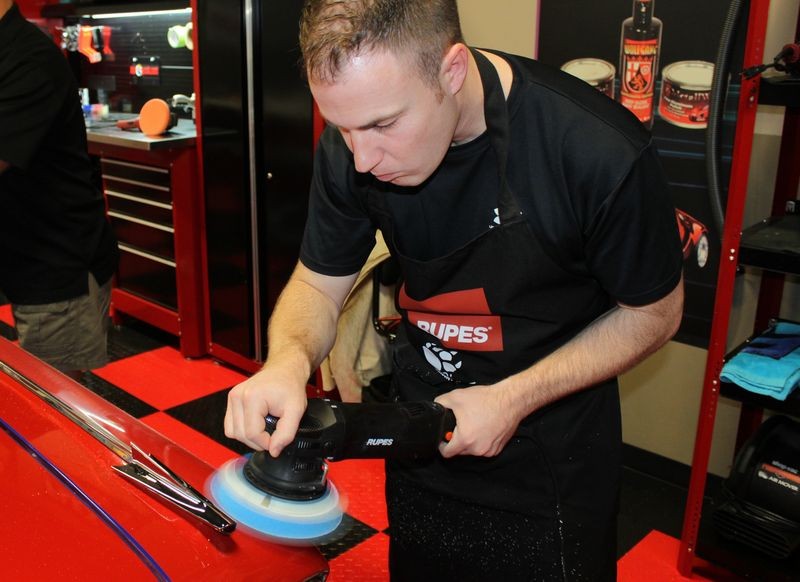
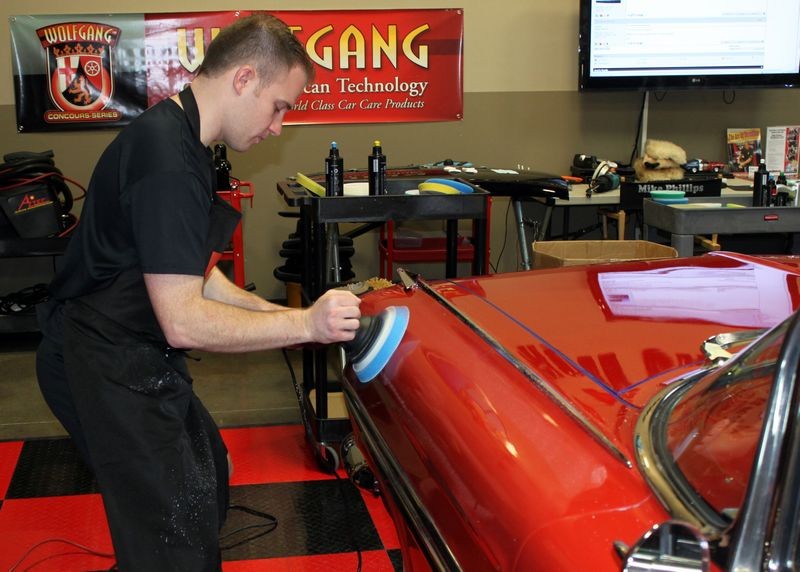
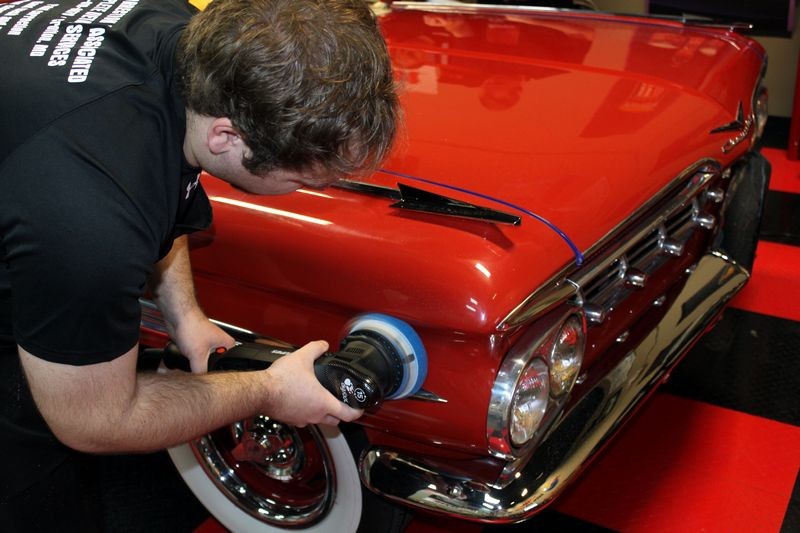
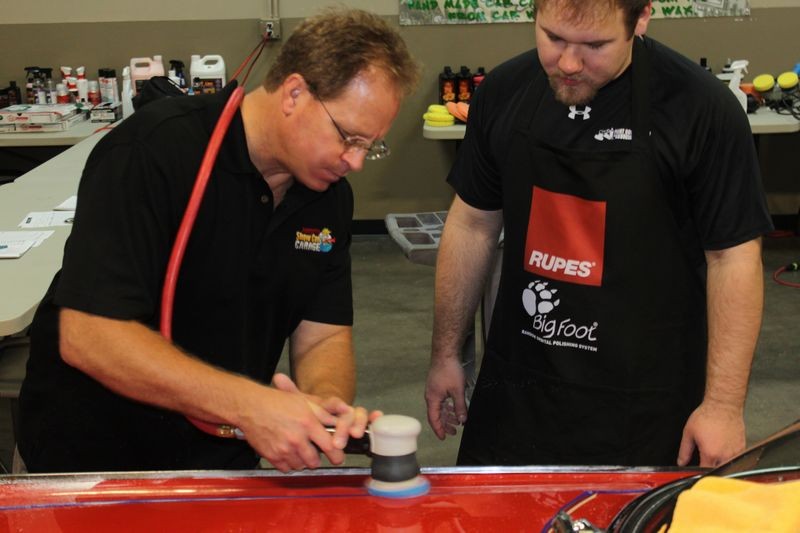
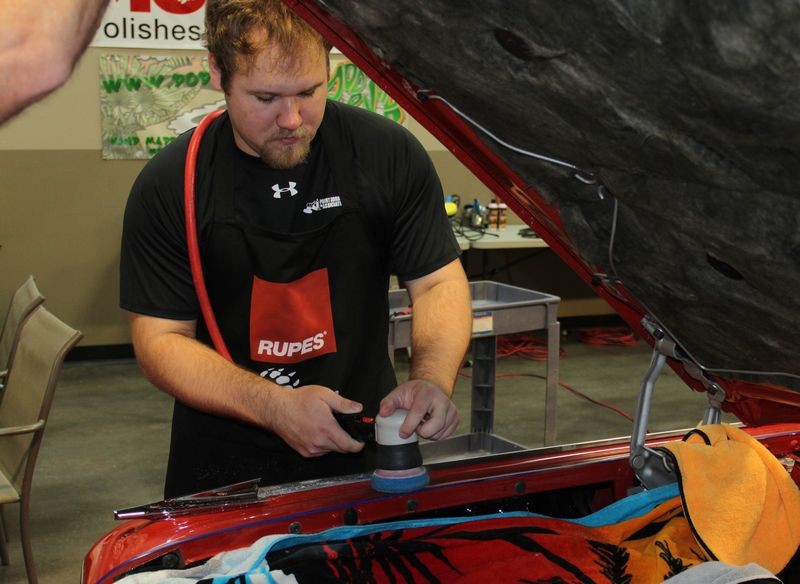
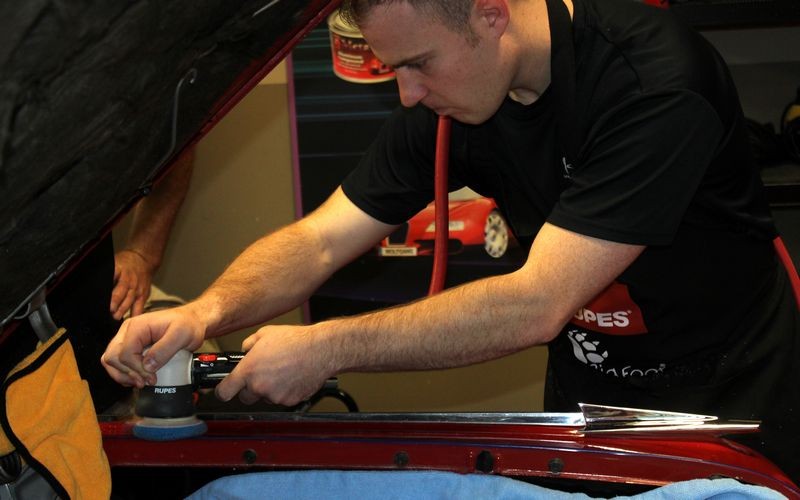
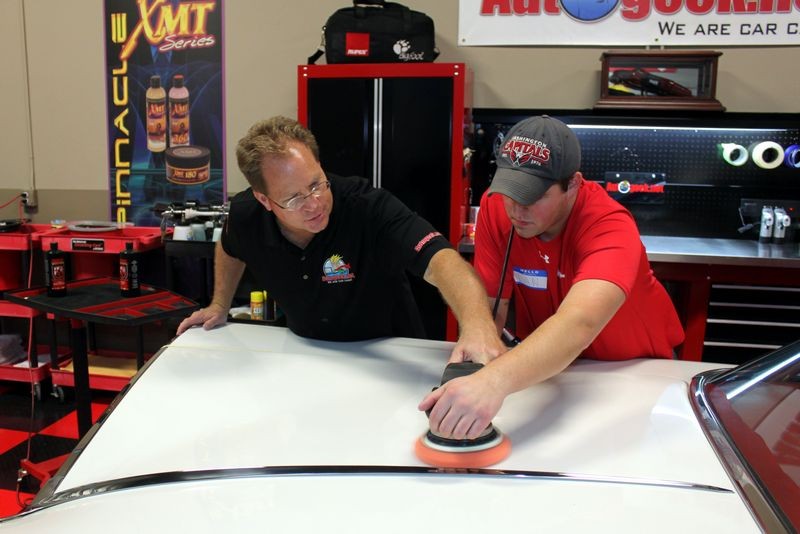
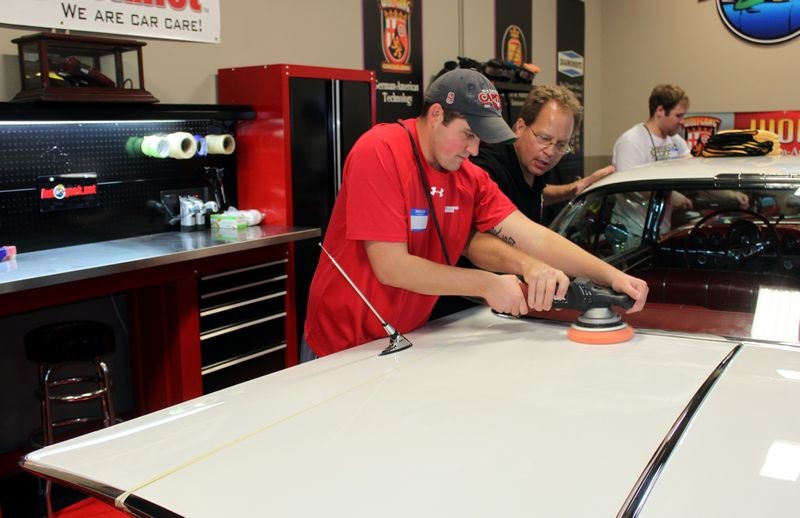
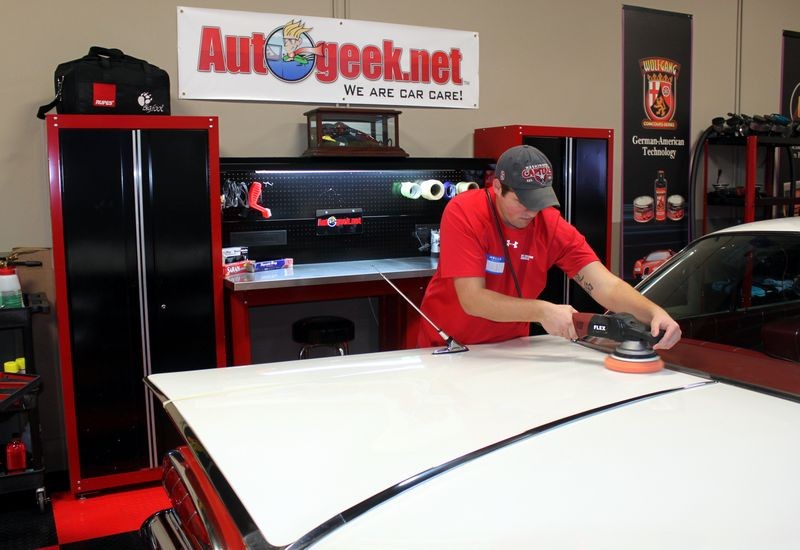
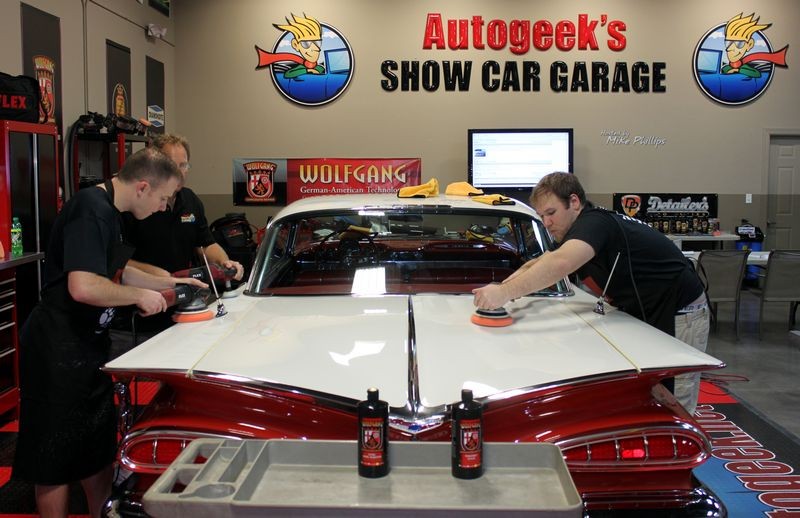
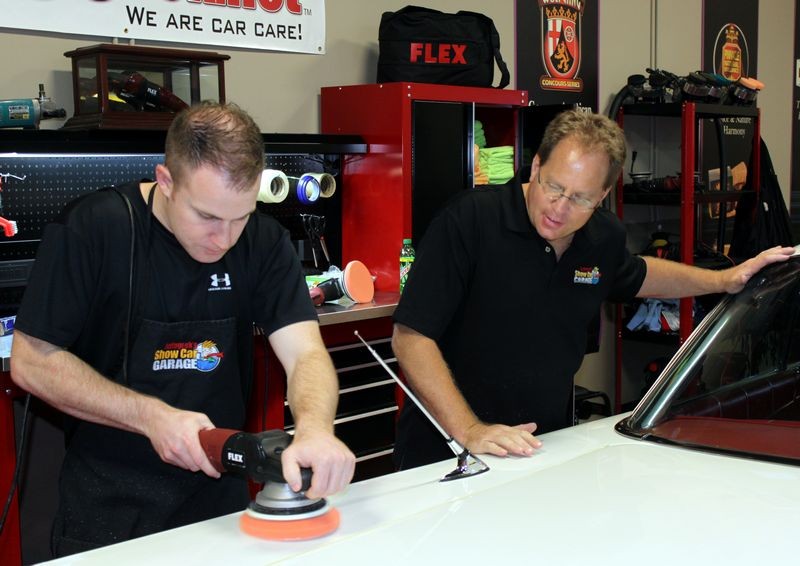
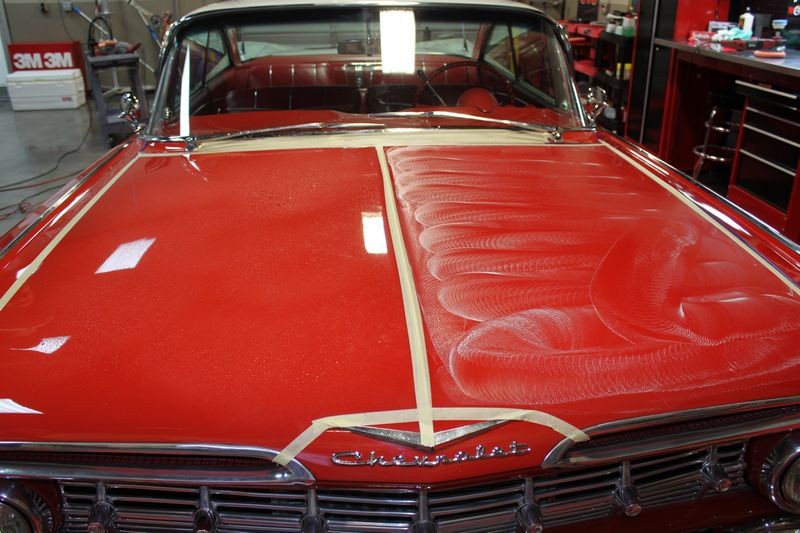
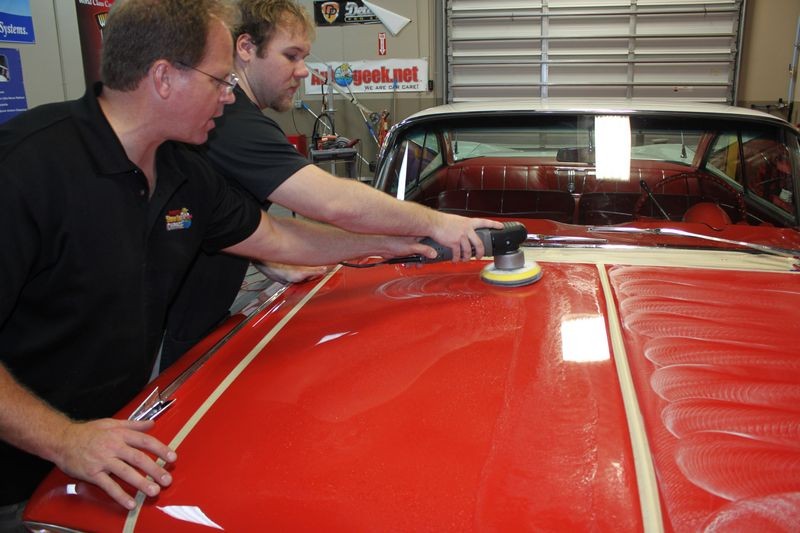
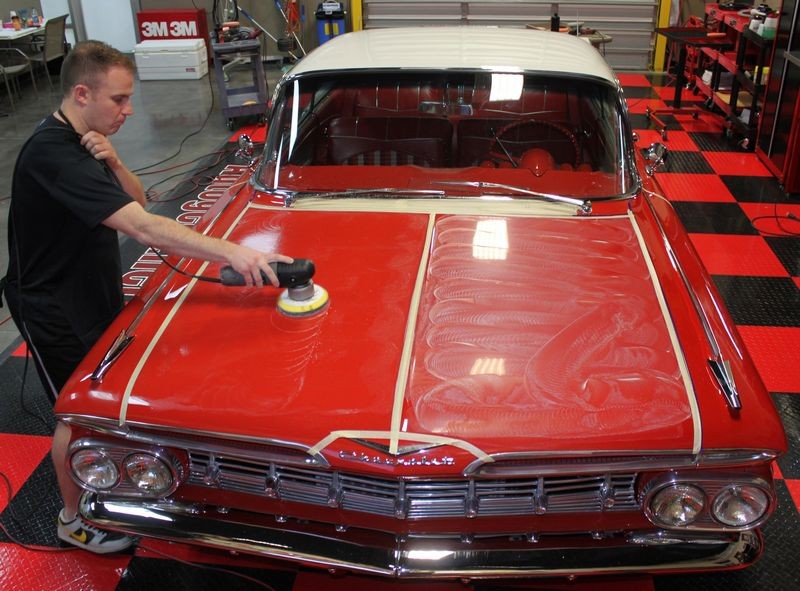
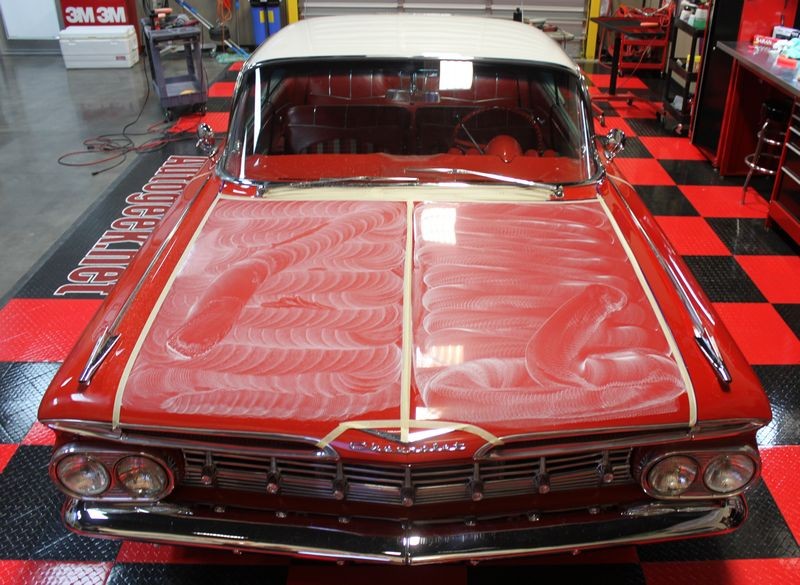
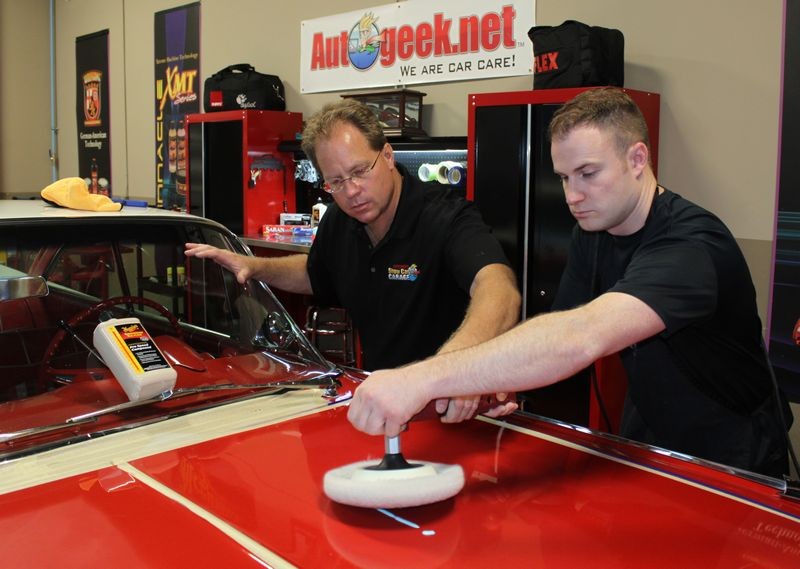
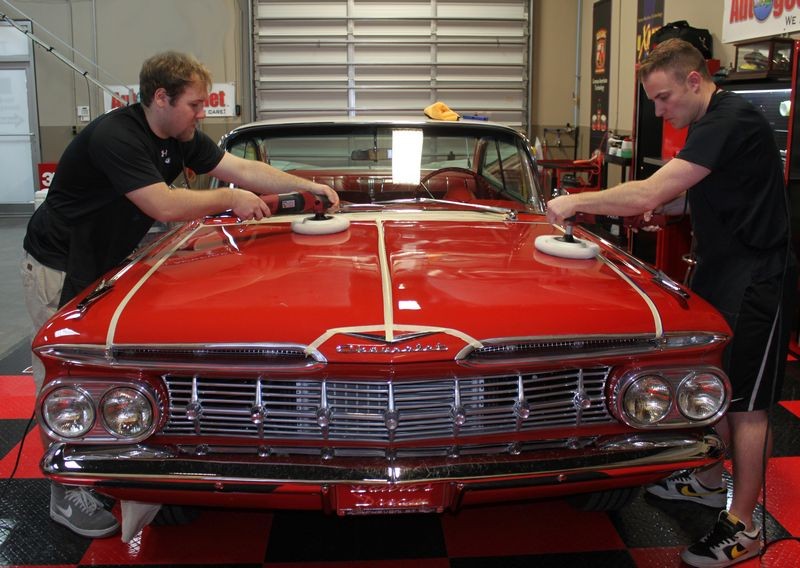
First up will be this classic 1959 Chevrolet Impala. This car has been repainted using a basecoat/clearcoat paint system so it has the same type of paint modern cars come with from the factory.


1959 Chevrolet Impala - Remove Swirls & Scratches
1959_Impala_010.jpg


1959_Impala_011c.jpg


:)
 
When it come to working on antiques, classics and streetrod here at Autogeek, I teach people to never wash these types of cars but instead, use either a rinseless car wash or a waterless car wash with the best option being the waterless car wash.

The reason for using a waterless car wash is to reduce the amount of water being introduced to the car where it can get into places where it can be a rust issue.

We started the 1959 Impala project by wiping the paint clean using Detailer's Waterless Auto Wash Concentrate poured off into Kwazar Mercury Pro 33 ounce bottles because they will lay down a lot of product very fast which is what you want when doing a waterless wash.

The_Art_of_Polishing_Paint_1Class_049.jpg


The_Art_of_Polishing_Paint_1Class_050.jpg


The_Art_of_Polishing_Paint_1Class_051.jpg


Exterior Paint Inspection and Evaluation

Next up I introduced the guy to,

The Baggie Test - How to inspect for above surface bonded contaminants

Not only so they can get an accurate feel for the true condition of the paint but to also use to market their business and educate their customers.

The_Art_of_Polishing_Paint_1Class_052.jpg


Even the sides of the car were contaiminated...

The_Art_of_Polishing_Paint_1Class_053.jpg


Speedy Prep Surface Towel to Decontaminate the Paint
To remove the above surface bonded contaminants, we used the Speedy Prep Surface Towels with Detailer's Universal Clay Lube.

The_Art_of_Polishing_Paint_1Class_054.jpg


The_Art_of_Polishing_Paint_1Class_055.jpg


The_Art_of_Polishing_Paint_1Class_056.jpg


The_Art_of_Polishing_Paint_1Class_057.jpg


The_Art_of_Polishing_Paint_1Class_058.jpg


How to tape-off and cover up a car before detailing

Before we stared machine polishing, I pointed out to the guys that you almost always find compound and polish splatter down inside the fresh air intake grill because this area was not taped-off.

I teach my students to always cover this area and to also tape-off any panel edges and raised body lines, especially if you're going to be doing major correction work and especially wetsanding.

The_Art_of_Polishing_Paint_1Class_059.jpg


The_Art_of_Polishing_Paint_1Class_060.jpg


The_Art_of_Polishing_Paint_1Class_061.jpg


The_Art_of_Polishing_Paint_1Class_062.jpg


The_Art_of_Polishing_Paint_1Class_063.jpg


The_Art_of_Polishing_Paint_1Class_064.jpg


The_Art_of_Polishing_Paint_1Class_065.jpg


Removing Swirls and Scratches

Next up, the guys are going to get some hands-on time behind the pneumatic 15 and pneumatic Mini Polishers.
The_Art_of_Polishing_Paint_1Class_066.jpg


Rupes 21
Giving Mike a little hands-on training on arm speed, pattern and downward pressure, this is the first time Mike had ever used the Rupes 21 polisher...

The_Art_of_Polishing_Paint_1Class_067.jpg


The_Art_of_Polishing_Paint_1Class_068.jpg


Rupes 15
Working with Derek and the Rupes 15 Polisher...

The_Art_of_Polishing_Paint_1Class_069.jpg


The_Art_of_Polishing_Paint_1Class_070.jpg


The_Art_of_Polishing_Paint_1Class_071.jpg


Both guys have experience using Porter Cable and Griot's Garage DA Polishers and picked up really quick on how to use the Rupes polishers...

The_Art_of_Polishing_Paint_1Class_072.jpg


The_Art_of_Polishing_Paint_1Class_073.jpg


The_Art_of_Polishing_Paint_1Class_074.jpg


The_Art_of_Polishing_Paint_1Class_075.jpg


:)
 
While Mike and Derek were working the Rupes polishers up front, I shared with Dan how to use the Flex 3401 with the Wolfgang Twins and LC Hybrid pads.

Showing Dan how to pick up a bead of product using a tweaked version of the 10 @ 10 technique used with rotary buffers. Since the pad rotates counterclockwise, (opposite a rotary buffer), it works best to pick up a bead of product using the 10 @ 3 position.

The_Art_of_Polishing_Paint_1Class_092.jpg


The_Art_of_Polishing_Paint_1Class_093.jpg


A little hands-on training to show how much downward pressure and arm speed for moving the tool over the surface.

The_Art_of_Polishing_Paint_1Class_094.jpg


The_Art_of_Polishing_Paint_1Class_095.jpg


The_Art_of_Polishing_Paint_1Class_096.jpg


The_Art_of_Polishing_Paint_1Class_097.jpg


Here we're inspecting the results using the Brinkmann Swirl Finder Light and it's pretty easy to see the swirls and scratches are now gone and what remains is swirl-free finish.

The_Art_of_Polishing_Paint_1Class_098.jpg


Derek and Mike finished the front so now they're testing out the Flex 3401's for the first time and now they can compare how these tools work as compared to the Rupes they just used on the front clip.

The_Art_of_Polishing_Paint_1Class_099.jpg


The_Art_of_Polishing_Paint_1Class_100.jpg


The_Art_of_Polishing_Paint_1Class_101.jpg


The_Art_of_Polishing_Paint_1Class_102.jpg


The_Art_of_Polishing_Paint_1Class_103.jpg


The_Art_of_Polishing_Paint_1Class_104.jpg


:)
 
Pictures look great, how many guys did you have total in the class, I know you said it was going to be small.
 
Would be interesting to hear their comments on the flex 3401 and rupes.
 
Pictures look great, how many guys did you have total in the class, I know you said it was going to be small.

My new advanced classes are limited to 8 or less people. We had five people signed up and two late minute cancellations due to travel arrangements. I have another advanced class in the works with more cool cars and a focus on the art of polishing paint.

Anyone reading this that wants to be notified for my next advanced class, these are $1000.00 for the two-day weekend class and you need to send me an e-mail and I'll put you on my contact list for these classes.

[email protected]


I saw the 55 Ford on Sunday at a car show. It came out great.

Good to hear, that was a fun car to work on and it's also the car I did the Rupes Polisher Time Lapse video with...

Rupes Polisher Time Lapse Video - 1955 Ford Crown Victoria


Here's the time-lapse video Yancy took for me as I buffed this classic out from start to finish...


[video=youtube_share;v7FjGcMCTEg&hd=1"]RUPES 21ES Vs 15 ES time comparison Time lapse -...[/video]​


On the passenger side I used the Rupes 21 and on the driver's side I used the Rupes 15. There was about a 20 minute time savings using the larger pad, larger stroke machine over the smaller pad, smaller stroke machine but my opinion is that for most body panel designs on modern cars the 6" pad will be a better match.

This tool definitely has a lot more correction ability plus power over a traditional DA Polisher like the Porter Cable 7424XP.

I did find that when buffing a curved panel, either concave or convex, the uneven pressure applied to the face of the pad will slow down and even stop pad rotation. The key is to focus on the panel and keep the pad as flat as possible to the surface.


Came out nice...

1955_Ford_Crown_Victoria_049.jpg


Would be interesting to hear their comments on the flex 3401 and rupes.


Interestingly, none of the guys that attended this class are members of this forum... yet. I've asked them to join and when they return home and get caught up I'm confident you'll see them chime in on this thread with their thoughts on my advanced class.


:)
 
After completely buffing out this Impala using both the Rupes System and the Flex 3401 with Wolfgang products, there were still a few RIDS in the hood as well as orange peel.

Because the hood is a dark color and what I call a "Gloss Panel", that is a panel that gets a lot of attention, I decided to use the hood to train the guys on how to machine sand using a very fine grit sanding disc and then the art of using a rotary buffer to remove their sanding mark and finish out hologram free.

Training on this 1959 Impala would perfectly prepare them for the next car, wetsanding the new paint job on the 1964 Chevelle Malibu.


Here's the Porter Cable with 3M #5000 Grit Sanding Disc. The cut is so light it's PERFECT for anyone brand new to machine wetsanding, especially on a restored classic car.

The_Art_of_Polishing_Paint_1Class_105.jpg


I demonstrated the technique on the driver's side...
The_Art_of_Polishing_Paint_1Class_106.jpg


Then taught the guys using the passenger side...

The_Art_of_Polishing_Paint_1Class_107.jpg


The_Art_of_Polishing_Paint_1Class_108.jpg


The_Art_of_Polishing_Paint_1Class_109.jpg


The_Art_of_Polishing_Paint_1Class_110.jpg


The_Art_of_Polishing_Paint_1Class_111.jpg


PERFECT

The_Art_of_Polishing_Paint_1Class_112.jpg


Edging
Now the guys are using 3" wool pads with Meguiar's M100 Pro Speed Compound to surgically remove their sanding marks around the perimeter of the panel. I call this edging.

The_Art_of_Polishing_Paint_1Class_113.jpg


The_Art_of_Polishing_Paint_1Class_114.jpg


The_Art_of_Polishing_Paint_1Class_115.jpg


The_Art_of_Polishing_Paint_1Class_116.jpg


The_Art_of_Polishing_Paint_1Class_117.jpg


The_Art_of_Polishing_Paint_1Class_118.jpg


The_Art_of_Polishing_Paint_1Class_119.jpg


The_Art_of_Polishing_Paint_1Class_120.jpg


The_Art_of_Polishing_Paint_1Class_121.jpg


Major on the majors
Now that the perimeter of this panel has been edged, it's time to knock out the major portion of the panel, I call this majoring on the majors.

The_Art_of_Polishing_Paint_1Class_122.jpg


The_Art_of_Polishing_Paint_1Class_123.jpg


The_Art_of_Polishing_Paint_1Class_124.jpg


The_Art_of_Polishing_Paint_1Class_125.jpg


The_Art_of_Polishing_Paint_1Class_126.jpg


After a little hands-on training the guys have it down, they thought they wouldn't like using rotary buffers and found out they really like using them...

The_Art_of_Polishing_Paint_1Class_127.jpg


The_Art_of_Polishing_Paint_1Class_128.jpg


Grit Guard Universal Pad Washer
I stress working clean in all my classes and this is especially true when working wetsanding, cutting and buffing a show car. Here's the guys using a pad washer to remove the spent compound and abraded paint.

The_Art_of_Polishing_Paint_1Class_129.jpg


Back to the task at hand removing 100% of the sanding marks as that's my criteria.

The_Art_of_Polishing_Paint_1Class_130.jpg


The_Art_of_Polishing_Paint_1Class_131.jpg


Next up... foam pad polishing and foam pad jewelling...


:)
 
I saw the 55 Ford on Sunday at a car show.It came out great.
I saw that car at AG just before the owner picked it up, as I commented in another thread every square inch of that car was perfect. Its Mike's attention to details that makes for the "Perfect Detail" :Picture:
 
I love to follow along to see whats going on in the AG garage.


And I like sharing what we do here. I can't actually think of any other place where the cars and the work done by the students is actually shared and documented so thoroughly. It takes some time to to get the pictures onto the forum but once they are up it's a living history that showcases what we do here.

To me its important to show just how much a person gets to learn when they attend these classes plus all the cool tools they get to work with and the cool cars they get to work on, so they can not only learn how to use the tools in a real-world situation but in some cases figure out which tools are a best fit for their needs.


For anyone reading through this thread that would like to attend one of these classes, here's the link to register for my next Detailing Boot Camp Class.


Registration
The two day detailing bootcamp class is $750.00 and this includes a $200.00 merchandise credit at Autogeek.net

Click here to register online


And here's a link to a thread for it on this forum with testimonies from people that have attended my classes in the past.


Mike Phillips's Detailing Boot Camp May 4th & 5th


My next and last Detailing Boot Camp Class for 2013 will be September 28th and 29th.

You can register for the September class by calling customer care at,

1-800-869-3011


More pictures today...


:)
 
Continued....


Here's Mike and Derek machine polishing to remove any holograms from the compound and wool fibers from the cutting pad using Lake Country 6.5" CCS Black Foam Polishing Pads with Meguiar's M205

The_Art_of_Polishing_Paint_1Class_132.jpg


The_Art_of_Polishing_Paint_1Class_133.jpg


Jewelling
After removing the holograms, here's Mike and Derek jewelling the paint using Menzerna SF 4500 with some beta 6.5" Flat Gold Jewelling Pads on 600 RPM on Flex PE14's. I had the guys open the hood and wipe off all trace residues from the compounding and polishing steps as well as around all the trim because the thing I see everyone leave out when they talk about jewelling is the importance of working clean.

The_Art_of_Polishing_Paint_1Class_134.jpg


The_Art_of_Polishing_Paint_1Class_135.jpg


The_Art_of_Polishing_Paint_1Class_136.jpg


The_Art_of_Polishing_Paint_1Class_137.jpg


The_Art_of_Polishing_Paint_1Class_138.jpg


Machine Apply Wolfgang Fuzion
Next up we're going to machine apply Wolfgang Fuzion using soft blue Lake Country 5.5" Waxing Pads on DA Polishers. This really lays down an thin, uniform layer of wax. After the guys machine wax the entire car then we'll carefully wipe the wax off...

The_Art_of_Polishing_Paint_1Class_139.jpg


The_Art_of_Polishing_Paint_1Class_140.jpg


The_Art_of_Polishing_Paint_1Class_141.jpg


The_Art_of_Polishing_Paint_1Class_142.jpg


The_Art_of_Polishing_Paint_1Class_143.jpg


The_Art_of_Polishing_Paint_1Class_144.jpg


The_Art_of_Polishing_Paint_1Class_145.jpg


The_Art_of_Polishing_Paint_1Class_146.jpg


The_Art_of_Polishing_Paint_1Class_147.jpg


Microfiber Gloves
Every time I bring out the microfiber gloves for all our high end work and AFTER everyone uses them for the first time they see how well they really do work.

The_Art_of_Polishing_Paint_1Class_148.jpg


The_Art_of_Polishing_Paint_1Class_149.jpg


The_Art_of_Polishing_Paint_1Class_150.jpg


The_Art_of_Polishing_Paint_1Class_151.jpg


The_Art_of_Polishing_Paint_1Class_152.jpg


The_Art_of_Polishing_Paint_1Class_153.jpg


Next up... the beauty shots!


:D
 
Here's the beauty shots...


Augeek.net.... where all the car action's at...

The_Art_of_Polishing_Paint_1Class_156.jpg


Look Ma... no holograms...
This is after a complete machine wetsanding, followed by compounding with a rotary buffer and wool pads, followed by a rotary buffer with polishing pads followed by a rotary buffer for the jewelling step and.... it was done by absolute newbies to wetsanding and rotary buffers.


Hologram-free finish in full sun...
The_Art_of_Polishing_Paint_1Class_157.jpg


The_Art_of_Polishing_Paint_1Class_158.jpg


This was done with the Flex 3401 so of course it's completely hologram-free too...

The_Art_of_Polishing_Paint_1Class_159.jpg


The_Art_of_Polishing_Paint_1Class_160.jpg


The_Art_of_Polishing_Paint_1Class_161.jpg


The Art of Polishing Paint

I present a 1959 Chevrolet Impala sanded and buffed by the students of my advanced "Art of Polishing Paint" class...

The_Art_of_Polishing_Paint_1Class_162.jpg


The low down front grill shot...

The_Art_of_Polishing_Paint_1Class_163.jpg


The_Art_of_Polishing_Paint_1Class_164.jpg


The_Art_of_Polishing_Paint_1Class_165.jpg


The_Art_of_Polishing_Paint_1Class_166.jpg


Iconic Cat Eye Tail Lights...

The_Art_of_Polishing_Paint_1Class_167.jpg


All the paint around the lights, license plate and under the wing was hand waxed...

The_Art_of_Polishing_Paint_1Class_168.jpg


The_Art_of_Polishing_Paint_1Class_169.jpg


The_Art_of_Polishing_Paint_1Class_170.jpg


The_Art_of_Polishing_Paint_1Class_171.jpg


The_Art_of_Polishing_Paint_1Class_172.jpg


The_Art_of_Polishing_Paint_1Class_173.jpg


From left to right...

Trey, Mike and Derek...
(not pictured Dan)

The_Art_of_Polishing_Paint_1Class_154.jpg


The_Art_of_Polishing_Paint_1Class_155.jpg


The_Art_of_Polishing_Paint_1Class_155c.jpg


Nice work guys for your first time sanding and using rotary buffers.


:dblthumb2:
 
Pictures The Art of Polishing Paint Advanced Detailing Classes

One day, emeraldgirl08, I bet all PCs will be sold like that - to save space Great pics by the way, very clear Are you going to put the T400 back together though?
 
Thanks Mike Phillips,

This class by far exceeded my expectations. One of the most informative and fun classes I have ever taken I would go all over again. If your into car detailing or want to know more i definitely recommend one of his classes. You leave much more confident and with a lot more knowledge overall.

Plus you get to try out all the new products and tools on the market. It couldn't have been better.

Mike Brown
 
Thanks Mike Phillips!

I cant say that enough. My skill set and comfort level have been brought to a new level after taking this course. We were able to use all the best products and tools and experience how they work best for each situation. The ability to first try the products really helped me recognize my needs.

Mike Phillips was hands on with us every-step of the way. I highly recommend this class everyone!
 
Back
Top