Polish Plan for Altima Advice

OMRebel

New member
Joined
Sep 29, 2012
Messages
162
Reaction score
0
I'm contemplating polishing my 2010 Dark Slate Altima. Through research on this forum, I've read that the paint is very thin on this car. I'm a little scared to polish it. Should I be? I'm the original owner, and it's never seen polish. It has the typical light scratches that most cars on the road have from improper washing techniques. It also has water spots that I believe are Type 2. This, of course, all developed before I caught the detailing fever. I'm not looking to make it perfect - just trying to get some light practice on the polisher and make the wife happy. Here's the plan:

1. Wash w/ Meg's Gold Class & Dawn (2 bucket system)
2. Griot's Paint Prep
3. Clay Bar (Griot's Clay & Speed Shine - not satisfied here, need recommendations for the future)
4. Polish (Griot's 6", Wolfgang Twins and LC 5.5" Flat Pads)

What color combo do you recommend for the pads w/ the twins? I have Orange, Yellow, White, and Black. I was thinking Swirl Remover w/ Yellow Pad; Finishing Glaze White Pad. But I read some folks use White Pad w/ SR then Black Pad w/ FG.

Also, I have Poorboy's SSR 2.5 and 1 if anyone thinks that would be better; however, I'm not a big fan.

5. WGDGS 3.0

The 12 hour cure time concerns me here.
The moisture is thick here in Mississippi and dew will be settling on the car by 6PM. I'm thinking of laying blankets and a tarp over it. Do you have any tips on fighting the weather/cure time?

6. Fuzion on Sunday Morning

Thoughts? Didn't provide pics - car is dirty and can't see scratches too well, but I'm asking more technical questions and less situational ones. Thanks in advance! You guys/gals rock.
 
Do not be afraid!

Watch videos, read articles, threads etc.

I would do a test spot. Start with a white pad, if no results move up to Orange.

How bad are the swirls?

Dont forget to do an IPA wipedown to be sure the polish is all gone, and not 'hiding' the swirls.


As far as the cure time. You should be fine after 6 hours or so IMO.

Thanks! The scratches are light, but consistent on all body panels. I've done nothing but watch videos and read articles for months now; however, now that it's time to put it to test on the wife's car I'm a little hesitant. I did my F150 a few weeks ago - amazing results, but if I screwed it up it was my car. ha.

Good to hear that cure time of 6 hrs is ok. 12 hrs is a bit ridiculous and puts a damper on adding a topper.

Is IPA necessary?
 
I would say yes. Mix 50/50 IPA and water. Will promote better bonding for your LSP.


Are they swirls, or RIDS?
http://www.autogeekonline.net/forum...5-rids-definition-rids-story-behind-term.html

I would suggest doing the LSP. Waiting the 12 hours, and using a quick detail spray, or even a quick wash to remove any dust etc. THAN apply another coat. That being said, doing it in 6 hours won't do any harm and will even insure even coverage.
 
I'm contemplating polishing my 2010 Dark Slate Altima. Through research on this forum, I've read that the paint is very thin on this car. I'm a little scared to polish it. Should I be? I'm the original owner, and it's never seen polish. It has the typical light scratches that most cars on the road have from improper washing techniques. It also has water spots that I believe are Type 2. This, of course, all developed before I caught the detailing fever. I'm not looking to make it perfect - just trying to get some light practice on the polisher and make the wife happy. Here's the plan:

1. Wash w/ Meg's Gold Class & Dawn (2 bucket system)
2. Griot's Paint Prep
3. Clay Bar (Griot's Clay & Speed Shine - not satisfied here, need recommendations for the future)
4. Polish (Griot's 6", Wolfgang Twins and LC 5.5" Flat Pads)

What color combo do you recommend for the pads w/ the twins? I have Orange, Yellow, White, and Black. I was thinking Swirl Remover w/ Yellow Pad; Finishing Glaze White Pad. But I read some folks use White Pad w/ SR then Black Pad w/ FG.

Also, I have Poorboy's SSR 2.5 and 1 if anyone thinks that would be better; however, I'm not a big fan.

5. WGDGS 3.0

The 12 hour cure time concerns me here.
The moisture is thick here in Mississippi and dew will be settling on the car by 6PM. I'm thinking of laying blankets and a tarp over it. Do you have any tips on fighting the weather/cure time?

6. Fuzion on Sunday Morning

Thoughts? Didn't provide pics - car is dirty and can't see scratches too well, but I'm asking more technical questions and less situational ones. Thanks in advance! You guys/gals rock.

Well, I like your plan!... For the clay, I would say try the Meguiar's Professional Detailing clays, or the Pinnacle clays.

Depending on the condition of the paint, I would stick with the yellow and white pad. Now, the Wolfgang twins would be the better choice over the Poorboy's.. I also am not a big fan of the ssr's...

I can't really help you with the dew issue, but a suggestion would be to keep it in the garage with the door closed. I don't believe it has to be outside.

Lastly, BE CAREFUL! The paint is pretty thin, and extremely soft. I did the same car, it was the third car I ever detailed. I didn't even have a polisher or rotary at that time, and did the car by hand. It was extremely neglected and it only took me 6 hours.. So you can realize it must have pretty soft paint...

Anyway, good luck and have fun!
 
Good to hear that cure time of 6 hrs is ok. 12 hrs is a bit ridiculous and puts a damper on adding a topper.
Is IPA necessary?

I was gonna say this too, 6 hours should be sufficient.. God knows I wasn't that patient either. lol:laughing:

As for IPA, It definitely helps! I used to never do it, but the sealants and waxes just didn't last as long as I would've liked. It's not that expensive either, so you don't gotta open up a second mortgage to do it like other things in detailing. lol
 
Lastly, BE CAREFUL! The paint is pretty thin, and extremely soft. I did the same car, it was the third car I ever detailed. I didn't even have a polisher or rotary at that time, and did the car by hand. It was extremely neglected and it only took me 6 hours.. So you can realize it must have pretty soft paint...

This is what I'm worried about. I guess I'll start w/ finishing glaze on a white pad and 3 section passes. Then keep slowly getting more aggressive w/ pad/polish combo & number of passes.

Thanks for all the great info so far!
 
I'm contemplating polishing my 2010 Dark Slate Altima. Through research on this forum, I've read that the paint is very thin on this car. I'm a little scared to polish it. Should I be? I'm the original owner, and it's never seen polish. It has the typical light scratches that most cars on the road have from improper washing techniques. It also has water spots that I believe are Type 2. This, of course, all developed before I caught the detailing fever. I'm not looking to make it perfect - just trying to get some light practice on the polisher and make the wife happy. Here's the plan:

1. Wash w/ Meg's Gold Class & Dawn (2 bucket system)
2. Griot's Paint Prep
3. Clay Bar (Griot's Clay & Speed Shine - not satisfied here, need recommendations for the future)
4. Polish (Griot's 6", Wolfgang Twins and LC 5.5" Flat Pads)

What color combo do you recommend for the pads w/ the twins? I have Orange, Yellow, White, and Black. I was thinking Swirl Remover w/ Yellow Pad; Finishing Glaze White Pad. But I read some folks use White Pad w/ SR then Black Pad w/ FG.

Also, I have Poorboy's SSR 2.5 and 1 if anyone thinks that would be better; however, I'm not a big fan.

5. WGDGS 3.0

The 12 hour cure time concerns me here.
The moisture is thick here in Mississippi and dew will be settling on the car by 6PM. I'm thinking of laying blankets and a tarp over it. Do you have any tips on fighting the weather/cure time?

6. Fuzion on Sunday Morning

Thoughts? Didn't provide pics - car is dirty and can't see scratches too well, but I'm asking more technical questions and less situational ones. Thanks in advance! You guys/gals rock.

I have a 2011 Altima coupe dark slate metallic, love the color. I just received the meguiars combo (m105,m205) an will be testing that out then putting down black light, fuzion, v7 I will let you know my results
 
This is what I'm worried about. I guess I'll start w/ finishing glaze on a white pad and 3 section passes. Then keep slowly getting more aggressive w/ pad/polish combo & number of passes.

Thanks for all the great info so far!

Finishing glaze/white pad is not the best product to start with on the scratches in your test spot.
 
I'm contemplating polishing my 2010 Dark Slate Altima. Through research on this forum, I've read that the paint is very thin on this car. I'm a little scared to polish it. Should I be? I'm the original owner, and it's never seen polish. It has the typical light scratches that most cars on the road have from improper washing techniques. It also has water spots that I believe are Type 2. This, of course, all developed before I caught the detailing fever. I'm not looking to make it perfect - just trying to get some light practice on the polisher and make the wife happy. Here's the plan:

1. Wash w/ Meg's Gold Class & Dawn (2 bucket system)
2. Griot's Paint Prep
3. Clay Bar (Griot's Clay & Speed Shine - not satisfied here, need recommendations for the future)
4. Polish (Griot's 6", Wolfgang Twins and LC 5.5" Flat Pads)

Move step #2 to step #5. As a general rule you clay immediately after washing. Paint Prep will replace your IPA step.

This would be my suggested order:

1- Wash w/ Megs....
2- Clay
3- Polish
4- Griot's Paint Prep
5- WGDPS
6- Fuzion

What color combo do you recommend for the pads w/ the twins? I have Orange, Yellow, White, and Black. I was thinking Swirl Remover w/ Yellow Pad; Finishing Glaze White Pad. But I read some folks use White Pad w/ SR then Black Pad w/ FG.

Also, I have Poorboy's SSR 2.5 and 1 if anyone thinks that would be better; however, I'm not a big fan. PICS would help here but suffice to say the combos you cited are fine relative to the condition of the paint. Lock in your base approach on your vehicle using a test spot, and start with SR and a white pad based on your assessment thus far. If the first test doesn't give you satisfaction then bump up to Orange. Based on your assessment you would not really need a Yellow pad. FG should be used with a black or grey pad but you may be able to get away with white if you use little to no pressure.

5. WGDGS 3.0

The 12 hour cure time concerns me here.
The moisture is thick here in Mississippi and dew will be settling on the car by 6PM. I'm thinking of laying blankets and a tarp over it. Do you have any tips on fighting the weather/cure time? What I typically do is get the car fully polished by the end of day 1, and then on day 2, early morning, QD the car and then apply the sealant. Leave the car alone for most of the day and after 6-8 hours you should be fine and can continue to the next step.

6. Fuzion on Sunday Morning You can apply Fuzion anytime, really, as there is no cure time constraint to deal with. Adding to my comments on #5, you would apply Fuzion late afternoon.

Thoughts? Didn't provide pics - car is dirty and can't see scratches too well, but I'm asking more technical questions and less situational ones. Thanks in advance! You guys/gals rock.


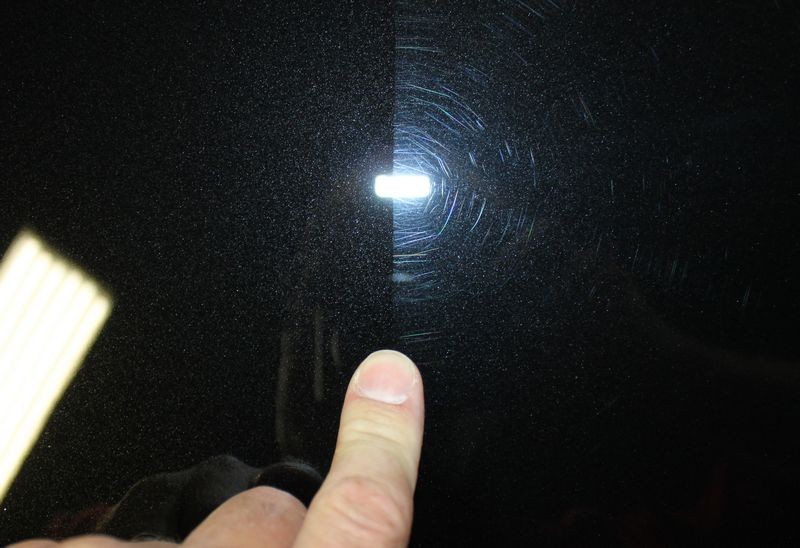
....
 
I've never seen your paint.
Detailers grind on Nissans everyday.
Light polish on a white pad is a waste of time for a 2-3 year dd with so called soft paint. But polishing is an ongoing learning process where eventually you'll know what to reach for in most instances to start your test spot.

But this is just my opinion...and you know what they say about opinions ;)

Autogeek Swirl Removers & Compounds Comparison Chart
 
:bump:...just wondering what you decided on.


Happy detailing...:autowash:
After I washed it and hit it with Paint Prep, I decided not to polish it. I'm going to wait until next Spring. My garage is currently filled with all the stuff that needs to be in my soon-to-be-built shed. Hopefully by next Spring I will have a garage I can park the car in and work on. Then, I clayed it, and the whole time was thinking "you need to try the speedy prep towel". After claying, hit it with WGDGS 3.0 around 11AM. Came back Sunday morning and topped it with Fuzion.

I've had that car for 2 years now, and it seems if you look at it the wrong way the paint will chip. It has little tiny rock chips all over it. I should've got a clear bra for it I guess.
 
After I washed it and hit it with Paint Prep, I decided not to polish it. I'm going to wait until next Spring. My garage is currently filled with all the stuff that needs to be in my soon-to-be-built shed. Hopefully by next Spring I will have a garage I can park the car in and work on. Then, I clayed it, and the whole time was thinking "you need to try the speedy prep towel". After claying, hit it with WGDGS 3.0 around 11AM. Came back Sunday morning and topped it with Fuzion.


I've had that car for 2 years now, and it seems if you look at it the wrong way the paint will chip. It has little tiny rock chips all over it. I should've got a clear bra for it I guess.

Smart move. Top shelp lsp.

For the life of me, I don't understand the fascination with the clay alternatives, but then again I use a seemingly mild clay, Speed Clay.

My dd Chrysler just hit the 101,xxx mile mark. I've got plenty of chips and rids, but being silver, they don't stand out in the sea of bling.
Thanks for coming full circle with your thread.
Looking forward to your show and shine this spring :dblthumb2:
 
How To Do a Test Spot


A Test Spot
TestSpot03.jpg


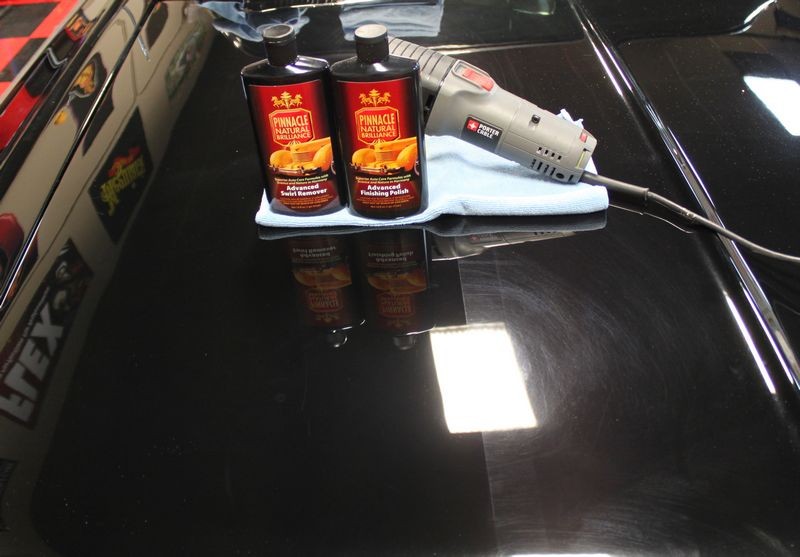
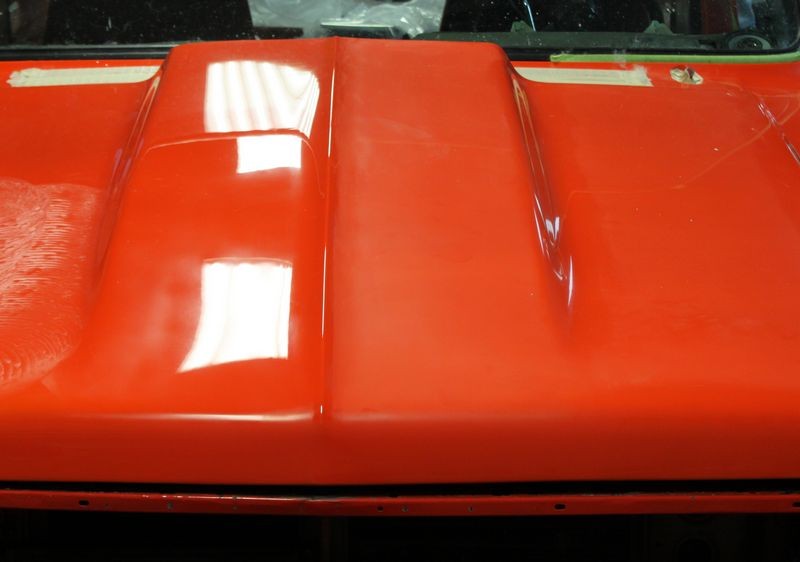
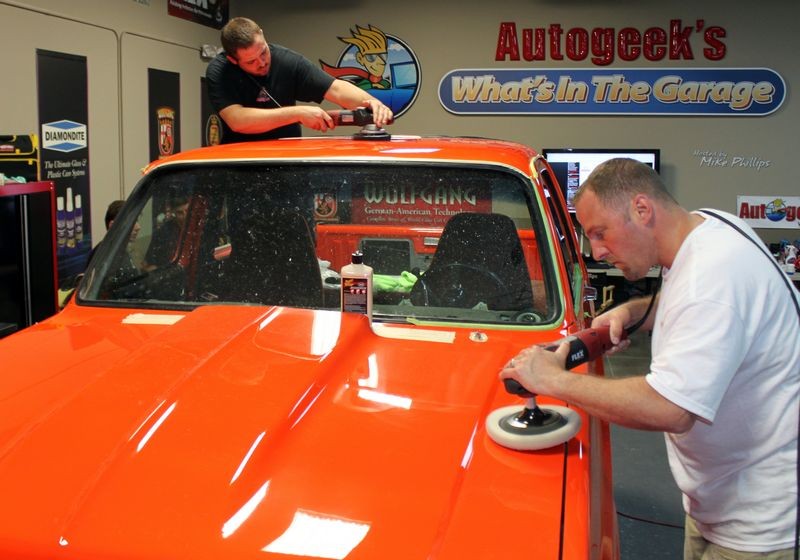
A Test Spot is where you take the products, pads, tools and your best technique and buff one small section, usually on a horizontal panel, to test out these things to see if they'll create the results you want, hope for and dream about in some cases.

If your choice of products, pads, tools and technique works to remove the defects and restore the finish to your expectations, then theoretically you should be able to duplicate the same process to the rest of the vehicle and create the same results.

If your choice of products, pads, tools and your technique doesn't create the results you want, hope for and dream about then you can come to the forum and post what you're seeing and we'll do our best to help you tweak your technique, substitute different products, pads and/or tools to see you through to success.


Tape Line
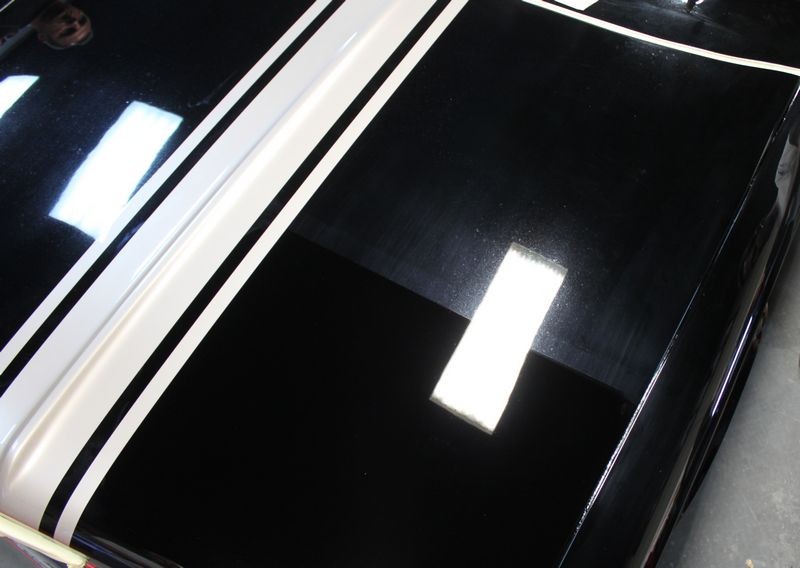
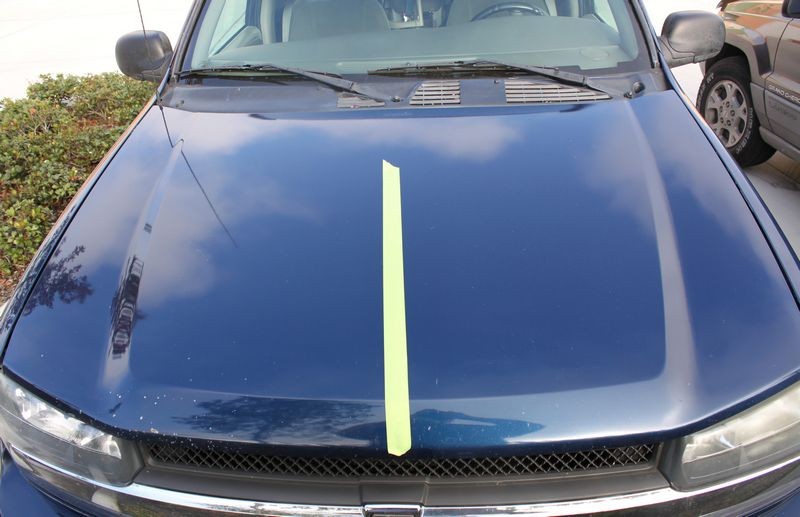
It helps to place a piece of painter's tape on a horizontal surface, usually the hood or trunk lid but if you want to be more discreet you can use the roof. Then only work on one side of the tape line as this will make it very easy for you to see visual changes due to the distinct demarcation line between before and after results.


Tape-line using 3M Green Painter's Tape
TapeLine02.jpg


Before and after results along the demarcation line
FlexVideo005.jpg


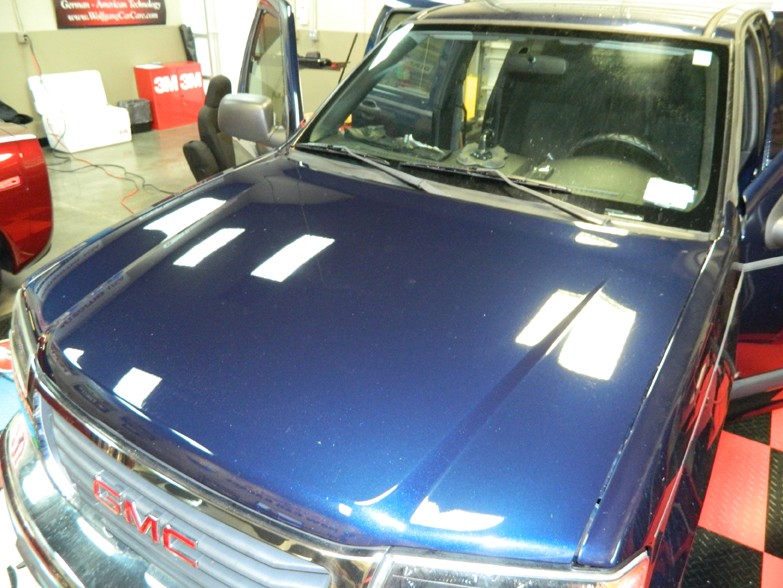
Test Spot performed by Nick Rutter @ Autogeek on a severely oxidized 2006 GMC Canyon
Here's a series of pictures taken by my co-worker Nick from a severely neglected truck he helped another co-worker Jason to buff out. For this project Nicked performed a Test Spot and the pictures really tell the story of what a Test Spot would look like that I've created this article using these pictures and Nick's permission.

The project vehicle is a severely neglected 2006 GMC Canyon with a heavily oxidized clear coat finish. In this case Nick used a one-step cleaner/wax applied by machine but you would buff the paint in the same way with whatever "system" you were planning on using.

If using a multiple step approach then you would use all the products and do all the steps to your Test Spot because this would be what you would do to the entire vehicle if the results from your Test Spot are good and you want to see what the true end-results are going to be. You can if you want skip applying the LSP or Last Step Product if you're happy with the last prep step as in most cases the application of your LSP will simply either make the paint look even better or maintain the results you've created.


Test Spot
test-spot-redone.jpg


Hood Competed
TestSpot04.jpg


Truck completed
TestSpot06.jpg


TestSpot07.jpg


See the original write-up for this project here,

How To: Maximize Time with a Cleaner Wax/AIO


Test every detailing project that's new to you
If you've never worked on the paint on the project you're currently detailing, the before you buff out the entire car, take a moment to do a Test Spot.

I do a Test Spot on ever car I work on as this give me an idea of,
  • How the paint reacts to machine polishing
  • How the products and pads are working on this specific type of paint
  • A feel for if the paint is hard or soft or somewhere in-between
  • A very good idea as to how the paint will and thus how the vehicle will look after the project is finished.
Plus, if you're buffing out the car professionally you can share with your customer how awesome they're car is going to look after you get through with it.


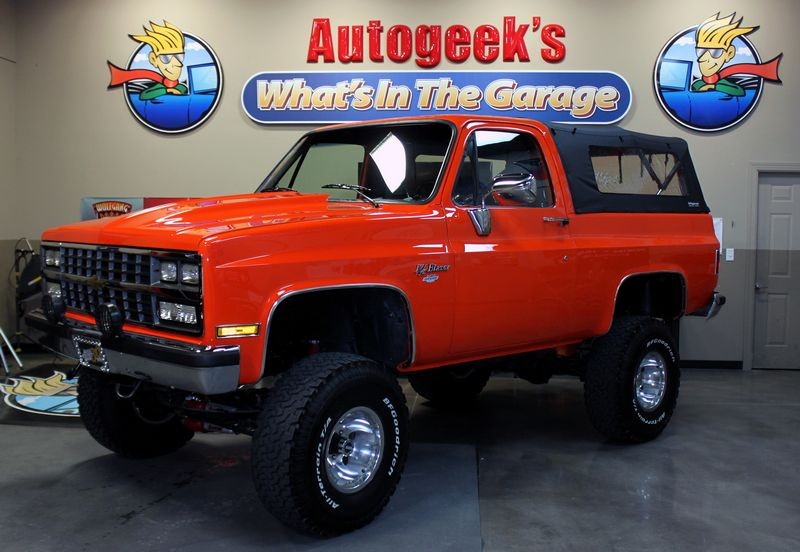
Here's the results from some of the Test Spots we've done to some of the recent projects cars here at AGO


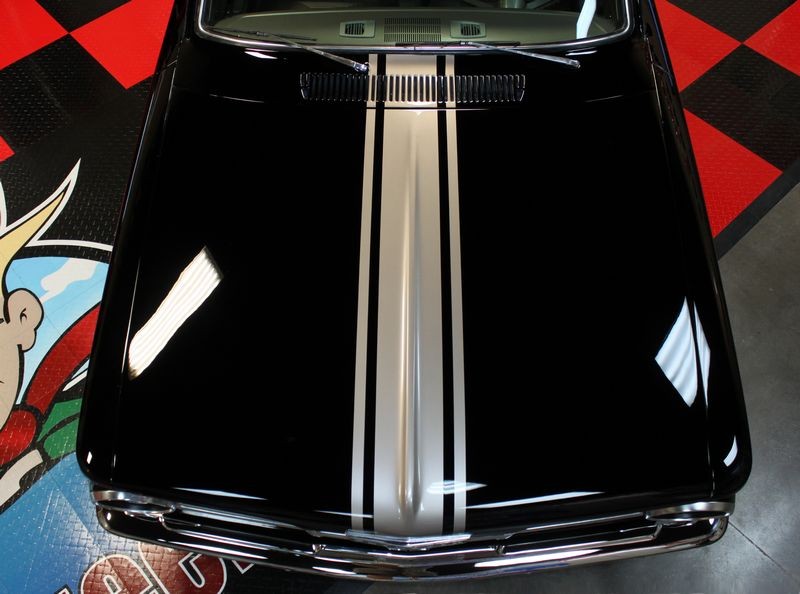
1959 Chevrolet El Camino - Extreme Makeover - Modeled by Christina

1959ElCamino008.jpg


1959ElCamino084.jpg


Live Broadcast Video - 1965 Plymouth Valiant - Extreme Makeover


Before
1965Plymouth013.jpg


Test Spot
1965Plymouth025.jpg


After
1965Plymouth078.jpg


Wetsanding Test Spot
Even if you're going to wetsand or dampsand a vehicle it's just as important to do a Test Spot by sanding a section of paint and then testing to see what it's going to take to remove 100% of your sanding marks.


Test Spot
MorePeopleMoreBuffers003.jpg


Hood compounded
MorePeopleMoreBuffers004.jpg


After
jaysk508.jpg


Test, test, test...
Test out the products you're planning on using over the entire vehicle to one small area first. Make sure you're getting the results you want, hope for and dream about before buffing out the entire project.


:)
 
This may seem like a dumb question, but even though I've been detailing for more years than I like to admit I've only been machine polishing for the last year.

So you do a test spot with a polishing pad and a polish--the results are not what you want so you step up to say a mild compound with the same pad and then to the same compound with a more aggressive pad to see how each will perform--do you have to start a test spot for each combination you are testing??
 
Back
Top