Wow!
All I can think is the factory paint must be soft and thin?
Has this panel or this car ever been repainted?
Two more comments... and these are for everyone that will read this thread into the future.
1: When working out defects that are IN the paint. Remember that paint is THIN. See my article here,
Clearcoats are thin by Mike Phillips
If your fingernail catches in the scratch, that's an indicator it's too deep to remove safely and you risk removing so much clearcoat that you expose the basecoat or worse, primer or even worse, the underlying panel. When this happens, the only way to recover is to repaint.
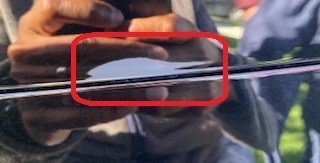
2: When attempting to remove deeper scratches, if working on a clearcoated car, you should NEVER see color or pigment on your applicator cloth, applicator pad or buffing pad if working by machine. As soon as you see the color of the car on any of these things, STOP. You have went through the clearcoat.
I've been helping people to remove swirls and scratches for a career now and I understand many of you, that are the type of person that swirls, scratches and water spots in your car's finish will BUG YOU as in you are probably a tick OCD.
OCD = Obsessive Compulsive Disorder
While I admire your passion for perfection, because the factory paint on most cars is very thin, there's only so much paint correction you can do before you simply have to learn to live with what you cannot remove.
To that end I wrote these articles,
Wow!
All I can think is the factory paint must be soft and thin?
Has this panel or this car ever been repainted?
Two more comments... and these are for everyone that will read this thread into the future.
1: When working out defects that are IN the paint. Remember that paint is THIN. See my article here,
Clearcoats are thin by Mike Phillips
If your fingernail catches in the scratch, that's an indicator it's too deep to remove safely and you risk removing so much clearcoat that you expose the basecoat or worse, primer or even worse, the underlying panel. When this happens, the only way to recover is to repaint.
2: When attempting to remove deeper scratches, if working on a clearcoated car, you should NEVER see color or pigment on your applicator cloth, applicator pad or buffing pad if working by machine. As soon as you see the color of the car on any of these things, STOP. You have went through the clearcoat.
I've been helping people to remove swirls and scratches for a career now and I understand many of you, that are the type of person that swirls, scratches and water spots in your car's finish will BUG YOU as in you are probably a tick OCD.
OCD = Obsessive Compulsive Disorder
While I admire your passion for perfection, because the factory paint on most cars is very thin, there's only so much paint correction you can do before you simply have to learn to live with what you cannot remove.
To that end I wrote these articles,
When to stop buffing - Or - How far should you go to remove swirls and scratches?
Considerations for removing paint defects - the BIG PICTURE
Topical Defects vs Sub-Surface Defects - Living life on the edge of the razor blade
What it means to remove a scratch out of anything...
")