Mike Phillips
Active member
- Dec 5, 2022
- 51,004
- 7
Review: BLACKFIRE Bug Blocker
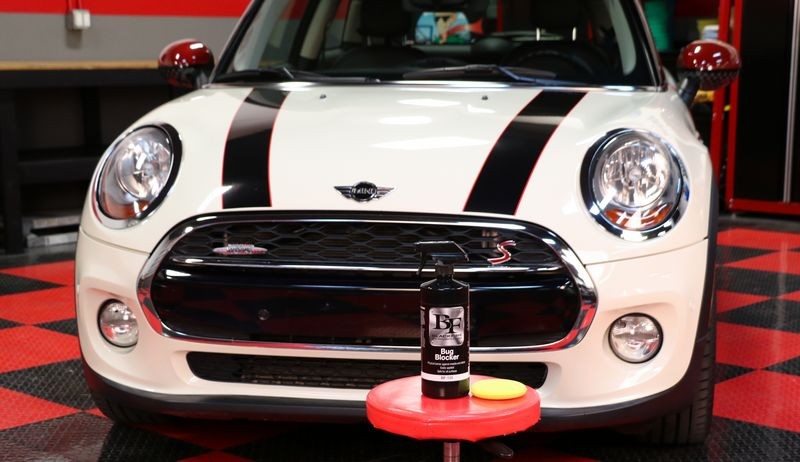
BLACKFIRE Bug Blocker

From the Autogeek.com store site
BLACKFIRE Bug Blocker
BLACKFIRE Bug Blocker was developed as a temporary shield that provides your paint enhanced protection from insect remains. BLACKFIRE Bug Blocker is perfect to apply just before a long road trip or once a week during love bug season! The buffering agents in BLACKFIRE Bug Blocker will not only shield your paint from the insects but will even neutralize the acids in their bodily fluids, preventing them from corroding through your clear coat!
Once your car is no longer at risk of bug bombardment, you can simply rinse or wash BLACKFIRE Bug Blocker (AND THE BUGS!) right off your car!
BLACKFIRE Bug Blocker is safe to use on all plastic, chrome, glass, and paint.
What it is?
A temporary shield that prevents damage caused by bugs hitting the front of your car.
What it does?
Protects paint, plastic, glass and metal from damage.
When to use it?
You can apply Bug Blocker to the front of your car after first washing and drying the car and before making a road trip during bug season.
Why to use it?
Bug Blocker prevents the corrosive acids found in bug guts from etching and removing paint and plastic off the front of your car where they impact when driving at high speeds.
Here's the problem --> BUGS
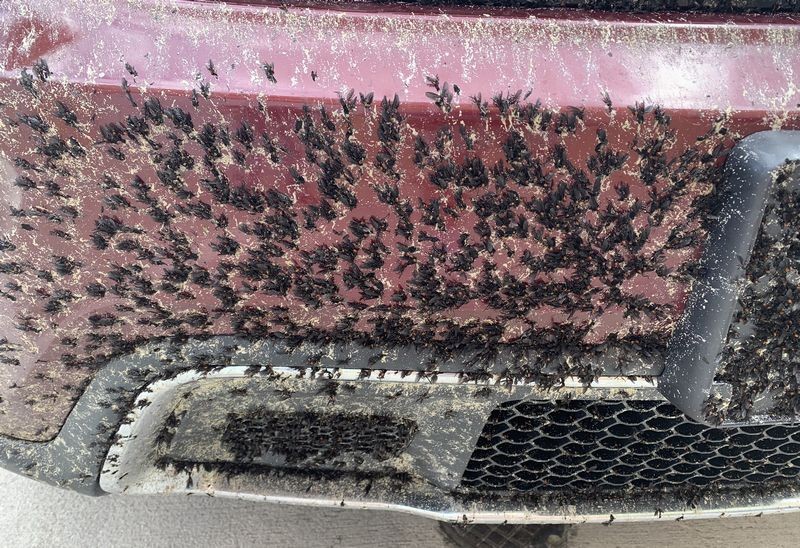
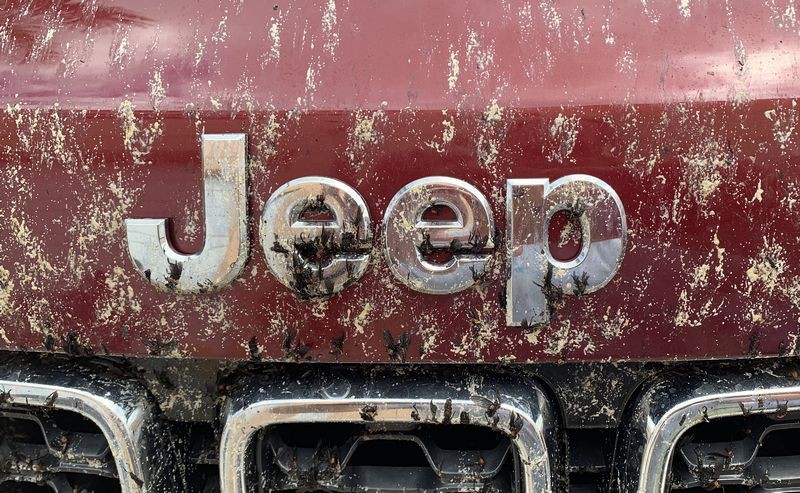
Here at Autogeek we had a customer stop by to show us the bugs that had accumulated on the front of his Jeep during Love Bug Season here in Florida. Love Bugs hatch and mate twice a year, first in May and then again in September.


Here's the Solution --> BLACKFIRE Bug Blocker
Apply BLACKFIRE Bug Blocker before making an road trips to protect your paint and make clean-up fast and easy!
The BIG PICTURE
Instead of trying to fix the problem after the fact, be pro-active before the problem can take place. Part of my job duties here at Autogeek is to answer questions on our car detailing discussion forum. I can no longer count how many times someone has asked,
How can I remove the damage to my car's paint caused by bug splatter?
The answer is - in most cases you can't.
You see, the bug guts contain highly corrosive acids that are strong enough to etch or EAT INTO your car's clearcoat paint if not removed within minutes of impact.
Everyone knows you can't simply pull over to the side of the road and wipe off bug splatter as the bugs hit the front of you car as there's simply too many bugs to deal with during Love Bug Season. You would never get to your destination. So the next best thing is to be pro-active and treat the front impact areas of your car to protect them from bug splatter until you arrive at your destination where you can remove them without rushing and without the danger and risk of trying to do so on the side of the road.
Bad News
Once the corrosive bug guts etch your car's paint - it's usually too deep to buff and remove. What this means is you now get to live with these splotchy crater etchings all over the front of our car OR take your car to a body shop and have them RE-PAINT all the affected panels.
$300.00
I have a few friends that own body shops and I asked them, if a person brought to them an averaged sized passenger car with bug splatter damage, but there is NO OTHER damage, that is no rust or dents, so all the body shop has to do is sand down to the base panel then primer, spray the basecoat and then spray the clearcoat, how much will this cost,
The low average is $300.00 and that's a low price. In most cases, especially if there are any dents or rust, the price will go up. If you need more than the hood re-painted, the price will go up. Besides the coat of re-painting the front clip on your car, you now have to deal with,
1: Color matching - cross your fingers and hope and pray that the new paint color matches the factory paint color.
2: Runs, sags, dirt in paint and orange peel - these are common fresh paint defects that can occur during the painting process. A high quality shop knows how to lay down a show car paint job, the less you spend, usually the more likely you'll see these types of fresh paint issues.
3: Holograms - in most cases, after spraying fresh paint, a body shop will sand and buff the paint to remove things like excessive orange peel, dirt in paint, runs and sags and mottling. As a by-product of this process there will often times be holograms left behind in the paint from compounding with a wool pad and a rotary buffer.
4: Overall quality and longevity - When a car is painted at the factory, there are super tight controls in place that ensure a quality paint job that with proper care will hold up over time. Whenever you get a re-paint, it's a gamble that you will get just as good a paint job as was applied at the factory. It all depends upon the quality of the body shop doing the work, the materials they use, the paint booth, the painter, etc.
The easy way to avoid all of the above hassles is to simply be pro-active with your car. If you know you're going to be driving in a geographical area of airborne bug problems, before making the trip, apply BLACKFIRE Bug Blocker to the front vertical panels on your car. It's not hard to do as long as you take your time. Of course more complicated components, like grills will take more time. But like the saying goes,
An ounce of prevention is worth a pound of cure
Or to extrapolate it out to the bug problem,
A few ounces of Bug Blocker will save you time, energy, frustration and money!
Step-by-step directions
Step 1: Thoroughly wash and dry car.
You want to start with a clean surface.
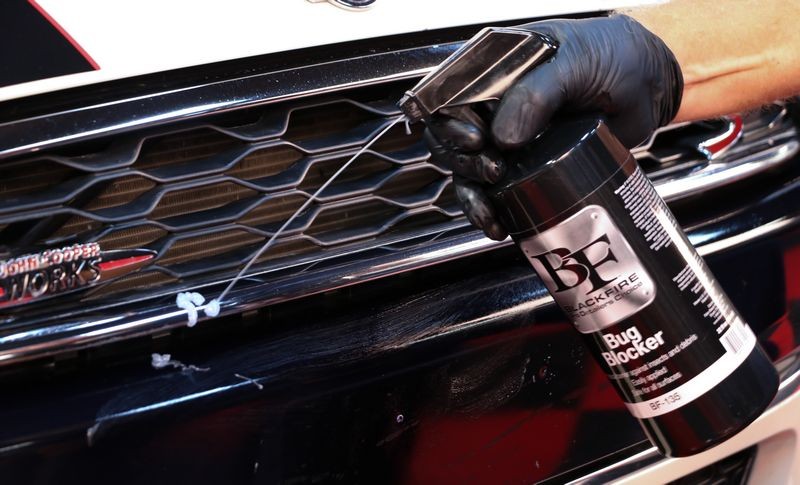
Step 2: Spray Bug Blocker directly onto panel to be treated or onto an applicator pad and then spread the product over the surface.
As you spread the product, do so in a way to leave a visible film of product on the surface. It is this FILM of product that is going to protect the surface and also neutralize the acids in the bug.
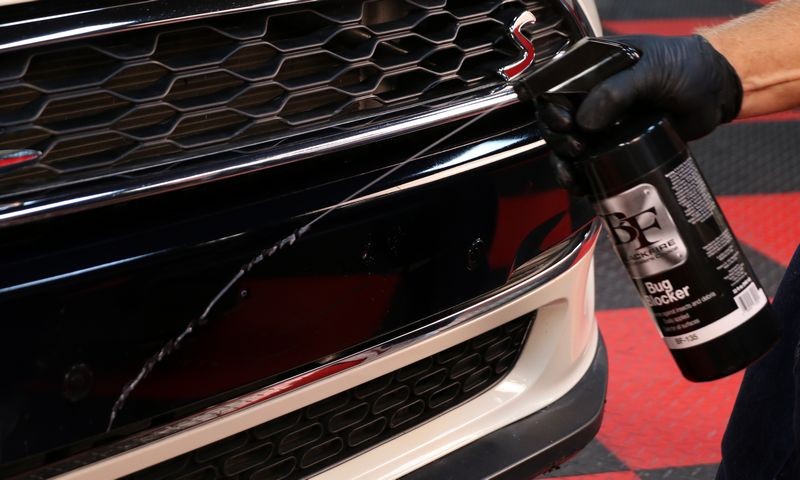
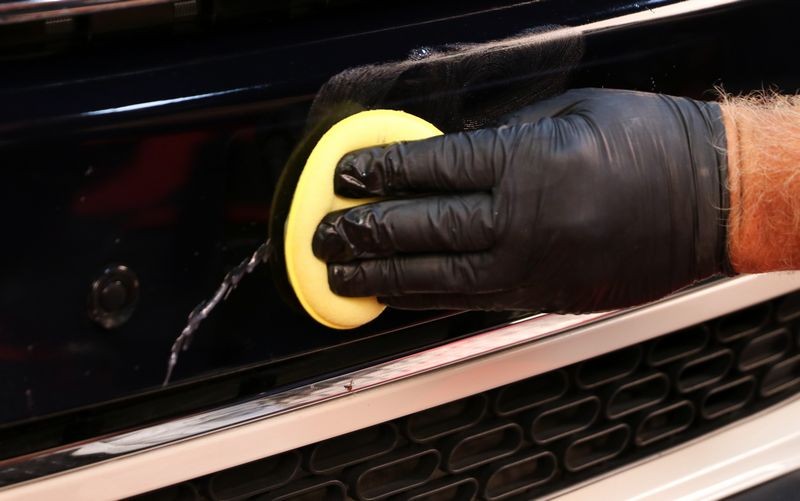


Pro Tip
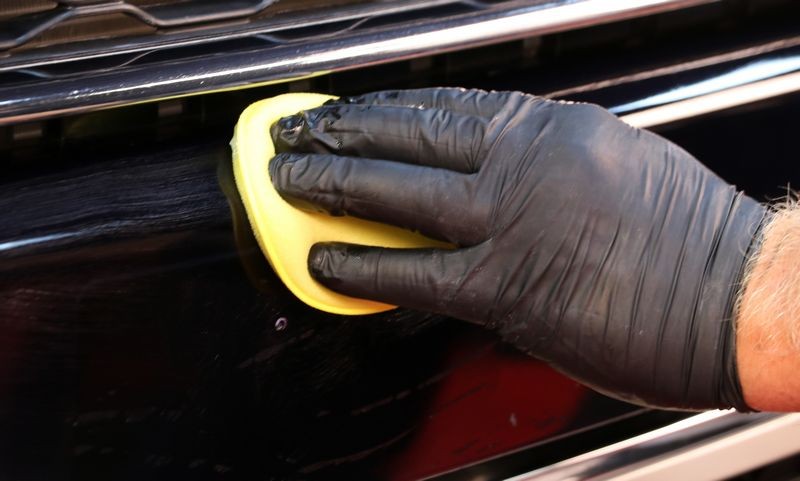
For intricate areas like grills, spray product directly onto an foam applicator pad and then using your fingers, spread the product to all sides of the grill design.
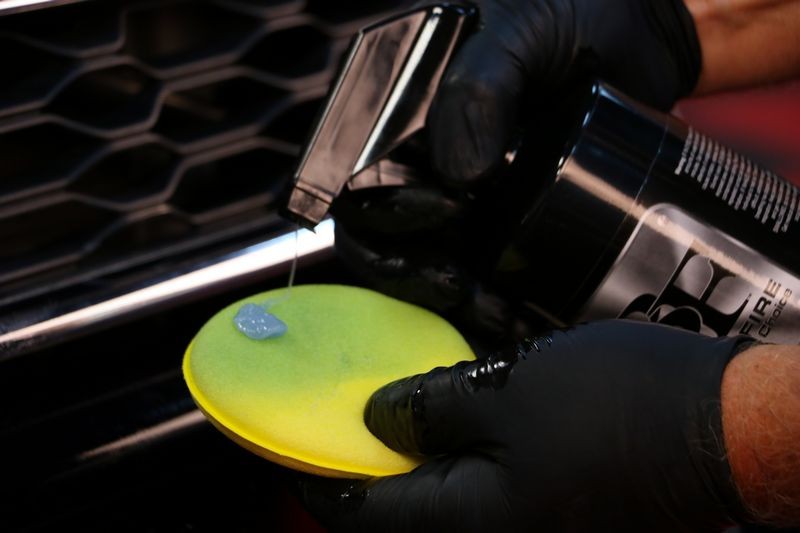
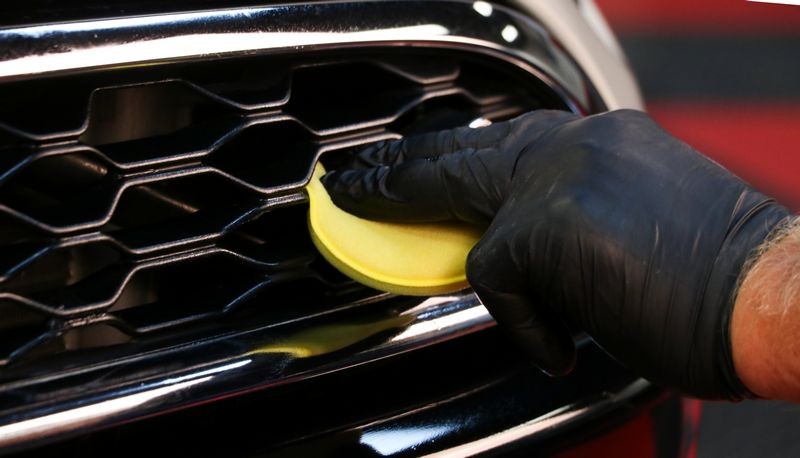
Continue applying Bug Blocker to all areas of impact including the front of the hood, front of fenders, graphics, emblems, headlights, driving lights, etc.

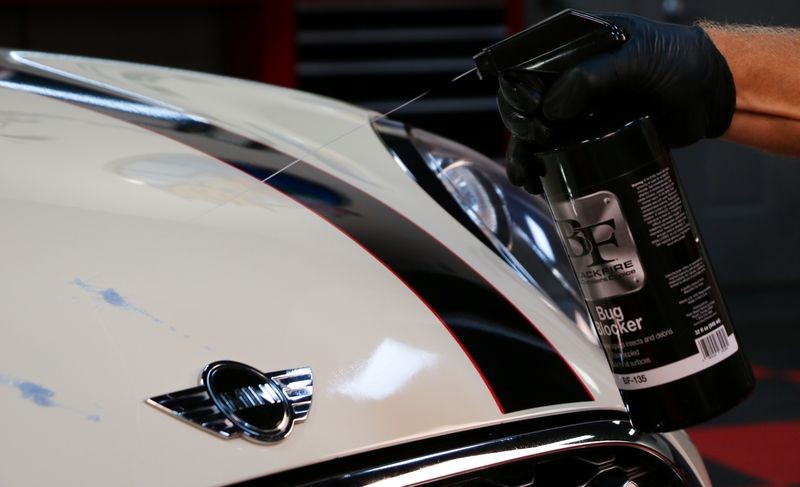
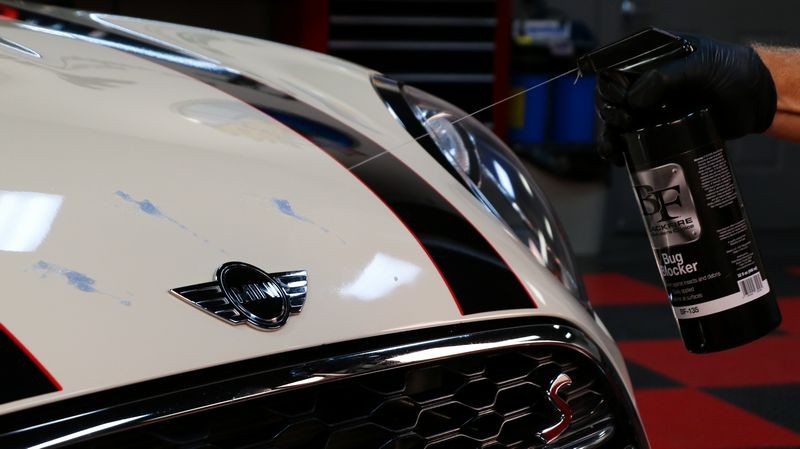
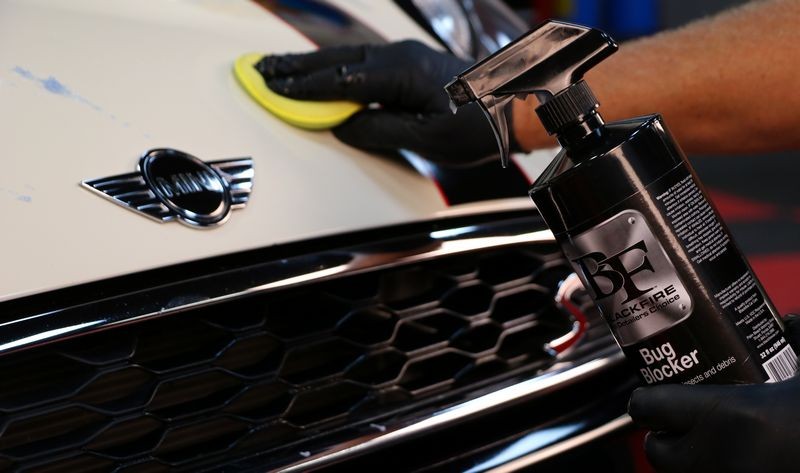


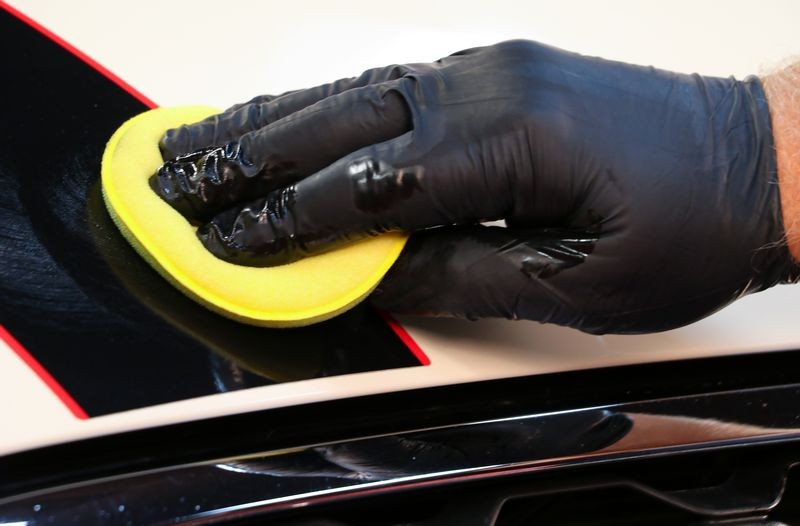

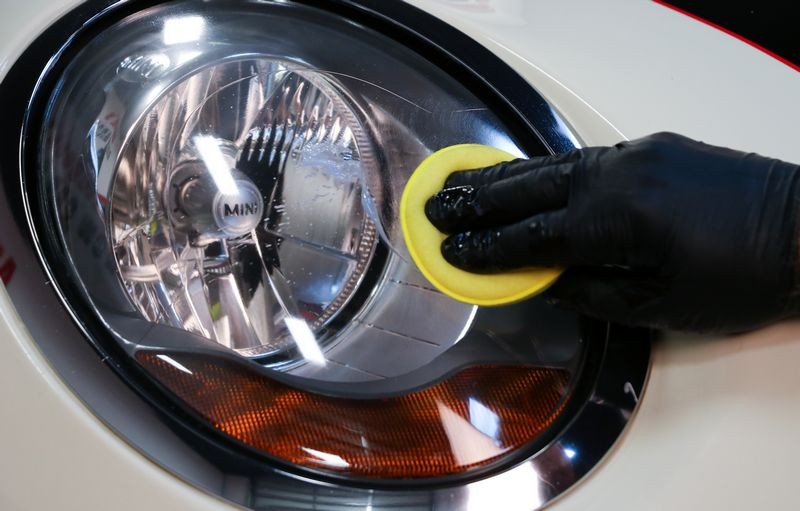

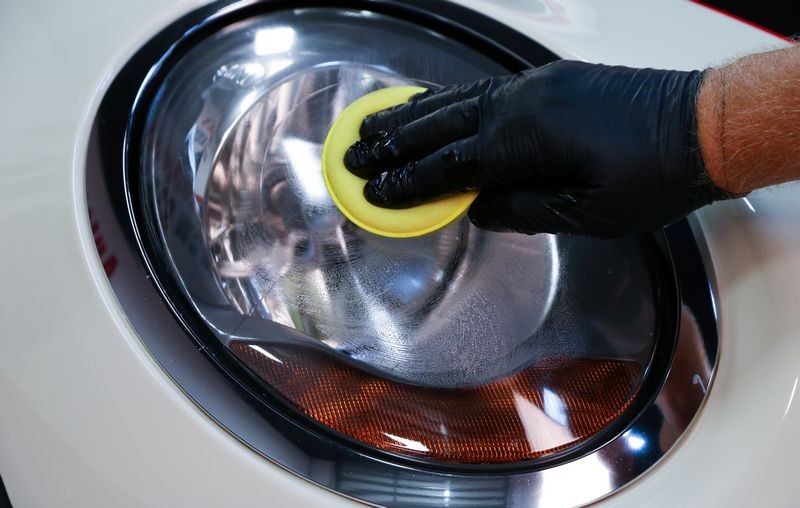
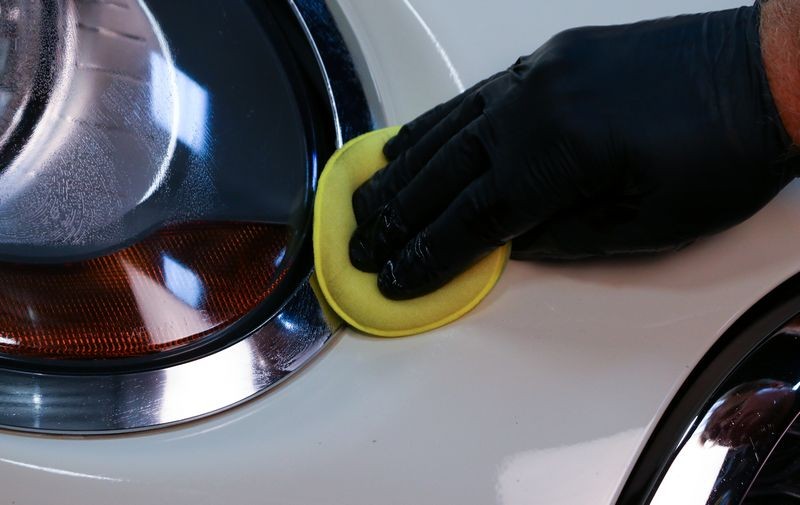


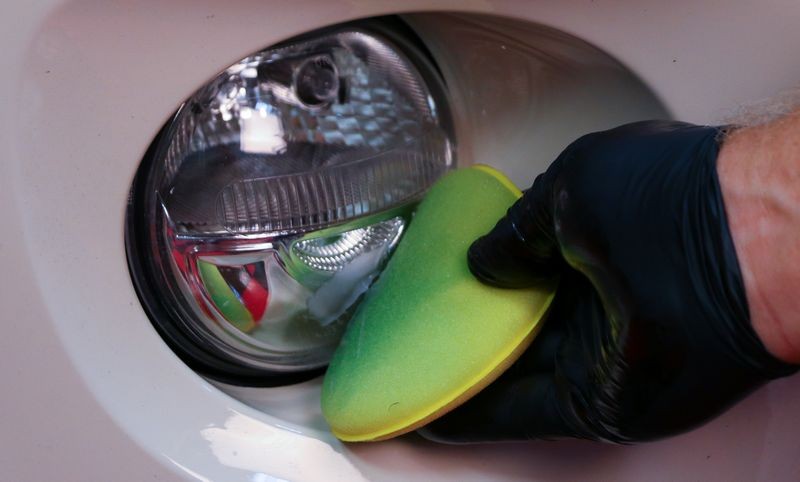
In the below picturs, if you look carefully you can see the film of product on the surface of treated areas.
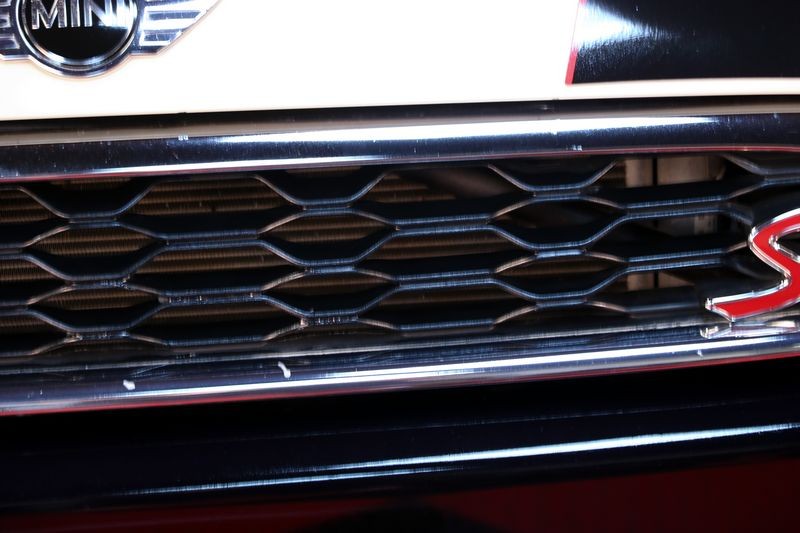


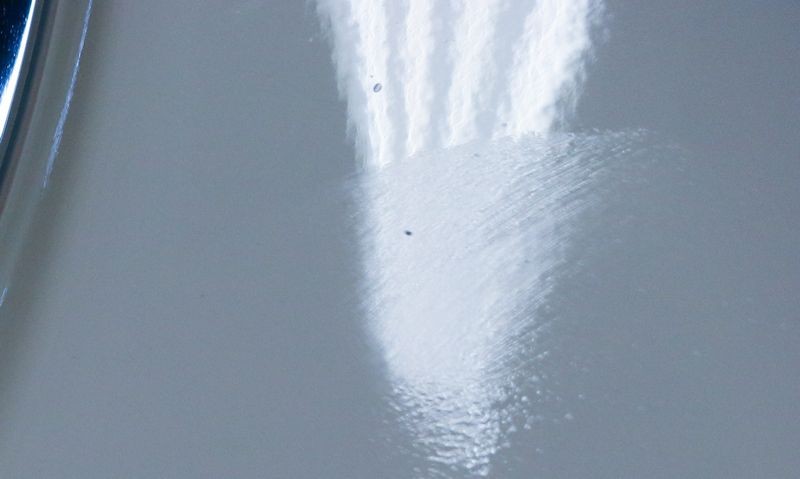
The product is clear after application so your car will retain it's beautiful appearance while being protected.

Review
This is the first time I've used and applied this product. I'm sorry to say, as I type this review it is August, 8th, 2019 and alas, it's not Love Bug Season. So all I can review or share with you is the application and removal characteristics.
The product is easy to apply. If you can apply a car wax to a car you can apply Bug Blocker to the front of your car. I don't believe there's any dangerous chemicals in the product but I wore black nitrile gloves just the same. I used an inexpensive foam wax applicator to apply and spread the Bug Blocker over flat areas and also INTO the honeycomb design grill. There's no foul odor and it's really basic stuff as far as application goes.
I will say that the product is quite THICK. It HAS to be. This product works in two ways,
1: A physical protective barrier.
2: A chemical neutralizing barrier
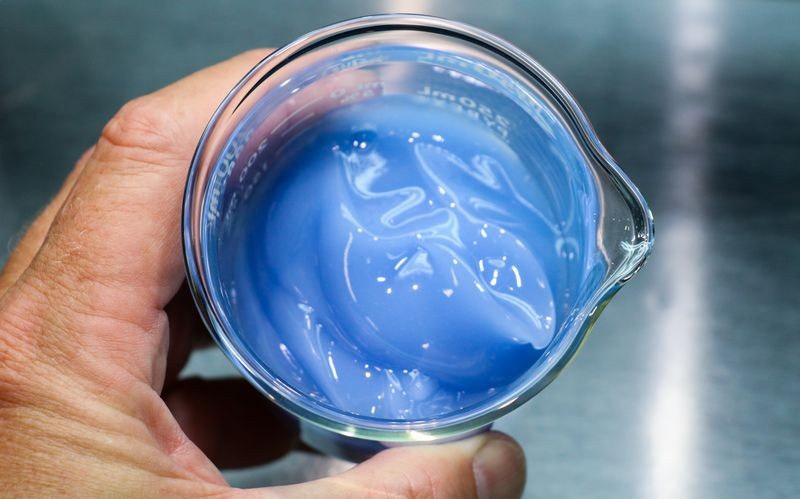
In order for both of these features to work you need an actual FILM on the surface thus the product MUST be thick. If it were thin, it would create a film and more than likely, it would simply run off the car and onto the ground. So understand the thickness of the product is key to the products effectiveness at protecting the front of your car from damage.
To give you an idea as to how thick this product is, here are some pictures,
This stuff is THICK!


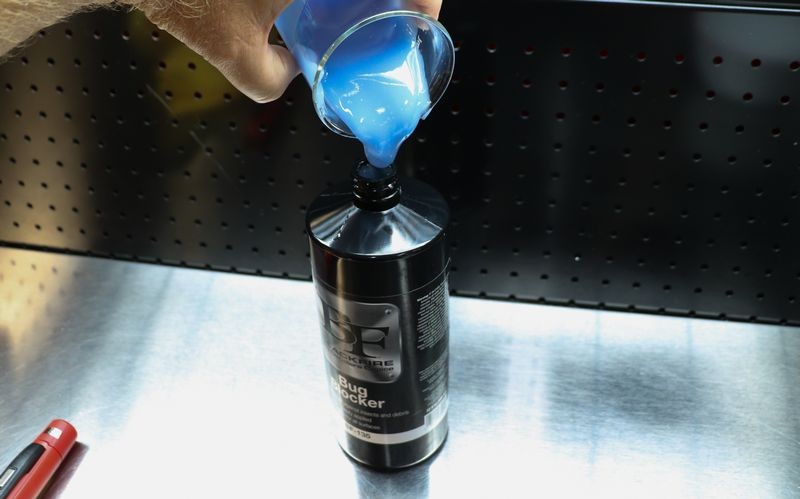
This is a Joke Picture
While it looks like I'm pouring the product back into the bottle - it ain't happening. The bottles are injection pumped.
There's no way to actually "pour" this product into a bottle. In fact, the beaker of product you see in the below picture is still out on the workbench as I type.
IMPORTANT NOTE
The product is so think it does not spray efficiently. This is because after you squeeze the spray trigger, it will take a few seconds for the thick liquid to refill the siphon tube. The siphon tube extends from the spray trigger to the bottom of the bottle. In the pictures above, I was easily able to get ONE full spray, then apply that spray of product, and in that short amount of time, the siphon tube would refill and then I could spray again. If you wanted, you could also simply squeeze product out into a secondary container, like a paper bowl or Dixie cup and then dab your applicator pad into the container to get product.
Again - this is not a negative aspect of design, it's the nature of the beast. In order to protect your car the product MUST be thick.
The full test
Love Bug Season is coming up fast. When it gets here, I will use this product on a commuter car and then update this thread to show the real-world results.
Recommendation
This is the type of product that would be of zero use to introduce DURING Love Bug Season. By then it's too late. If you live here in South Florida or ANYWHERE that has a flying insect population that ends up on the front of you car, then you need to get this product BEFORE the season hits. That's what it means to be pro-active.
Below I will include the link to the product as well as gloves and applicator pads.
On Autogeek.com
BLACKFIRE Bug Blocker
Thin, cheapie black nitrile gloves
Thicker, better heavy duty orange nitrile gloves
6-Pack Yellow Foam Applicator Pads
These would also work great for some applications
Flex Foam Finger Pockets

BLACKFIRE Bug Blocker
From the Autogeek.com store site
BLACKFIRE Bug Blocker
BLACKFIRE Bug Blocker was developed as a temporary shield that provides your paint enhanced protection from insect remains. BLACKFIRE Bug Blocker is perfect to apply just before a long road trip or once a week during love bug season! The buffering agents in BLACKFIRE Bug Blocker will not only shield your paint from the insects but will even neutralize the acids in their bodily fluids, preventing them from corroding through your clear coat!
Once your car is no longer at risk of bug bombardment, you can simply rinse or wash BLACKFIRE Bug Blocker (AND THE BUGS!) right off your car!
BLACKFIRE Bug Blocker is safe to use on all plastic, chrome, glass, and paint.
What it is?
A temporary shield that prevents damage caused by bugs hitting the front of your car.
What it does?
Protects paint, plastic, glass and metal from damage.
When to use it?
You can apply Bug Blocker to the front of your car after first washing and drying the car and before making a road trip during bug season.
Why to use it?
Bug Blocker prevents the corrosive acids found in bug guts from etching and removing paint and plastic off the front of your car where they impact when driving at high speeds.
Here's the problem --> BUGS
Here at Autogeek we had a customer stop by to show us the bugs that had accumulated on the front of his Jeep during Love Bug Season here in Florida. Love Bugs hatch and mate twice a year, first in May and then again in September.
Here's the Solution --> BLACKFIRE Bug Blocker
Apply BLACKFIRE Bug Blocker before making an road trips to protect your paint and make clean-up fast and easy!
The BIG PICTURE
Instead of trying to fix the problem after the fact, be pro-active before the problem can take place. Part of my job duties here at Autogeek is to answer questions on our car detailing discussion forum. I can no longer count how many times someone has asked,
How can I remove the damage to my car's paint caused by bug splatter?
The answer is - in most cases you can't.
You see, the bug guts contain highly corrosive acids that are strong enough to etch or EAT INTO your car's clearcoat paint if not removed within minutes of impact.
Everyone knows you can't simply pull over to the side of the road and wipe off bug splatter as the bugs hit the front of you car as there's simply too many bugs to deal with during Love Bug Season. You would never get to your destination. So the next best thing is to be pro-active and treat the front impact areas of your car to protect them from bug splatter until you arrive at your destination where you can remove them without rushing and without the danger and risk of trying to do so on the side of the road.
Bad News
Once the corrosive bug guts etch your car's paint - it's usually too deep to buff and remove. What this means is you now get to live with these splotchy crater etchings all over the front of our car OR take your car to a body shop and have them RE-PAINT all the affected panels.
$300.00
I have a few friends that own body shops and I asked them, if a person brought to them an averaged sized passenger car with bug splatter damage, but there is NO OTHER damage, that is no rust or dents, so all the body shop has to do is sand down to the base panel then primer, spray the basecoat and then spray the clearcoat, how much will this cost,
The low average is $300.00 and that's a low price. In most cases, especially if there are any dents or rust, the price will go up. If you need more than the hood re-painted, the price will go up. Besides the coat of re-painting the front clip on your car, you now have to deal with,
1: Color matching - cross your fingers and hope and pray that the new paint color matches the factory paint color.
2: Runs, sags, dirt in paint and orange peel - these are common fresh paint defects that can occur during the painting process. A high quality shop knows how to lay down a show car paint job, the less you spend, usually the more likely you'll see these types of fresh paint issues.
3: Holograms - in most cases, after spraying fresh paint, a body shop will sand and buff the paint to remove things like excessive orange peel, dirt in paint, runs and sags and mottling. As a by-product of this process there will often times be holograms left behind in the paint from compounding with a wool pad and a rotary buffer.
4: Overall quality and longevity - When a car is painted at the factory, there are super tight controls in place that ensure a quality paint job that with proper care will hold up over time. Whenever you get a re-paint, it's a gamble that you will get just as good a paint job as was applied at the factory. It all depends upon the quality of the body shop doing the work, the materials they use, the paint booth, the painter, etc.
The easy way to avoid all of the above hassles is to simply be pro-active with your car. If you know you're going to be driving in a geographical area of airborne bug problems, before making the trip, apply BLACKFIRE Bug Blocker to the front vertical panels on your car. It's not hard to do as long as you take your time. Of course more complicated components, like grills will take more time. But like the saying goes,
An ounce of prevention is worth a pound of cure
Or to extrapolate it out to the bug problem,
A few ounces of Bug Blocker will save you time, energy, frustration and money!
Step-by-step directions
Step 1: Thoroughly wash and dry car.
You want to start with a clean surface.
Step 2: Spray Bug Blocker directly onto panel to be treated or onto an applicator pad and then spread the product over the surface.
As you spread the product, do so in a way to leave a visible film of product on the surface. It is this FILM of product that is going to protect the surface and also neutralize the acids in the bug.
Pro Tip
For intricate areas like grills, spray product directly onto an foam applicator pad and then using your fingers, spread the product to all sides of the grill design.
Continue applying Bug Blocker to all areas of impact including the front of the hood, front of fenders, graphics, emblems, headlights, driving lights, etc.
In the below picturs, if you look carefully you can see the film of product on the surface of treated areas.
The product is clear after application so your car will retain it's beautiful appearance while being protected.
Review
This is the first time I've used and applied this product. I'm sorry to say, as I type this review it is August, 8th, 2019 and alas, it's not Love Bug Season. So all I can review or share with you is the application and removal characteristics.
The product is easy to apply. If you can apply a car wax to a car you can apply Bug Blocker to the front of your car. I don't believe there's any dangerous chemicals in the product but I wore black nitrile gloves just the same. I used an inexpensive foam wax applicator to apply and spread the Bug Blocker over flat areas and also INTO the honeycomb design grill. There's no foul odor and it's really basic stuff as far as application goes.
I will say that the product is quite THICK. It HAS to be. This product works in two ways,
1: A physical protective barrier.
2: A chemical neutralizing barrier
In order for both of these features to work you need an actual FILM on the surface thus the product MUST be thick. If it were thin, it would create a film and more than likely, it would simply run off the car and onto the ground. So understand the thickness of the product is key to the products effectiveness at protecting the front of your car from damage.
To give you an idea as to how thick this product is, here are some pictures,
This stuff is THICK!
This is a Joke Picture
While it looks like I'm pouring the product back into the bottle - it ain't happening. The bottles are injection pumped.
There's no way to actually "pour" this product into a bottle. In fact, the beaker of product you see in the below picture is still out on the workbench as I type.
IMPORTANT NOTE
The product is so think it does not spray efficiently. This is because after you squeeze the spray trigger, it will take a few seconds for the thick liquid to refill the siphon tube. The siphon tube extends from the spray trigger to the bottom of the bottle. In the pictures above, I was easily able to get ONE full spray, then apply that spray of product, and in that short amount of time, the siphon tube would refill and then I could spray again. If you wanted, you could also simply squeeze product out into a secondary container, like a paper bowl or Dixie cup and then dab your applicator pad into the container to get product.
Again - this is not a negative aspect of design, it's the nature of the beast. In order to protect your car the product MUST be thick.
The full test
Love Bug Season is coming up fast. When it gets here, I will use this product on a commuter car and then update this thread to show the real-world results.
Recommendation
This is the type of product that would be of zero use to introduce DURING Love Bug Season. By then it's too late. If you live here in South Florida or ANYWHERE that has a flying insect population that ends up on the front of you car, then you need to get this product BEFORE the season hits. That's what it means to be pro-active.
Below I will include the link to the product as well as gloves and applicator pads.
On Autogeek.com
BLACKFIRE Bug Blocker
Thin, cheapie black nitrile gloves
Thicker, better heavy duty orange nitrile gloves
6-Pack Yellow Foam Applicator Pads
These would also work great for some applications
Flex Foam Finger Pockets
