Mike Phillips
Active member
- Dec 5, 2022
- 51,004
- 8
Review: P&S Play Maker All in One - 2016 Chevy Impala - Production Detailing
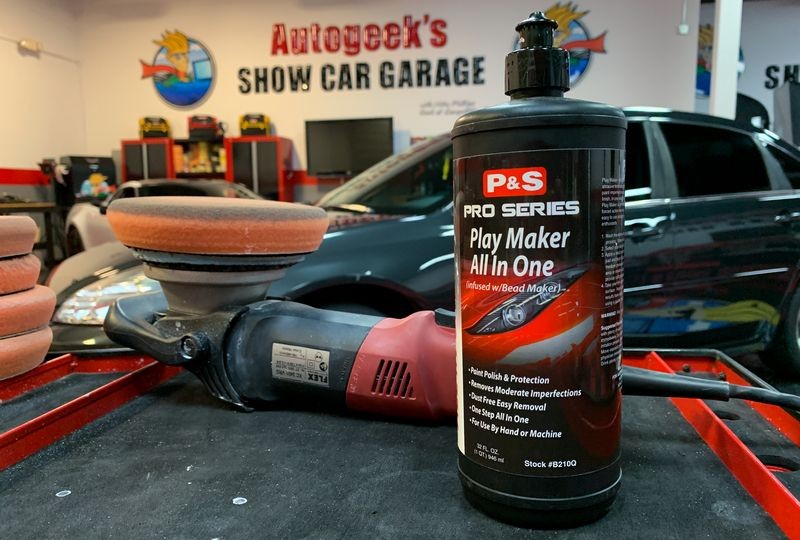
P&S Play Maker All in One
What is it?
All-in-One cleaner, polish and sealant.
What does it do?
Removes swirls
Polishes the paint to a bright high gloss
Protects the finish.
When do I use it?
After first washing and drying paint in new condition or after first doing any claying and paint correction to older cars.
Why should I use it?
It's a fast and easy way to remove swirls, scratches, water spots and oxidation, restore gloss and clarity to the paint while leaving the paint protected in one step..
From the manufacturer
P&S Play Maker All-in-One Polish & Protectant will complete an entire 3-step detailing process in just one step! The genius formula of P&S Play Maker All-in-One Polish & Protectant contains professional level micro-abrasives that give it the incredible ability to correct moderate paint imperfection and polish out to a glossy shine. Once the micro-abrasives have done their job, the rest of the formula of P&S Play Maker All-in-One Polish & Protectant will take over, leaving behind a durable layer of protection! Now your paint is polished, cleaned, and protected, all in one step thanks to P&S Play Maker All-in-One Polish & Protectant!
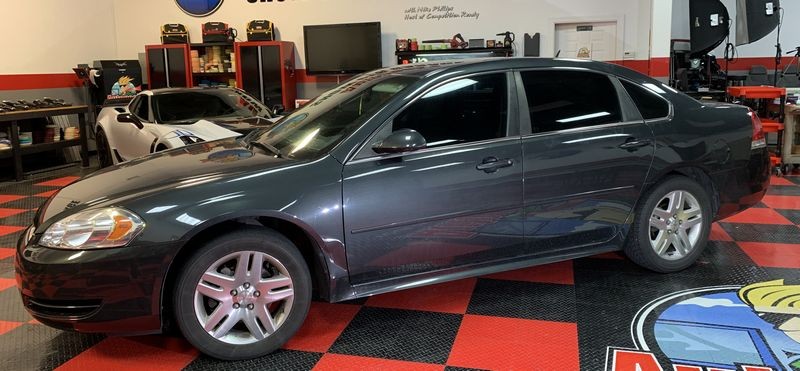
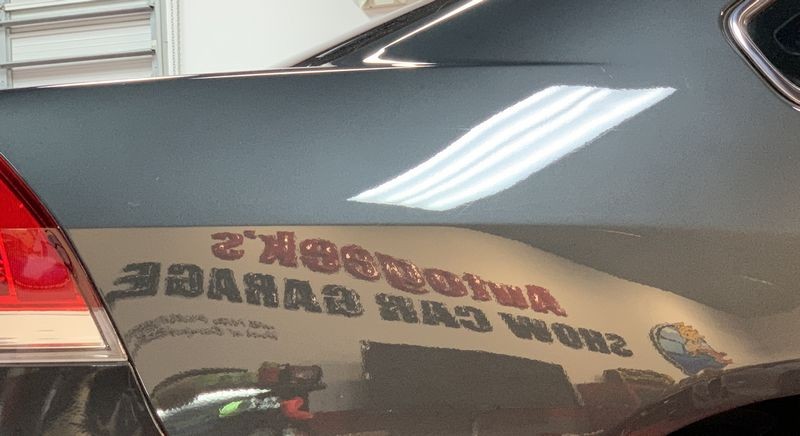
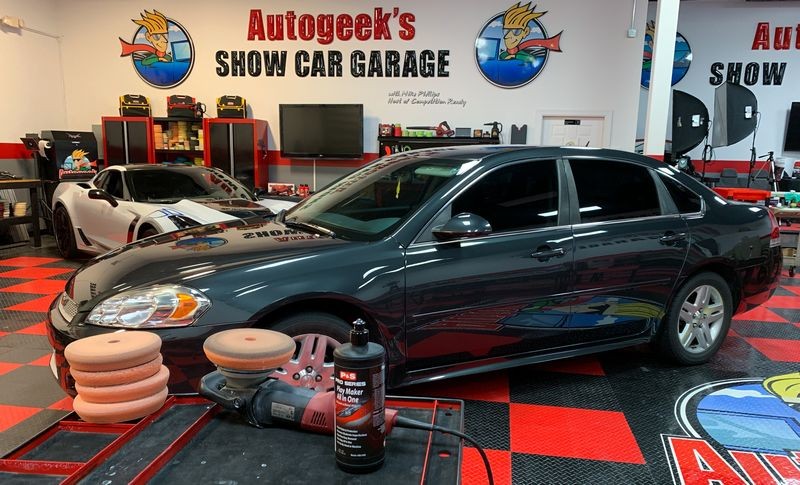
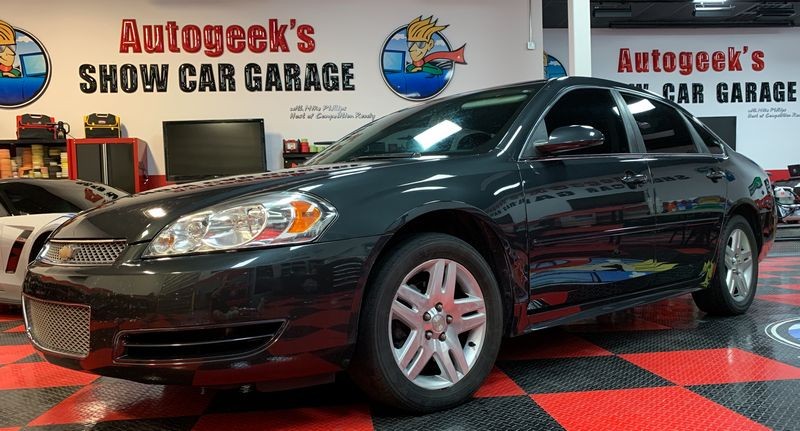
Test Vehicle - Daily Driver 2016 Chevy Impala
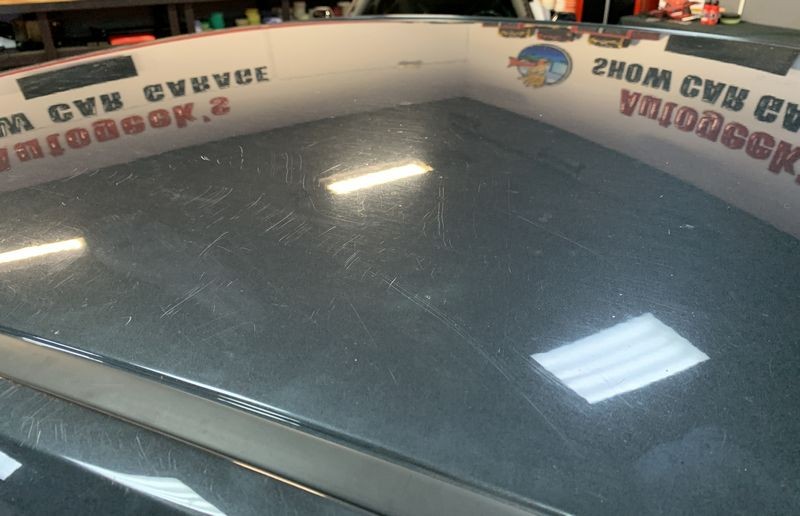
This car belongs to a co-worker and while he's really good about washing it often, the paint is in dire need of some correction work.
Here's how she looked after arriving to Autogeek's Show Car Garage.

Florida Love Bugs
The marks you see in the paint are ETCHINGS caused by Love Bugs that have slammed into the paint and then before they were removed, the corrosive acids in their little tiny bug guts have actually eaten or dissolved portions of the clearcoat paint.

DISCLAIMER
These types of Bug Etchings in most cases can never be 100% removed, not even via wetsanding. So this type of damage is beyond the ability of compounds, polishes and AIO's like I'll be using. I just want to put this out there in case anyone reading this into the future doesn't know what Love Bug damage is and the resulting damage, which is permanent. That said - even cars with Love Bug damage will still look better after the paint is restored to it's maximum potential using quality products.

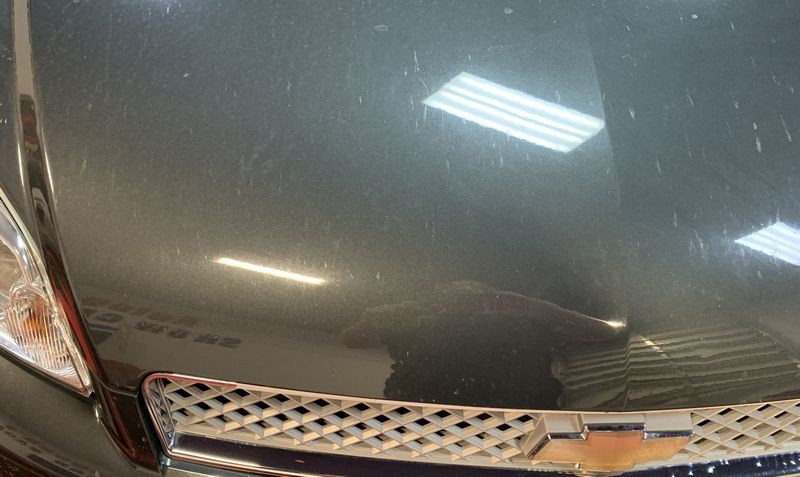
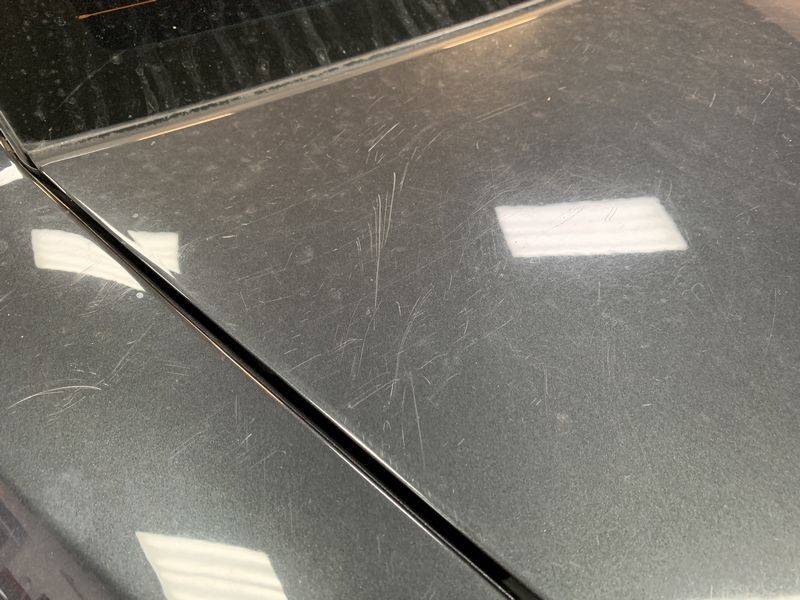
Dull, lifeless paint
This is just your normal water spots and dirt from driving in the rain. But look how DULL and lifeless the paint is?

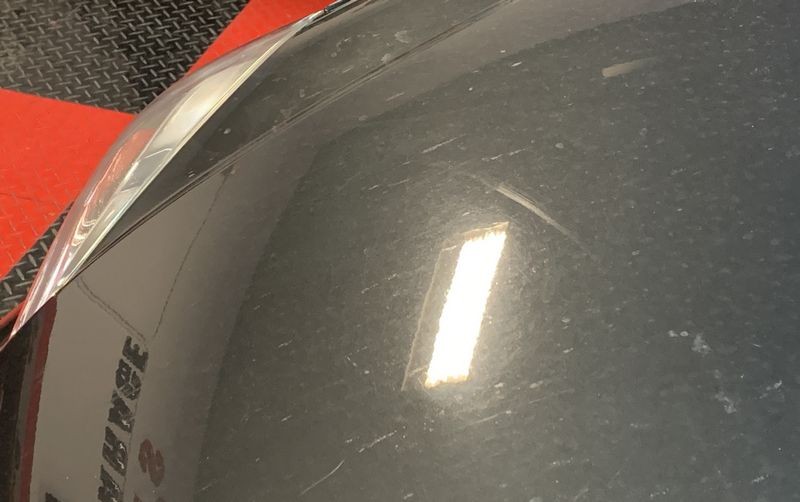
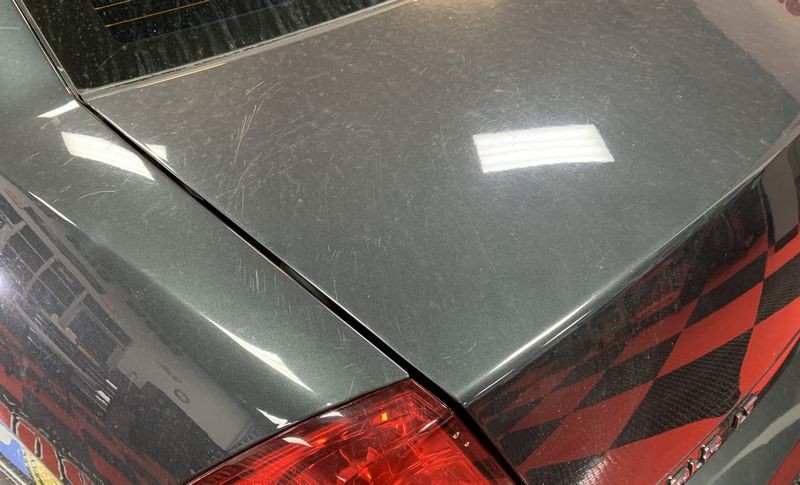
LOTS OF DEEP SCRATCHES
This car has lots of scratches throughout the finish. Some of these scratches are TOO DEEP to remove 100% - BUT - like the Love Bug damage, a thorough polishing will dramatically improve the deeper scratches while restore a clear, bright high gloss finish to the rest of the paint.
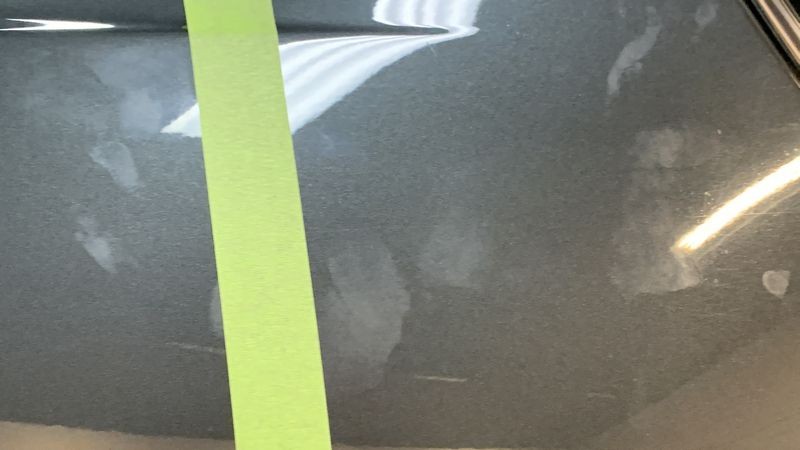
Hand Prints IN the paint?
I have know idea how this happened and neither does the owner? In the panel below as well as in other places around the car there are HAND PRINTS that have physically altered and etched into the paint. Washing did not remove them. Claying did not remove them. Wiping HARD with a microfiber towel did not remove them.

So however these hand prints and also fingerprints and other human inflicted smudges got into the paint doesn't matter - what matters is the only way to remove them at this point will be via a mechanical polishing process.
We'll find out if P&S Play Maker is up to the job!


Road Film
The glass is not only dirty but it has road film and drizzle stains on the paint and on the glass.


Rinseless Wash
First up I had to get the car clean, for this I used a popular rinseless wash and lots of microfiber towels.
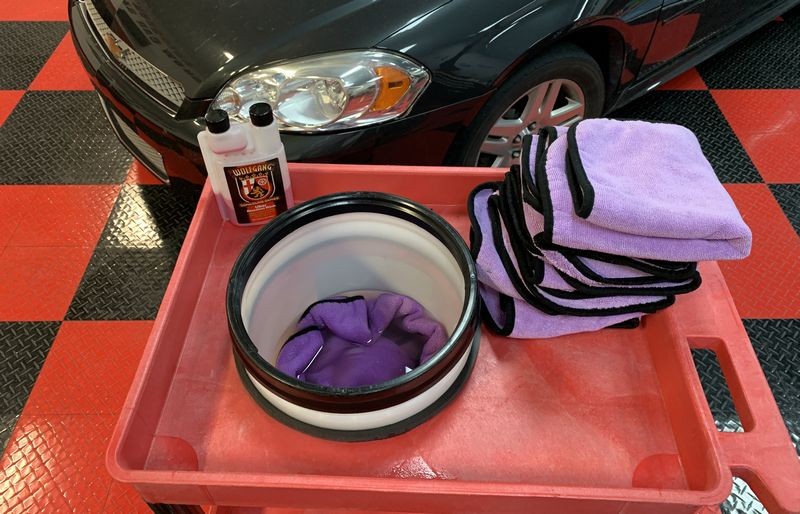
Looks like 5 towels to wash the car and 2 towels to dry the car. This is fine for a PREP rinseless wash but for a MAINTENANCE wash I would normally use a lot more towels.

Mechanical Decontamination
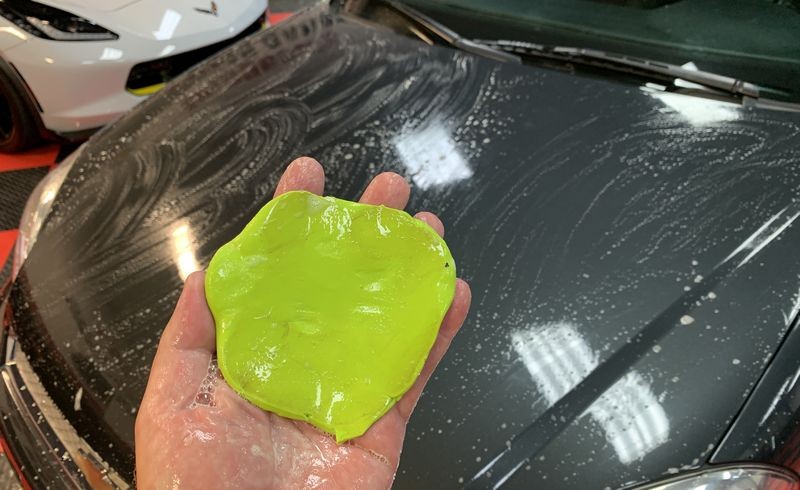
I did the baggie test but the paint did NOT feel that bad. Still - the foundation for a high gloss finish is a smooth surface and because there was some level of contamination - I clayed all the paint plus all the glass.
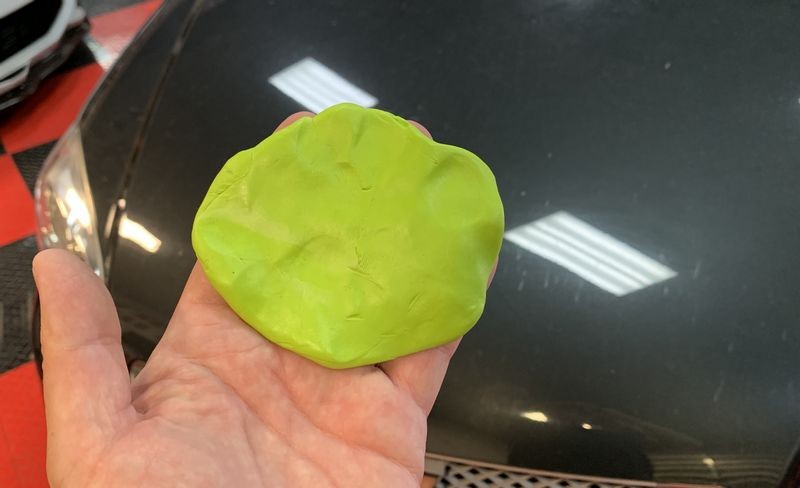
Not so bad
Here's the clay after claying the entire hood. As you can see, there's NOT a lot of contaminants on the face of the clay patty. The owner says he washes the car often and that explains why the paint is not that contaminated.
Removing Hand Prints IN the paint
First thing I wanted to do was test out the P&S Play Maker to see if it could remove these hand prints in the paint. Not sure how this happened but under close inspection the paint is physically flat or dull in these areas?

For those that might not see it, here's my hand at the same angle of the hand imprint in the paint - see it?

Just to document, washing didn't remove the prints, claying didn't remove them and wiping HARD had zero effect.


Here I've placed some 3M Painter's Tape right down the middle of the hand print.

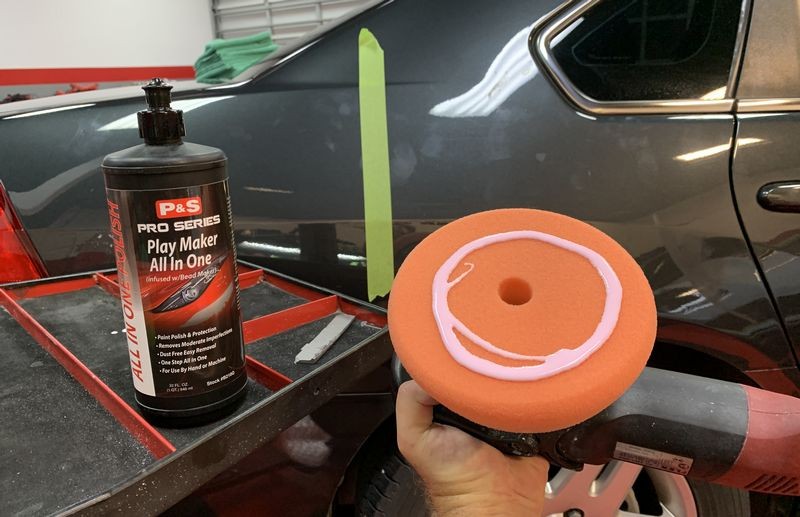
Testing P&S Play Maker All in One
I've placed an ample amount of the P&S Play Maker on the face of a clean, dry Lake Country 6.5" Force Hybrid Foam Cutting pad on a FLEX 3401.
Buff buff buff...
Wipey wipey...

Remove the tape...
AND....................................

The hand prints are GONE!
And look how clear, shiny and glossy the paint is!

Some more product and in a few passes all the hand prints and finger smudges will be obliterated.


Whatever they were and whatever caused them don't matter no more because they be gone!
After removing the hand prints I simply repeated the machine application process for the P&S Play Maker to the rest of the car and except for the Love Bug etchings, the results look freaking phenomenal.
Fir this one-step AIO I used 5 foam pads - it's important to switch pads often when doing what I call - Production Detailing.

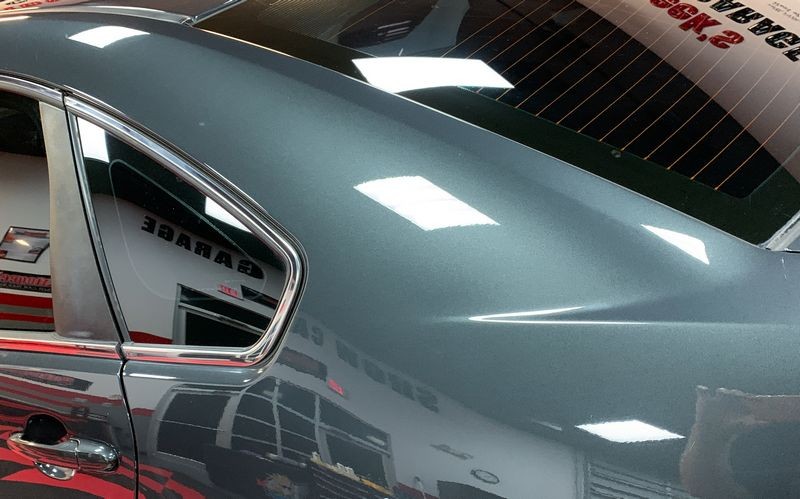
Here's the final results...


Review
Overview
This is a really nice one-step AIO. The manufacturer claims there's no dusting and that is an accurate description. I buffed out this entire car and never had any dusting issues. It offers good correction ability and easily removed impacted road film as well as all the shallow swirls, scratches and water spots. After buffing out the entire car the only remaining defects were defects that are so deep there's no way to safely remove them without compromising the clearcoat.
Buffing cycle
This product has a long buffing cycle. This means it stays wet on the surface as long as you're working it without drying out or becoming dusty. Besides excellent correction ability - the resulting appearance is clear and glossy. And just as nice, the paint feels sick and slippery after removing the residue.
Wipe-off
There were no instructions for how long to wait before wiping the product off. I tested to approaches, I wiped the product off immediately after application and it wiped-off easy. I also allowed some time to go by before wiping off the residue and found some patches of residue wiped off a tick more sticky. My recommendation when using this product is to wipe-off immediately after buffing a section as you move around the car.
Abrasive Technology
I tested this product on one of my black demo hoods and it passed my own personal test for quality. Otherwise I would not have used it on my co-workers car. The product info says it uses micro-abrasives and they seem to work great for cutting and finishing as I didn't see any micro-marring even when using a foam cutting pad. (I found the paint to be hard on this car or normally I would have probably used foam polishing pads.
Nice product
It's important to have a great one-step AIO in your detailing arsenal. If your a fan of P&S products I think you'll really like the P&S Play Maker. If you're looking for a good one-step, then give this one a shot. At $32.99 for a quart it's a lot of correction, polishing and sealing for the money.
On Autogeek.com
P&S Play Maker All-in-One Polish & Protectant
")
P&S Play Maker All in One
What is it?
All-in-One cleaner, polish and sealant.
What does it do?
Removes swirls
Polishes the paint to a bright high gloss
Protects the finish.
When do I use it?
After first washing and drying paint in new condition or after first doing any claying and paint correction to older cars.
Why should I use it?
It's a fast and easy way to remove swirls, scratches, water spots and oxidation, restore gloss and clarity to the paint while leaving the paint protected in one step..
From the manufacturer
P&S Play Maker All-in-One Polish & Protectant will complete an entire 3-step detailing process in just one step! The genius formula of P&S Play Maker All-in-One Polish & Protectant contains professional level micro-abrasives that give it the incredible ability to correct moderate paint imperfection and polish out to a glossy shine. Once the micro-abrasives have done their job, the rest of the formula of P&S Play Maker All-in-One Polish & Protectant will take over, leaving behind a durable layer of protection! Now your paint is polished, cleaned, and protected, all in one step thanks to P&S Play Maker All-in-One Polish & Protectant!
Test Vehicle - Daily Driver 2016 Chevy Impala
This car belongs to a co-worker and while he's really good about washing it often, the paint is in dire need of some correction work.
Here's how she looked after arriving to Autogeek's Show Car Garage.
Florida Love Bugs
The marks you see in the paint are ETCHINGS caused by Love Bugs that have slammed into the paint and then before they were removed, the corrosive acids in their little tiny bug guts have actually eaten or dissolved portions of the clearcoat paint.
DISCLAIMER
These types of Bug Etchings in most cases can never be 100% removed, not even via wetsanding. So this type of damage is beyond the ability of compounds, polishes and AIO's like I'll be using. I just want to put this out there in case anyone reading this into the future doesn't know what Love Bug damage is and the resulting damage, which is permanent. That said - even cars with Love Bug damage will still look better after the paint is restored to it's maximum potential using quality products.
Dull, lifeless paint
This is just your normal water spots and dirt from driving in the rain. But look how DULL and lifeless the paint is?
LOTS OF DEEP SCRATCHES
This car has lots of scratches throughout the finish. Some of these scratches are TOO DEEP to remove 100% - BUT - like the Love Bug damage, a thorough polishing will dramatically improve the deeper scratches while restore a clear, bright high gloss finish to the rest of the paint.
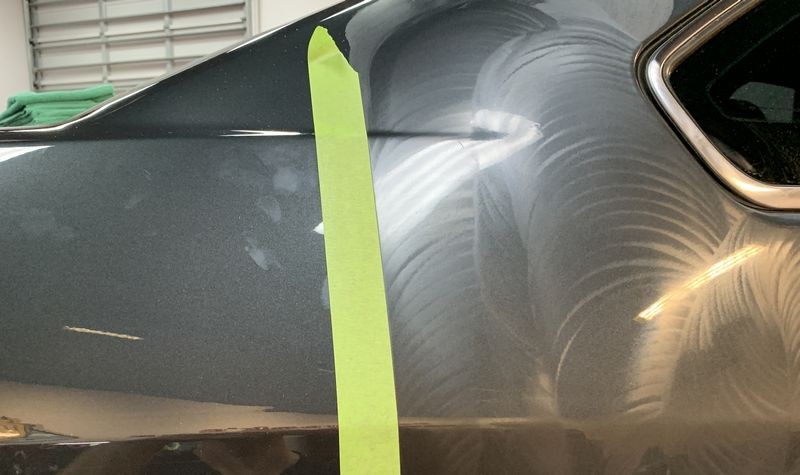
Hand Prints IN the paint?
I have know idea how this happened and neither does the owner? In the panel below as well as in other places around the car there are HAND PRINTS that have physically altered and etched into the paint. Washing did not remove them. Claying did not remove them. Wiping HARD with a microfiber towel did not remove them.
So however these hand prints and also fingerprints and other human inflicted smudges got into the paint doesn't matter - what matters is the only way to remove them at this point will be via a mechanical polishing process.
We'll find out if P&S Play Maker is up to the job!
Road Film
The glass is not only dirty but it has road film and drizzle stains on the paint and on the glass.
Rinseless Wash
First up I had to get the car clean, for this I used a popular rinseless wash and lots of microfiber towels.
Looks like 5 towels to wash the car and 2 towels to dry the car. This is fine for a PREP rinseless wash but for a MAINTENANCE wash I would normally use a lot more towels.
Mechanical Decontamination
I did the baggie test but the paint did NOT feel that bad. Still - the foundation for a high gloss finish is a smooth surface and because there was some level of contamination - I clayed all the paint plus all the glass.
Not so bad
Here's the clay after claying the entire hood. As you can see, there's NOT a lot of contaminants on the face of the clay patty. The owner says he washes the car often and that explains why the paint is not that contaminated.
Removing Hand Prints IN the paint
First thing I wanted to do was test out the P&S Play Maker to see if it could remove these hand prints in the paint. Not sure how this happened but under close inspection the paint is physically flat or dull in these areas?
For those that might not see it, here's my hand at the same angle of the hand imprint in the paint - see it?
Just to document, washing didn't remove the prints, claying didn't remove them and wiping HARD had zero effect.
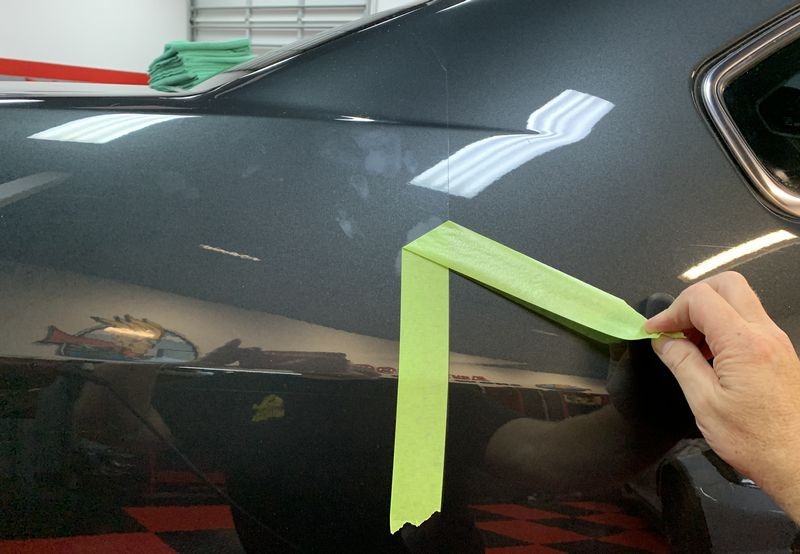
Here I've placed some 3M Painter's Tape right down the middle of the hand print.
Testing P&S Play Maker All in One
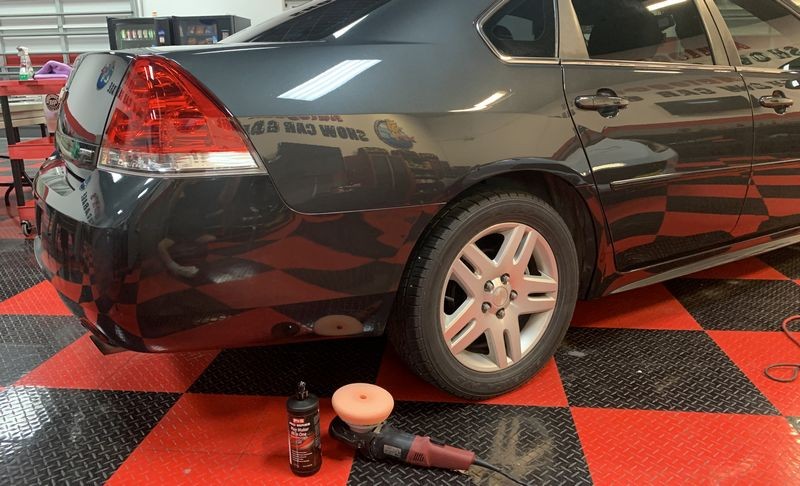
I've placed an ample amount of the P&S Play Maker on the face of a clean, dry Lake Country 6.5" Force Hybrid Foam Cutting pad on a FLEX 3401.
Buff buff buff...
Wipey wipey...
Remove the tape...
AND....................................
The hand prints are GONE!
And look how clear, shiny and glossy the paint is!
Some more product and in a few passes all the hand prints and finger smudges will be obliterated.
Whatever they were and whatever caused them don't matter no more because they be gone!
After removing the hand prints I simply repeated the machine application process for the P&S Play Maker to the rest of the car and except for the Love Bug etchings, the results look freaking phenomenal.
Fir this one-step AIO I used 5 foam pads - it's important to switch pads often when doing what I call - Production Detailing.
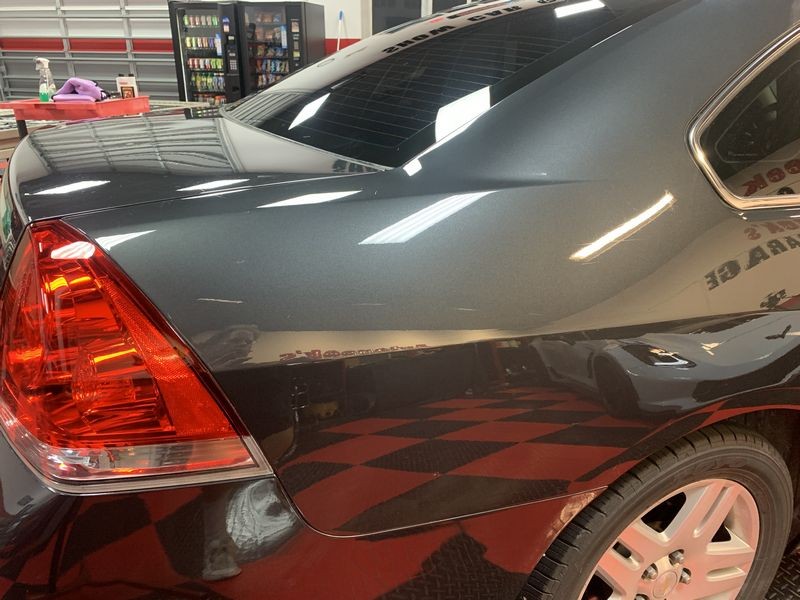
Here's the final results...
Review
Overview
This is a really nice one-step AIO. The manufacturer claims there's no dusting and that is an accurate description. I buffed out this entire car and never had any dusting issues. It offers good correction ability and easily removed impacted road film as well as all the shallow swirls, scratches and water spots. After buffing out the entire car the only remaining defects were defects that are so deep there's no way to safely remove them without compromising the clearcoat.
Buffing cycle
This product has a long buffing cycle. This means it stays wet on the surface as long as you're working it without drying out or becoming dusty. Besides excellent correction ability - the resulting appearance is clear and glossy. And just as nice, the paint feels sick and slippery after removing the residue.
Wipe-off
There were no instructions for how long to wait before wiping the product off. I tested to approaches, I wiped the product off immediately after application and it wiped-off easy. I also allowed some time to go by before wiping off the residue and found some patches of residue wiped off a tick more sticky. My recommendation when using this product is to wipe-off immediately after buffing a section as you move around the car.
Abrasive Technology
I tested this product on one of my black demo hoods and it passed my own personal test for quality. Otherwise I would not have used it on my co-workers car. The product info says it uses micro-abrasives and they seem to work great for cutting and finishing as I didn't see any micro-marring even when using a foam cutting pad. (I found the paint to be hard on this car or normally I would have probably used foam polishing pads.
Nice product
It's important to have a great one-step AIO in your detailing arsenal. If your a fan of P&S products I think you'll really like the P&S Play Maker. If you're looking for a good one-step, then give this one a shot. At $32.99 for a quart it's a lot of correction, polishing and sealing for the money.
On Autogeek.com
P&S Play Maker All-in-One Polish & Protectant