Mike Phillips
Active member
- Dec 5, 2022
- 51,004
- 6
Testing Out Chemical Guys Black Wax - 1964 BLACK Catalina
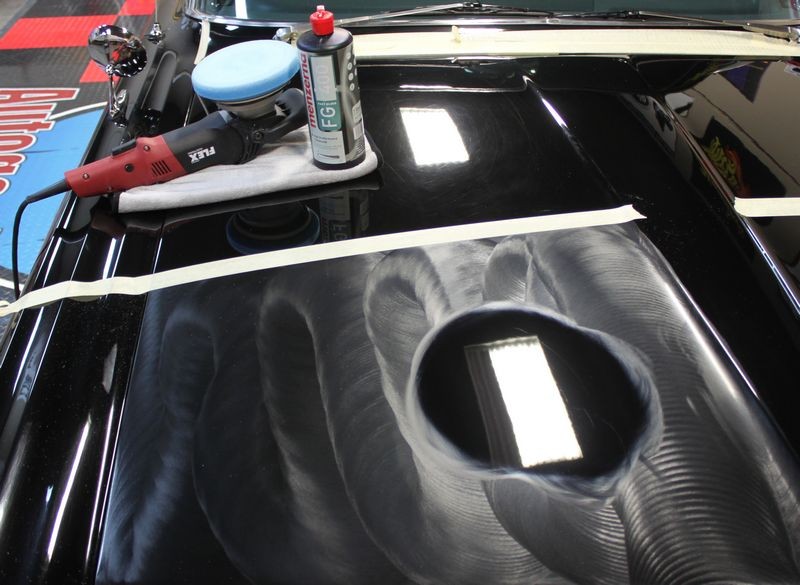
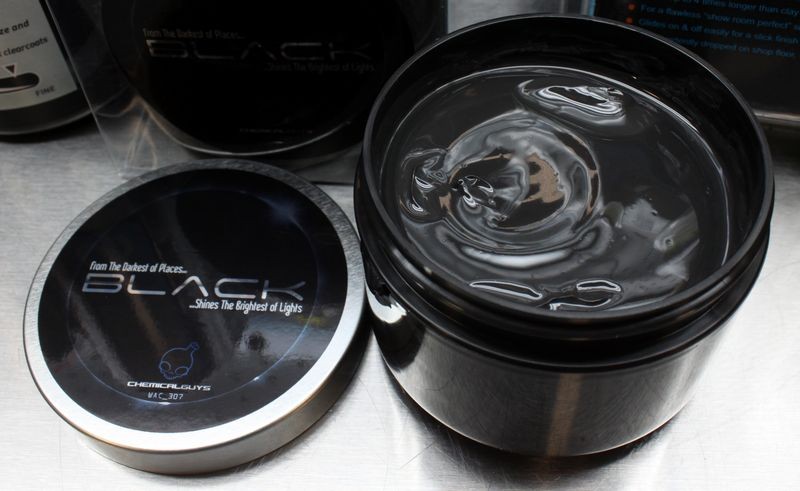
Here she is, the new Chemical Guys Black Wax...
Mmmm.... looks like black pudding!
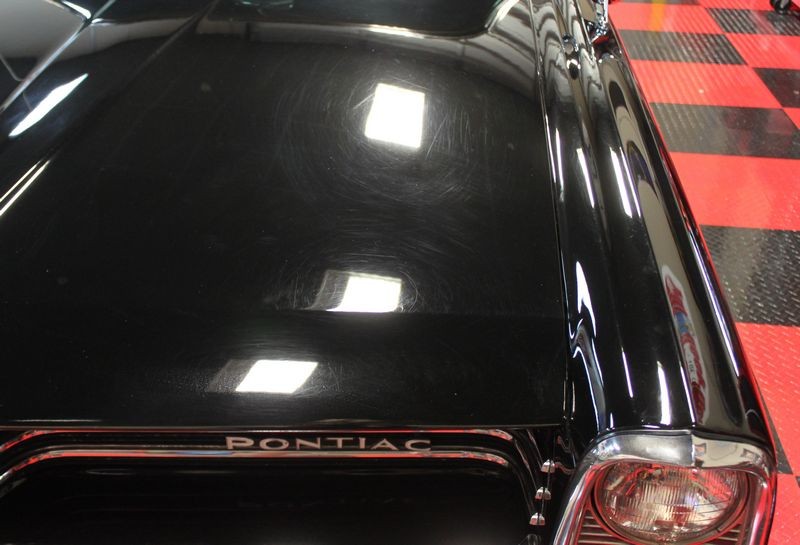
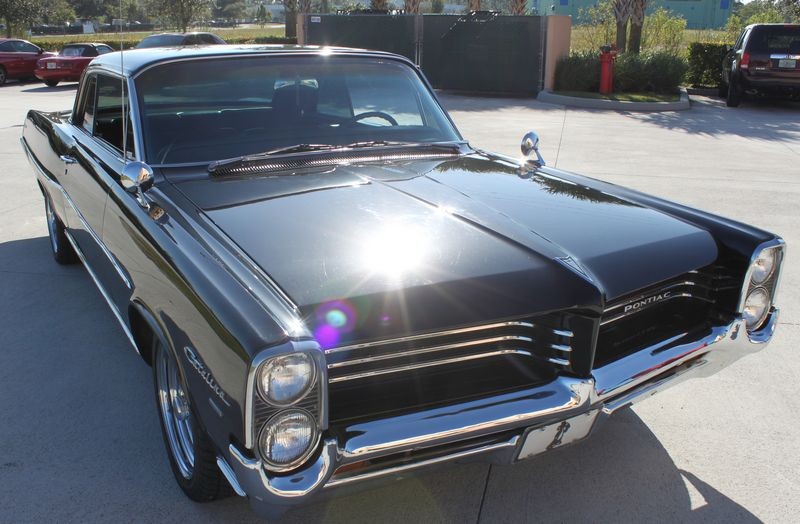
1964 Pontiac Catalina Ventura
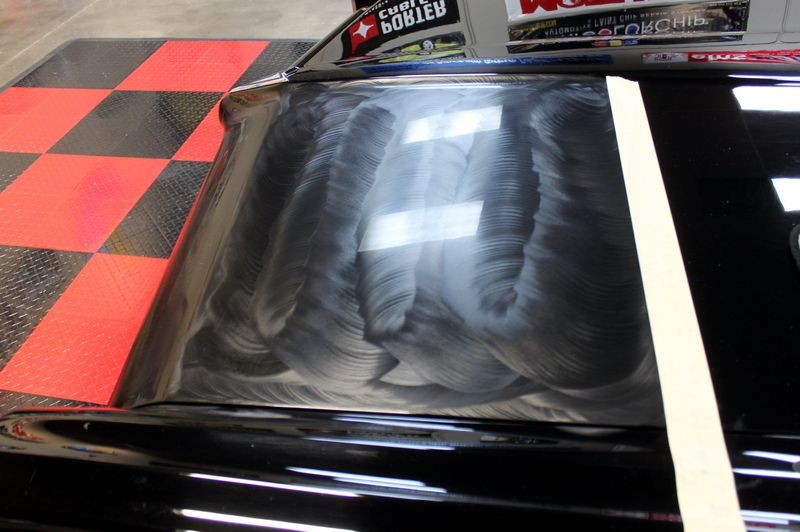
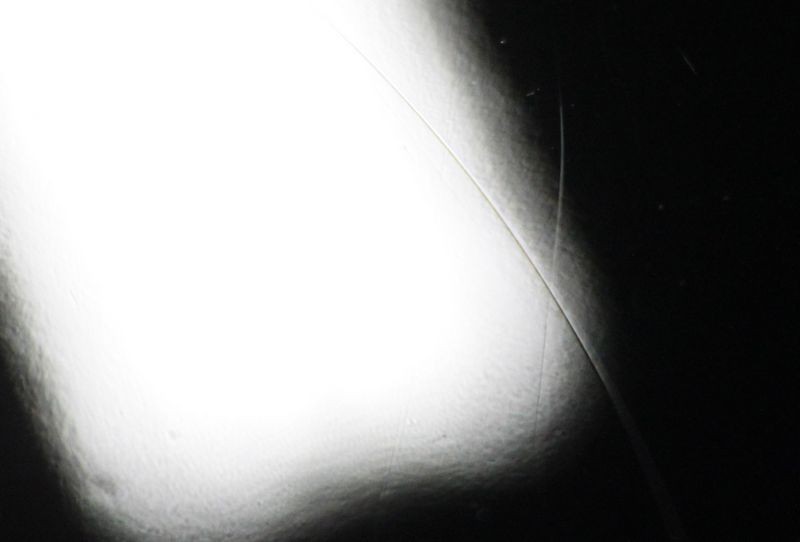
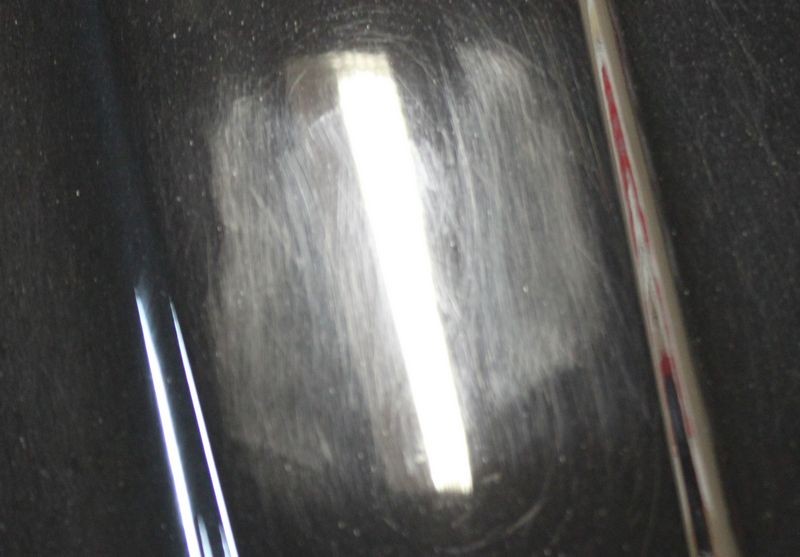
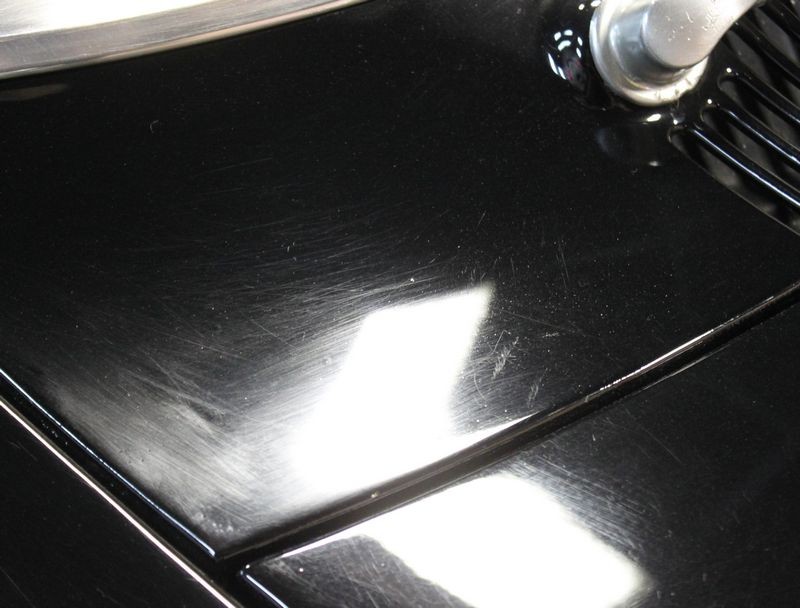
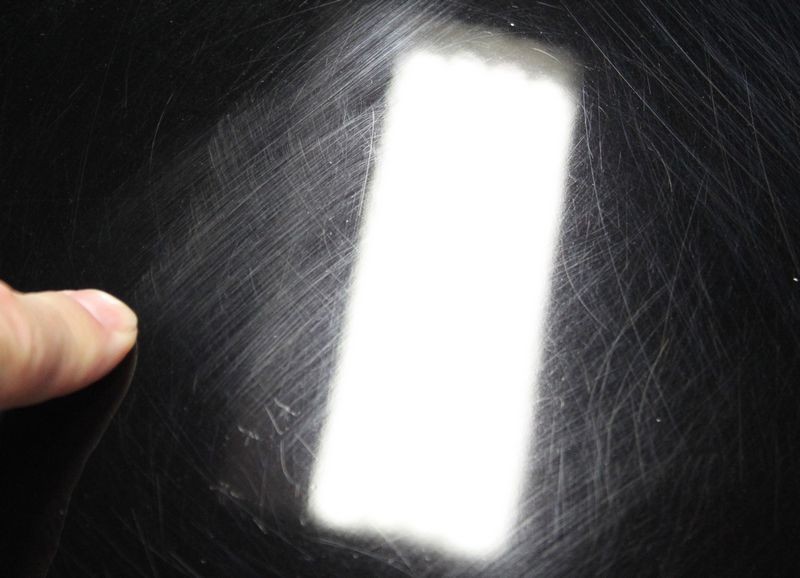
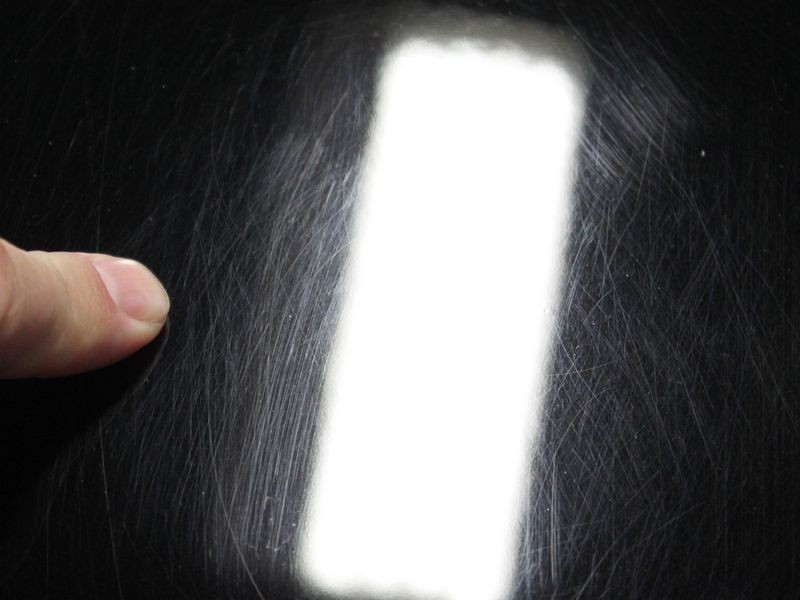
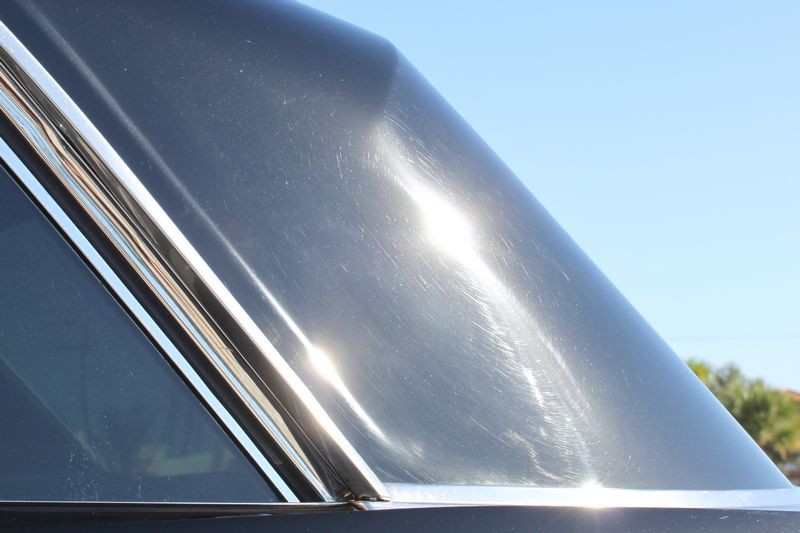
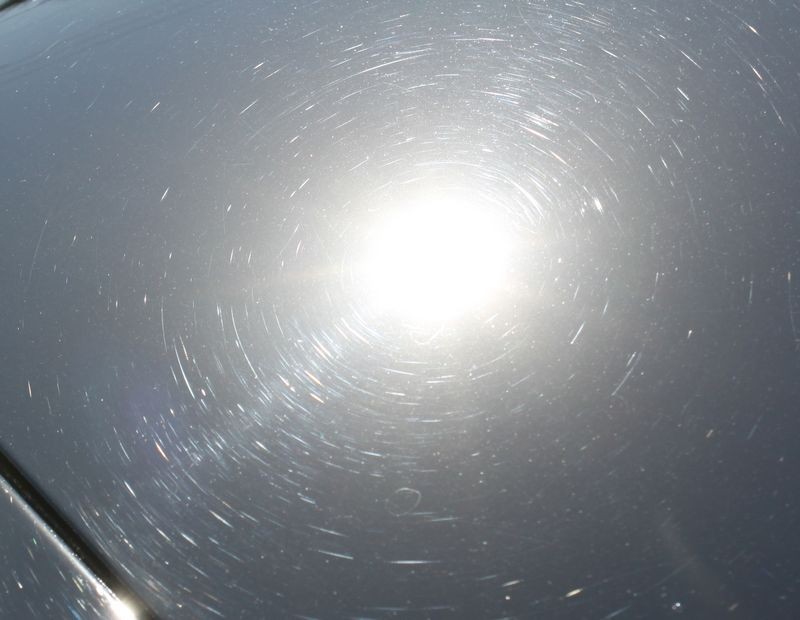
Here's my project, a very beautiful 1964 Pontiac Catalina Ventura with a 389 Big Block and Dual 4-Barrel Carburetors. While this car looks beautiful from a distance or in low light, when you inspect the paint using bright light you can see the finish is completely filled with swirls and scratches.
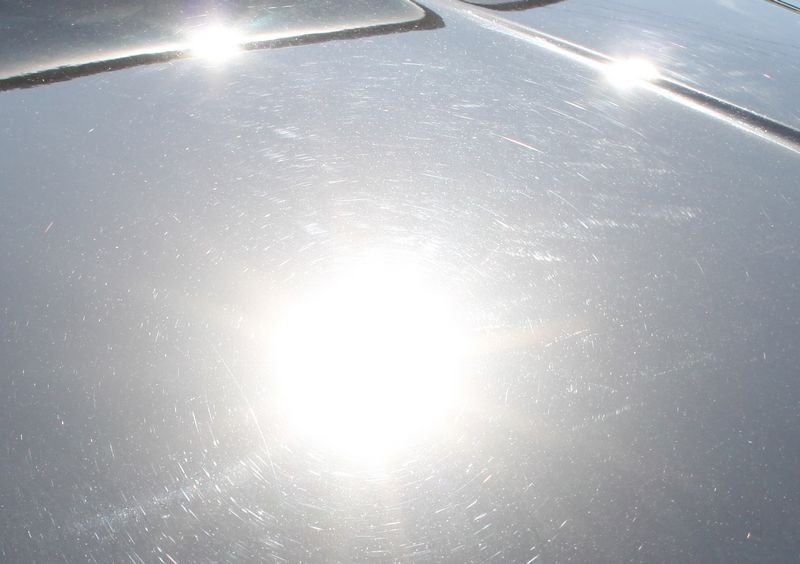
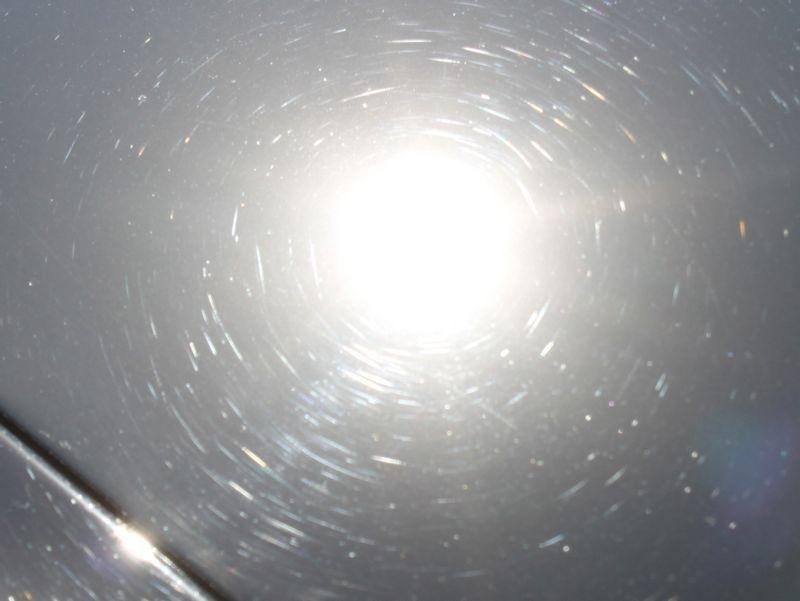
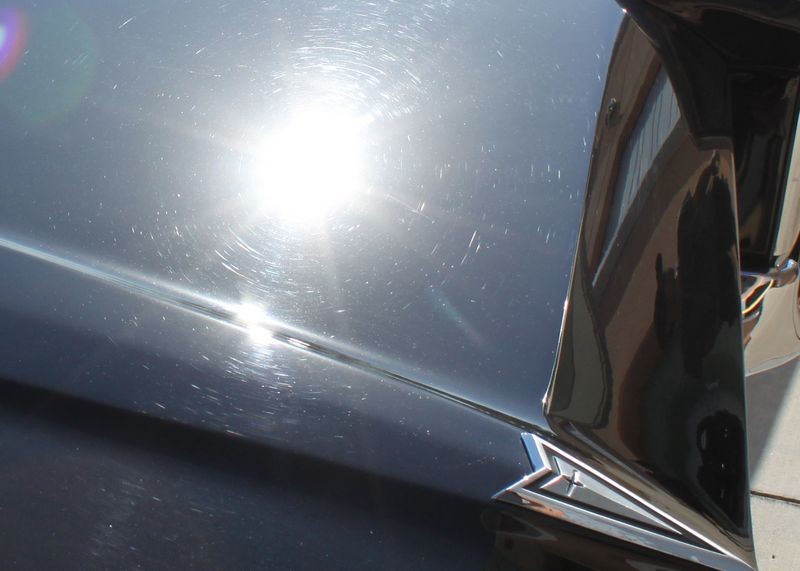
High Resolution Still Shots

Hood


Trunk Lid


Right behind the B-Pillar

Roof

Front corner of passenger side windshield
Random places on the hood...

More to come...

Here's the walk-around-video showing the end results...
[video=youtube_share;xbY4KXIFvmQ&hd=1"]Chemical Guys Black Wax on a 1964 Pontiac Catalina - YouTube[/video]Here she is, the new Chemical Guys Black Wax...
Mmmm.... looks like black pudding!
1964 Pontiac Catalina Ventura
Here's my project, a very beautiful 1964 Pontiac Catalina Ventura with a 389 Big Block and Dual 4-Barrel Carburetors. While this car looks beautiful from a distance or in low light, when you inspect the paint using bright light you can see the finish is completely filled with swirls and scratches.
Before Video Showing the True Condition of the Basecoat/Clearcoat Paint
[ame=http://www.youtube.com/watch?v=Y3fsdIDb1u8&hd=1]1964 Pontiac Catalina Swirled Out Mess - YouTube[/video]High Resolution Still Shots
Hood
Trunk Lid
Right behind the B-Pillar
Roof
Front corner of passenger side windshield
Random places on the hood...
More to come...


")
 rops:
rops: