Mike Phillips
Active member
- Dec 5, 2022
- 51,004
- 7
The Definitive Porter Cable Polisher Spindle Wrench Thread
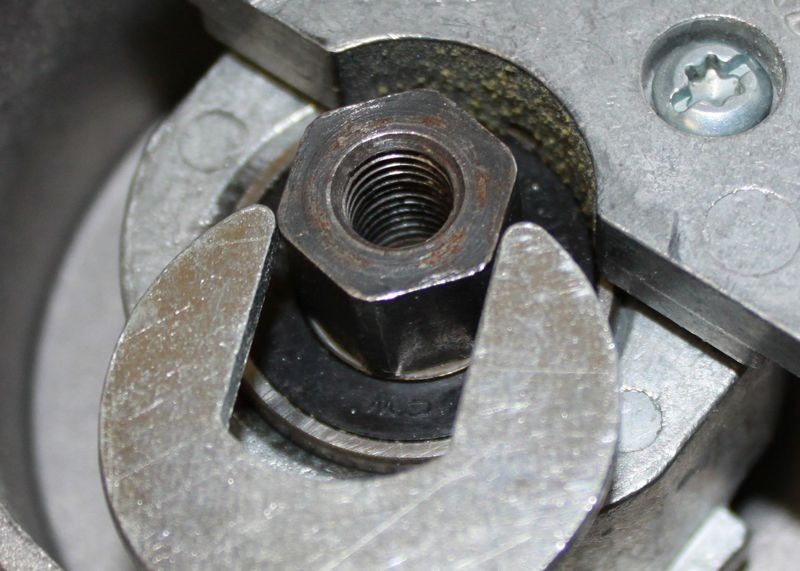
The wrench that comes with a Porter Cable Sander/Polisher fitted onto the free spinning spindle
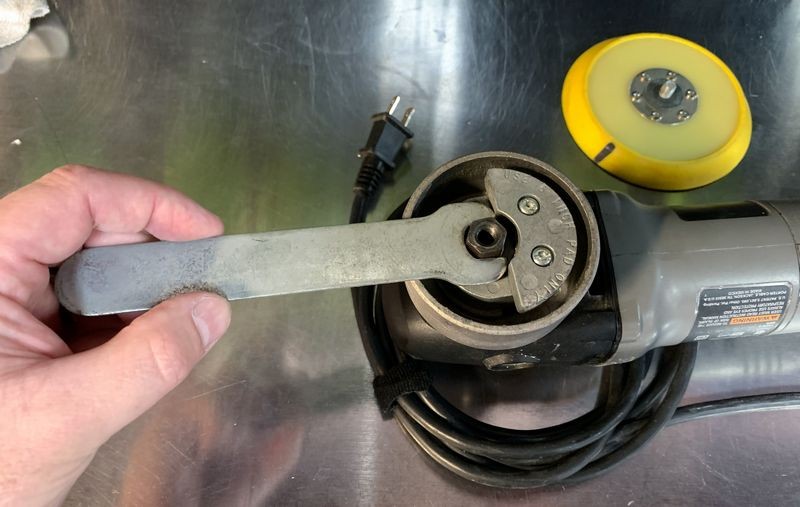
From the side view, you need to locate the position of the counterweight and insert the PC wrench into the housing from the opposite side because there is more clearance for the wrench to fit.

The below picture is the same picture as seen above only I've drawn circles around the sides of the counterweight, (red circles), and I've circled the spindle, which is where you need to place the wrench.

This is the side view from the opposite side and the red circle is around the counterweight. DON'T try to insert wrench here as there's usually not enough clearance between the counterweight and the back of the backing plate.

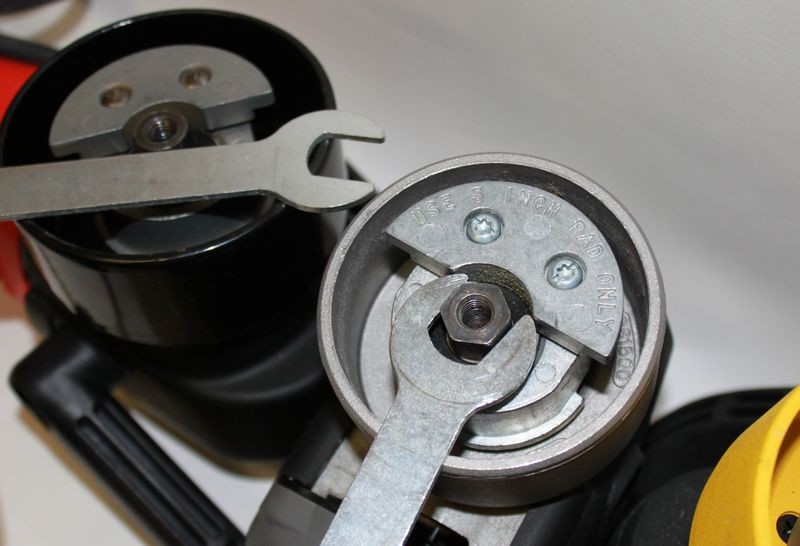
Here I'm inserting the PC wrench into the side opposite of the counterweight

Here you can see the PC wrench being inserted from the correct side.

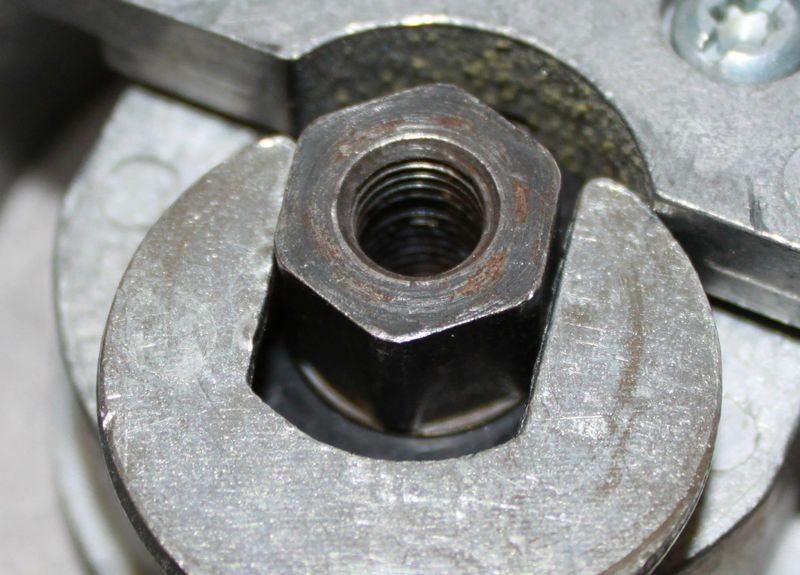
And now with the backing plate removed, you can see what I'm talking about.

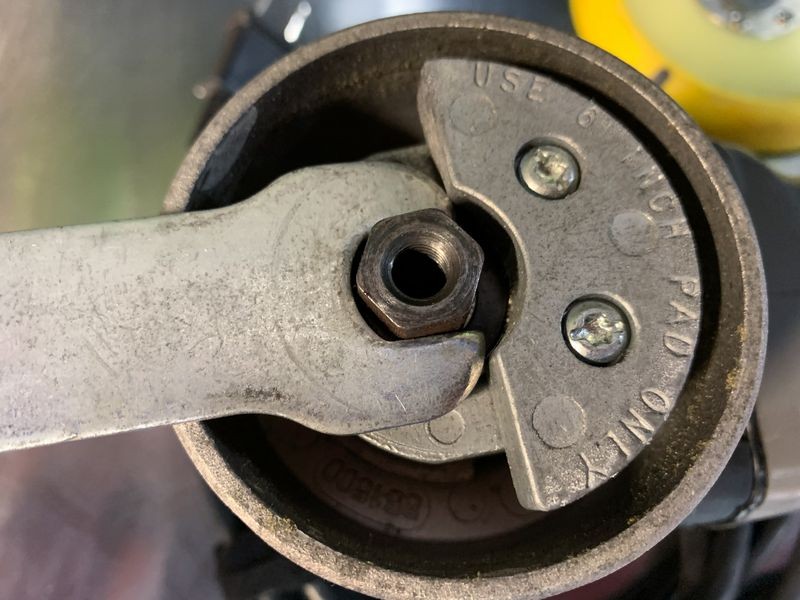
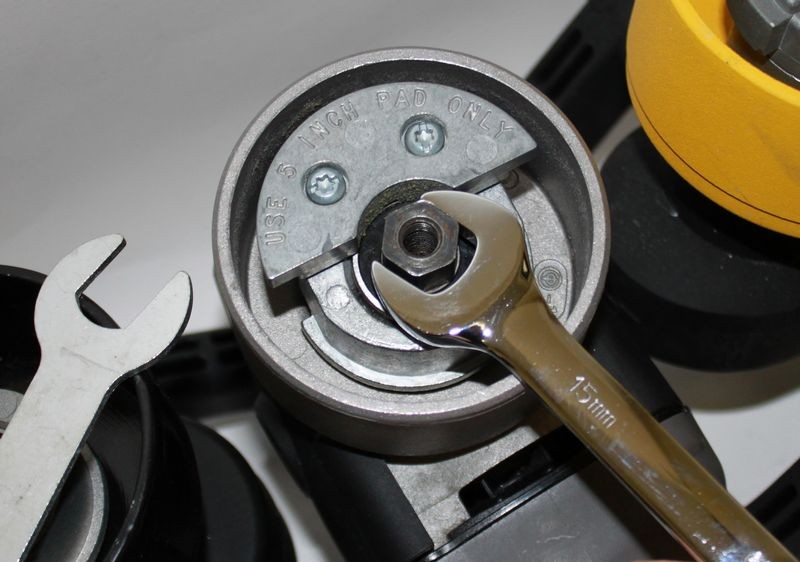
Don't do this - there's not enough room between the counterweight and the backing plate. If you do it this way and tighten down the backing plate it will be difficult to pull the wrench out as you will have sandwiched it between the counterweight and the backing plate.


When attaching a backing plate DON'T LOSE THE COMPRESSION WASHER - The compression washer prevents metal-to-metal contact.
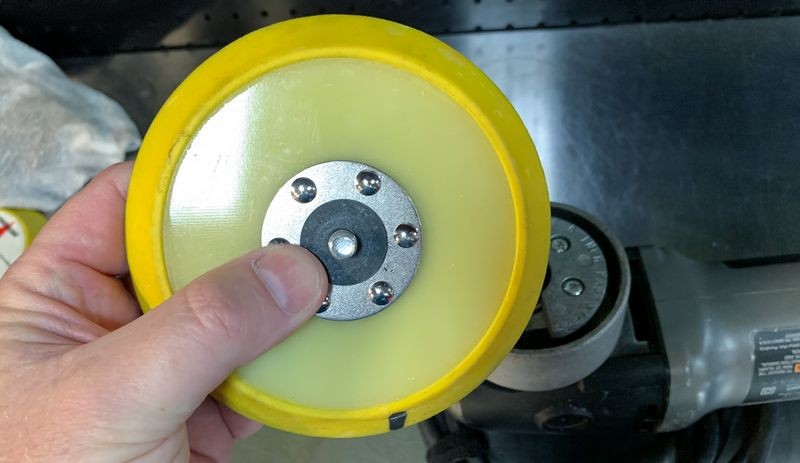
Find your own way to make sure the compression washer does not fall off when you turn the backing plate over to thread onto the spindle, I use my thumb to hold it in place.
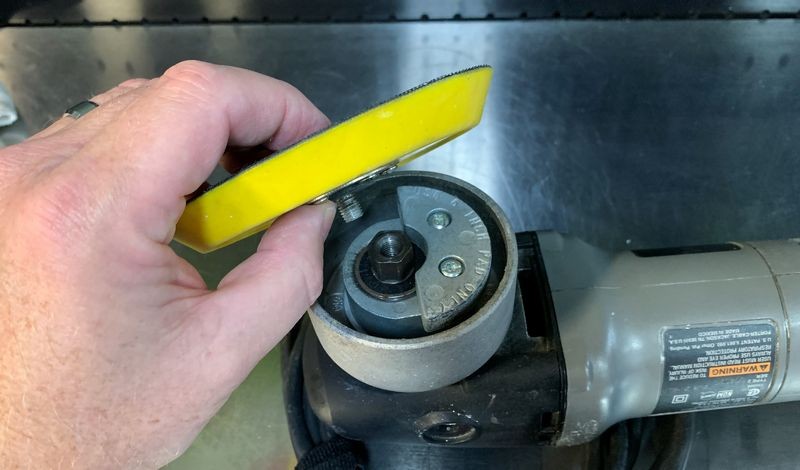
Then look through the side of the housing to locate the correct place, opposite of the counterweight to insert the wrench on to the spindle and then tighten the backing plate down snug. Don't over tighten - don't leave too loose. The key word is SNUG.

Read to start removing swirls....

On Autogeek.com
Porter Cable 7424XP Flat Wrench
Lake Country Compression Washers 5-Pack
Backing Plates

The wrench that comes with a Porter Cable Sander/Polisher fitted onto the free spinning spindle
From the side view, you need to locate the position of the counterweight and insert the PC wrench into the housing from the opposite side because there is more clearance for the wrench to fit.
The below picture is the same picture as seen above only I've drawn circles around the sides of the counterweight, (red circles), and I've circled the spindle, which is where you need to place the wrench.
This is the side view from the opposite side and the red circle is around the counterweight. DON'T try to insert wrench here as there's usually not enough clearance between the counterweight and the back of the backing plate.
Here I'm inserting the PC wrench into the side opposite of the counterweight
Here you can see the PC wrench being inserted from the correct side.
And now with the backing plate removed, you can see what I'm talking about.
Don't do this - there's not enough room between the counterweight and the backing plate. If you do it this way and tighten down the backing plate it will be difficult to pull the wrench out as you will have sandwiched it between the counterweight and the backing plate.
When attaching a backing plate DON'T LOSE THE COMPRESSION WASHER - The compression washer prevents metal-to-metal contact.
Find your own way to make sure the compression washer does not fall off when you turn the backing plate over to thread onto the spindle, I use my thumb to hold it in place.
Then look through the side of the housing to locate the correct place, opposite of the counterweight to insert the wrench on to the spindle and then tighten the backing plate down snug. Don't over tighten - don't leave too loose. The key word is SNUG.
Read to start removing swirls....
On Autogeek.com
Porter Cable 7424XP Flat Wrench
Lake Country Compression Washers 5-Pack
Backing Plates


