Touch up paint?

Sunder92

New member
Joined
Feb 23, 2013
Messages
83
Reaction score
0
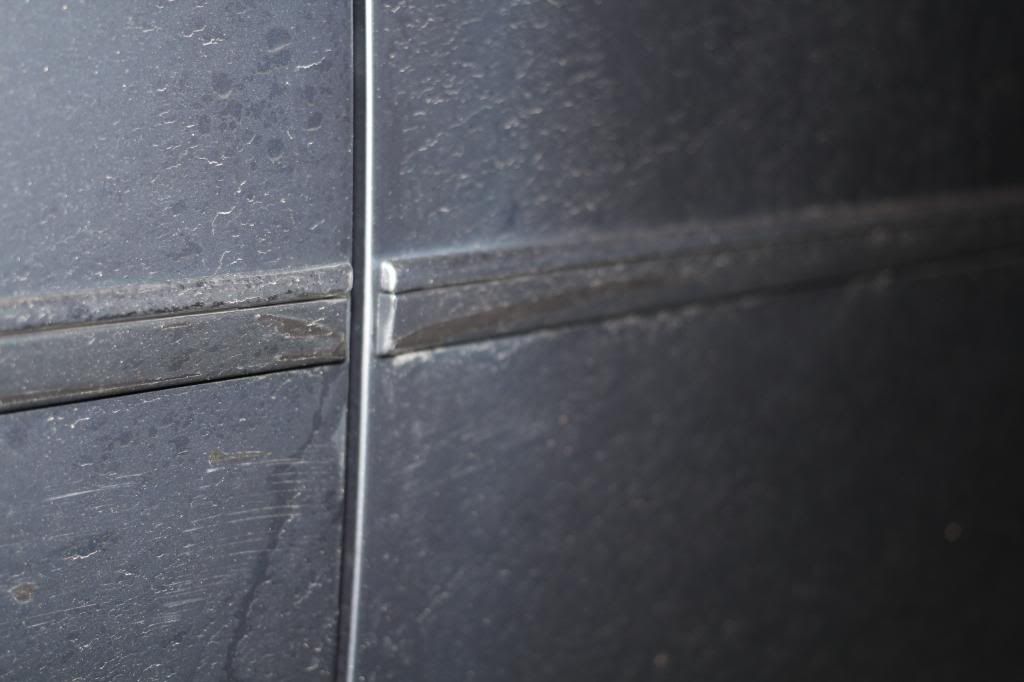
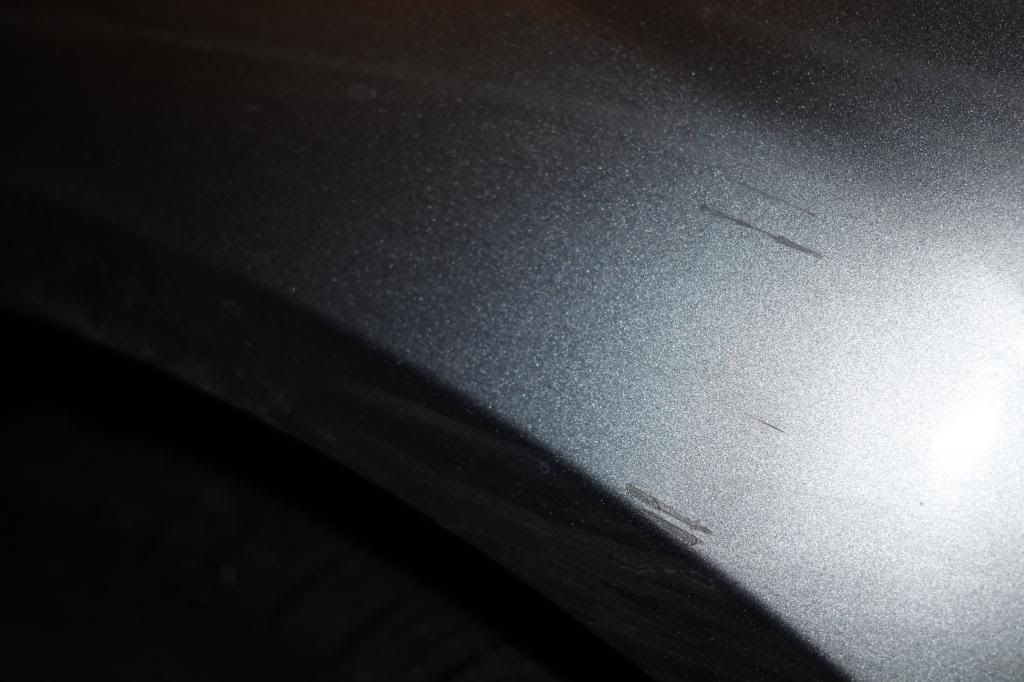
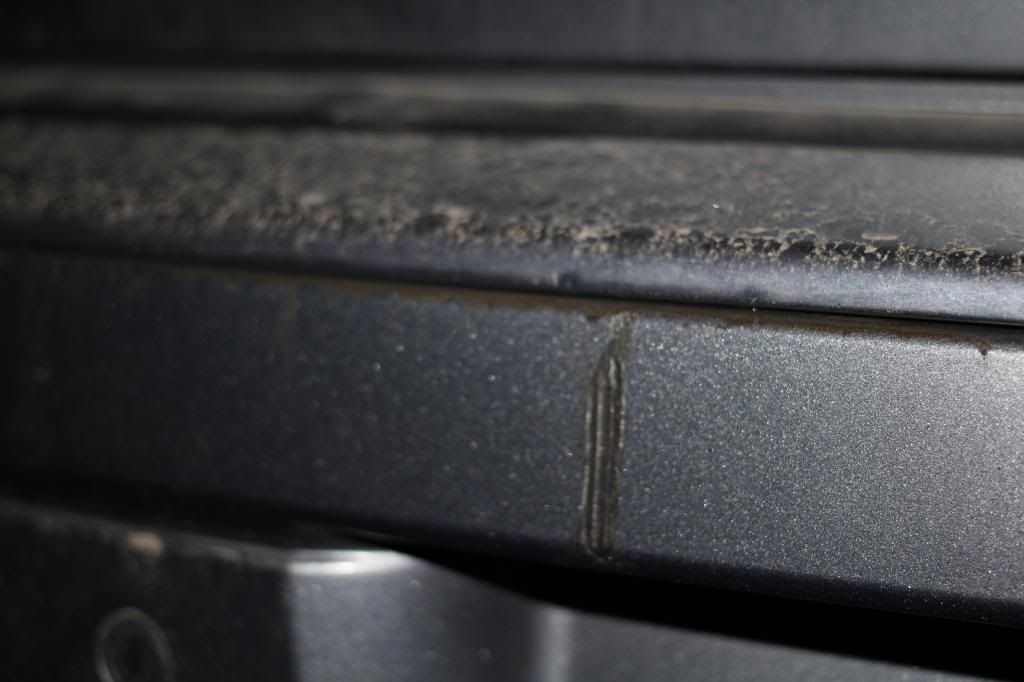
Working on my brother's 2006 300c and there are a lot of deep scratches.
The paint color seems slightly different than the original paint. However, I have yet to compound and polish it. I was thinking of fixing the scratches before I do all that.
Should I buy touch up paint in the oem paint color or go to a shop and match the paint to what it is now?
 
Do you have a process in mind? Dr. Colorchip is great for very small chips and short scratches, but what you're describing raises a few caution flags. Might be worth reading up on some successful repairs before attempting to dig in...at least to save yourself some disappointment.

The entire car is a different color, or have some of the panels possibly been repainted?

Bottom line answer - I'd recommend OEM touch-up paint for jobs like this, but that's really the easiest part of the project.
 
A 2006 model is not that old. Even baking in this desert New Mexican Sun at 100+ degrees in the summer, shouldn't have bleached that paint that much.

That is provided the paint is clean, and the only true way you'll get that paint in the best shape that it can be, is with polishes.

Today again, I'm slowly going around my Summit White 1997 Tahoe SUV with the Dr Colorchip Touch Up Paint System.

God, I love this stuff!

Although my truck, with 39,000 original miles has been meticulously cared for over the years, I of course cannot be on both sides of the truck as she goes down the road, batting away rocks flying up from the oversized tires. Unless the truck sat in a glass case, 15 years has taken some toll on the paint.

As I'm going around the truck, the Dr C-Chip is "erasing" all this chip damage big time. I'm doing a small section of rocker panel at a time, and I'm getting results like the pics, and videos depict. Wow!

I'm truly tickled pink with this product, worth every penny spent IMO.

And, the beauty of this system is, "you cannot mess up"! Make a mistake, over apply, wrongly apply, no harm, no foul, the SealAct leveling solution can come along, correct, or totally eliminate your previous poor attempts, and then you can start again.

The paint they provide is virtually bone dry in a few minute's time. Then you simply come along, follow their directions with the SealAct solution, gently smooth the touch up, to level, and it is a very forgiving and "cave man proof" system.

There's never a danger to the original paint, you cannot harm it no kind of way with this system.

As a plus, the Dr C-Chip can even correct and remove your poor previously done attempts with factory touch up paints, albeit, with a lot more Sealact product, and some vigorous rubbing.

Just beautiful stuff! How I wish this product was around so many years ago. Mark
 
The paint doesn't look metallic, but I have to double check on it.
This is how bad/deep the scratches are:
_MG_2538_zps4d4202c6.jpg

_MG_2539_zps5c214d97.jpg

_MG_2532_zpsaca82803.jpg
<-- It seems like my brother tried to touch it up, but the paint is way off. Not sure what he used. It is currently higher than the original paint.

Edit: My original plan was to wet sand the scratches, fill them up with touch up paint (do I need clear coat?), wet sand it again, then compound and polish.
But I think about it more and more, it seems like it won't be as simple as that.
Should I sand the area down to the metal, or just a bit and then add the paint?
 
The Dr Colorchip system can come along, and either better, or totally remove these previous attempts at touch up.

Yes, you might rub you butt off, but the Sealact Solution will work to either better level, or totally remove these previous attempts.

I'll try to share what little I know, but as I understand it, basically all touch up paints are Laquer based.

I of course do not know Dr Colorchip's proprietory formula for their SealAct Solution, but an educated guess has me thinking it is a laquer thinner-reducer, with a fine polish added.

Don't quote me on this, but I'm probably mostly right.

A good tip I'll share with the Dr Chip system, today I had a small bottle of Naptha (Lighter Fluid) on hand, as I was crawling around the undersides of my truck. As I was going, I was cleaning up the paint bottle, small brushes, hands, whatnot with the Naptha, trying to keep things clean.

The Dr C-Chip paint coagulates almost immediately, and any brush you use will set quickly with their touch up paint.

Just a simple slight saturation of the brushes with naptha, and a wipe with a paper towel has the brushes clean again, and ready to then move onto a new damaged area.

For upper body panels, I used a prep solvent first, to de-wax these damaged areas, wipe with an MF Towel, then pre-mark these chip areas with a small piece of blue painter's masking tape, so I can quickly recognize where I have identified damage, and walk around the vehicle with paint, and brush.

Although I had an initial paint mismatch from Dr C-Chip, they worked with me and got it right. An evident FUBAR of formulations with my paint color, which was no fault of theirs, this is a mistake in a paint database.

They got it right on the second time, and a big thanks to their patience, and willingness to make me happy. Mark
 
Total FWIW.... A few notes/comments:

The paint definitely appears to be metallic, or pearlescent. Just a guess, but maybe silver steel metallic?

2006 Chrysler 300C Colors

Probably obvious, but that thing needs a bath. A close examination after a good cleaning, and even a clay treatment, will really give you an idea of what you're up against.

The damage in the first pic may well simply polish out.

The touch-up in the second pic does appear to be a mismatch. Either the wrong paint, or only the first step (color) of what maybe needed to be a two step process?

You definitely have your work cut out for you with the deeper scratches. I would definitely follow the approach outlined in the link shared by cartman57.

MarkD51 - you've definitely become a Dr Colorchip pro. Not at all to discount your efforts, but it's worth keeping in mind that GM's Summit White is definitely one of the more easier colors to touch-up. (Of course, this assumes, as you mentioned, that the match is accurate. Summit, Olympic, Arctic...whether it's 8624, 8554, or 9567, GM's whites are well known to vary dramatically across batches and suppliers.)


You are of course right, and I know all too well what a nightmare it is matching metallic paints, let alone some other exotics like pealescents, candys. flip flops, metal flakes, glass flakes, fades, etc etc.

But white is a SOB in a way, because the chip looks black. I've found this usually isn't an easy process either, filling a black chip, with a lighter white paint, which at times appears to be somewhat translucent in color.

That the darker, apparently black chip remains, unless you do a multitude of follow-up coats-layers of paint to cover-hide.

Even with the Dr C-Chip, there's some chips which I had to repeatedly re-fill to try leveling, and hiding such.

But, one real beauty with Dr C-Chip, you can do this re-application within a sparse few minutes, not hours, nor days.

Factory touch up is not easy to deal with. Vertical panels commonly have touch up paints sagging all to hell, the top side of a chip has little paint, while the paint ran-flowed to the bottom of the chip, and even off the chip completely.

One almost needs a garage floor, like the Green Hornet, where the "Black Beauty" was clamped to the floor, and then Kato can have the car on its side in mid-rotation, so touch up paints don't run down the sides. Mark
 
Total FWIW.... A few notes/comments:

The paint definitely appears to be metallic, or pearlescent. Just a guess, but maybe silver steel metallic?

2006 Chrysler 300C Colors

Probably obvious, but that thing needs a bath. A close examination after a good cleaning, and even a clay treatment, will really give you an idea of what you're up against.

The damage in the first pic may well simply polish out.

The touch-up in the second pic does appear to be a mismatch. Either the wrong paint, or only the first step (color) of what maybe needed to be a two step process?

You definitely have your work cut out for you with the deeper scratches. I would definitely follow the approach outlined in the link shared by cartman57.

MarkD51 - you've definitely become a Dr Colorchip pro. Not at all to discount your efforts, but it's worth keeping in mind that GM's Summit White is definitely one of the more easier colors to touch-up. (Of course, this assumes, as you mentioned, that the match is accurate. Summit, Olympic, Arctic...whether it's 8624, 8554, or 9567, GM's whites are well known to vary dramatically across batches and suppliers.)

It may be the lighting, but in real life, it seems to lean more towards Magnesium Pearlcoat. However, I will double check it when I get a chance to.

I think it would much easier if most of the scratches were not already filled in with the wrong color. The pictures only show a few sections of where some of the scratches are.

The filled portions are actually higher than the original paint, so I have to sand them down before applying the right color. However, I am not completely sure how much I should sand. Some suggestions would be great.

And I am on somewhat of a time constraint, so I do not think I will have enough time to order the Dr Colorchip product. I will most likely have to pick up some touch up paint from the dealer or store tomorrow and work on it through the weekend.
 
My question is-- if i am working on a car with scratches that need to touched up, should I do compound (paint correction) before or after I do the touch up? I don't want to use touch up paint and then have it burn through/off when I hit it with a buffer.
 
Back
Top