Using Extreme, Super, Heavy cut compounds for Headlighs?

Be careful with the Ceriglass--It needs to be used wet and will sling everywhere! I think so much time will be spent protecting surrounding areas from the sling that it will be a net negative. It's incredibly useful for windshields, but so many easier ways exist for headlights!

A super heavy compound I've had luck with on headlights is Shurhold's Buff Magic. I still prefer sanding first, though. I'll usually sand to 2000 (foam finishing) before taking out the Buff Magic.
 
Thank you Brandon.

Yeah, I've seen some videos and threads on glass polishing and that is one of my concerns. Don't want to sling it everywhere and risk marring the paint if I do not cover it up some how. Will try on my own test subjects first to see what happens.

If it Ceriglass doesn't work for this, I'll just save it for it's intended propose. All of my vehicles are over 10 years old and am sure my work trucks could use it.

Still want those rylon pads. I have no interest in polishing glass by hand unless I somehow put on an extra 20lbs.
 
Did some testing before the trip to grandmas.

Believe it or not, Optimum compound II removed 500 grit sanding marks without to much work and lots of pressure. Ceriglass did the same, maybe slightly quicker, but left more tracers/swirls. Did not have any real issues with it slinging either, used it as is with no added water.

Don't think it got above 30 degrees today. Pad looked like it was steaming because it was so cold, but pad and light did not get hot, just warm.

Used both with LC purple foamed wool pad. Compounding only, no polishing.


Might put up some pics later of the cracked up 4Runner lights I "enhanced", not corrected.
 
Absolutely no disrespect intended, and I'm all for experimenting and learning new things, but that seems to have been a lot of time and even some money invested in going after results that are already easily attainable using proven methods and very little cash.

A 3M Headlamp kit plus a sheet each of 2000 and 3000 and a sanding block would have set you back about $25 and done every one of those lenses properly the first time. A shaker can of 2K urethane clear is about $15 and will coat at least a dozen pairs, or you can even try the incredibly inexpensive Sparathane method if these are your personal vehicles and you don't mind learning to sand the lenses again in 18-24 months. Lastly you can invest in a bottle of dedicated headlamp lens clear coat that costs about $2 a lens. If you plan on doing more sets of lenses, the small outlay for 3-inch sanding discs will pay off in time and effort saved. The cost per lens for 2000 is about 35¢ and 3000 is about a dollar a lens.
 
No offense taken at all Francesco and I do appreciate the criticism. Guess it may seem as me trying to reinvent the the wheel. Just kinda a journal of my exploration in technique and trials. Maybe it will help someone else on their journey.

This is done partially for my own enjoyment in my spare time with products that I can hopefully use elsewhere if needed.

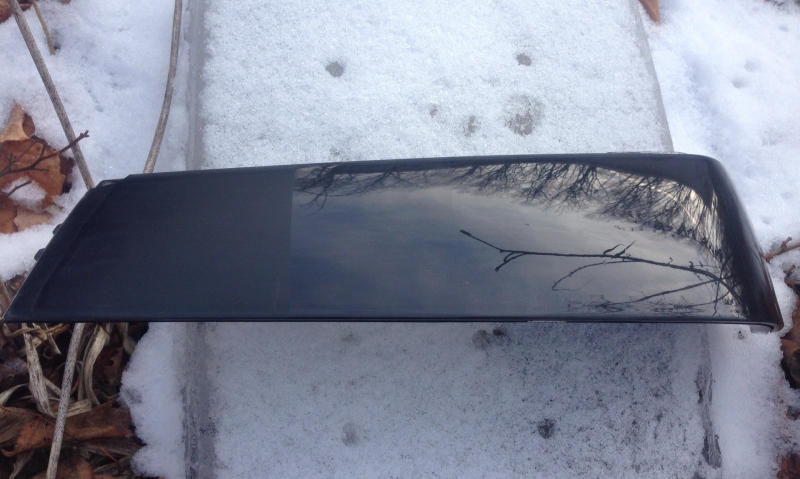
After I researched restoring headlights quite a bit because of a bad looking used headlight I bought. I did decide to use the 3M and two packs of assorted grit paper. After finishing mine, I started considering doing this as a side job and looking for quicker ways to get the same results before going any further.

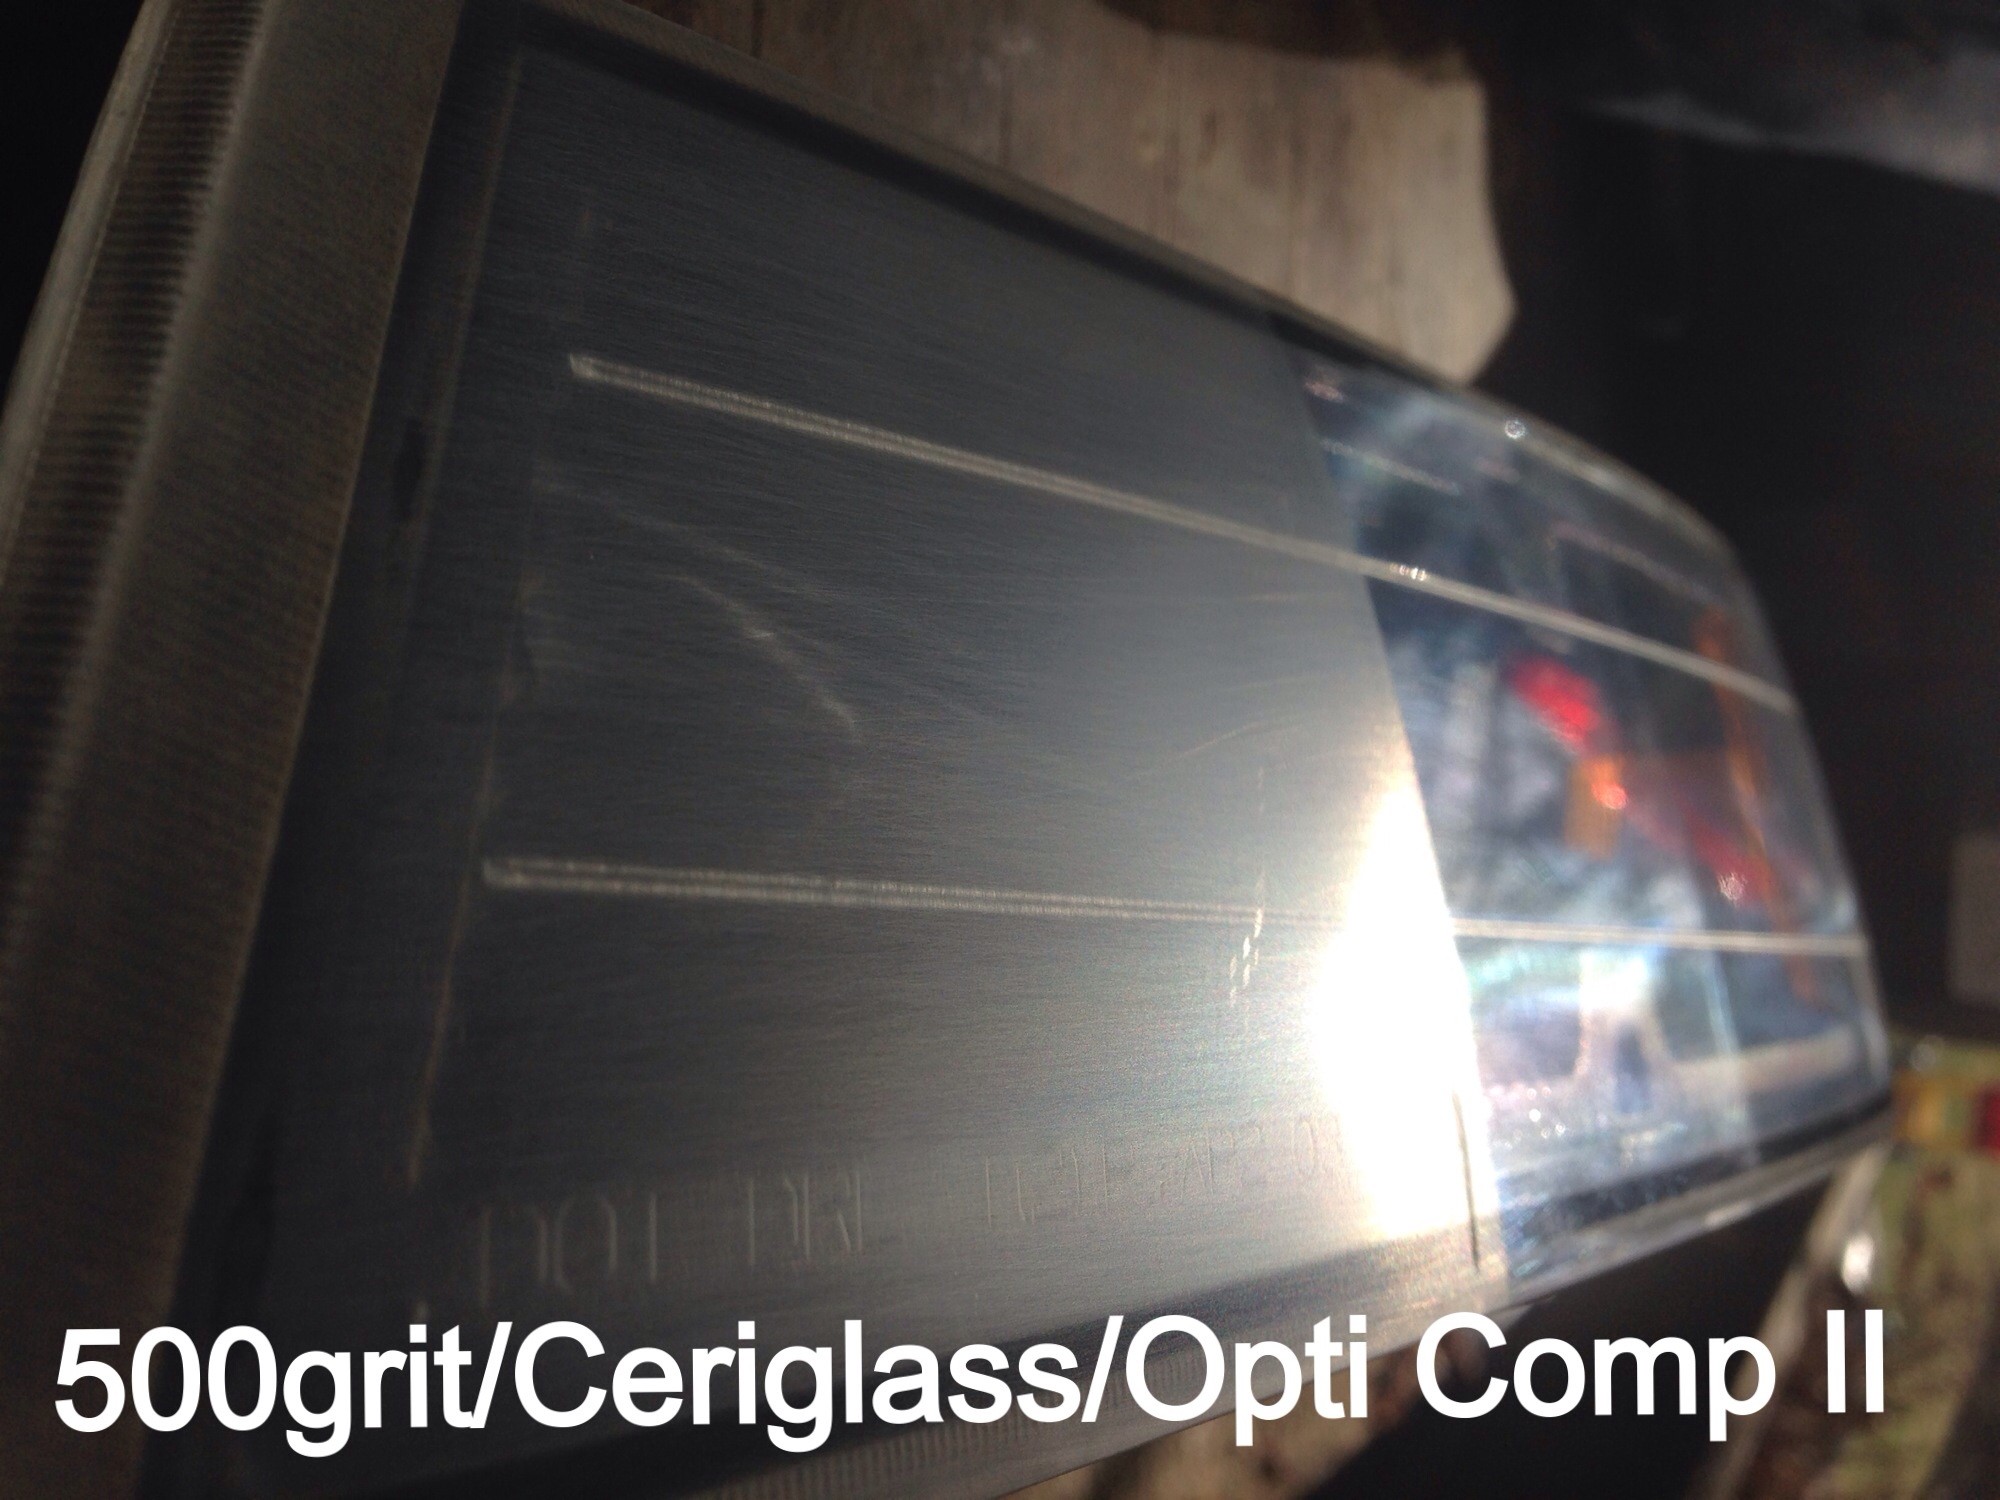
Just seemed quite time consuming going through all the grits from 320 up 3000 and a bit unnecessary after more research.

To me, why not stop sanding at a much earlier point, ditch the fancy disks, and go to a compound if you can still get good results. Instead of repeated sanding and inspecting.

I do understand the more disks you buy the less they are. But, for someone like me, poor and just trying to get started, dropping 2-300 dollars (I assume your talking buying by the 100 to get to that price point) just on disks that I'm not even sure I'll get to use up is not acceptable to me, or my wife.

After my experimentation yesterday, I believe I see no need to buy any sanding disks. Just some wet/dry sheets in lower grits, compound, and polish. 1000 grit will be my limit for purchasing for now. I will continue to test and provide the results here.

I am interested in the durability of the 2k clears, but not having the proper spray equipment and the canned versions may only be used within short time frame per can once used, or you just got throw it out.

I shall continue on my journey, hopefully without blinders on. Anyone, please feel free to comment or call me a wanna be hack. Just provide the reason if you do.
 
No, I get it. The fun is in the learning process.:xyxthumbs:

I bought all my Meg's sanding discs here when they were on special combined with one of the frequent sales, up to 1500. I searched elsewhere for P2000 and P3000, and wound up finding 100 foil 2000 discs for $25, and boxes of 15 foam-backed 3M Trizact P3000 discs for $30 a box.

Total time to prep, tape off, machine damp sand, clean up and clear a pair of normal lenses is about an hour to an hour and 15 minutes. I couldn't possibly do it in that time using compounds and polishes.
 
That's a good idea using one of the discounts here.

Here is what I've have been wanting to fix or help for awhile. My in-laws 4runner lights. I knew it would be impossible to completely fix, but would have thought I could have corrected more easier.

Untouched
image898.jpg


Just Ultimate Comp II just to knock the haze of and see the cracks better


Directly to 330 grit wet/dry. This is after 20-30 minutes sanding and it made me wish I had a lower grit. Didn't seem like I was getting to far to quick, but these were deep.


It was so cool my sanding slurry was freezing on the bumper. Basically ran out of time and daylight. Just ended up compounding out again and left with some sanding marks and swirls. There definitely clearer than before but not finished either.

Here's the money shot. Just kidding. No better lighting pics for now.


Looked at with a flashlight and looked pretty bad. I'll try and get some daylight pics and finish them up and coat soon.

Anyone know if there is a minimum temperature at which you should not apply Opti-Lens? Did not waste on this one, just wondering.
 
Should we be treating raw polycarbonate headlights like really soft paint if they are being polished out?

Maybe finished out with a ultra fine polish with a no/low cut pad?

Just started thinking about painting one of my test lights black on the inside to see if it shows sanding, swirls, marring marks better.

Also I must note that upon closer inspection of the compounded light, post #23, that there are still some straight line sanding marks visible. Really only near the edge, center is good, and seems to be only on the sandpaper sanded side/Ceriglass and not really any on the green pad/Compound II side.

Really hard to see these scratches in the lights partly because of the different surfaces and reflective pieces behind the lens. Hence, another reason I want to paint the backside of the lens black.
 
Baked and blacked out
image949.jpg

Coating failing on corner I have not touched.

Swirls(knew those were there, compounded only,wool) and horizontal scratches left from sanding in bottom center of pic


This will defiantly help me see more without the "background noise"
 
Just found this on the "Featured Items" at the AG store site.

Meguiars Unigrit Sand & Clean M31716

I guess this is a new product, little info on Meg's forum from back in Oct/Nov. Might be what they are using in their new headlight kit or at least sounds the same; matting compound used with a scuff pad.

No claims to what grit it would be comparable to or grade of scratches left behind.

I do have some more tests coming once I get some reasonable weather. Decided to make some of my own pads; one closed cell foam and a double sided compressed wool.
 
Well, made a few pads with nothing invested a little success. Pad delaminated after some increased heat and pressure with the rubber contact cement used. Then thought some more.

I really like how stiff the CarPro blocks were that came with the kit and really want to try the 3" ones when I can, but can't get right now. Then thought, why not turn one of the two CarPro rayon blocks(if they are the same material as the 3" pads) from the kit into a smaller disk.

Pealed the rayon part right off the foam block, and went to work on it and my broken 3M backing plate.

Cut the pad as big as I could and ended up with a 1 5/8" disk.

Some epoxy and some left over plastic radio trim was used to make my new backing plate from the broken 3M one.

image1004.jpg


Everything after all epoxied and clamped together. Also pictured is my modified CarPro rayon pad with an old piece of 3M 500 grit epoxied to it for the "loop side" which was something hard it find suprizeingly.

image1005.jpg


With the "hook" side that was removed from the 3M foam backed plate.

image1006.jpg


What I ended up with for now. Can always be made smaller if needed.

image1008.jpg


image1009.jpg


image1007.jpg


Have not had a chance to try out yet.
 
Bump to an old thread
I've also been trying to find ways to avoid Sanding steps or atleast make things.no more then a 3 step when dealing with a crazed headlight

Most aggressive combo over.used that was on hand was carprp Cool wool hybrid pad and S3 XXL(may work well for pitted lens)
It reduced crazing, but didn't remove it
I'll be ordering S0 and see if that does the trick
Also found Menzerna liquid sand paper(equivalent to 800-1000 grit)

Plan to also try meguiers liquid sand paper and clean product..
If non works for at least a quick 2 step
.then I'll start off with 320 or 600 then do the steps one of the products mentioned followed by S3 xxl
 
No progress here.

I've been grinding away at the bad ones using 500 and 800 grit disks to start out with when needed, then hand sand with a foam block up 2000. All the corners and hard spots by hand. Then compound, polish, coat.
 
Back
Top