Navigation
Install the app
How to install the app on iOS
Follow along with the video below to see how to install our site as a web app on your home screen.
Note: This feature may not be available in some browsers.
More options
Style variation
You are using an out of date browser. It may not display this or other websites correctly.
You should upgrade or use an alternative browser.
You should upgrade or use an alternative browser.
Using Iron-X in a rinseless wash situation?
- Thread starter RZJZA80
- Start date
FUNX650
New member
- Dec 1, 2010
- 21,057
- 1
Is it possible there’s a nearby DIY
car wash facility at which you could
perform the IronX decon process?
If not:
Same “rules” apply. Here, IMO, are
two of the more important ones:
1.) Make sure IronX’s dwell-time is held to
specified recommendation.
2.) Make sure to thoroughly rinse away every
single bit of IronX’ed residues from all of the
vehicle’s surfaces—Of course it’ll be harder to
do with a RW.
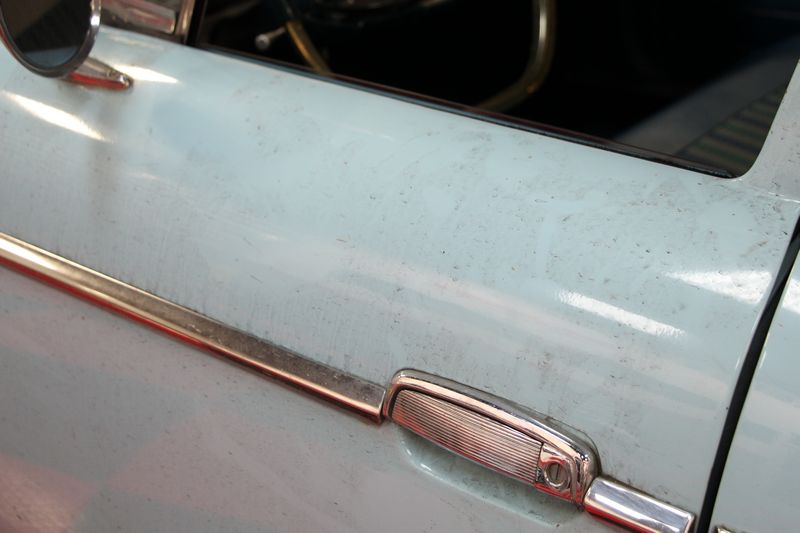
Don’t forget the emblems, trim, door handles,
etc.; or, as the Yardbirds once intoned:
”Over under sideways down,
Backwards forwards square and round.”
Bob
car wash facility at which you could
perform the IronX decon process?
If not:
Same “rules” apply. Here, IMO, are
two of the more important ones:
1.) Make sure IronX’s dwell-time is held to
specified recommendation.
2.) Make sure to thoroughly rinse away every
single bit of IronX’ed residues from all of the
vehicle’s surfaces—Of course it’ll be harder to
do with a RW.
Don’t forget the emblems, trim, door handles,
etc.; or, as the Yardbirds once intoned:
”Over under sideways down,
Backwards forwards square and round.”
Bob
MarkD51
Active member
- Oct 15, 2012
- 3,130
- 0
I myself would say no, I wouldn't advise it, and best plan is mentioned above by the previous poster. A coin-op spray wash if you have one in your area.
Firstly, this stuff stinks to high heaven. To have it possibly hang around for any length of time might be unbearable fragrance-wise.
Two, without being able to fully rinse this product away from little nooks, cracks and crannies might also be detrimental. Having used this product a few times, I've seen it bleed for a very long time, where copious amounts of water were needed to fully flush.
Purple residues were still coming out from many areas for numerous minutes of heavy flushing-rinsing.
My theory was to continue flushing and rinsing till I no longer seen it.
And even doing this outdoors, I could smell this stuff outside 2 weeks later!
Mike Phillips
Active member
- Dec 5, 2022
- 51,004
- 6
Just to chime in,
Half my forum work is simply remembering all the cars I've worked on over the last 10 years....
Hang tight...
")
Half my forum work is simply remembering all the cars I've worked on over the last 10 years....
Hang tight...
Mike Phillips
Active member
- Dec 5, 2022
- 51,004
- 6
Here you go....
From 2015
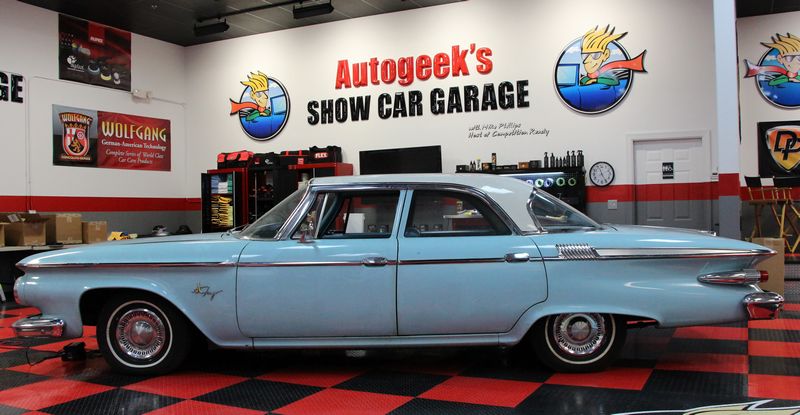
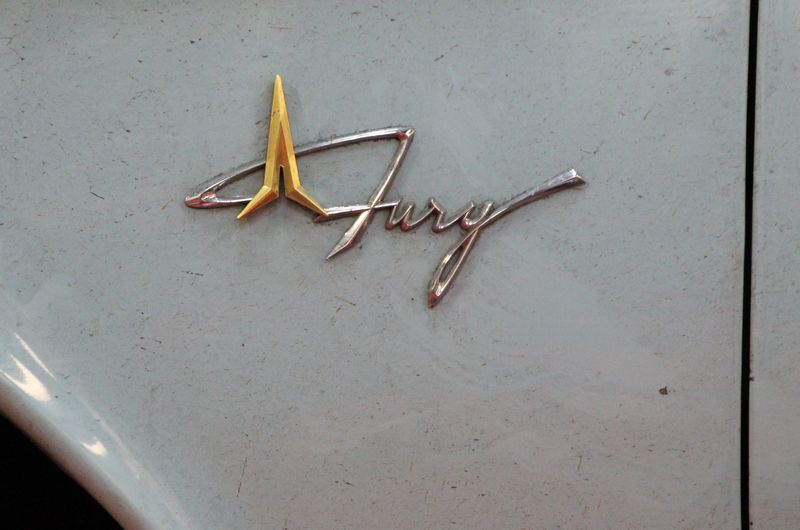
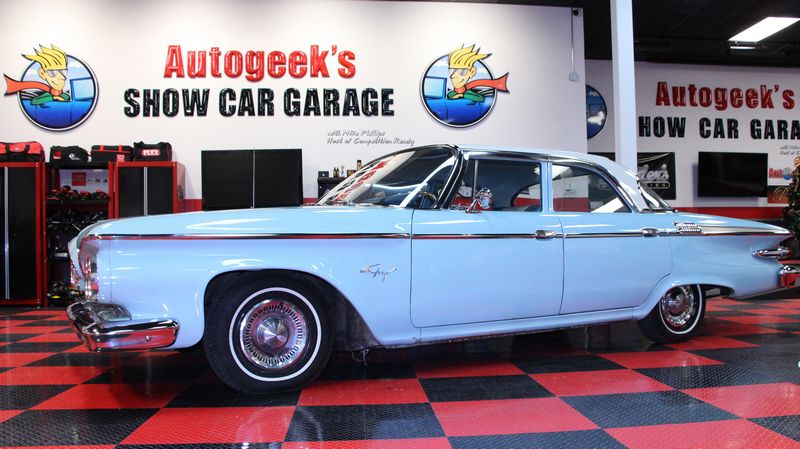
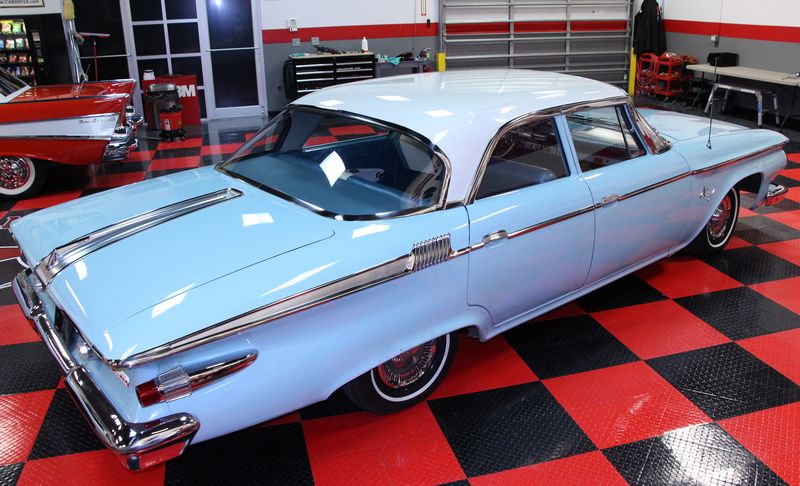
Before & After - 1961 Plymouth Fury Barn Find
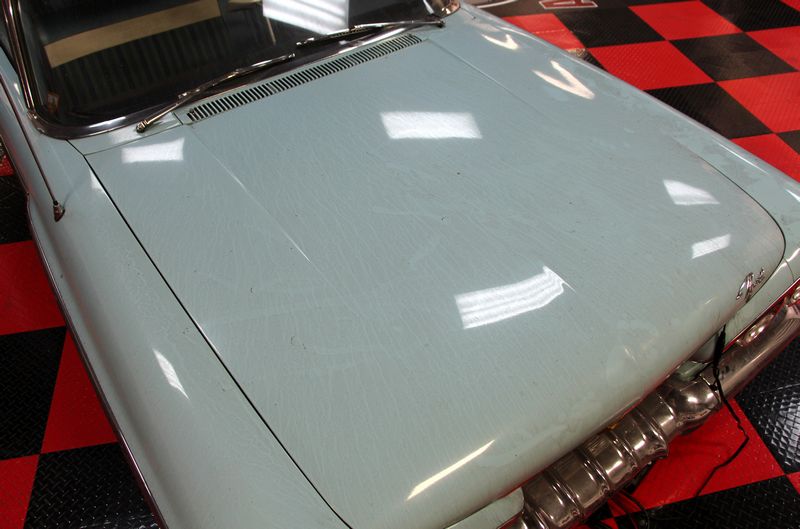
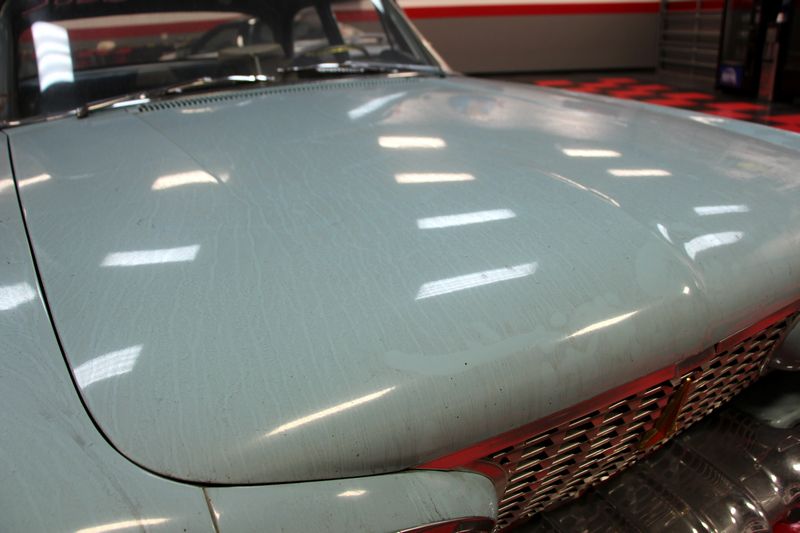
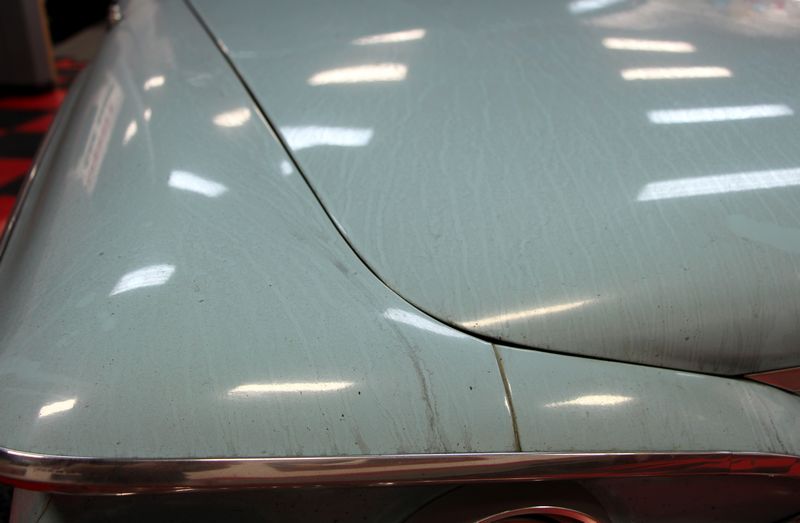
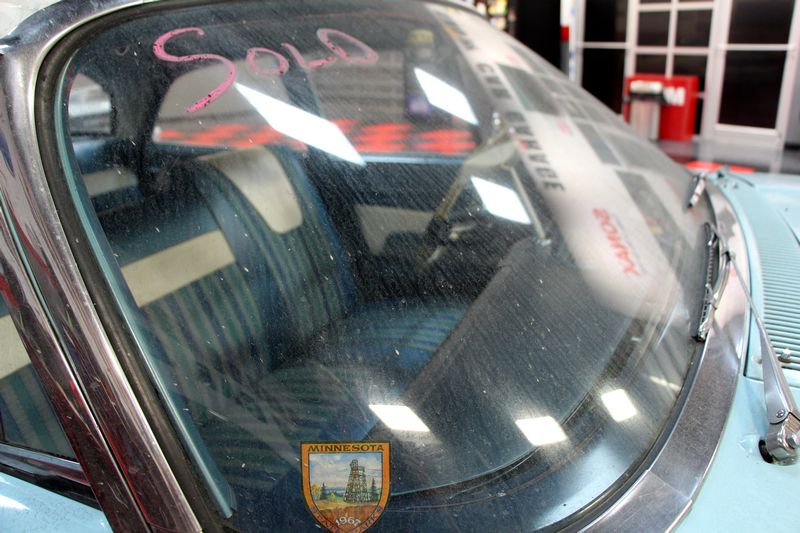
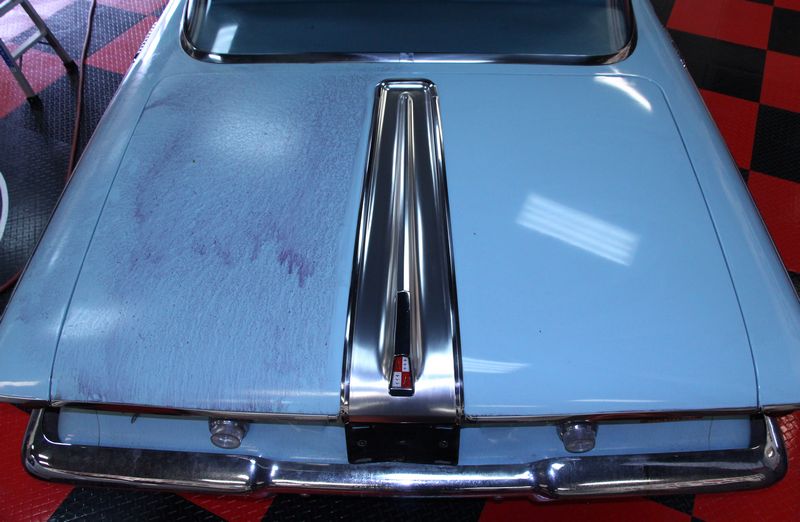
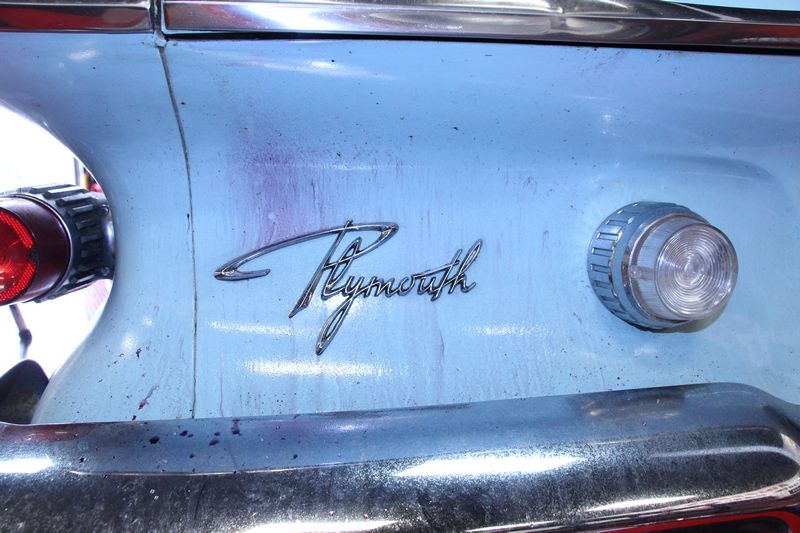
My good friend Jim Serra bought himself a Christmas present for himself from his wife. The funny part is he hasn't told his wife! Before she sees it in its current dirty and neglected condition I'm going to shine it up for him and then put a pretty Christmas ribbon and bow on it for the reveal.
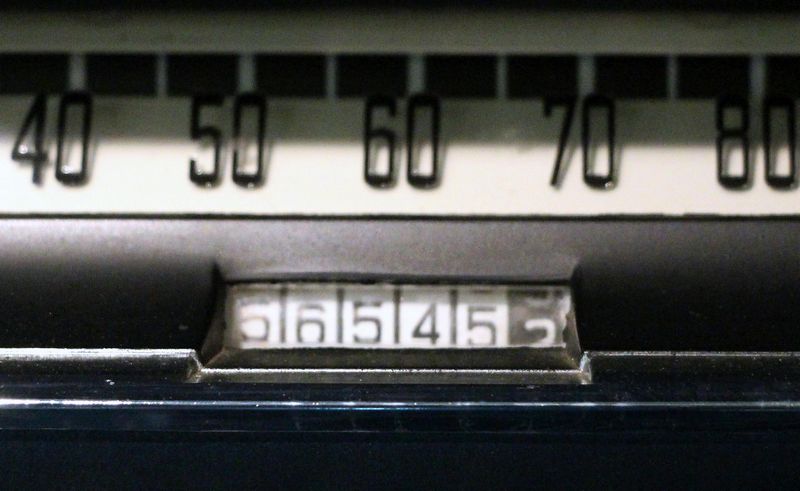
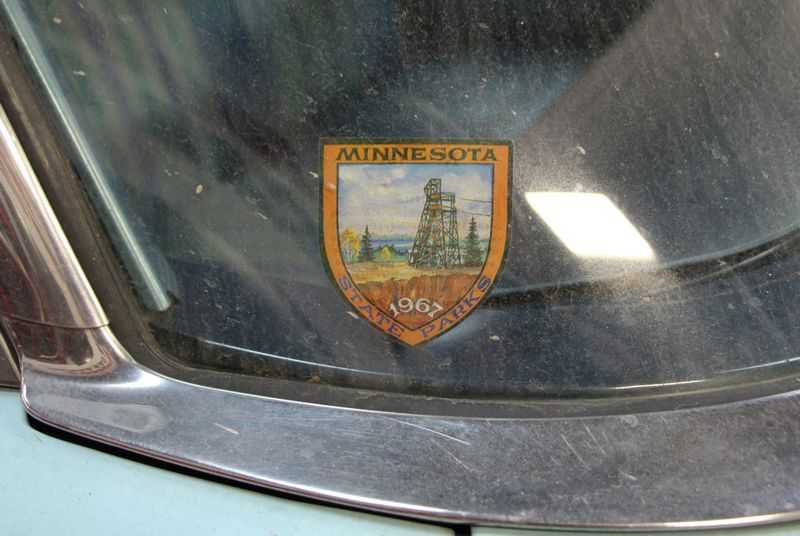
This car is all original and a fresh barn find out of Minnesota. It has 56,545 miles on it. It's just now broken in!
Here she is right off the car hauler from Minnesota!
The dealership told Jim that normally they wash the cars and have them detailed before they put them up for sale but for this car they just left her alone. (Good thing for Jim)


From 2015
Before & After - 1961 Plymouth Fury Barn Find
My good friend Jim Serra bought himself a Christmas present for himself from his wife. The funny part is he hasn't told his wife! Before she sees it in its current dirty and neglected condition I'm going to shine it up for him and then put a pretty Christmas ribbon and bow on it for the reveal.
This car is all original and a fresh barn find out of Minnesota. It has 56,545 miles on it. It's just now broken in!
Here she is right off the car hauler from Minnesota!
The dealership told Jim that normally they wash the cars and have them detailed before they put them up for sale but for this car they just left her alone. (Good thing for Jim)
Mike Phillips
Active member
- Dec 5, 2022
- 51,004
- 6
Continued...
Just a pre-warning
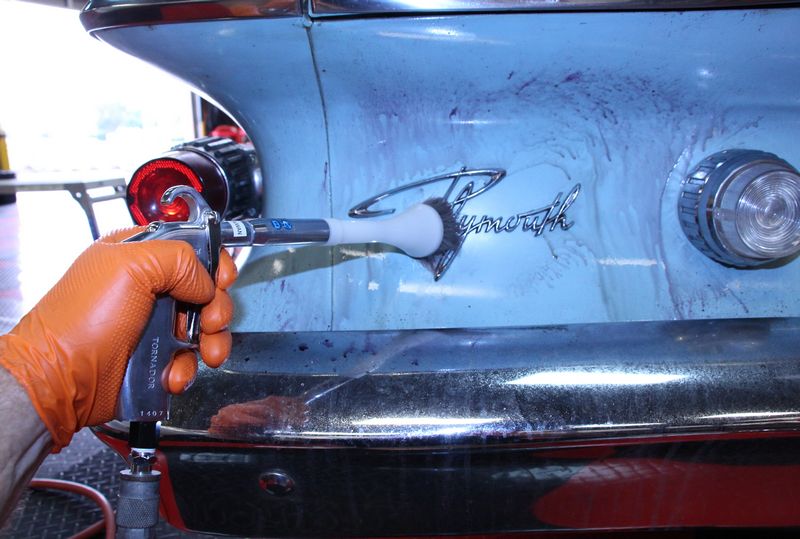
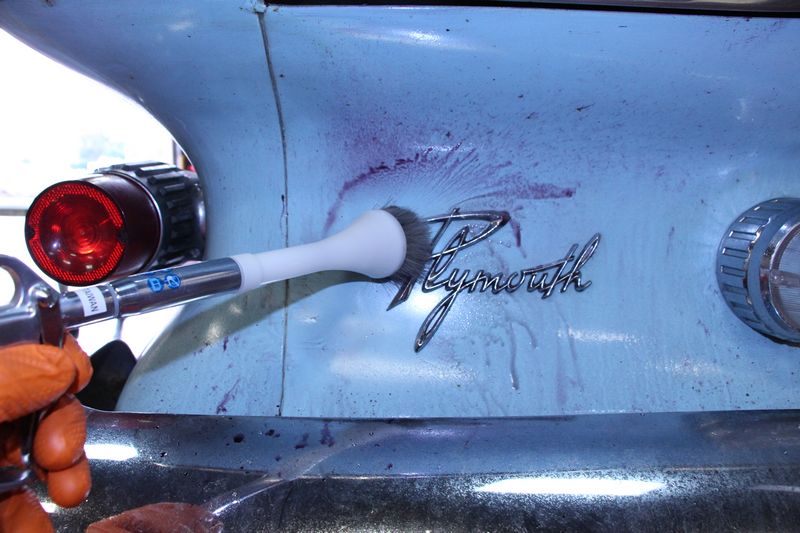
It's not recommended to use Iron X without rinsing the residue off. So for best results, always fallow the manufacturer's directions.
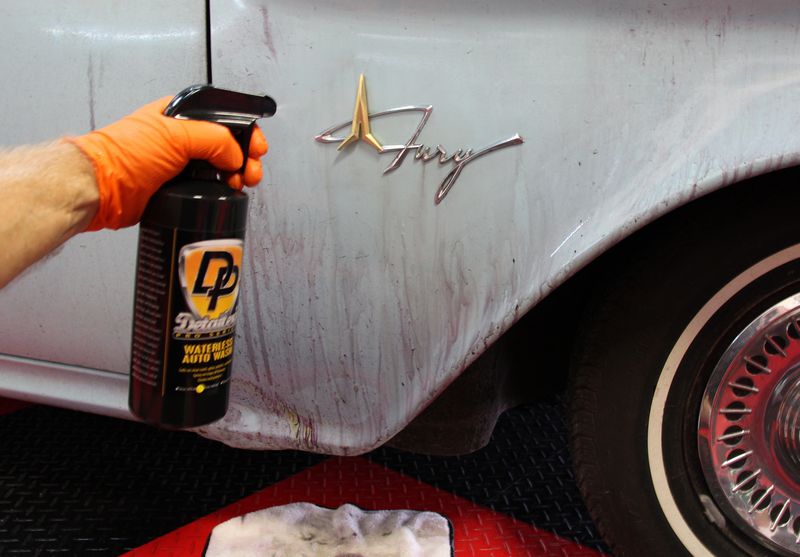
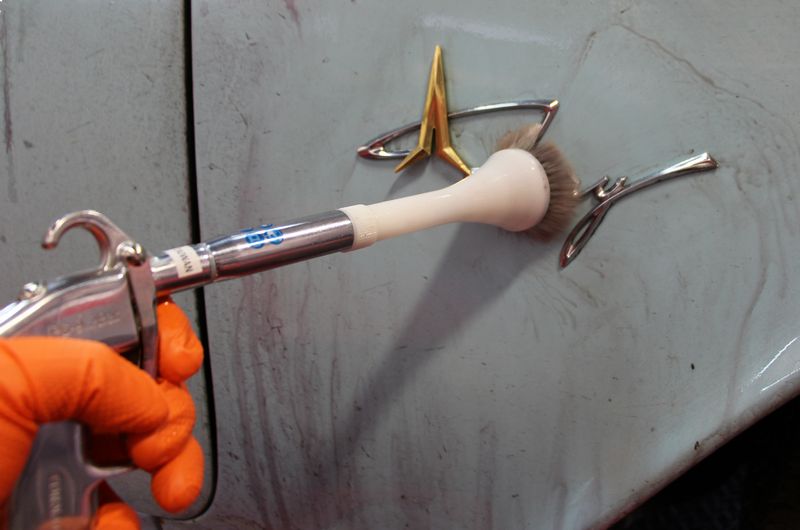
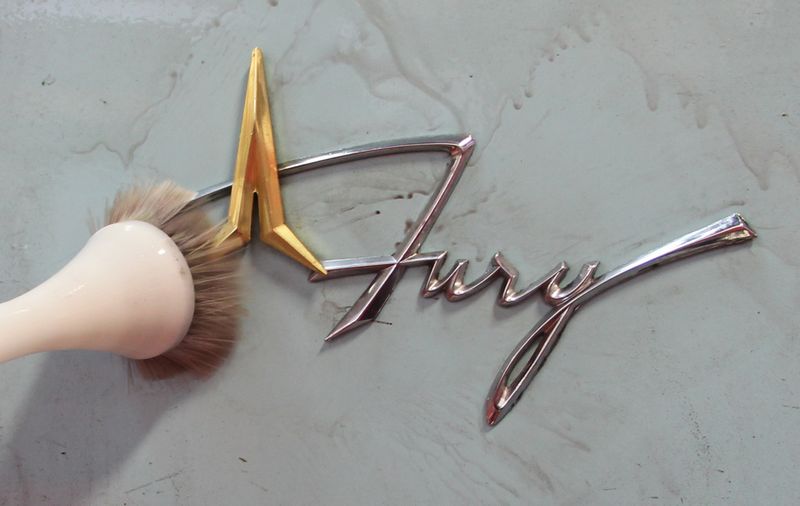
That said, I used a modified technique of using a HEAVY saturation of Detailer's Pro Series Waterless Wash to wash off the residue as I worked around the car. I also used the Tornado Air Blowout Gun WITH a heavy saturation of Detailer's Pro Series Waterless Wash around any trim or emblems to flush the component with waterless wash and then blast out the residue.
Process
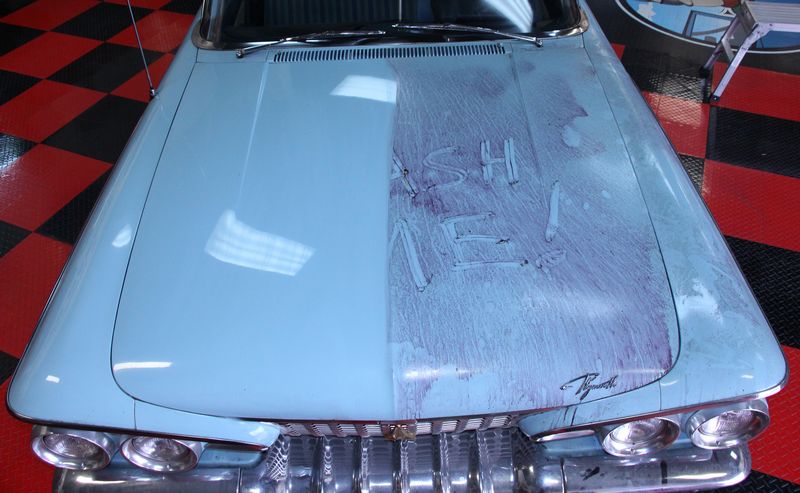
Step 1 - Chemically decontaminate the car
I used a modified technique for Iron X because I wanted to make sure any iron contamination is removed. I sprayed down the body panels with Iron X starting with horizontal panels first and then after they were rinsed clean I moved onto the vertical panels only tackling one side at a time.
Step 2 - Wash car using DP Waterless Auto Wash
For this I used a super heavy saturation with LOTS of clean microfiber towels to liquefy the Iron X and wipe it plus any and all dirt off the body panels.
Step 3 - Mechanically decontaminate the paint
For this we used the Porter Cable 7424XP with Nanoskin Autoscrub Pads (Medium Grade) and Detailer's Pro Series Universal Clay Lube
Step 4 - Compound paint using SONAX CUTMAX
For this step we used the SONAX CUTMAX with the Flex 3401 on Speed 6 with 6.5" Lake Country Hybrid Orange Cutting Pads.
Step 5 - Machine polish and wax using SONAX PAINT CLEANER HYBRID NPT
Next we used the SONAX PAINT CLEANER which is not technically a dedicated paint cleaner but a hi-tech cleaner/sealant.
A cleaner/sealant is like a cleaner/wax in that it will clean, polish and protect in one step only instead of using some type of natural wax ingredient for protection it uses some type of synthetic ingredients for protection.
Rob McCrary at SONAX USA told me that the SONAX PAINT CLEANER had the cutting ability of SONAX Profiline Nano Polish. So this should remove any haze left by the aggressive compounding step while leaving the paint clear, glossy, rich in color and also protected.
For the exterior glass, chrome and stainless steel trim I simply ran over these surfaces using the orange Hybrid cutting pad with the SONAX CUTMAX.
Hubcaps and tires were wiped clean using an all purpose cleaner.
Now on to the pictures...
Just a pre-warning
It's not recommended to use Iron X without rinsing the residue off. So for best results, always fallow the manufacturer's directions.
That said, I used a modified technique of using a HEAVY saturation of Detailer's Pro Series Waterless Wash to wash off the residue as I worked around the car. I also used the Tornado Air Blowout Gun WITH a heavy saturation of Detailer's Pro Series Waterless Wash around any trim or emblems to flush the component with waterless wash and then blast out the residue.
Process
Step 1 - Chemically decontaminate the car
I used a modified technique for Iron X because I wanted to make sure any iron contamination is removed. I sprayed down the body panels with Iron X starting with horizontal panels first and then after they were rinsed clean I moved onto the vertical panels only tackling one side at a time.
Step 2 - Wash car using DP Waterless Auto Wash
For this I used a super heavy saturation with LOTS of clean microfiber towels to liquefy the Iron X and wipe it plus any and all dirt off the body panels.
Step 3 - Mechanically decontaminate the paint
For this we used the Porter Cable 7424XP with Nanoskin Autoscrub Pads (Medium Grade) and Detailer's Pro Series Universal Clay Lube
Step 4 - Compound paint using SONAX CUTMAX
For this step we used the SONAX CUTMAX with the Flex 3401 on Speed 6 with 6.5" Lake Country Hybrid Orange Cutting Pads.
Step 5 - Machine polish and wax using SONAX PAINT CLEANER HYBRID NPT
Next we used the SONAX PAINT CLEANER which is not technically a dedicated paint cleaner but a hi-tech cleaner/sealant.
A cleaner/sealant is like a cleaner/wax in that it will clean, polish and protect in one step only instead of using some type of natural wax ingredient for protection it uses some type of synthetic ingredients for protection.
Rob McCrary at SONAX USA told me that the SONAX PAINT CLEANER had the cutting ability of SONAX Profiline Nano Polish. So this should remove any haze left by the aggressive compounding step while leaving the paint clear, glossy, rich in color and also protected.
For the exterior glass, chrome and stainless steel trim I simply ran over these surfaces using the orange Hybrid cutting pad with the SONAX CUTMAX.
Hubcaps and tires were wiped clean using an all purpose cleaner.
Now on to the pictures...
Mike Phillips
Active member
- Dec 5, 2022
- 51,004
- 6
Continued...
Steps 1 & 2 were done at the same time as I worked around the various body panels on the car.
Step 1 - Chemically decontaminate the car
I used a modified technique for Iron X because I wanted to make sure any iron contamination is removed. I sprayed down the body panels with Iron X starting with horizontal panels first and then after they were rinsed clean I moved onto the vertical panels only tackling one side at a time.
Step 2 - Wash car using DP Waterless Auto Wash
For this I used a super heavy saturation with LOTS of clean microfiber towels to liquefy the Iron X and wipe it plus any and all dirt off the body panels.
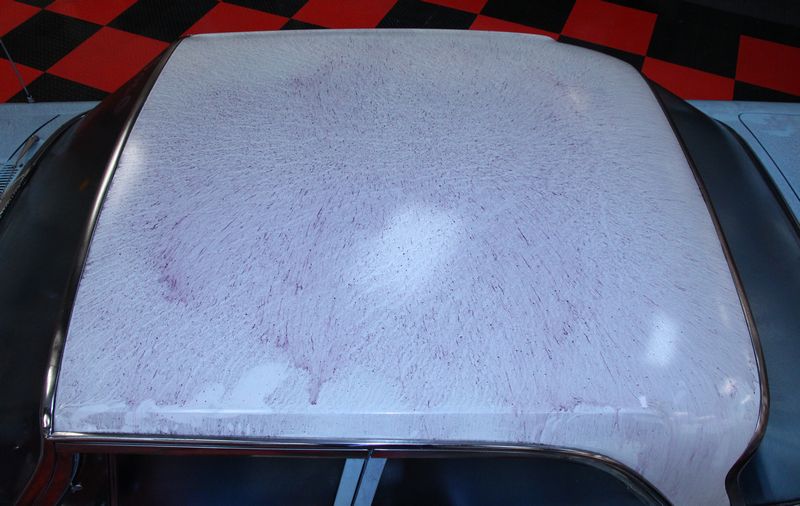
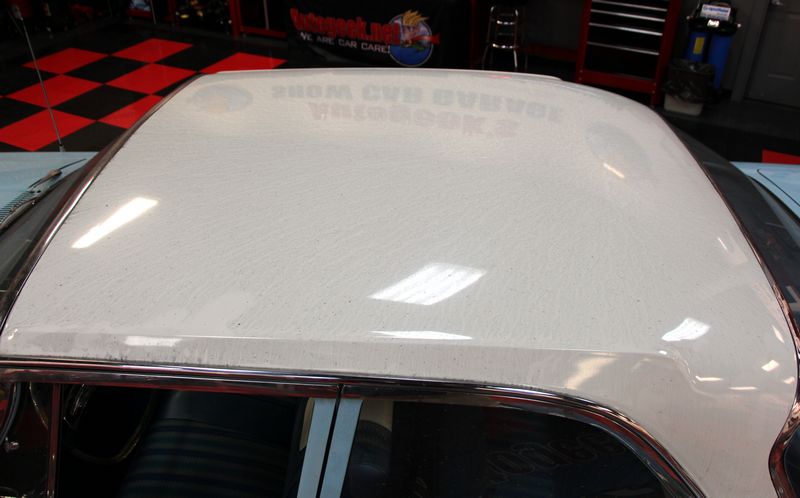
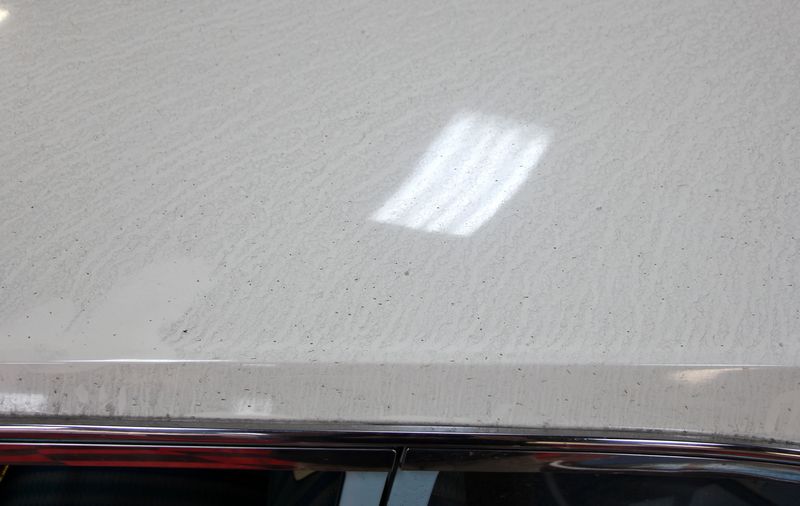
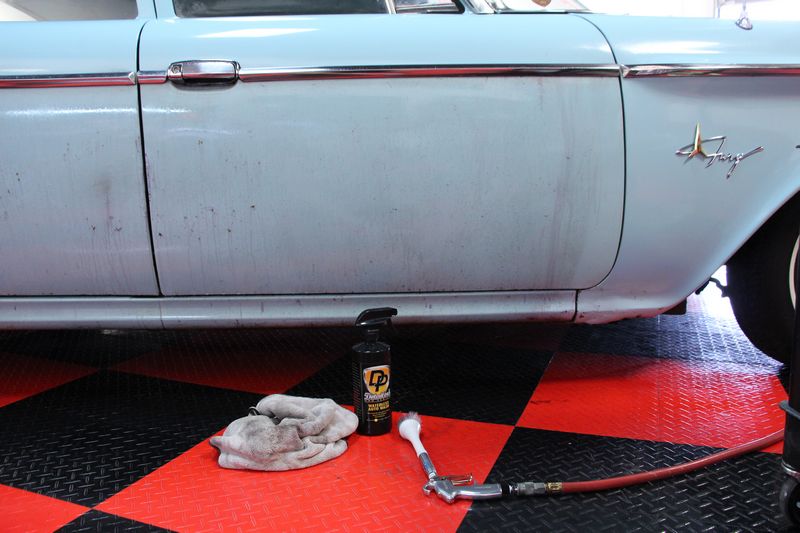
This is me saturating the roof with a very wet coat of DP Waterless Wash. This is taking the place of a normal water hose flush. This car does not have working brakes so I can't easily move it in and out of the garage.
I still wanted to chemically decontaminate the paint however so I used this modified technique of using lots of waterless wash to flush the surface and then immediately wipe the residues off the car. And "yes" this technique worked for me. Follow my process at your own judgment.


Clean as a whistle!
Then simply move around the car tackling the vertical panels one at a time.
Steps 1 & 2 were done at the same time as I worked around the various body panels on the car.
Step 1 - Chemically decontaminate the car
I used a modified technique for Iron X because I wanted to make sure any iron contamination is removed. I sprayed down the body panels with Iron X starting with horizontal panels first and then after they were rinsed clean I moved onto the vertical panels only tackling one side at a time.
Step 2 - Wash car using DP Waterless Auto Wash
For this I used a super heavy saturation with LOTS of clean microfiber towels to liquefy the Iron X and wipe it plus any and all dirt off the body panels.
This is me saturating the roof with a very wet coat of DP Waterless Wash. This is taking the place of a normal water hose flush. This car does not have working brakes so I can't easily move it in and out of the garage.
I still wanted to chemically decontaminate the paint however so I used this modified technique of using lots of waterless wash to flush the surface and then immediately wipe the residues off the car. And "yes" this technique worked for me. Follow my process at your own judgment.
Clean as a whistle!
Then simply move around the car tackling the vertical panels one at a time.
Mike Phillips
Active member
- Dec 5, 2022
- 51,004
- 6
Continued...
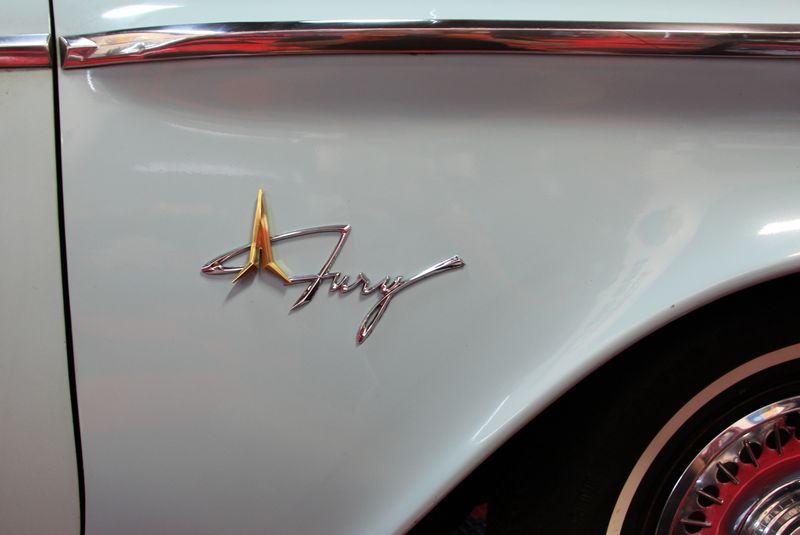
Finished!
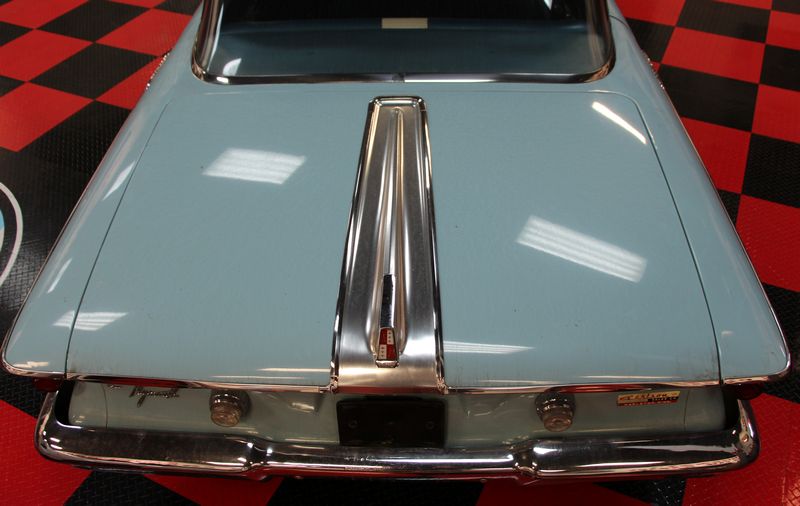
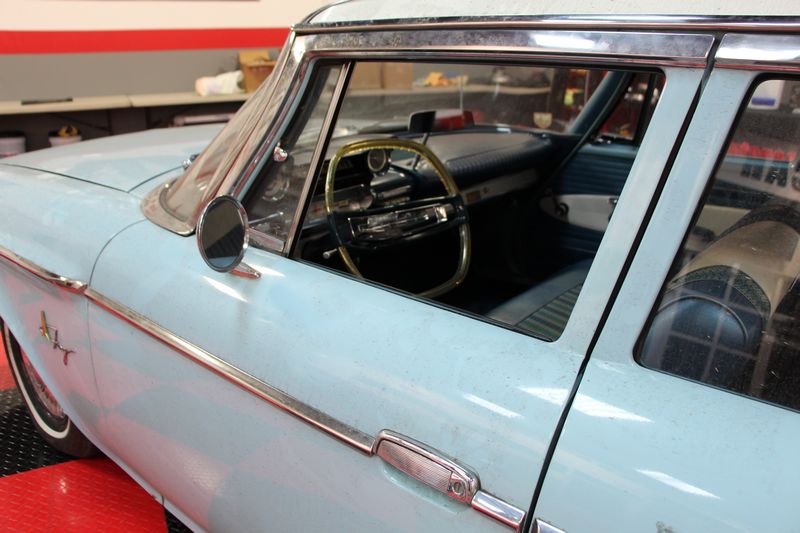
Here's the after shots or what I like to call the beauty shots! Near as we can tell this is the original factory paint.
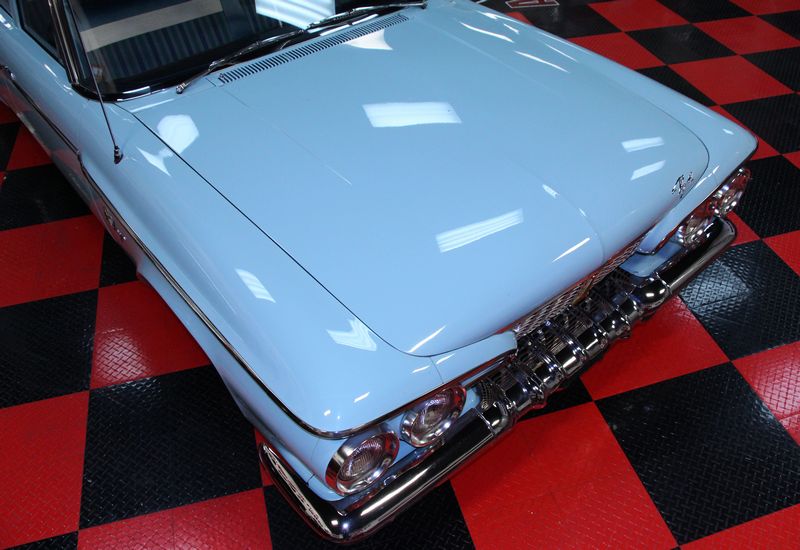

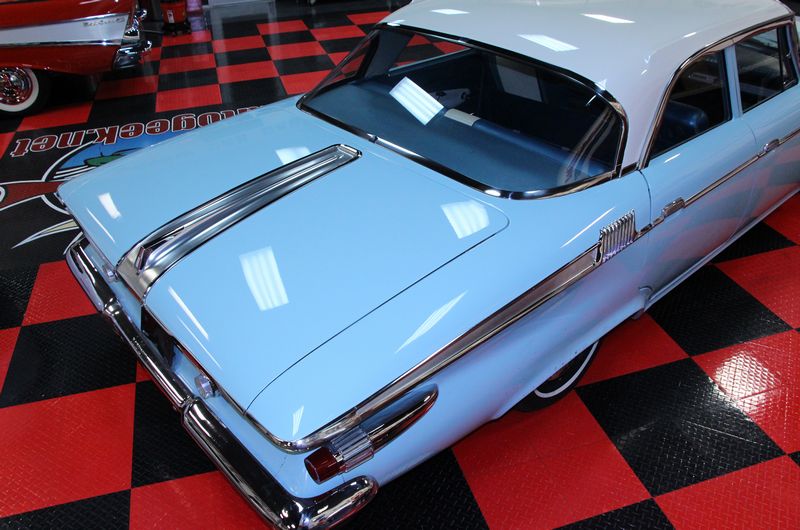
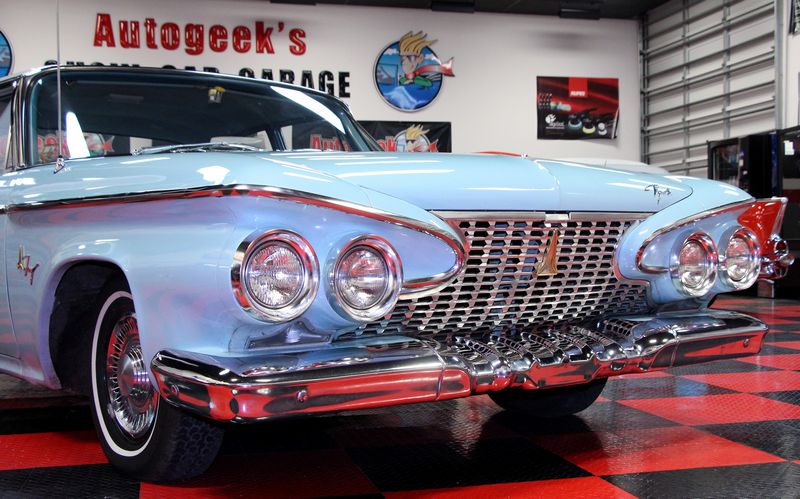
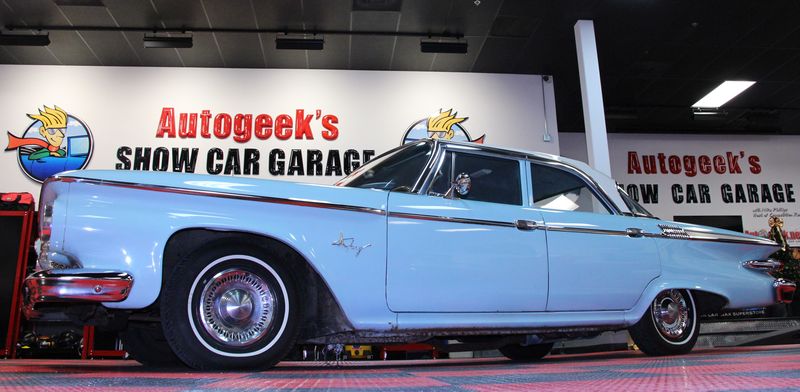
There's a million ways to skin a cat... sometimes you just have to think outside the box...
Full write-up here,
Before & After - 1961 Plymouth Fury Barn Find
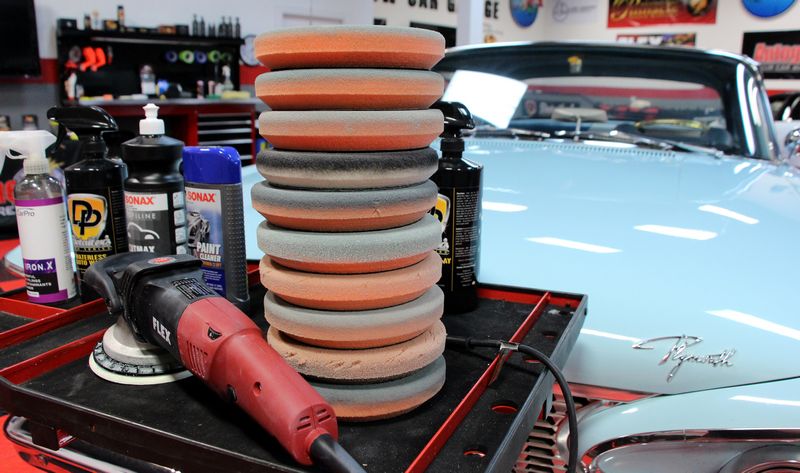
And I'm so glad I take these pictures - it shows how many pads I used and this is my way of showing others how many pads it takes to do a proper buff job.
Also - see the bottle of Iron X?
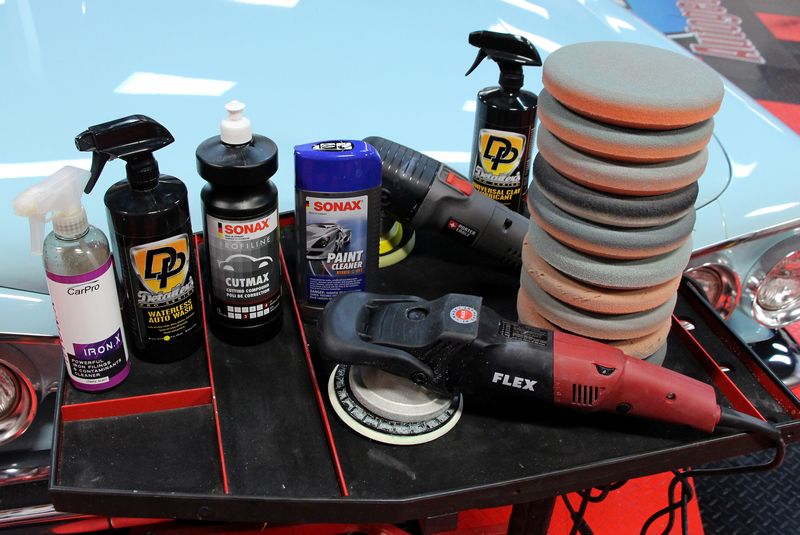
More pads are gooder
Finished!
Here's the after shots or what I like to call the beauty shots! Near as we can tell this is the original factory paint.
There's a million ways to skin a cat... sometimes you just have to think outside the box...
Full write-up here,
Before & After - 1961 Plymouth Fury Barn Find
And I'm so glad I take these pictures - it shows how many pads I used and this is my way of showing others how many pads it takes to do a proper buff job.
Also - see the bottle of Iron X?
More pads are gooder
Mike Phillips
Active member
- Dec 5, 2022
- 51,004
- 6
The real key to using any Iron Remover without access to running water via a garden hose or even a Coin-op Car Wash is to use LOTS of Rinseless Wash or in my example above, I used lots of Waterless Wash.
The below is from post #3 from the above write-up.
So lots of rinseless or waterless wash and lots of drying towels.
Hope that helps...
The below is from post #3 from the above write-up.
Mike Phillips said:This is me saturating the roof with a very wet coat of DP Waterless Wash. This is taking the place of a normal water hose flush. This car does not have working brakes so I can't easily move it in and out of the garage.
I still wanted to chemically decontaminate the paint however so I used this modified technique of using lots of waterless wash to flush the surface and then immediately wipe the residues off the car. And "yes" this technique worked for me. Follow my process at your own judgment.
So lots of rinseless or waterless wash and lots of drying towels.
Hope that helps...
JustJesus
New member
- Oct 10, 2014
- 1,294
- 0
Thanks Mike! That helps a TON. I've been fortunate to have some type of hose access for my mobile jobs, but always wondered about this. I thought about going about it how you did, but with rinseless. Just haven't had to do it. Good thing I have lots and lots of towels
I didn't have much experience with the line up. Started getting into this stuff as it was being phased out.
I do have a new, unused bottle of the DP Waterless Wash, though! Gave a second bottle I had to the neighbor who liked it VERY much after he tried it out.
I miss the Old DP lineup. Some great products PRICED really well.
I didn't have much experience with the line up. Started getting into this stuff as it was being phased out.
I do have a new, unused bottle of the DP Waterless Wash, though! Gave a second bottle I had to the neighbor who liked it VERY much after he tried it out.
Leon Sidursky
New member
- Oct 23, 2019
- 30
- 0
You may also be able to use a 3 gallon pump sprayer to rinse it. Would take few trips back and forth to the sink but it’s an option if you don’t have a lot of RW or WW product.
edit- test your process out on the front of back bumper and low as you can to the ground. This will keep the amount of runoff running down a panel to the minimum if it doesn’t work out.
edit- test your process out on the front of back bumper and low as you can to the ground. This will keep the amount of runoff running down a panel to the minimum if it doesn’t work out.
- Thread starter
- #14
The main issue here isn't having access to a hose but doing this all indoors, so hitting the car with any type of streaming water is what I'm trying to avoid. I was hoping to spray it on panel by panel and then doing a Rinseless wash like I would normally do but wasn't sure if that would be good enough to remove all the Iron-X.
FUNX650
New member
- Dec 1, 2010
- 21,057
- 1
Using IronX...indoors!?!?The main issue here isn't having access
to a hose but doing this all indoors...
You got a death wish or something?
Bob
Bruno Soares
New member
- Mar 30, 2017
- 2,482
- 2
No kidding. He won't survive to tell us how well it worked.Using IronX...indoors!?!?
You got a death wish or something?
Bob
Mike Phillips
Active member
- Dec 5, 2022
- 51,004
- 6
Thanks Mike! That helps a TON.
Thanks Mike, that's exactly what I was looking for!
I'm just a blue collar working class dog - woof woof.
I use what I have and when I have to get a job done, if I can't get it done the right way, or the "normal" way, I find a way.
I posted how I use one of the tables in our garage to reach the roof of tall trucks when detailing and someone challenged me on whether it was safe or the right way to do it. I took a picture showing I TAPED the safety clamp that keep the legs from folding or collapsing so they could not move. The job is over. Standing, (carefully), on the table enabled me to clay, compound, polish and wax the roof of the truck. The truck is gone. The owner is happy. I found a way to get the job done without the help of the experts on Facebook.
Woof woof.
- Thread starter
- #18
Using IronX...indoors!?!?
You got a death wish or something?
Bob
With 2 bay doors and AC in the shop I think I'll be ok
With 2 bay doors and AC in the shop I think I'll be ok
You'll be ok, you won't die but after smelling it you might wish you did!!! It smells horrendous, and it sticks around for a long time! If the AC recirculates, turn it off, trust me! They do have "flavored" iron x, but I like to compare it to a air freshener in a bathroom, it smells like roses but there a horrendous under lying smell too.
Jay
Sent from my iPad using Autogeekonline mobile app
- Thread starter
- #20
You'll be ok, you won't die but after smelling it you might wish you did!!! It smells horrendous, and it sticks around for a long time! If the AC recirculates, turn it off, trust me! They do have "flavored" iron x, but I like to compare it to a air freshener in a bathroom, it smells like roses but there a horrendous under lying smell too.
Jay
Sent from my iPad using Autogeekonline mobile app
Well I have the lemon scented one so hopefully it isn't too bad