Personally I don't need to check it with a stripper on every section. Once I know I'm getting the results on a car I repeat my method and simply check now and then and if something changes in the defects or surface type.
:iagree:
Also, this is pretty much what I wrote in this article...
How to Mix IPA for Inspecting Correction Results
Mike Phillips said:
Checking Your Test Spot vs Checking the Entire Car
Theoretically, if your use IPA to chemically strip your Test Spot and after stripping and inspecting the results look good to your eyes, then theoretically if you duplicate the same correction process over the rest of the panels you will also remove all the defects and leave the same finish behind that you saw in your Test Spot.
Assuming all the panels have the same type of paint, then you shouldn't have to continue stripping all the paint on each panel, just keep doing the same good work you did for your test spot and trust in your skills and ability.
You can check each square inch as you work around the car to make sure you're doing as good of work over the rest of the car as you did in your test spot, that's an option and choice each person can make. I tend to check my Test Spot and if it looks good then simply repeat the process over the rest of the car and trust in my skill and ability to duplicate my process over and over again with little variation.
With coatings you really want no oil or filler on the surface. It must be CLEAN. However with many sealants and waxes it's not so important
:iagree:
Here's what I wrote on the topic of bonding in this article,
Miscible and Immiscible - Wax and Paint Sealant Bonding
Mike Phillips said:
Follow the Manufacturer's Recommendations
The first and primary consideration goes to the manufactures recommendations. If the manufacturer of a wax or paint sealant officially recommends that the surface of the paint must be stripped clean before their product can properly bond to the paint, then you should follow the recommendations of the manufacturer as they know their products best.
If the manufacturer does not specifically recommend that a painted surface needs to be stripped clean, then whatever recommendations they do provide should be followed as they know their products best.
To my knowledge, there are only a few manufacturers in the wax and paint sealant business that recommend that the surface of automotive paint be surgically clean and bare before their products can be applied. Besides these few companies, most manufacturers either recommend to apply their wax and/or paint sealant to the paint after first using their surface prep products which can include, compounds, polishes, paint cleaners and pre-wax cleaners. And of course, sometimes there are no specific recommendations.
One thing I would point out when it comes to products with polishing oils intended to bring out the full richness of color, some of these like the #7 and #80 work better on more porous paints like single stage paints. #7 has been around since cars have been around and clear coats have only been around since the late 70's in Europe and the first clear coat I know of in the U.S. was the 1980 Corvette. I cover this all in my how to book by the way.
Also see this article,
The practical differences between single stage paints and a clear coat paints
I've worked on hundreds of cars with single stage paints as well as conducted a number of extreme makeovers where the project car had single stage paint and below I'll outline some of the practical differences between single stage paints and clear coat paints. One of the reasons I chose single stage paint for the extreme makeovers was just to give younger detailers a chance to work on single stage paint, usually on very cool cars, this is becoming a more rare opportunity as time passes.
Clearcoat paints were introduced to production cars in the U.S.A. starting in the early 1980's and since that time the technology has continually improved to create automotive paint systems that will last a long time as well as provide a beautiful finish with great gloss, clarity and shine.
The oldest factory clear coat finish I've ever worked on was an all original 1980 Corvette and after that it was an all original 1982 Corvette. Here's a picture of the 1982 Corvette, I'm still searching my hard drive for a picture of the 1980 Corvette.
All original 1982 Corvette
Since clear coat finishes, or what's called Basecoat/Clearcoat Paint Systems were introduced and become mainstream, we now have entire generations of people that have only owned cars with what's called a basecoat/clearcoat paint system; they have never owned, nor worked on a car that has a single stage paint system.
From time to time a new member will join our forum and ask for help removing
oxidation from their car's finish not knowing that the problem with their car's paint, (basecoat/clearcoat), is not oxidation, but is in fact
clearcoat failure.
Clear coat paints, when exposed to too much sun over time and without out proper care will deteriorate throughout the entire
matrix or
thickness of the clear layer of paint. You can't fix it by abrading the surface because the problem isn't just on the surface,
it's throughout the entire layer of paint. This is called clearcoat failure and the only honest fix is to repaint the affected panels or the entire car.
Clear Coat Failure
The primary problem most people experience with the clearcoat finish on their car is
swirls. Swirls are actually scratches in the paint and besides being ugly and unsightly, they block your view of the color coat under the clear coat.
Swirls can be removed because they are
topical, that is like oxidation the swirls are in the upper surface of the layer of clear paint and all you have to do is use a compound or a paint cleaner and remove a little paint from off the surface which will act to level or flatten out the surface again. See the below thread for more information.
What it means to remove swirls, scratches and water spots out of automotive clear coats
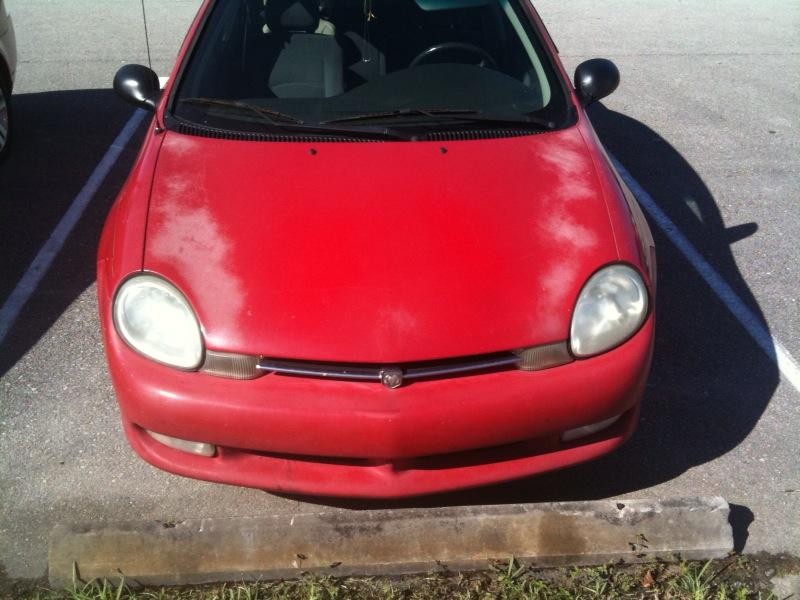
Single stage paints like the type of paint that came on a 1965 Mustang will
oxidize and the problem can be fixed because like swirls, the problem is topical and isolated to just the upper surface of the paint. The way you fix oxidation is to abrade or remove just a little bit of paint off the surface to expose a fresh layer of paint or what we call a
fresh base.
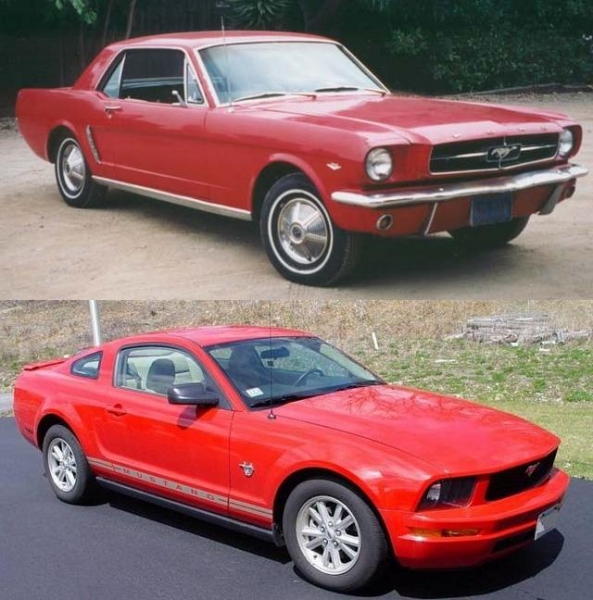
Top: 1965 Mustang with single stage finish. Bottom: 2009 Mustang with a basecoat/clearcoat finish.
Classic cars with oxidized single stage paints are easy to fix, (in my opinion), as well as fun to work on, (again, just my opinion).
The thing to understand is that there's a huge difference between these two types of paint systems; the good news is you can usually fix
true oxidation but the bad news is in most cases once a clearcoat finish deteriorates to what we call clearcoat failure there's really nothing you can do to permanently fix the problem and restore a nice looking finish that will hold up over time. Usually you have to repaint the affected sections or repaint the entire car, or learn to live with the problem.
Single stage paints will tend to be messier because whatever color of the paint is will be transferred to all your microfiber polishing cloths as well as to your buffing pads and this worries some people. There's nothing to be worried about. In most cases, washing your polishing cloths and buffing pads will remove most of the transferred pigment but not all of it however there's nothing to worry about as your polishing cloths and buffing pads can still be used for a future detailing session.,
Here's the practical difference
Single Stage Paints
The problem with single stage paints is oxidation as they oxidize very easily. Single stage paints still get swirls and scratches however in the real world the
noticeable problem is the dullness and fading by oxidation.
Oxidation Before
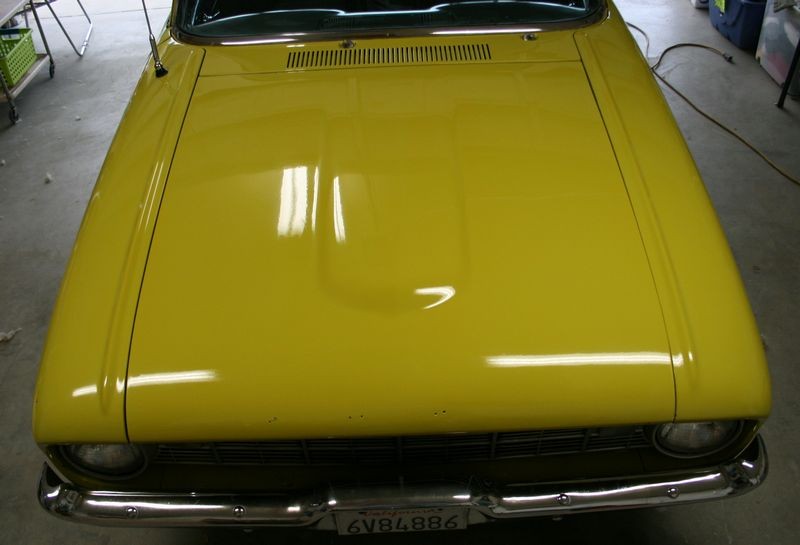
After removing oxidation
Clear Coat Paints
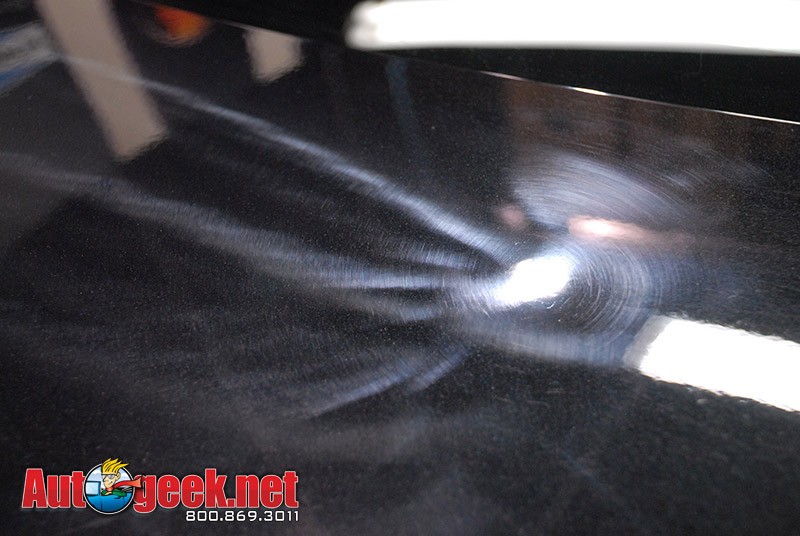
The problems with clear coat paints is swirls and scratches as they oxidize very slowly. Clear coat paints will oxidize but in the real world the
noticeable problem will be swirls and scratches. When you work on your own car or a customer's car your primary goal will be to remove swirls.
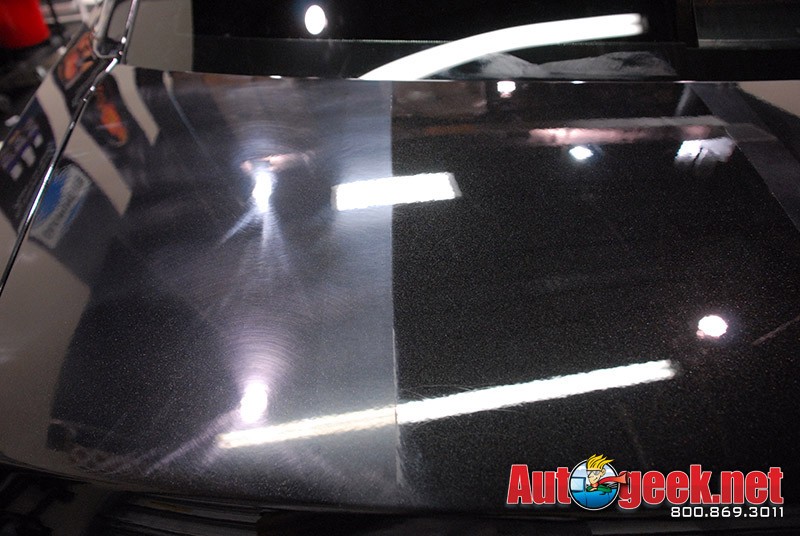
Swirls Before
After removing swirls
The best tool for either type of paint when it comes to restoring a show car finish will be an electric polisher like one of these,
Dual Action Polishers - Free Rotating Spindle Assembly
Porter Cable 7424XP
Griot's Garage Random Orbital Polisher
Meguiar's G110v2
Hybrid Dual Action Polishers - Direct Drive - Forced Oscillation & Rotation
Flex 3401 Forced Rotation Dual Action Orbital Polisher
Rotary Buffers - Direct Drive -
Rotation
Flex 3403 Lightweight Rotary Buffer
DeWalt 849 Rotary Buffer
Makita 92227c Rotary Buffer
Flex LK603VVB Rotary Buffer
Of course you can work by hand if you want to but most people find it very difficult and very time consuming to try to remove swirls by hand due to the hardness factor of clear coat paints. (See below for more on paint hardness)
Also check out the time difference to remove the swirls to machine quality results by hand as compared to how long it took to get the same results by machine.
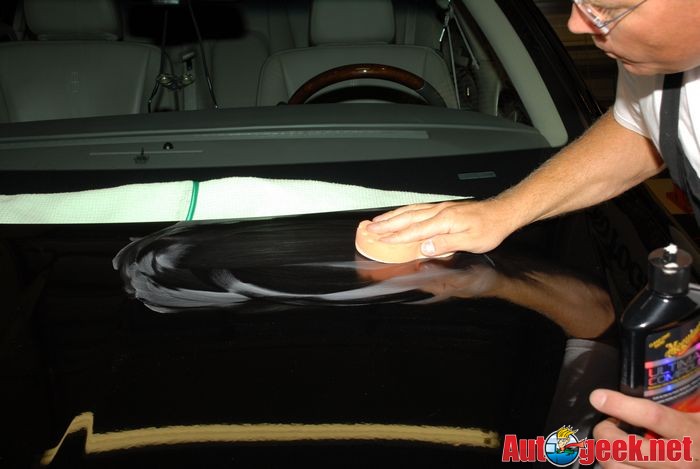
Man versus Machine
Final Results from the Man versus Machine Test
- The surface prep steps by Hand: 1 hour and 45 minutes
- The surface prep steps Machine: 30 minutes.
That's a difference of 1 hour and 15 minutes for one half of a hood done by hand versus machine.
Paint Hardness
Clear Coats
The hardness of a clear coat finish is determined by primarily the type of resin used to make the clear paint and then by a number of other factors like whether it's catalyzed or not and also the type of hardeners used, types of solvents used, other additives as well as the drying or baking process used.
Single Stage
The hardness of single stage paints is also determined by primarily the type of resin used to make the paint but also by the type of pigment used to give the paint color. Different pigments in and of themselves can be soft or hard and thus alter the resin, (that's the paint), to make it either softer or harder. Here's an article that discusses this at length I wrote back in 2004
A Lesson From White Paint
While you'll often times find threads on discussion forums that generalize the hardness or softness of entire manufactures lines of cars, trucks and s.u.v.'s, it's really not a good idea to generalize this aspect of a car. A better idea is to push away from the keyboard and actually go out into your garage and work on your car and determine on your own if your car's paint is hard or soft.
Summary
Because generally speaking, most single stage paints are softer than modern clear coat paints and because the before and after differences are so dramatic with a single stage paint as compared to most before and after differences for a clear coat finish, a lot of people find restoring a show car shine to a classic car with a single stage paint to be easier, more fun and usually more rewarding even though it will tend to be messier.
Because generally speaking modern clear coat paints tend to be harder than traditional single stage paints, it will usually require a person to focus more on the task at hand in order to get show car results as well as shrink their work area down to a smaller size. Luckily electric polishers will take a lot of the work out of the swirl removal step.
Closing thoughts...
If after reading all the above you're wondering,
If single stage paints tend to be more user-friendly to work on for the average person, why do car manufactures spray them with basecoat/clearcoat paint systems?
Good question!
The primary reason the OEM industry, (OEM means,
Original Equipment Manufacture, which in this case the
equipment is a car or truck), switched paint systems was due to new laws and regulations from the EPA and other government regulatory agencies. The new basecoat/clearcoat paint systems emit less
V.O.C.'s into the air, (V.O.C.'s means
Volatile Organic Compounds, which typically means some type of air-borne solvent), and thus supposedly have a less negative impact on the earth.
A benefit to modern basecoat/clearcoat paint technology is that due to the harder resulting finishes and the improved resin technology modern bc/cc finishes will tend to
last longer over the service life of a car as compared to the time period a single stage paint would last on a new cars built before the early 1980's
Don't make the common mistake of confusing the words I wrote above that state
last longer to mean
look good longer because you can have a clear coat finish with swirls that are ugly and the paint can still last a long time although it won't look good over that long time.
")
]-vehicle-panels;