Year Long 3401 Production Review & Rotary Finish Compairson

7PaintGuns

New member
Joined
Oct 6, 2015
Messages
359
Reaction score
0
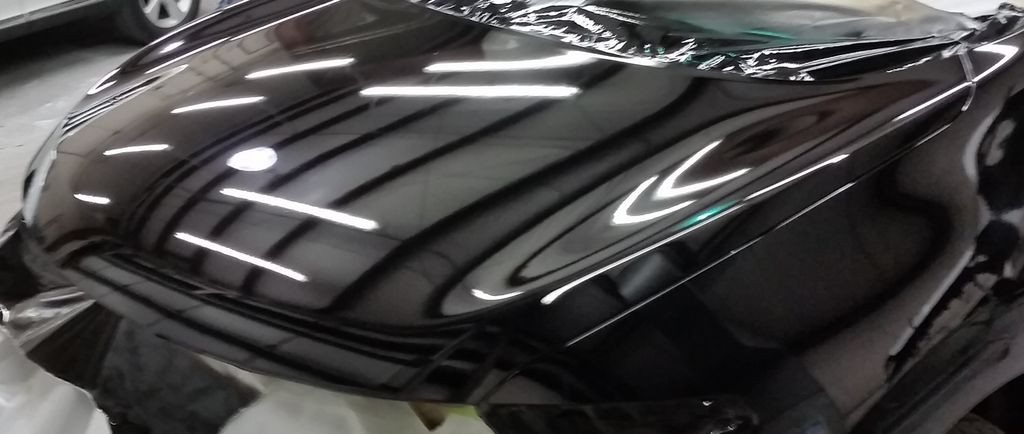
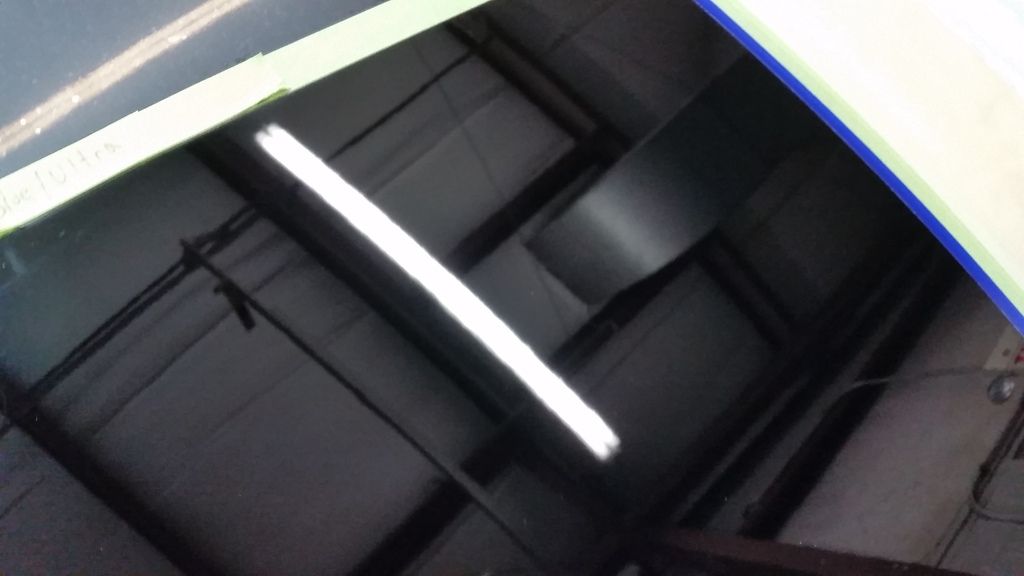
As I had mentioned in this thread http://www.autogeekonline.net/forum/flex-polishers/97011-flex-xc-3401-first-options.html I decided to purchase a Flex 3401 to test at work for assisting with clear coat finishing, mostly on black and really dark colors for hologram elimination. Having used a rotary buffer for many years I would say my skills are just as proficient as the next professionals. Working with recently painted panels (buffed next day) can be difficult as the paint has not fully cured and scratches very easily.

Usually holograms are not something a customer will notice or mention because most cars aren't black and the vast majority of vehicles we paint finish fantastically, but there are exceptions.

Example 1: Seasons and Time of Day
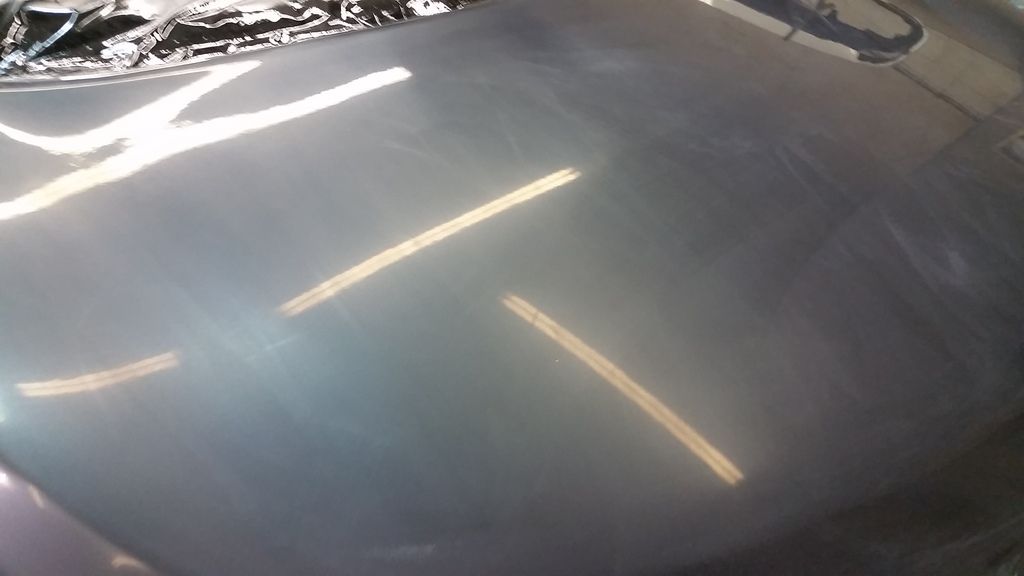
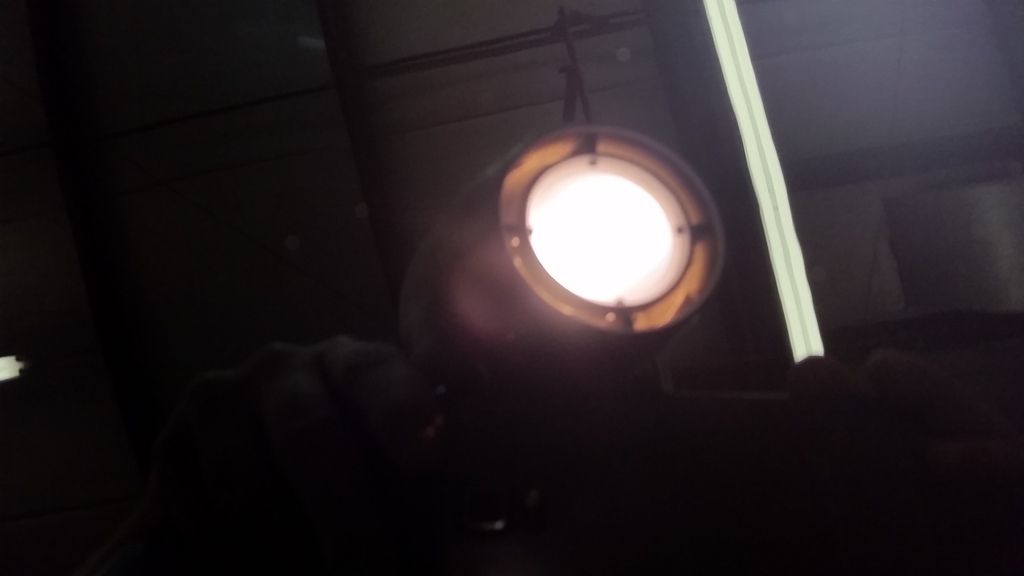
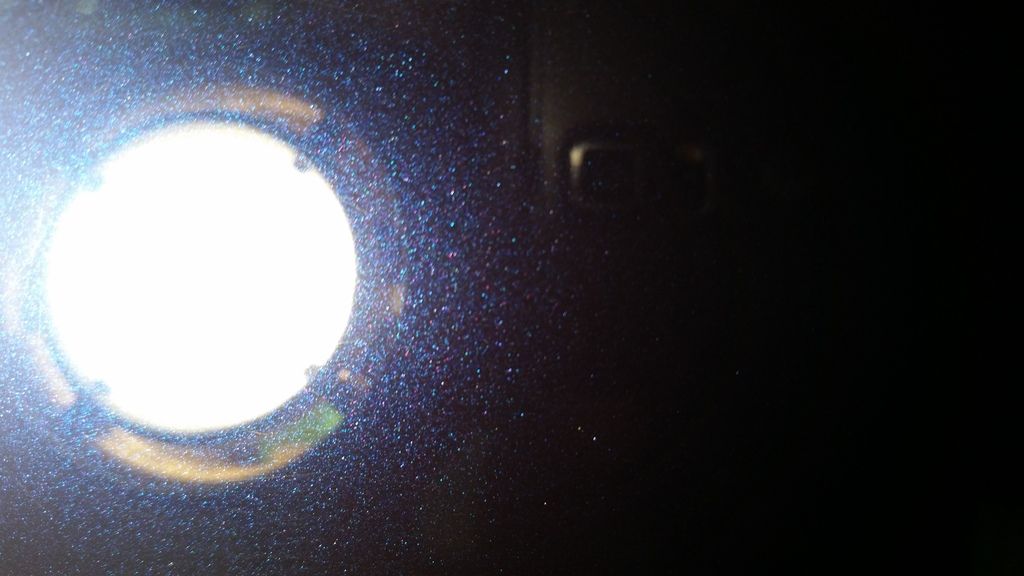
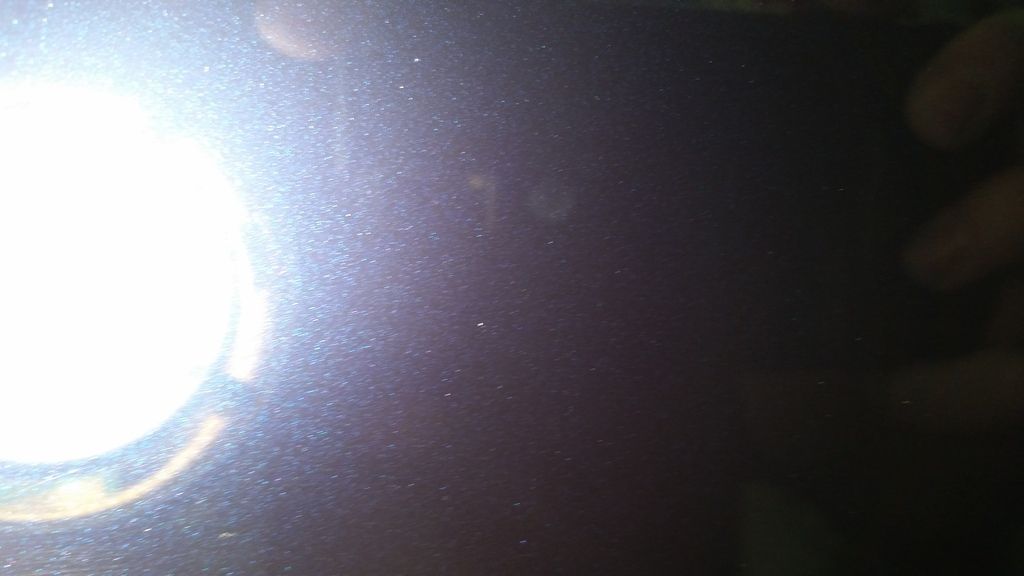
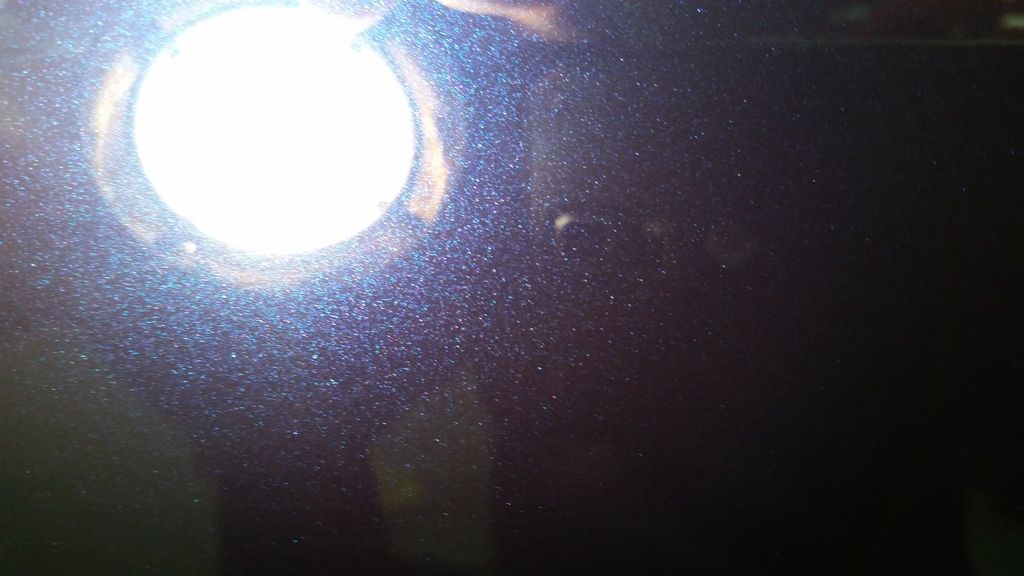
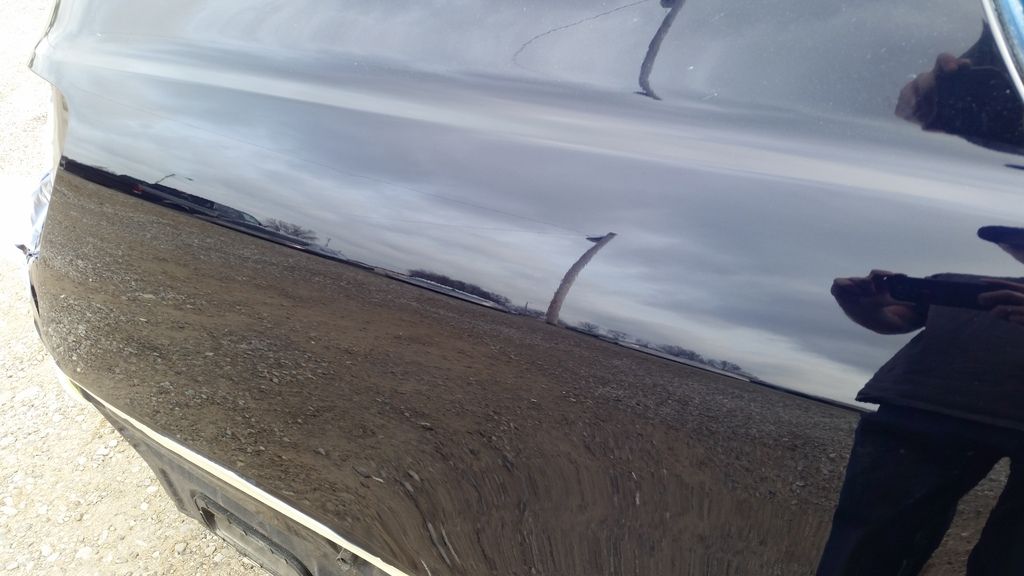
Most forum members will obviously know that a recently polished or corrected vehicle will look way better in the shade vs the sun. In the winter time, when its cold and grey here in the mid-west, holograms aren't a problem because they cant be seen. In the spring and summer months, the sun is high and holograms become much more noticeable. Autumn represents a different story. Don't ask me why, but having painted for 12 years, swirls and holograms are extremely obvious in the fall, especially in the evening. It may be because the sun is lower in the sky, it might be because there is less humidity in the air distorting the light. I'm not sure, but its obvious if you pay attention year to year.

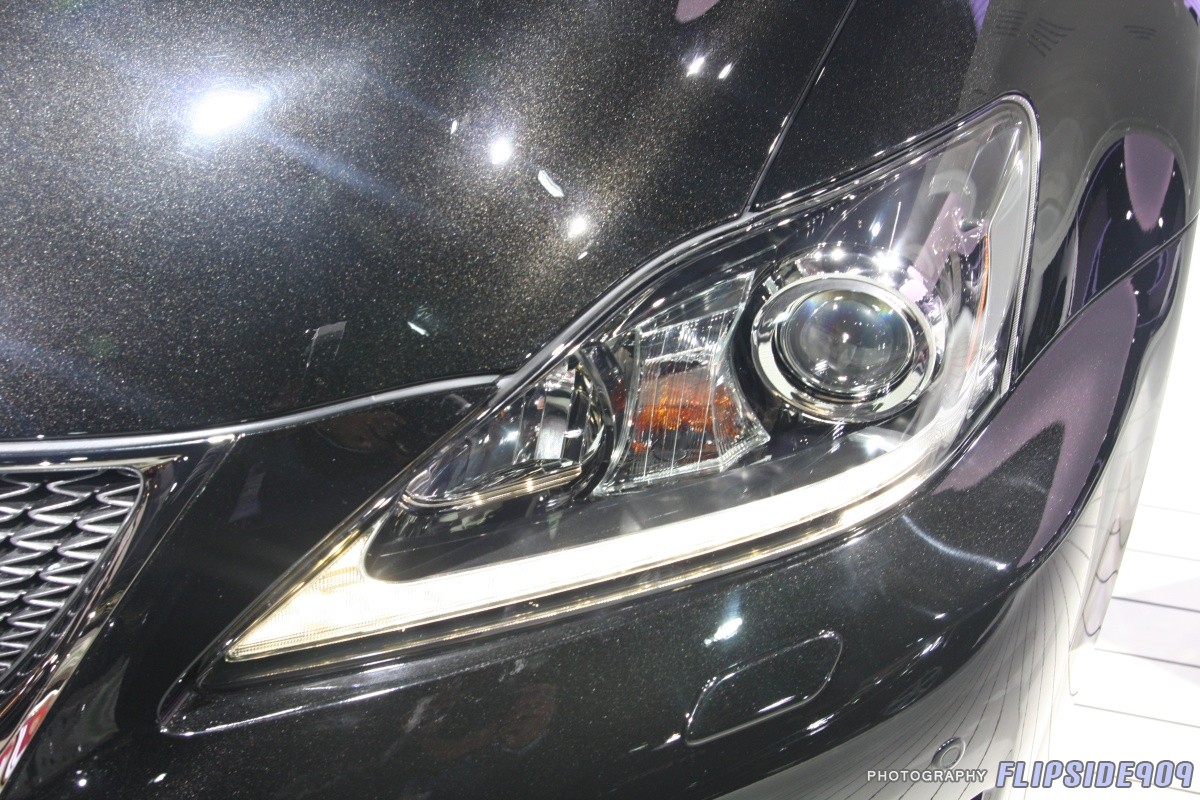
Example 2: Higher end Vehicles
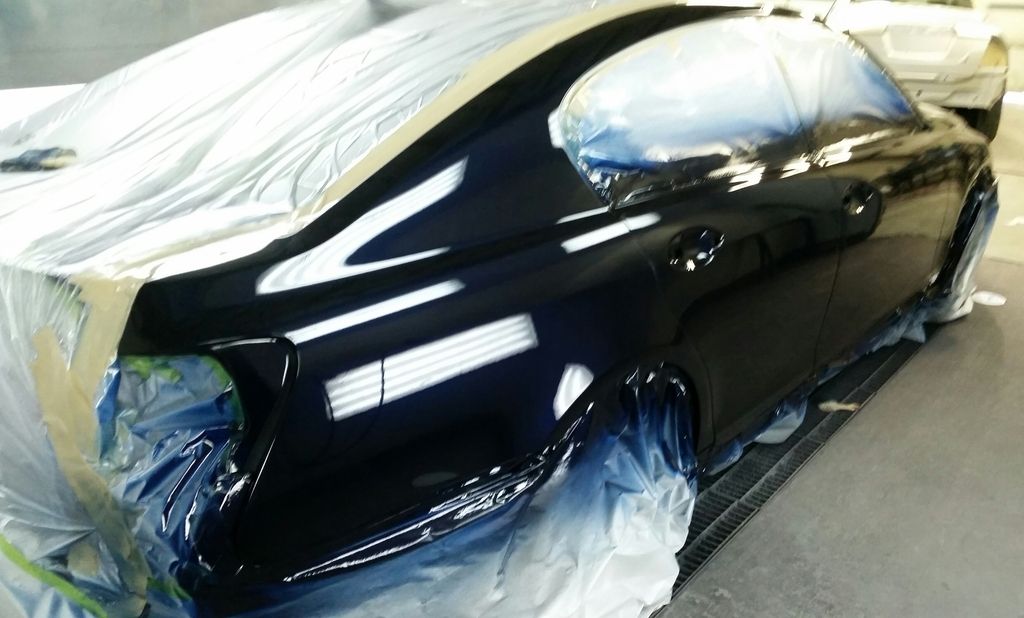
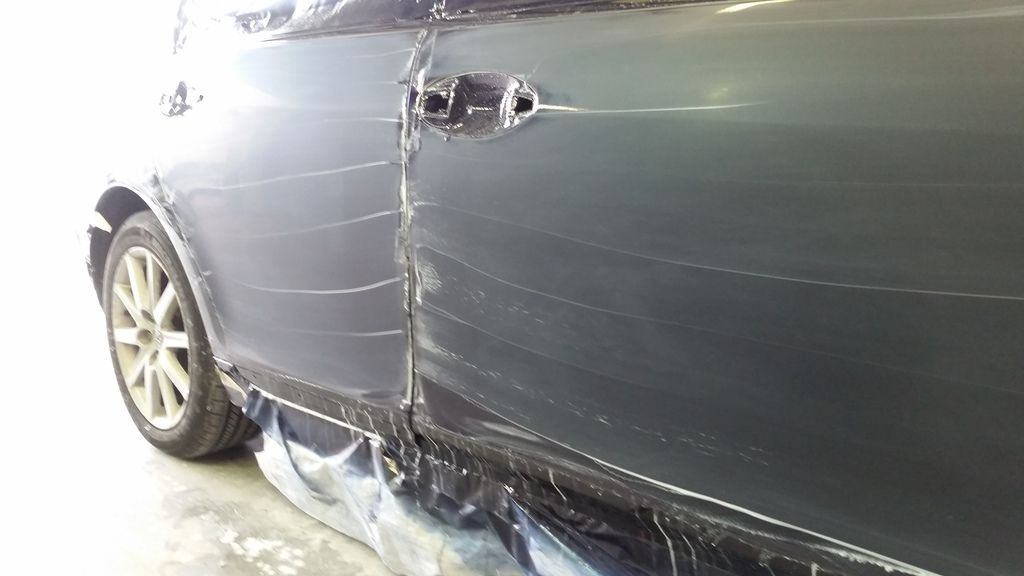
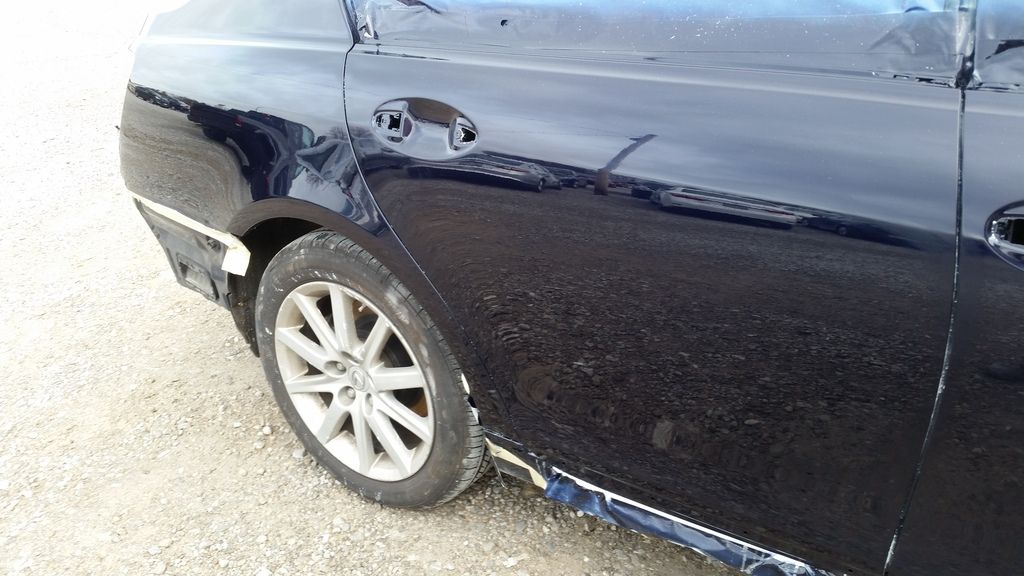
More than 3/4 of the vehicle delivered from our shop are higher end vehicles. Not Lamborghini and Ferrari, but normal DD vehicles involved in accidents such as Lexus, Mercedes, Ford (Mustang GT, Shelby ROUSH) Acura, BMW, you name it. Obviously these customers can be very picky and they should be. They pay their insurance and want their care repaired properly. Saying that, all delivered cars are finished to the best quality physically possible.

I have written all this because I want to spend 2016 periodically updating this thread regarding rotary and dual action buffers/polishers and their finishing qualities at my experience level. This will include Winter/Spring/Summer/Fall for a full spectrum of situations and conditions. I will be doing this at my leisure throughout the year but updating when I can. I'm mainly doing this to log my own experiences and for my own knowledge, but thought some members would like to see what I come up with. This wont be a perfectly written thread and there will be a lot of variable so you will have to take this for what it is. :buffing:
 
The only buffers/polishers in this thread that will be used unless otherwise specified...

DEWALT Variable Speed Polisher/3M Hookit SBS Backup Pad DWP849

FLEX XC 3401 VRG Polisher/The FLEX XC3401 4 Inch Changeable Backing Plate System/Flex XC 3401 VRG 5.5 inch Backing Plate

20151205_102216_zps4rw7mlc4.jpg
 
That Dewalt looks huge! Flex looks stunning in gloss black.
 
***Subscribed***

For people not familiar with how discussion forums work. If you want to follow a thread then what you want to do is "subscribe" to the thread. When you subscribe to a thread you will receive an e-mail notice anytime a new post is made to the thread.

This reminds you that,

A: You're subscribed to the thread.

B: To click on the link in the e-mail to instantly go to the thread to read the most recent thread.


If you don't know how to "subscribe" to a thread I have an article on this with pictures showing you what to do.


How To Subscribe to a Thread


:)
 
To 7PaintGuns,

As you know, having the right tool and pads is only part of the equation. The most important factor in my opinion is to have the best abrasive technology. This is vitally important when it comes to finishing with a dual action polisher otherwise you'll leave tiny scratches in the paint from the abrasive technology.

These tiny scratches are called,

DA Haze (dual action polisher haze)

Tick Marks (a term coined by Meguiar's chemists)

Micro-marring (general term for the scouring appearance caused by low quality abrasive technology used with orbital polishers)


All three of these terms describe the same scratch pattern caused by low quality abrasive technology when used with dual action orbital polishers.

There are other things that cause scratch patterns when using dual action polishers like the pad but keep in mind it's the ABRASIVES that come into contact with the paint surface FIRST not the pad.

Note: Holograms is a term to describe a very specific scratch pattern inflicted into paint by the misuse of a rotary buffer.


Because you paint cars my guess is you're familiar with and use a lot of body shop grade and body shop safe compounds and polishes. Nothing wrong with this just make sure by doing some testing that the products you choose to use either,

1. Are formulated and recommended for use with dual action polishers

And/Or

2. Visually appear to work to your expectations upon your inspection after use.


Here's a little article I wrote on this topic. The article is the result of me answering questions for people NOT getting good results when using the Flex 3401 and tracing the ROOT CAUSE of the issue back to the abrasive technology chosen not the tool or the pad.

For Use with Rotary Buffer Only - Read the Directions


For what it's worth... if a person were to read enough of my articles or replies to others questions they will see that I use the below two words a lot when helping others to troubleshoot root causes of paint finishing problems.


abrasive technology


:)
 
12/5/15

Winter Time

This is my first winter test and is only an initial rotary vs dual action test.

Note: This is my first time using the 3401 and the Lake county Hybrid Pads.

Subject Panel: Hood/Nissan KH3

Clear Coat: ChromaPremier Pro 74500S Productive Clearcoat
Activator: ChromaPremier Pro 14305S Normal Activator
Reducer: ChromaPremier Pro 14375S Fast Reducer

Compound: 3M Perfect-It EX Rubbing Compound 36060
Polish: 3M Perfect-It 3000 Machine Polish 06064
Polish: 3M Perfect-It 3000 Ultrafine Machine Polish 06068

Dry Time: 10 hours after bake
f480a3ea-8312-4686-b910-82482c40883d_zpskvyekxhn.jpg


Panel was first sanded with 3M 1500 wet/dry paper followed by 3M (02087) Trizact Hookit 3" P3000 Grit Foam Disc and3M (30662) Hookit Trizact 6" 5000 Grit Foam Disc on a DA sander with a 3M (05777) Hookit 6" x 1/2" x 3/4" Soft Interface Pad.

After 5000
20151205_101203_zpsp3rlq7xi.jpg


My first test with the DA was with the 5 inch Hybrid Blue Light Cutting Pad used at speed 6 and 6 passes

20151205_102418_zpsidxydacs.jpg

Post correction
20151205_102845_zpsbp8ddeiy.jpg


I decided the blue pad had not provided enough correction to move on to polishing so I moved a step down to the 5 inch Hybrid Orange Heavy Cutting Pad at speed 6 and 6 passes.
20151205_103412_zpsrzfii1jh.jpg

Back up to Blue at speed 6 and 6 passes(still using compound) (unfortunately I forgot to take a picture of the orange correction to the blue)

Then the 5 inch Hybrid White Polishing Pad at speed 6 at 6 passes and speed 5/4.5 4 passes (with compound)
20151205_104658_zpsg1cznxsb.jpg


At this point I decided this was the best stepping process prior to polishing but can/will be adjusted based on suggestions for these particular conditions and polishes and pads.

Cleaning the White pad "on the fly" I attached it to my rotary, soaked it with detail spray and blew it out with a pencil style adjustable air blower.
20151205_104807_zps2ytp87jh.jpg


Primed pad with polish.
20151205_104958_zps0vssjfql.jpg


Post white pad with polish at speed 5 with 6 passes and speed 4 with 4 passes.
20151205_105521_zpsgj30hyf7.jpg


20151205_105624_zpsonzijejm.jpg


5 inch Hybrid Black Finishing Pad with polish at speed 5 with 6 passes and speed 4 with 4 passes then speed 3 and 2 with 3 passes.
20151205_111220_zpscarjll27.jpg


20151205_111146_zpshiux76rj.jpg


20151205_105940_zpsevcqqety.jpg


5 Inch Hybrid Power Finish Red Pad with Ultrafine Machine Polish at speed 2 with 6 passes and speed 1 with 2 passes.
20151205_111643_zpsjkyiglyn.jpg


20151205_111624_zpsutzphyqd.jpg


Additional notes:
1. As I continue this thread I will obviously employ a better picture structure to better inform and illustrate my process but will always be a work in progress.

2. My camera is terrible and will need to invest in something with a better focus and higher resolution.

3. My 3M inspection light has a fan for cooling which blew dust on my panels after wipe down. Not something I want to fight while taking pictures.

4. Noticed my first post was littered with grammatical problems.

Not bad for a first test run in my opinion. I will post the rotary results from this test later today.
 
To 7PaintGuns,

As you know, having the right tool and pads is only part of the equation. The most important factor in my opinion is to have the best abrasive technology. This is vitally important when it comes to finishing with a dual action polisher otherwise you'll leave tiny scratches in the paint from the abrasive technology.

These tiny scratches are called,

DA Haze (dual action polisher haze)

Tick Marks (a term coined by Meguiar's chemists)

Micro-marring (general term for the scouring appearance caused by low quality abrasive technology used with orbital polishers)


All three of these terms describe the same scratch pattern caused by low quality abrasive technology when used with dual action orbital polishers.

There are other things that cause scratch patterns when using dual action polishers like the pad but keep in mind it's the ABRASIVES that come into contact with the paint surface FIRST not the pad.

Note: Holograms is a term to describe a very specific scratch pattern inflicted into paint by the misuse of a rotary buffer.


Because you paint cars my guess is you're familiar with and use a lot of body shop grade and body shop safe compounds and polishes. Nothing wrong with this just make sure by doing some testing that the products you choose to use either,

1. Are formulated and recommended for use with dual action polishers

And/Or

2. Visually appear to work to your expectations upon your inspection after use.


Here's a little article I wrote on this topic. The article is the result of me answering questions for people NOT getting good results when using the Flex 3401 and tracing the ROOT CAUSE of the issue back to the abrasive technology chosen not the tool or the pad.

For Use with Rotary Buffer Only - Read the Directions


For what it's worth... if a person were to read enough of my articles or replies to others questions they will see that I use the below two words a lot when helping others to troubleshoot root causes of paint finishing problems.


abrasive technology


:)

I agree 100% Mike. Fortunately I have most of my supplies provided to me and an organization that wants the best for their customers. With this thread I hope to evaluate what products I need for the best results possible, and then go to my manager with that information. The best way to do that is with my own personal evaluation with multiple tests and results, and with our refinishing products, but not being limited to/by our current polishing and finishing products. Also, I implore all forum members with any experience to post their thoughts and comments as I do this testing. I'm always searching for better advice and information. That's why I'm posting it and that's why I'm here!Feed back please:dblthumb2:
 
Subscribed!

Thanks 7PG for sharing your log with us. Very helpful and considerate. I NEVER stop learning.
 
Subscribed as well. Can't wait to see what this thread has to offer. I too am always trying to lean something new
 
12/5/15 Continued

Winter Time

Subject Panel: Hood/Nissan KH3

Clear Coat: ChromaPremier Pro 74500S Productive Clearcoat
Activator: ChromaPremier Pro 14305S Normal Activator
Reducer: ChromaPremier Pro 14375S Fast Reducer

Compound: 3M Perfect-It EX Rubbing Compound 36060
Polish: 3M Perfect-It 3000 Machine Polish 06064
Polish: 3M Perfect-It 3000 Ultrafine Machine Polish 06068

Dry Time: 10 hours after bake

After completing my initial dual action testing I did my normal rotary correction/finishing process. This will be very simple and to the point as I have done it thousands of time before.

After the DA test I had noticed that the regular 3M high performance green masking tape was bleeding adhesive onto the test area after lengthy use and decided to use 3M vinyl fine line tape on the outer edge.
20151205_112120_zpssft2d6fr.jpg


Rotary with 3M Perfect-It Wool Compounding Pad 9" 05719 and compound after 5 passes with the buffer set at 1800rpm. I do have to note, when doing passes 4 and 5 I tend to "feather" the throttle on the trigger of the polisher which results in slower rotation and removing a vast majority of liquid product. The 6th pass is faster as far as far as arm movement to remove the remaining product leaving the area almost dry. However I did wipe the panel before taking the picture.
20151205_112601_zps3eotf3zp.jpg


Note the dust for the inspection light lading on the panel.
20151205_112651_zpsi71laovq.jpg


This is my standard first step compound correction process. Now to step 2 Polish.

Rotary with 3M Perfect-It Plus Foam Polishing Pad 8' 05738 and polish after 7 passes with the buffer set at 1800rpm. I do have to note, when doing passes 5 and 6 I tend to "feather" the throttle on the trigger of the polisher which results in slower rotation and removing a vast majority of liquid product. The 7th pass is extremely fast as far as arm movement and removes the remaining product leaving the area almost dry. However I did wipe the panel before taking the picture.

20151205_113007_zpsmlrdvslj.jpg


20151205_113107_zpsxtuz6zws.jpg


20151205_113100_zpsdcowmxny.jpg


Final step with 3M Perfect-It Plus Ultrafina Foam Polishing Pad 8" 05733 and Ultra polish with 5 passes at 1800 rpm leaving the buffer barley resting on the surface, slightly lighter than a full weight only rest, by lifting on the buffer very slightly.

20151205_113348_zpsye7vuiik.jpg


20151205_113122_zpshwzbcwmi.jpg


Conclusion:
This was an initial test. It is also winter time. In my opinion with these parameters and particular situation and without direct sunlight there is no way to tell what process is better for finishing. What I did learn was the DA is just as good at final finish as the rotary but at this point, seeing the final finish, I do believe I had slightly better results with the rotary. That being said this is the first time I have used the DA. As the tests continue and my experience with the DA improves (the sun would help with fine tuning) and use different polishing and finishing products the results may/should change. Thanks for reading! I have to say I'm excited to continue the experiment!
 
That is a phenomenal finish on that new paint! I'm excited for you to continue too. :xyxthumbs:
 
Perfect timing for this thread for me. I'm actually starting to use a rotary more and more. I'm not a pro, but have used several different compounds and polishes on both machines. I've got the 3D rubbing compound and finishing polish on the way. I'm really in seeing your results. If you want to try some different products without shelling out hundreds of dollars I would be more than happy to send you some 6 or 8 oz samples of some polishes and compounds to try.
 
That is a phenomenal finish on that new paint! I'm excited for you to continue too. :xyxthumbs:
Thanks! New paint can be fun when you're the one controlling the mills of the CC and it's never seen the light of day!
Perfect timing for this thread for me. I'm actually starting to use a rotary more and more. I'm not a pro, but have used several different compounds and polishes on both machines. I've got the 3D rubbing compound and finishing polish on the way. I'm really in seeing your results. If you want to try some different products without shelling out hundreds of dollars I would be more than happy to send you some 6 or 8 oz samples of some polishes and compounds to try.
I may take you up on that offer. I'm sure we could find and equal trade that could benefit the both of us. I know Mike P has written many many articles about rotary polishing and I know I haven't read through them all but hopefully during this I can share some new tips and tricks some may have never considered. If someone gave me a tip, and a cow and firecrackers were involved, and it resulted in a better finish, I'd try it!
 
To 7PaintGuns,

As you know, having the right tool and pads is only part of the equation. The most important factor in my opinion is to have the best abrasive technology. This is vitally important when it comes to finishing with a dual action polisher otherwise you'll leave tiny scratches in the paint from the abrasive technology.

These tiny scratches are called,

DA Haze (dual action polisher haze)

Tick Marks (a term coined by Meguiar's chemists)

Micro-marring (general term for the scouring appearance caused by low quality abrasive technology used with orbital polishers)


All three of these terms describe the same scratch pattern caused by low quality abrasive technology when used with dual action orbital polishers.

There are other things that cause scratch patterns when using dual action polishers like the pad but keep in mind it's the ABRASIVES that come into contact with the paint surface FIRST not the pad.

Note: Holograms is a term to describe a very specific scratch pattern inflicted into paint by the misuse of a rotary buffer.


Because you paint cars my guess is you're familiar with and use a lot of body shop grade and body shop safe compounds and polishes. Nothing wrong with this just make sure by doing some testing that the products you choose to use either,

1. Are formulated and recommended for use with dual action polishers

And/Or

2. Visually appear to work to your expectations upon your inspection after use.


Here's a little article I wrote on this topic. The article is the result of me answering questions for people NOT getting good results when using the Flex 3401 and tracing the ROOT CAUSE of the issue back to the abrasive technology chosen not the tool or the pad.

For Use with Rotary Buffer Only - Read the Directions


For what it's worth... if a person were to read enough of my articles or replies to others questions they will see that I use the below two words a lot when helping others to troubleshoot root causes of paint finishing problems.


abrasive technology


:)


I'm a bit confused, is DA haze/ micro marring a normal part of corrections or is something wrong in the process? I was taught that haze was normal due to the aggressiveness of the compound/ pad. Just follow up with a polish to eliminate the haze. Should I be finishing down haze free on my cutting step? I don't get haze all the time depends on the paint but I just polish it out
 
Thanks! New paint can be fun when you're the one controlling the mills of the CC and it's never seen the light of day!

I may take you up on that offer. I'm sure we could find and equal trade that could benefit the both of us. I know Mike P has written many many articles about rotary polishing and I know I haven't read through them all but hopefully during this I can share some new tips and tricks some may have never considered. If someone gave me a tip, and a cow and firecrackers were involved, and it resulted in a better finish, I'd try it!

I'm with you, the more I can learn the better. I'm interested in seeing if we come up with similar results using these products with a rotary.
 
I'm a bit confused, is DA haze/ micro marring a normal part of corrections or is something wrong in the process? I was taught that haze was normal due to the aggressiveness of the compound/ pad. Just follow up with a polish to eliminate the haze. Should I be finishing down haze free on my cutting step? I don't get haze all the time depends on the paint but I just polish it out


I tend to think of da haze/micro marring as the dual action equivalent of rotary holograms/buffer trails. Cutting with either one can leave some type scratch pattern behind, but like you said, it can be polished out.

I may be incorrect, but I think a lot of thoughts that dual actions finish so much better than rotaries is because of the scratch pattern let behind. It's easier for our eyes to catch the rhythmic fine lines a rotary can leave versus the random fine lines left by a DA.


Not a fan of haze, even if I get the correction I'm looking for I found haze a pita to get rid of. I rather not have micro marring
 
Should I be finishing down haze free on my cutting step?


Great question and the answer is sometimes.


Whether you can finish down haze free during the cutting step depends on,

The paint - Some paints polish better than others and dark colors show haze to your eyes better than light colors. Doesn't mean light colors don't haze it's just harder to see.

The product - As I noted in my previous post it's all about the abrasive technology.

The pad - This actually goes back to the paint as some paints are more sensitive to micro=marring than others.

The tool - Again, this goes back to the paint.


:)
 
12/12/15

Winter Time
fea6cdb2-0613-4b1b-a98b-c13841ab6c33_zpse1mmmrmi.png

This is my second winter test. First test with Menzerna products.

Subject Panel: Right Side/Lexus 8U0

Clear Coat: ChromaPremier Pro 74500S Productive Clearcoat
Activator: ChromaPremier Pro 14305S Normal Activator
Reducer: ChromaPremier Pro 14375S Fast Reducer

Compound: Menzerna Heavy Cut Compound 1000 S34A
Polish: Menzerna Power Finish 2500 PO 203
Polish: Menzerna Super Finish SF-3500 PO 106 FA

Dry Time: 9 hours after bake
2015-12-11%2016.35.27_zpsetwuitoe.jpg

Panel was first sanded with 3M 1500 wet/dry paper followed by 3M (02087) Trizact Hookit 3" P3000 Grit Foam Disc on a DA sander with a 3M (05777) Hookit 6" x 1/2" x 3/4" Soft Interface Pad. Note: Skipped 5000 for compound testing
20151212_101037_zpslhc3rxvm.jpg

Rotary with 3M Perfect-It Wool Compounding Pad 9" 05719 Menzerna S34A after 4 passes with the buffer set at 1800rpm. The S34a seems to have a very fast initial correction as far as gloss (why I stopped after 4 passes) but I could still see haze and sanding marks upon further inspection with a light, more than I would have with 3M Perfect-It 36060 at 5 passes but S34A had more gloss. Added 2 more passes with additional product to achieve normal correction results. Also, the S34A seemed to clog or build up faster on the pad than the 36060 with equal amounts of product. Results:
20151212_104922_zpsovhrsjv7.jpg

20151212_105102_zpsmhvpwatv.jpg


Rotary with 3M Perfect-It Plus Foam Polishing Pad 8' 05738/White and then Black Hybrid Polishing Pads and Menzerna PO23 after 7 passes with the buffer set at 1800rpm/DA at speed 5 and 4 both pads. I have to start by saying I think this polish is fantastic. Stayed very wet for all 7 passes and finished out very well. Didn't have to use as much product as 3M Perfect-It 3000 06064. Seemed to finish out slightly better (gloss) than the 3M but did not cut as well as the 3M, but I'm not sure most people could/would notice, just my opinion. Results:
20151212_105739_zpspjnhxnih.jpg

2e63c16b-a154-4957-a199-bc203a25a938_zpsftsevdel.jpg


Final step with 3M Perfect-It Plus Ultrafina Foam Polishing Pad 8" 05733/Black and Red Hybrid Polishing Pads and Menzerna Super Finish 106FA with 5 passes at 1800 rpm/DA at speed 5 and 4 and 3 both pads/4, 3 and 2 on the final red pad. More pressure must be applied on a vertical panel vs a horizontal panel, then leaving the buffer barley resting on the surface, slightly lighter than a full weight only rest, by pulling back on the buffer very slightly. This polish finished out to my liking, very impressed. Stayed wet and resulted in a very high gloss. I would like to see how the 3800 looks after this step. That will be done in the next test. Results:
20151212_111240_zpskdy5p6jp.jpg


20151212_111251_zpsmlqstqig.jpg


20151212_111315_zpskvvoqisl.jpg


When I polished the vehicle, I used rotary polishing steps on the quarter panel and DA polishing steps on the rear door (both panels rotary only first step). Once again with the weather being cloudy, I can not honestly say which finishing process is better even with my inspection light. At this point there is nothing else I can do but hope for a sunny weekend for any real conclusive results. Don't worry, there will be many opportunities with perfect weather to check for holograms this year! Here are some out door shots 1/4(rotary) vs door (DA):
20151212_111603_zps3rptozpe.jpg


Rotary:
20151212_111531_zpsii0jyjnm.jpg

20151212_111520_zpsdhh52z4n.jpg


DA:
20151212_111547_zpsnlirq2rq.jpg

20151212_111551_zpso0bvd1je.jpg
:xyxthumbs:
 
Back
Top