Mike Phillips
Active member
- Dec 5, 2022
- 51,004
- 7
Removing #1500 Sanding Marks with Rupes Bigfoot 21 Polisher
Yesterday I created a thread to share the new 3M Flexible Hookit Sanding Sheets here,
Dry Sanding & Wet Sanding with 3M's Flexible Abrasive Hookit Sheets
As a part of sharing them I also sanded a small section on the hood of this hotrod Model A. I sanded just enough to capture a couple of shots showing what orange peel looks like as you start to knock off the tops of the hills to make them level with the valley.
Here's a few pictures from the above thread...
3M Flexible Abrasive Hookit Sheets
These new flexible Hookit sheets us an anti-loading technology to help prevent the face of the paper from loading up with paint as fast and as easily as traditional wet/dry sandpaper.
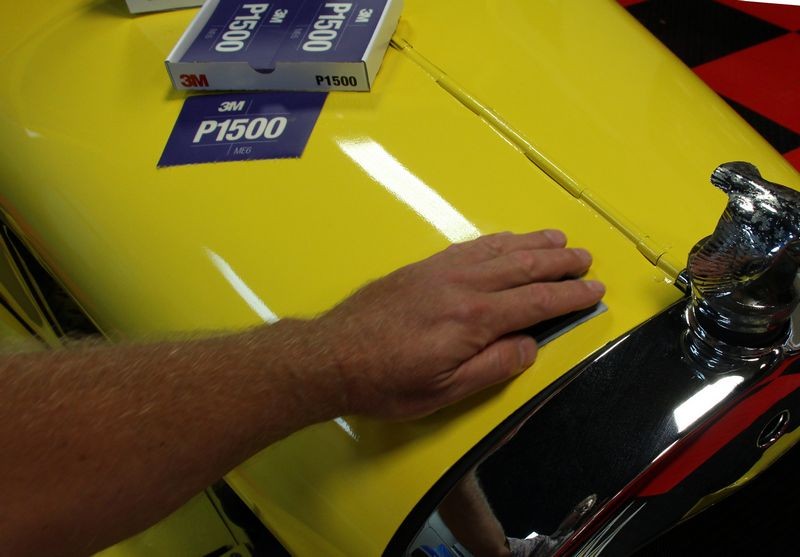
I sanded this section with about 10 back and forth passes and found the #1500 to cut incredibly fast.

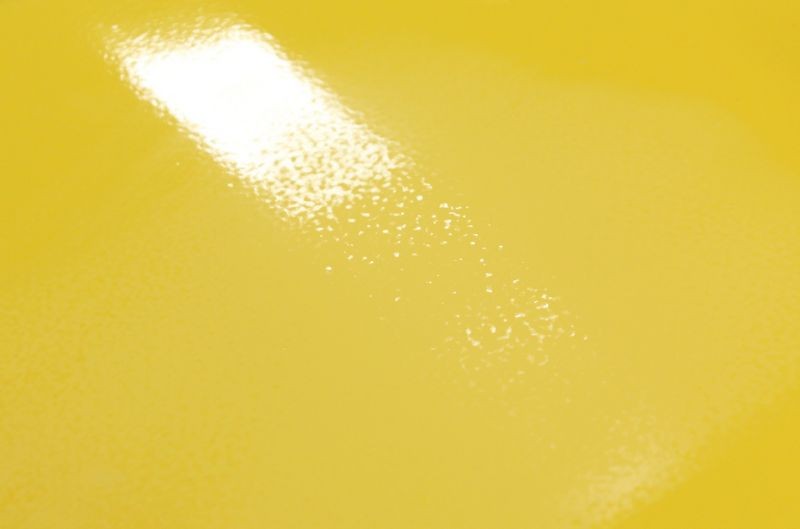
Here you can see the orange peel being removed as you look towards the bottom of the picture the orange peel is being removed leaving behind a very flat surface that after compounding and polishing will produce a smooth, high gloss finish with excellent Distinction of Image or DOI.
Removing Sanding Marks
"It's easy to sand paint... that's putting scratches into the paint. The tricky part is getting them 100% out"
This morning I wanted to test out what it was going to take to remove the sanding marks to get an idea as to how hard the paint is. Normally I would finish out at #3000 or #5000 grit sanding marks to make the compounding step cooler, faster, easier and safer.
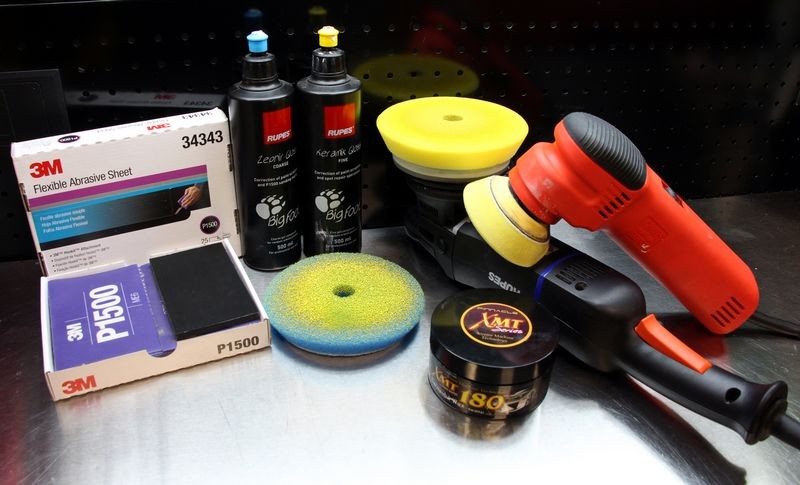
Instead, I threw caution to the wind and just tried removing the #1500 grit sanding marks and to do this I used the Rupes Bigfoot 21 Polisher with the Rupes Zephir Gloss Coarse Gel Compound and Blue Foam Cutting Pad followed by the Rupes Keramik Gloss Fine Gel Polish and the Rupes matching Yellow Foam Polishing pad. I followed this with a quick application of Pinnacle XMT 180 Paste Wax machine applied using a Griot's Garage 3" Mini Polisher with a Rupes 4" polishing pad.
This was just a test to a small section as I'm saving this car for this weekends detailing boot camp class. The Rupes Bigfoot 21 along with their compound and foam cutting pad remove 100% of the sanding marks after just a few passes.
This first pictures will frame up the shot so you can see I worked in the same place I hand sanded...
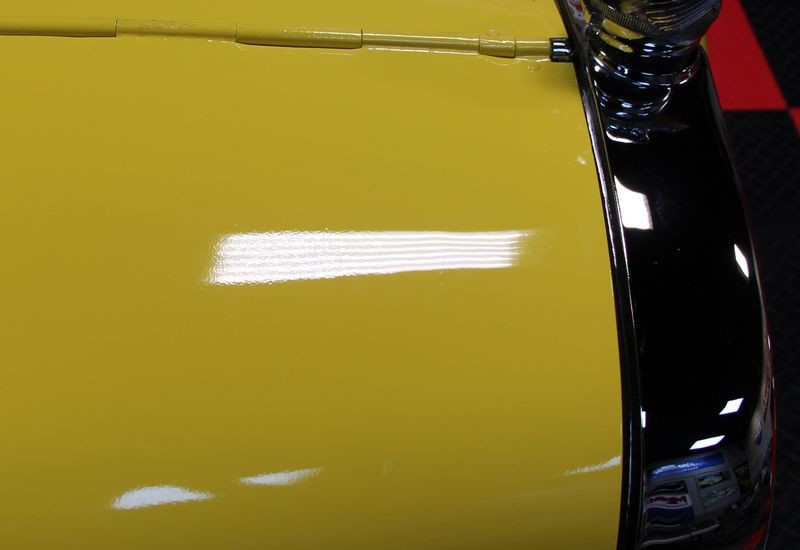
Now I've zoomed in and you can see the orange peel on the right side where I did not sand and how the paint starts to flatten out as you look to the right side of the picture.

Below are some shots taken using different camera settings including one group of shots with the flash on.
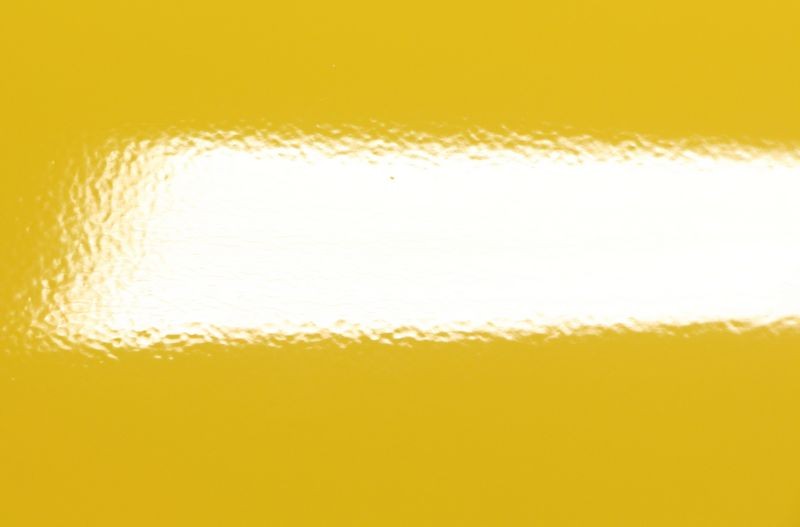
Orange Peel
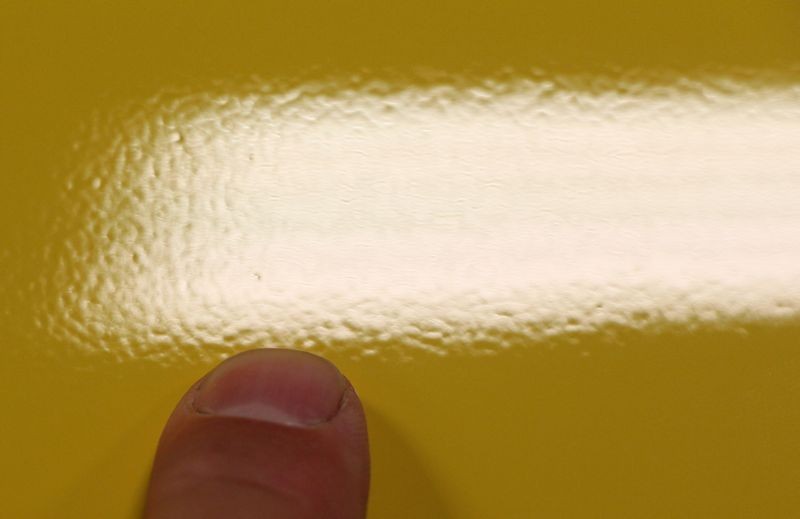
No Orange Peel but also no sanding marks and no holograms or haze...

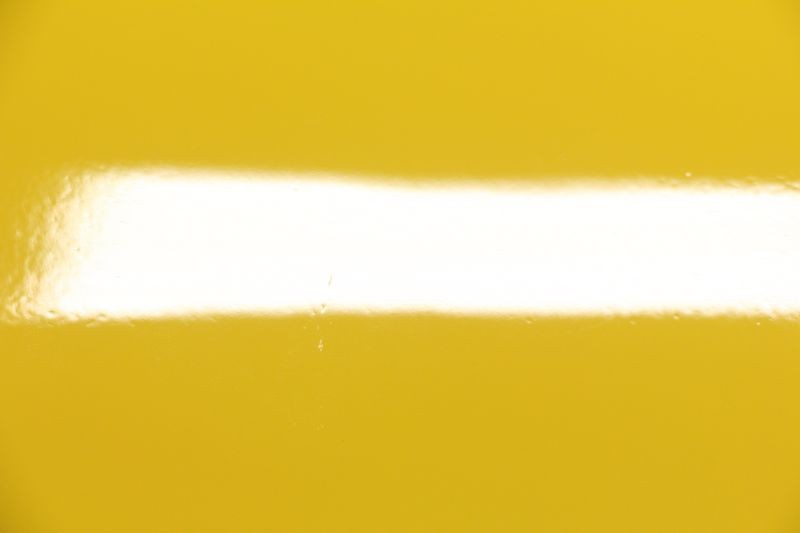
Orange Peel
No Orange Peel but also no sanding marks and no holograms or haze...
Orange Peel
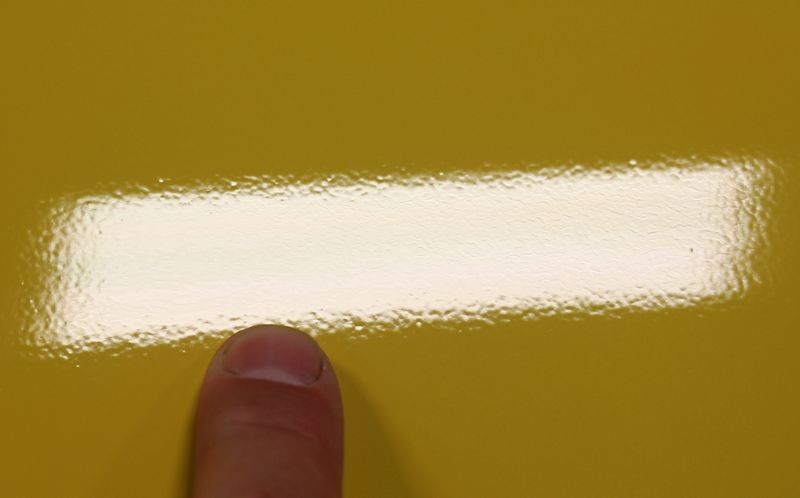
No Orange Peel but also no sanding marks and no holograms or haze...

The sanding marks removed very easy without having to use a rotary buffer or wool pad which while it would likely work faster, the rotary buffer and the wool pad would have left holograms behind.
")
Yesterday I created a thread to share the new 3M Flexible Hookit Sanding Sheets here,
Dry Sanding & Wet Sanding with 3M's Flexible Abrasive Hookit Sheets
As a part of sharing them I also sanded a small section on the hood of this hotrod Model A. I sanded just enough to capture a couple of shots showing what orange peel looks like as you start to knock off the tops of the hills to make them level with the valley.
Here's a few pictures from the above thread...
3M Flexible Abrasive Hookit Sheets
These new flexible Hookit sheets us an anti-loading technology to help prevent the face of the paper from loading up with paint as fast and as easily as traditional wet/dry sandpaper.
I sanded this section with about 10 back and forth passes and found the #1500 to cut incredibly fast.
Here you can see the orange peel being removed as you look towards the bottom of the picture the orange peel is being removed leaving behind a very flat surface that after compounding and polishing will produce a smooth, high gloss finish with excellent Distinction of Image or DOI.
Removing Sanding Marks
"It's easy to sand paint... that's putting scratches into the paint. The tricky part is getting them 100% out"
This morning I wanted to test out what it was going to take to remove the sanding marks to get an idea as to how hard the paint is. Normally I would finish out at #3000 or #5000 grit sanding marks to make the compounding step cooler, faster, easier and safer.
Instead, I threw caution to the wind and just tried removing the #1500 grit sanding marks and to do this I used the Rupes Bigfoot 21 Polisher with the Rupes Zephir Gloss Coarse Gel Compound and Blue Foam Cutting Pad followed by the Rupes Keramik Gloss Fine Gel Polish and the Rupes matching Yellow Foam Polishing pad. I followed this with a quick application of Pinnacle XMT 180 Paste Wax machine applied using a Griot's Garage 3" Mini Polisher with a Rupes 4" polishing pad.
This was just a test to a small section as I'm saving this car for this weekends detailing boot camp class. The Rupes Bigfoot 21 along with their compound and foam cutting pad remove 100% of the sanding marks after just a few passes.
This first pictures will frame up the shot so you can see I worked in the same place I hand sanded...
Now I've zoomed in and you can see the orange peel on the right side where I did not sand and how the paint starts to flatten out as you look to the right side of the picture.
Below are some shots taken using different camera settings including one group of shots with the flash on.
Orange Peel
No Orange Peel but also no sanding marks and no holograms or haze...
Orange Peel
No Orange Peel but also no sanding marks and no holograms or haze...
Orange Peel
No Orange Peel but also no sanding marks and no holograms or haze...
The sanding marks removed very easy without having to use a rotary buffer or wool pad which while it would likely work faster, the rotary buffer and the wool pad would have left holograms behind.
 rops:
rops:


