lawrenceSA
New member
- Feb 7, 2012
- 1,713
- 0
This car belongs to a fellow VW Club member, who was in Durban (the part of South Africa in which I live, which is around 400 miles from where he lives in Johannesburg) between Christmas and New Year and so was able to leave the car with me for a few days allowing me the opportunity to give it a proper detail.
When cleaning your car, you should always start with the dirtiest area first and progressively work cleaner. This prevents having to clean the same area twice, reducing time, product usage and most importantly, the chance for swirls. The microfibre towels you use to touch the surface you are cleaning, should, IMO, follow the same approach, with your plushest cleanest towels only coming into play on perfectly clean paint, and towels in worse condition being reserved for things like wiping clean the fender liner for example, and as many categories in between as you deem fit.
If I am detailing an engine bay, it's always where I will start so I have the opportunity to clean up any product, dirt or water that gets onto the fenders, front windscreen or anywhere else, during the wash - if not, its usually with the wheels, which can be as dirty or sometimes even more dirty than the engine bay.
So the first order of business was to remove this from the underside of the bonnet.
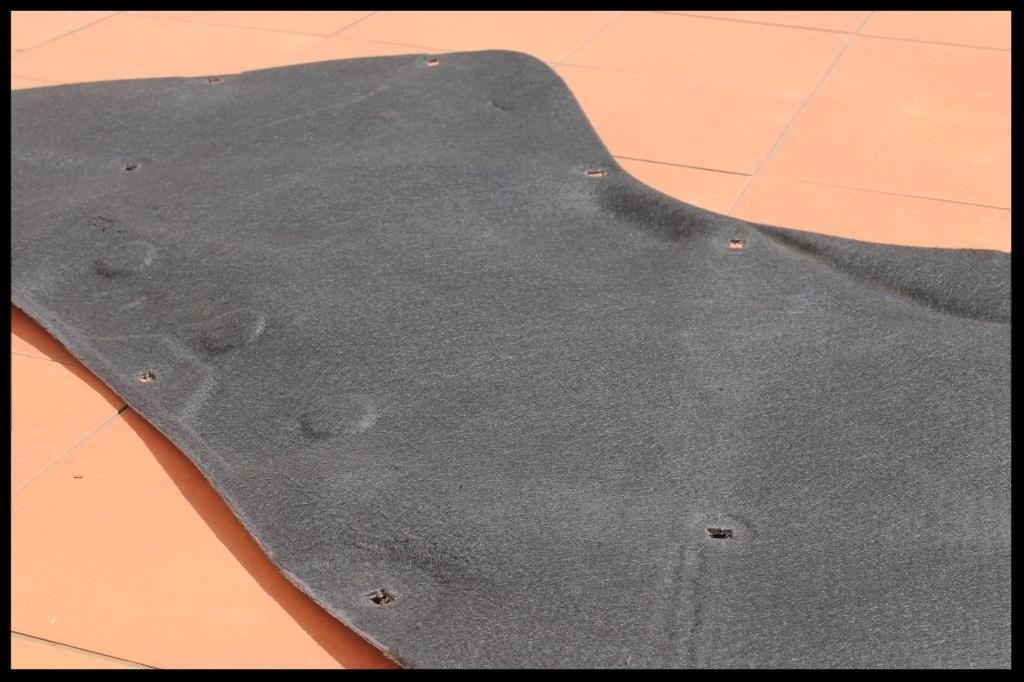
Looks clean enough right?
Wrong.... :lol:
First it was vacuumed, then some of the product sprayed into the MF towel which was then used to rub it clean. Then wiped down again with a damp clean MF towel. The little plastic clips were cleaned and dressed with Autofinesse Dressel before it was put back in place after I had finished the rest of the engine bay detail. I then forgot to take a few decent before shots of the dirt in the bay itself, but did get this during the taping up of the sensitive areas I didn't want to get wet (it was still a work in progress at this stage). The bay was quite dirty though.
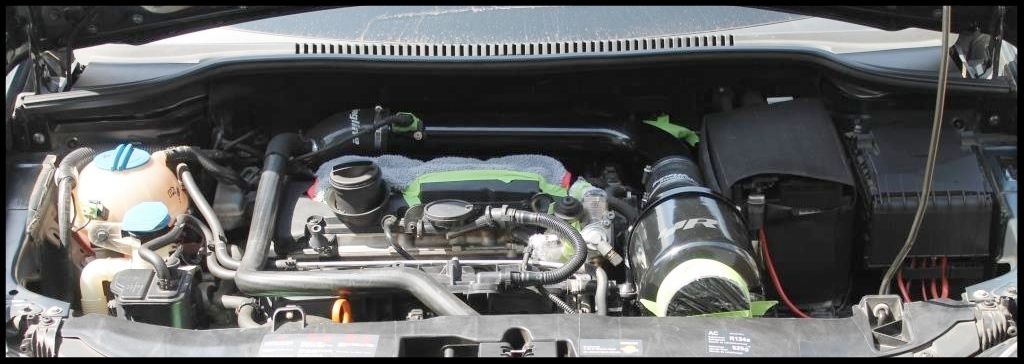
Once I had protected I didn't want to get wet I first cleaned the underside of the bonnet using Carchem Citrus APC @ 1:5 and various brushes then HP rinsed it. Again, you wouldn't start in the bay itself, then do the underside of the bonnet and allow that dirt to drip back down onto the clean bay - common sense, but you'd be surprised.... :crazy:
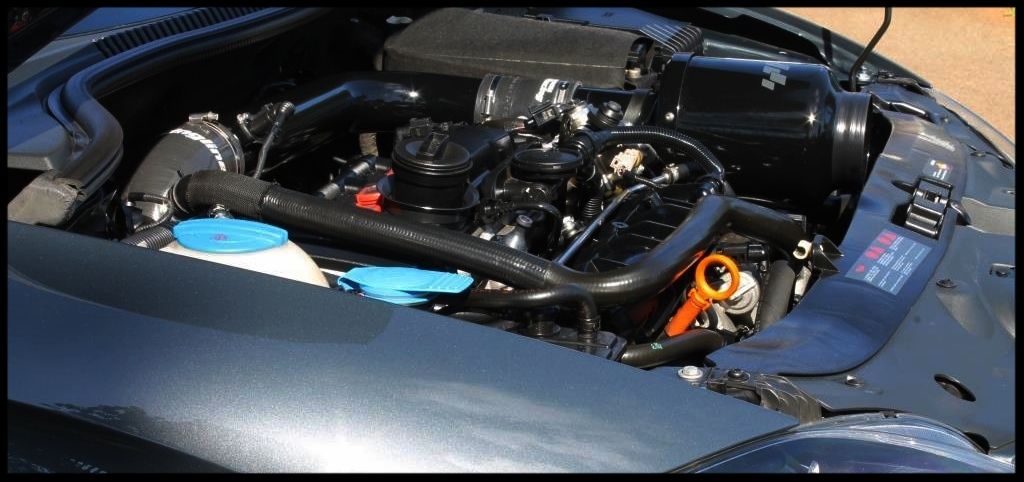
Then the bay itself was done, using the same approach. I then blew dry the underside of the bonnet and the bay itself and removed all the protective tape/plastic wrap/packets etc (these sections were cleaned using the same product and a combination of q-tips, mf towels and brushes. The painted surfaces were then cleaned/polished/protected using Autofinesse Tripple on a MF hand applicator which was then left to cure overnight. The bay itself was then liberally dressed with Autofinesse Dressel which was then also left on overnight. The following morning I buffed off the Tripple (any dust the falls onto any plastics in the bay is then wiped away when you wipe there - again, don't work backwards) and buffed off of the Dressel residue .
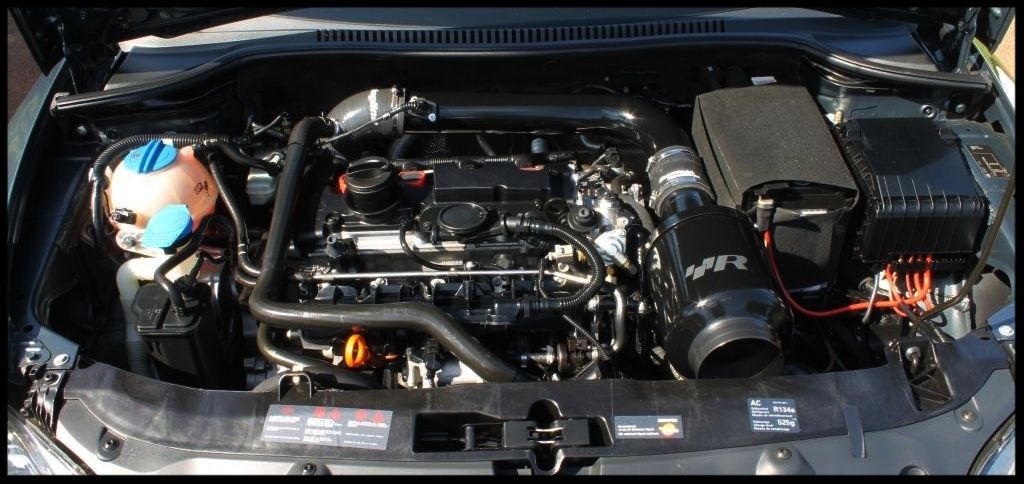
This was the end result.

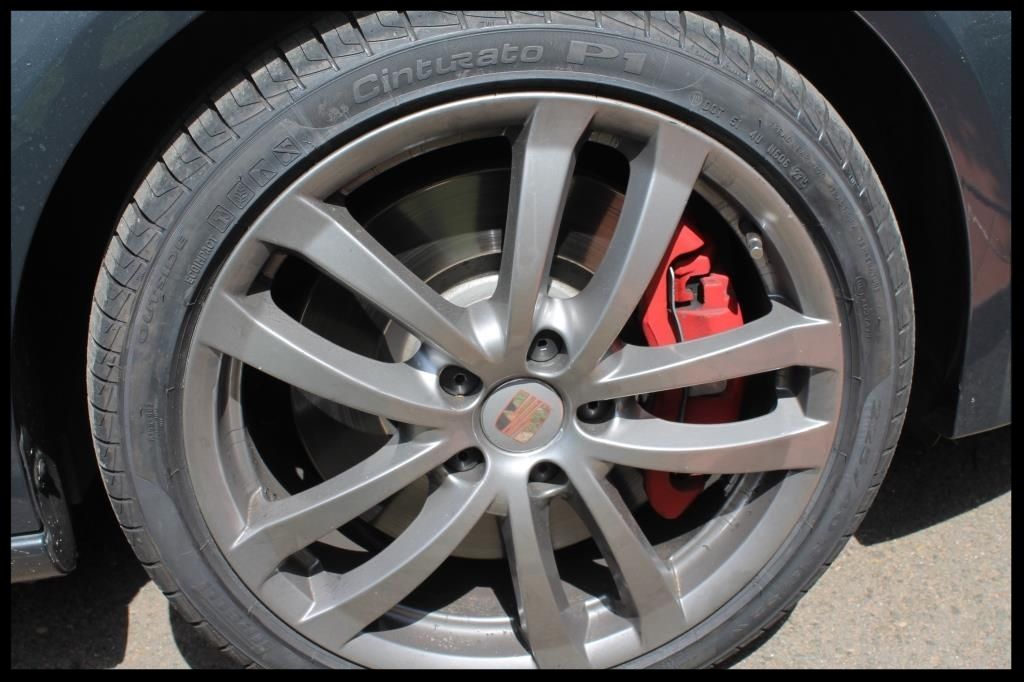
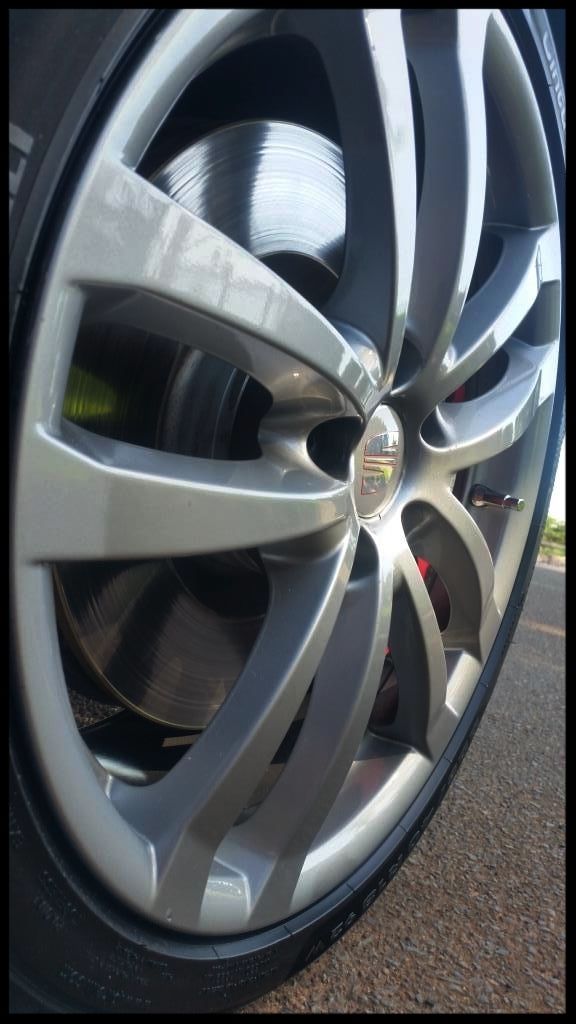
Then it was time to tackle the arches, tires, brake calipers and wheels.
This is how they looked on arrival.
After having already mixed up some shampoo - Cyclo Polymer Hand Wash with some hot water - in my 'wheels' bucket (fitted with a grit guard) and placed all the brushes [Speedmaster and Speedmaster Jnr, Wheel Woolies, Mothers Fenderwell Brush, Mothers Tire Brush and Valet Pro Boars Hair Brushes] in the bucket and allow them to soak for about 20 min to half an hour to allow them to soften up before use, It was time t get cleaning.
I also removed the plastic lug nut covers and placed them in the wheels bucket to start cleaning themselves :lol: Later these would be dressed with Autofinesse Dressel before being put back in place
Then onto the process itself.
- HP rinse arches, tires and wheels to remove any loose dirt, debris, brake dust etc
-Spray arches with a Carchem APC at 1:5 through a foaming trigger head, allow to dwell, then scrub using various brushes
- HP rinse
- Clean tires with Valet Pro Billberry Wheel Cleaner @ 1:6 and a Mothers Tire brush.
- HP rinse
- Repeat tire cleaning
- HP rinse
-Wash wheels and brake calipers with VP Bilberry Wheel Cleaner @ 1:6
- HP rinse
- Quick Dry with WW drying towel
- Remove tar using Valet Pro Citrus Tar Remover and MF towels
- Spray with APC, let it dwell a bit, then HP Rinse to remove any remaining tar remover residue
- Quick Dry with WW drying towel
- Remove bonded and embedded ferrous contaminants on wheels and brake calipers with Carchem Revolt, Speedmaster (big and small) brushes and Valet Pro Boars Hair Brushes
- HP Rinse + flood rinse
- Spray Gyeon Wetcoat onto the wheel, let it sit for a few moments, then blast with a HP washer
(later in the detail)
- Tires dressed with 2 coats of Optimum Tire Shine.
- Arch liners sprayed with Autofinesse Dressel
After
Now that the dirty engine bay and wheels were taken care of, it was time to tackle the rest.
Here is how she looked....

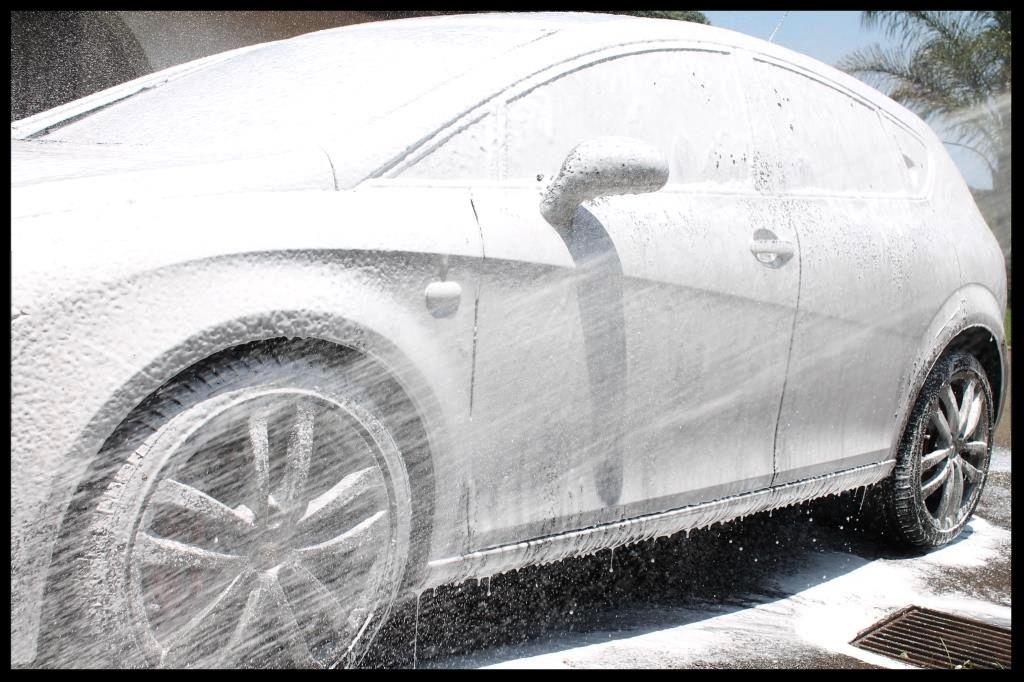
To start with the car was given a thorough HP rinse to remove as much dirt as possible. Then I used Anglewax Fast Foam to foam the car.
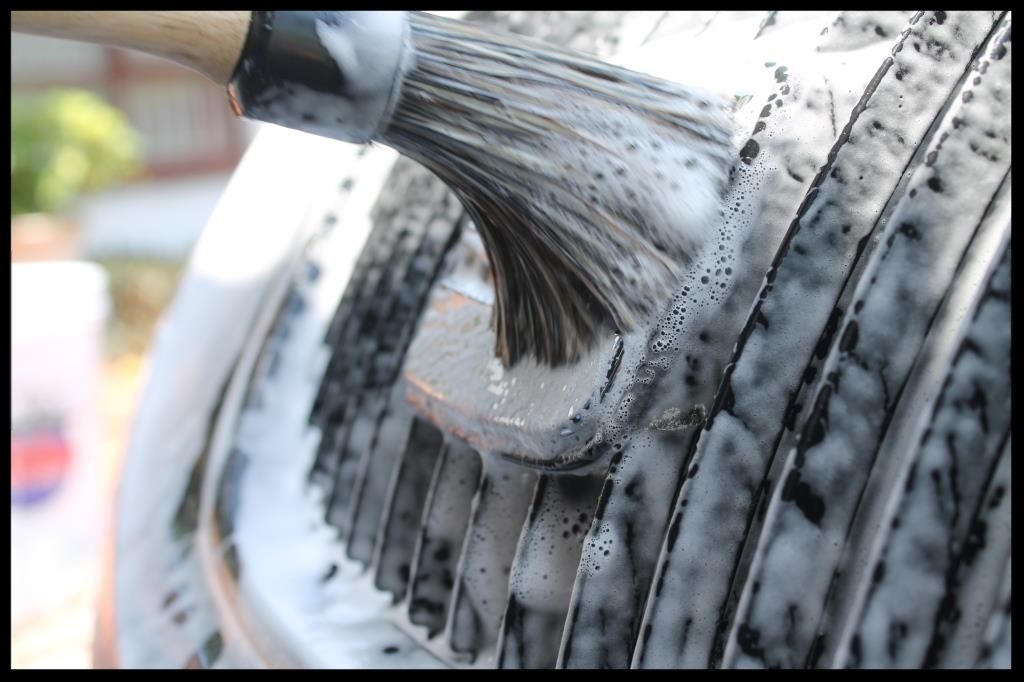
While the foam was dwelling the grills and emblems were agitated
And the door and boot shuts were sprayed with Carchem APC via foaming trigger head and agitated.
Then everything was HP rinsed off and the car given a 2 bucket wash with Carchem Luxury Shampoo and Lambswool Wash Mitts.
Another HP rinse, a very quick dry to remove most of the standing water, not all, and then a liberal spraying of Carchem Revolt, which was then covered with another layer of Angelwax Fast Foam and worked over the paint using a dedicated Wash Mitt.
Finally the car was HP rinsed, flood rinsed and pulled into the garage to be clayed (using Shield Heavy Duty Clay - there was still a fair amount of gunk on the car).
So, on to the correction.... the paint readings were fairly typical (if there is such a thing) [110µ to 140µ]....
But to achieve an acceptable level of correction I needed to resort to the Blue Lake Country Wool Pads, Menzerna FG400 on the Flex 3401, followed by SF4000 on the Black hybrid.
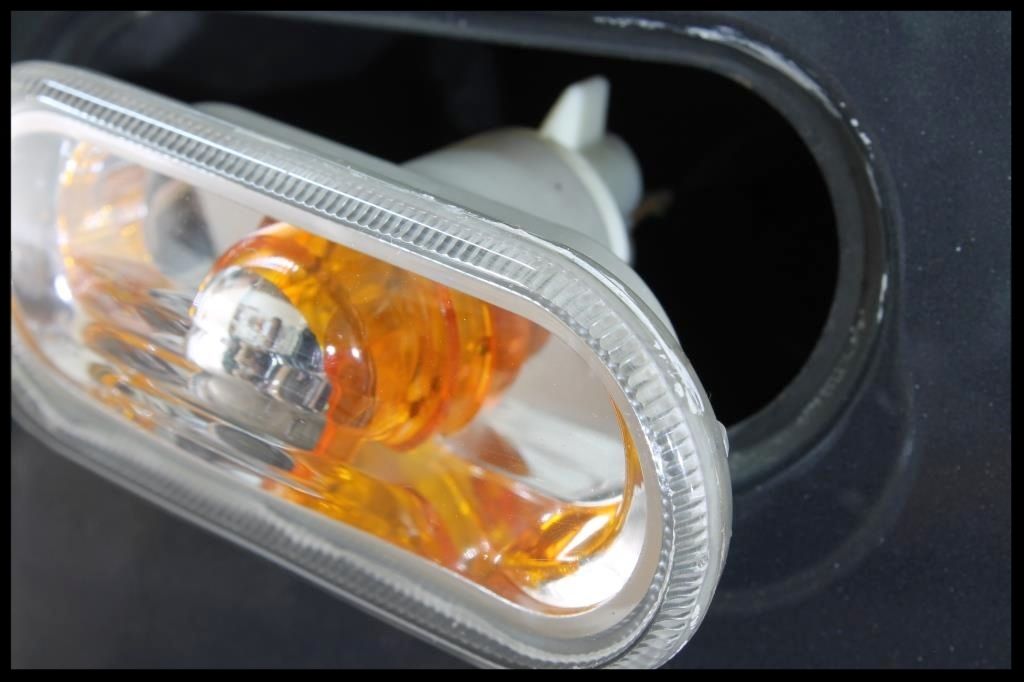
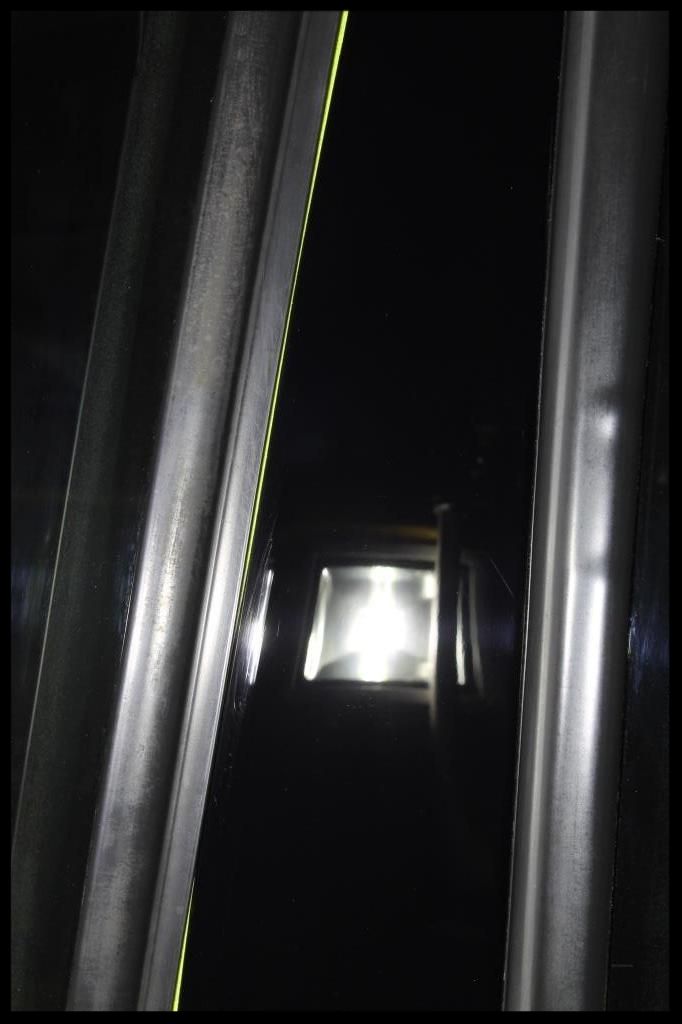
So in preparation for polishing I removed the side markers, cleaned out the other guys wax (which as you can see from the below, was pretty much everywhere.
And obviously taped off any edges I didn't want to run over
Then corrected the paint so it looked like this
Another example
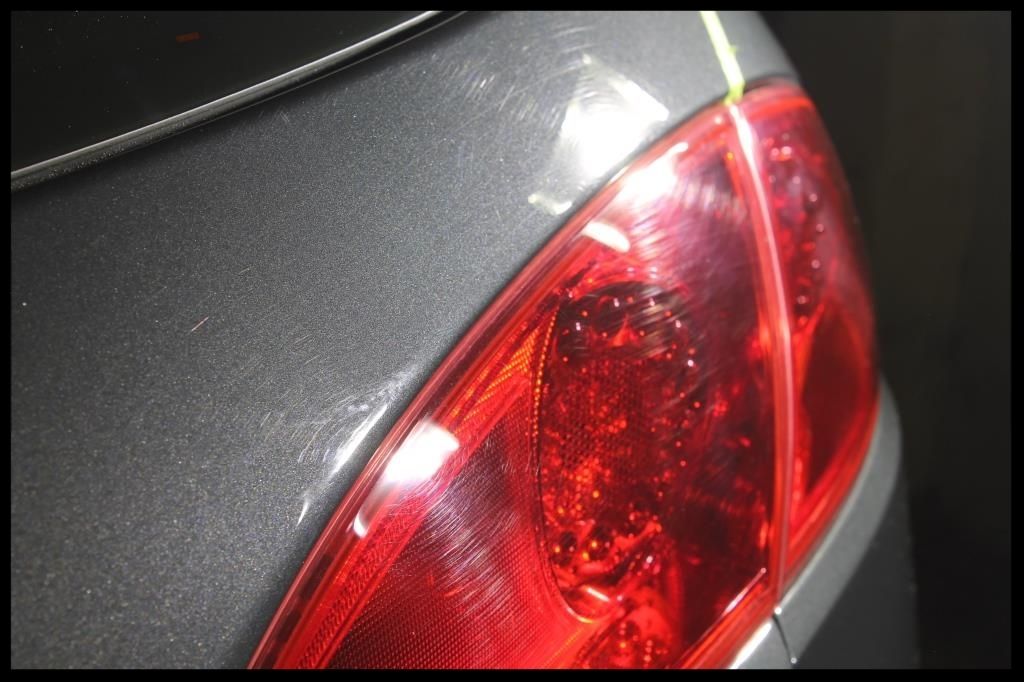
Before
After
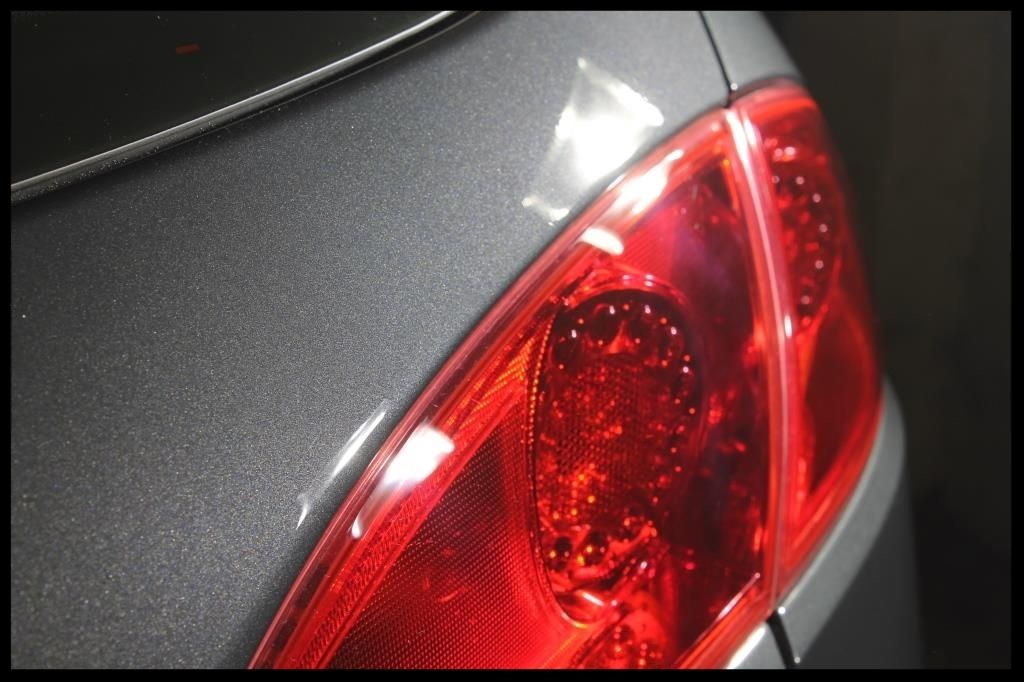
Before
After
The B-pillars being much softer, require a much less aggressive approach - Menzerna 3-in-1 on White Hybrid Pad on the Flex
Before
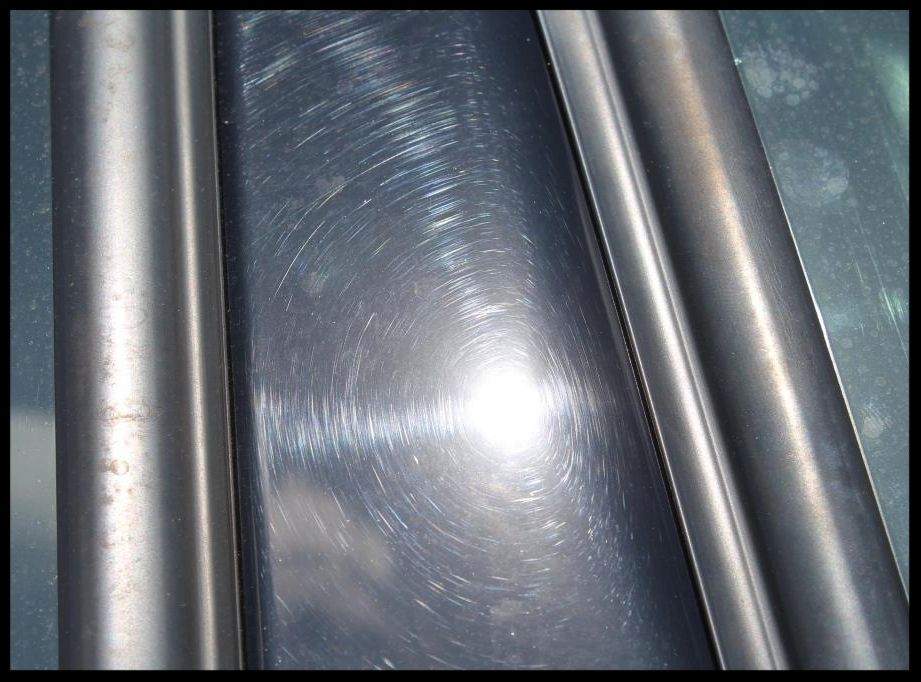
After
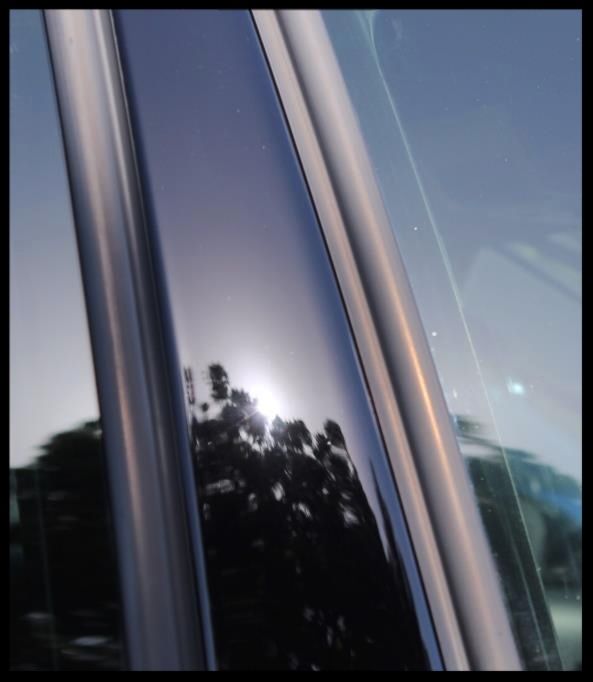
Before

After
Then I applied a coat of Menzerna Powerlock, left it on for an hour and buffed it off.
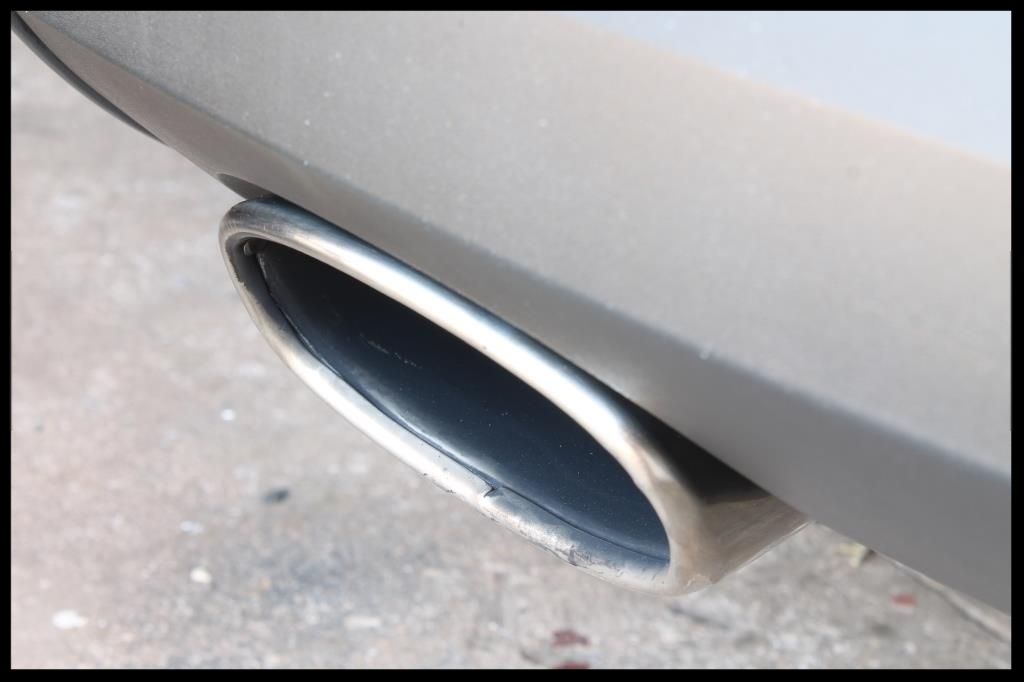
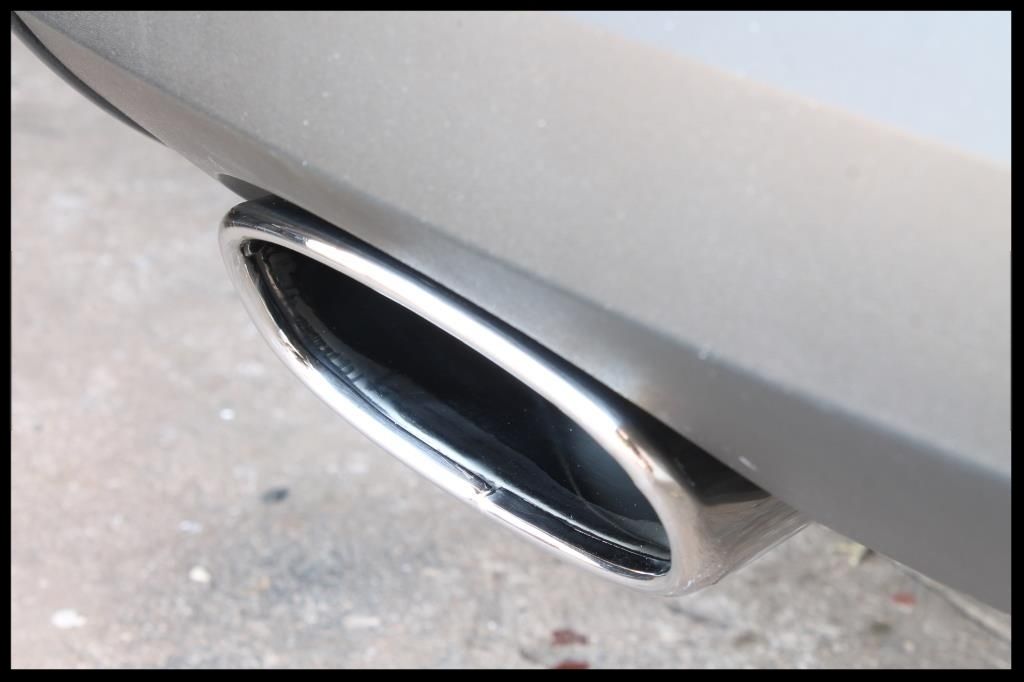
In the meantime the exhaust tip was first cleaned using Carchem APC via a foaming trigger which was then left to dwell and agitated with MF Towels (on the outside) and brushes (on the inside). Then it was polished using Mothers Aluminium Polish.
Before
After
Other things done:
Interior
- Blow out loose dirt with blower
- Vacuum
- Upholstery cleaned and with Glossworx Carpet and Upholstery Cleaner
- Plastics and dash cleaned with Carchem APC then given a final wipe using Autofinesse Spritz
- Final Vacuum
Glass
- Clayed using Shield Heavy Duty clay with ONR as lube
- Front windscreen polished using Autoglym Glass Polish on a Green Lake Country Polishing Pad on the Flex 3401. Then 2 coats of Wynn's C-Thru were applied.
-The remaning glass (inside and out) was cleaned using Autoglym Fast Glass
Door and window rubbers
- Cleaned using Shield Heavy Duty Vinyl and Rubber Cleaner
- Protected using Aerospace 303
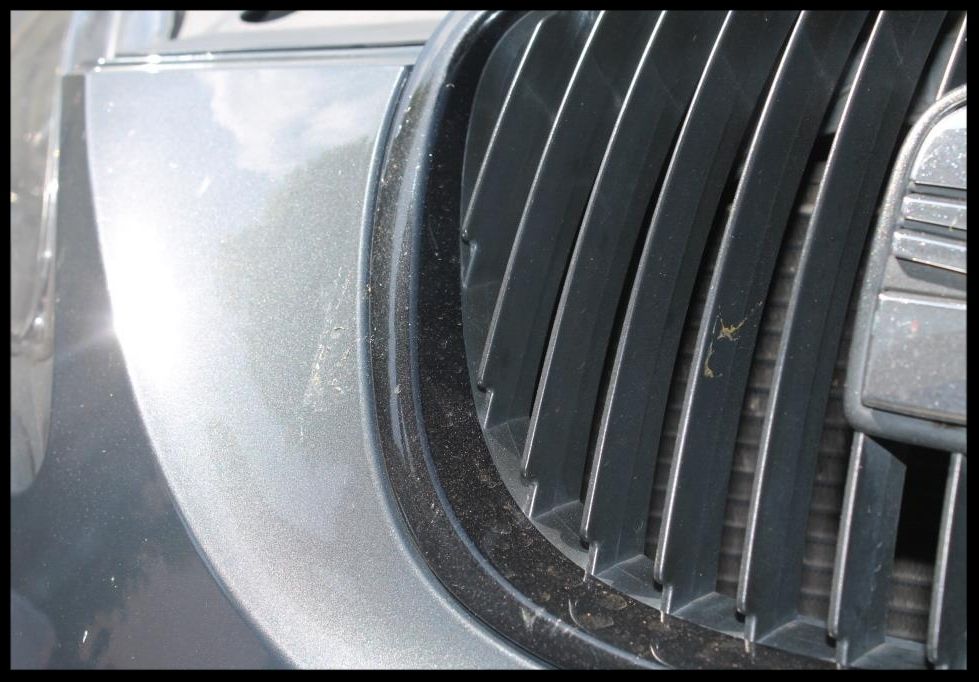
Exterior plastic trim/honeycomb
- Cleaned using Shield Heavy Duty Vinyl and Rubber Cleaner
- Dressed using Carchem Tire and Trim Gel
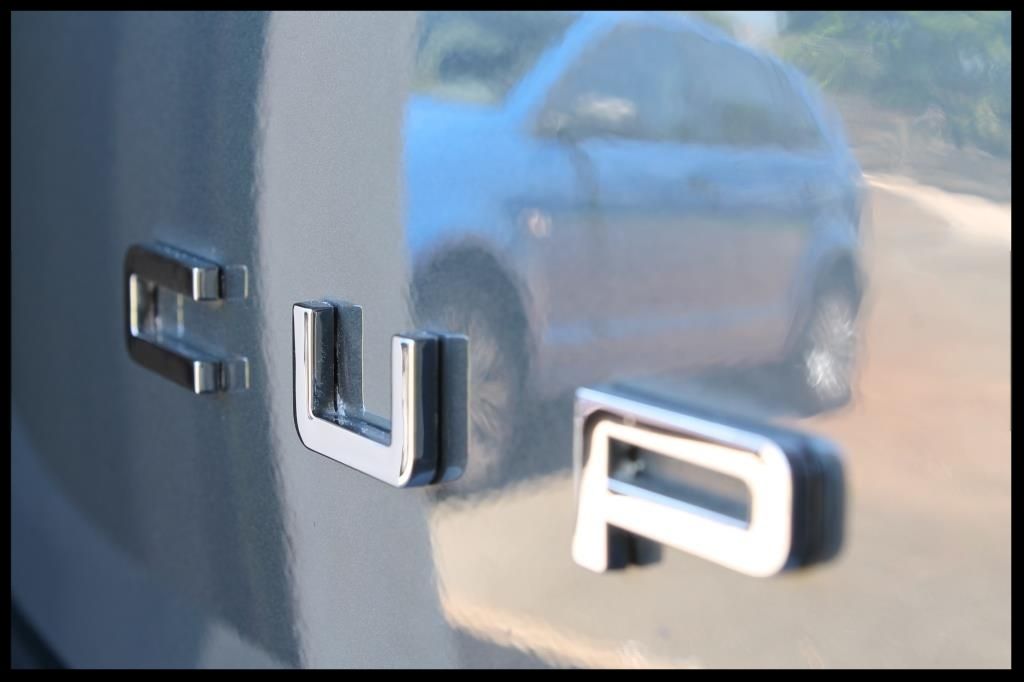
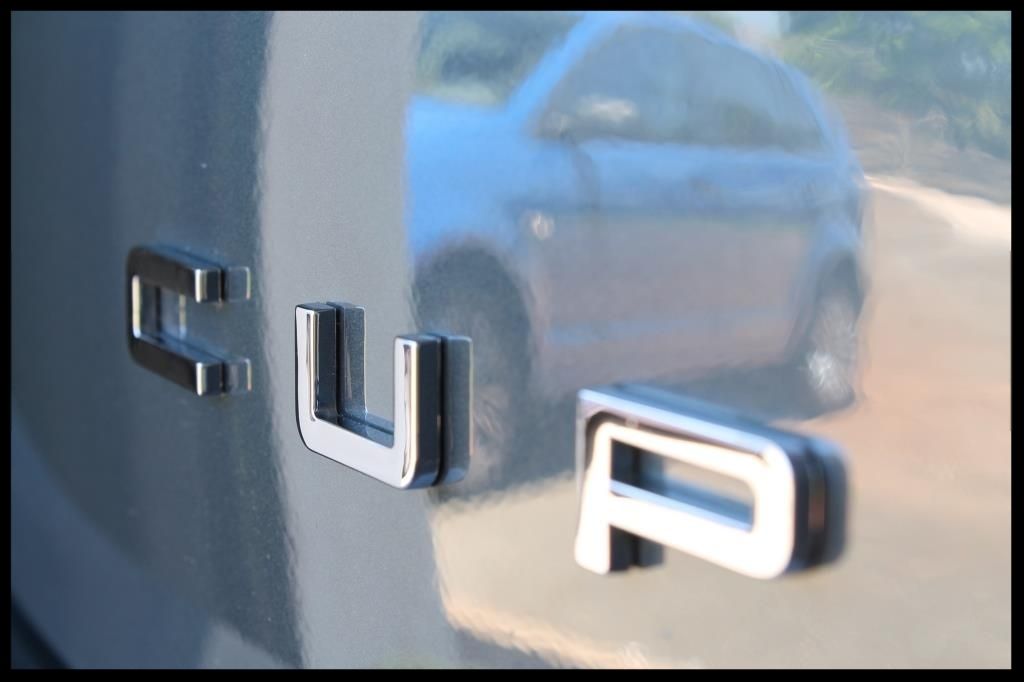
Badges
- Autofinesse Tripple, Q-tips and MF towels
Before
After
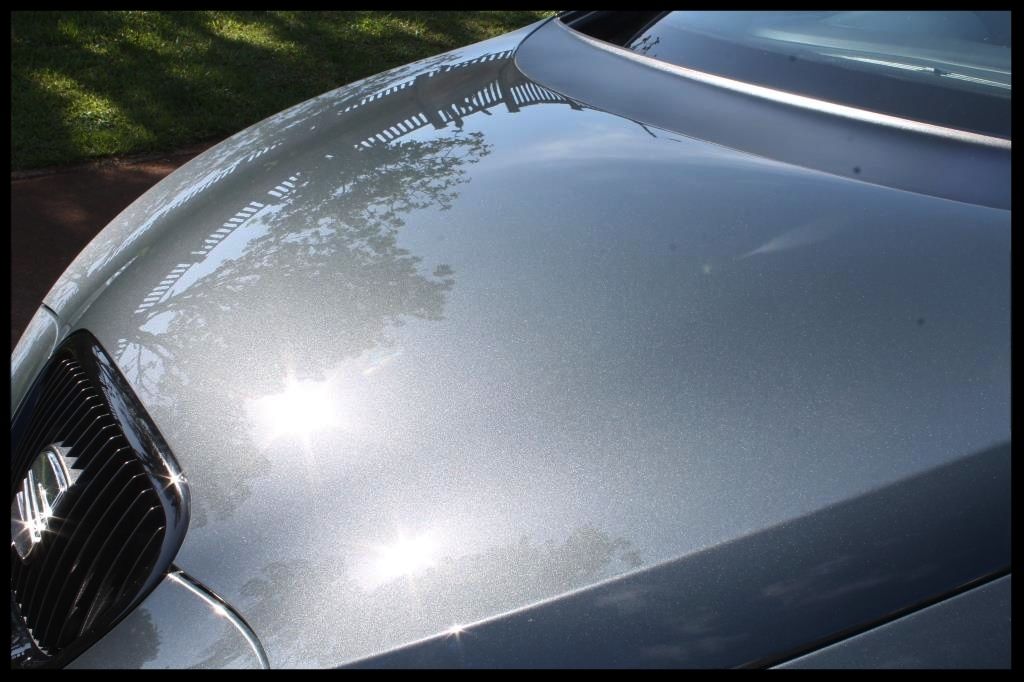
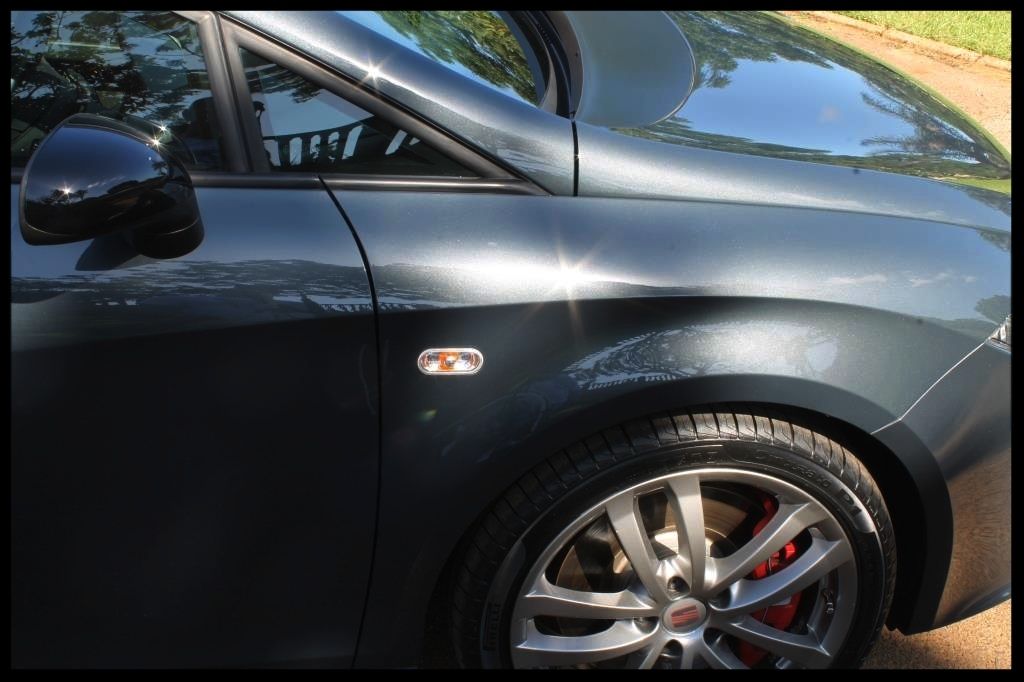
Then a final coat of Autofinesse Glisten was applied to the paint
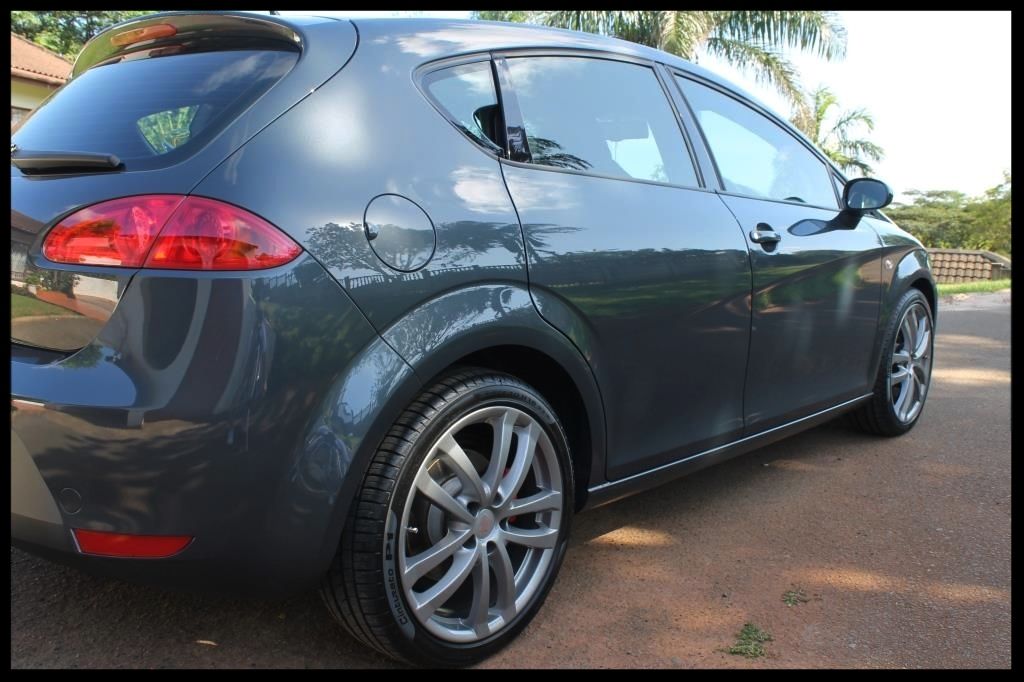
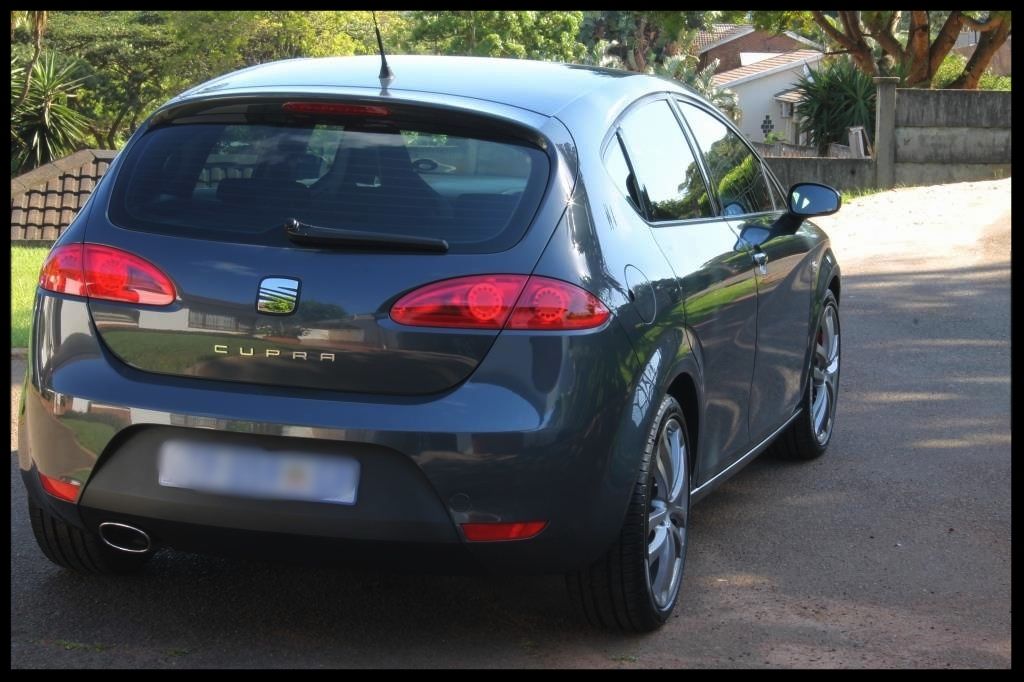
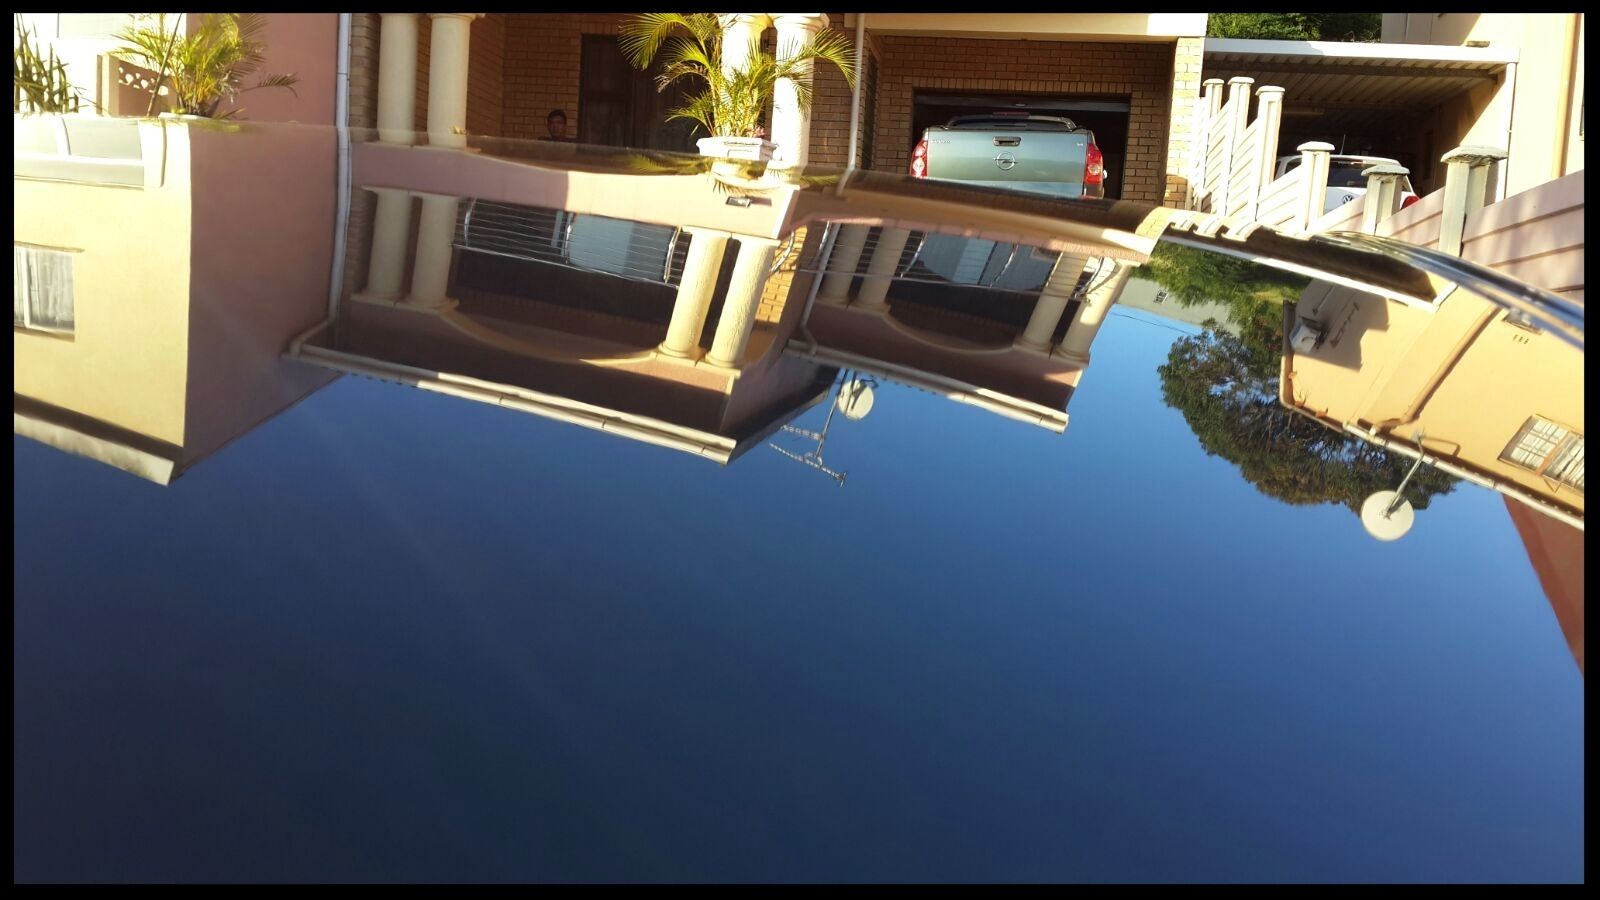
Some after shots of the paint in the sun


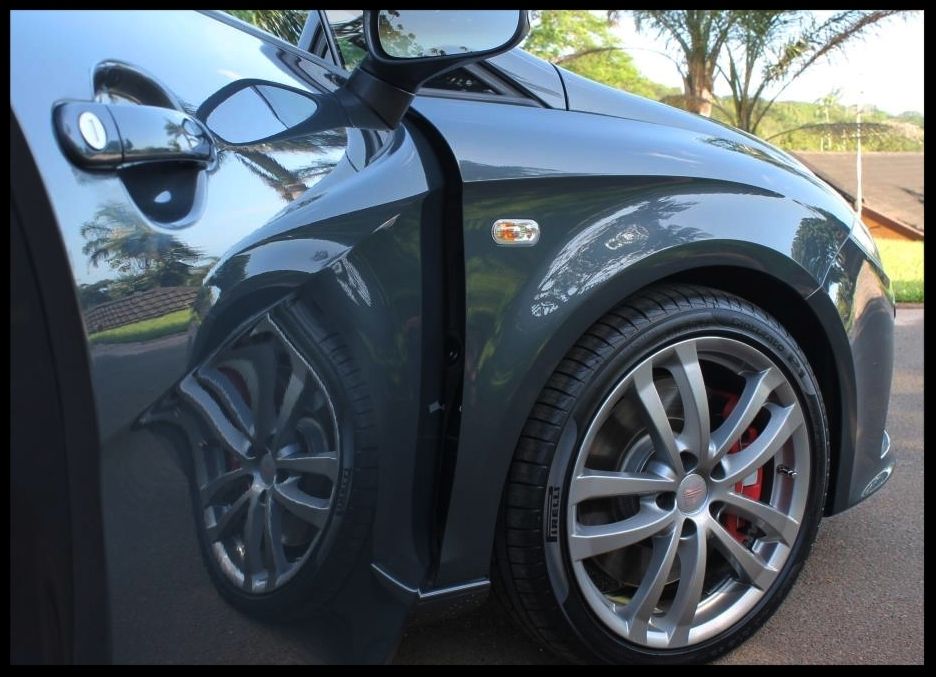
And then some general after pics
 [/URL]

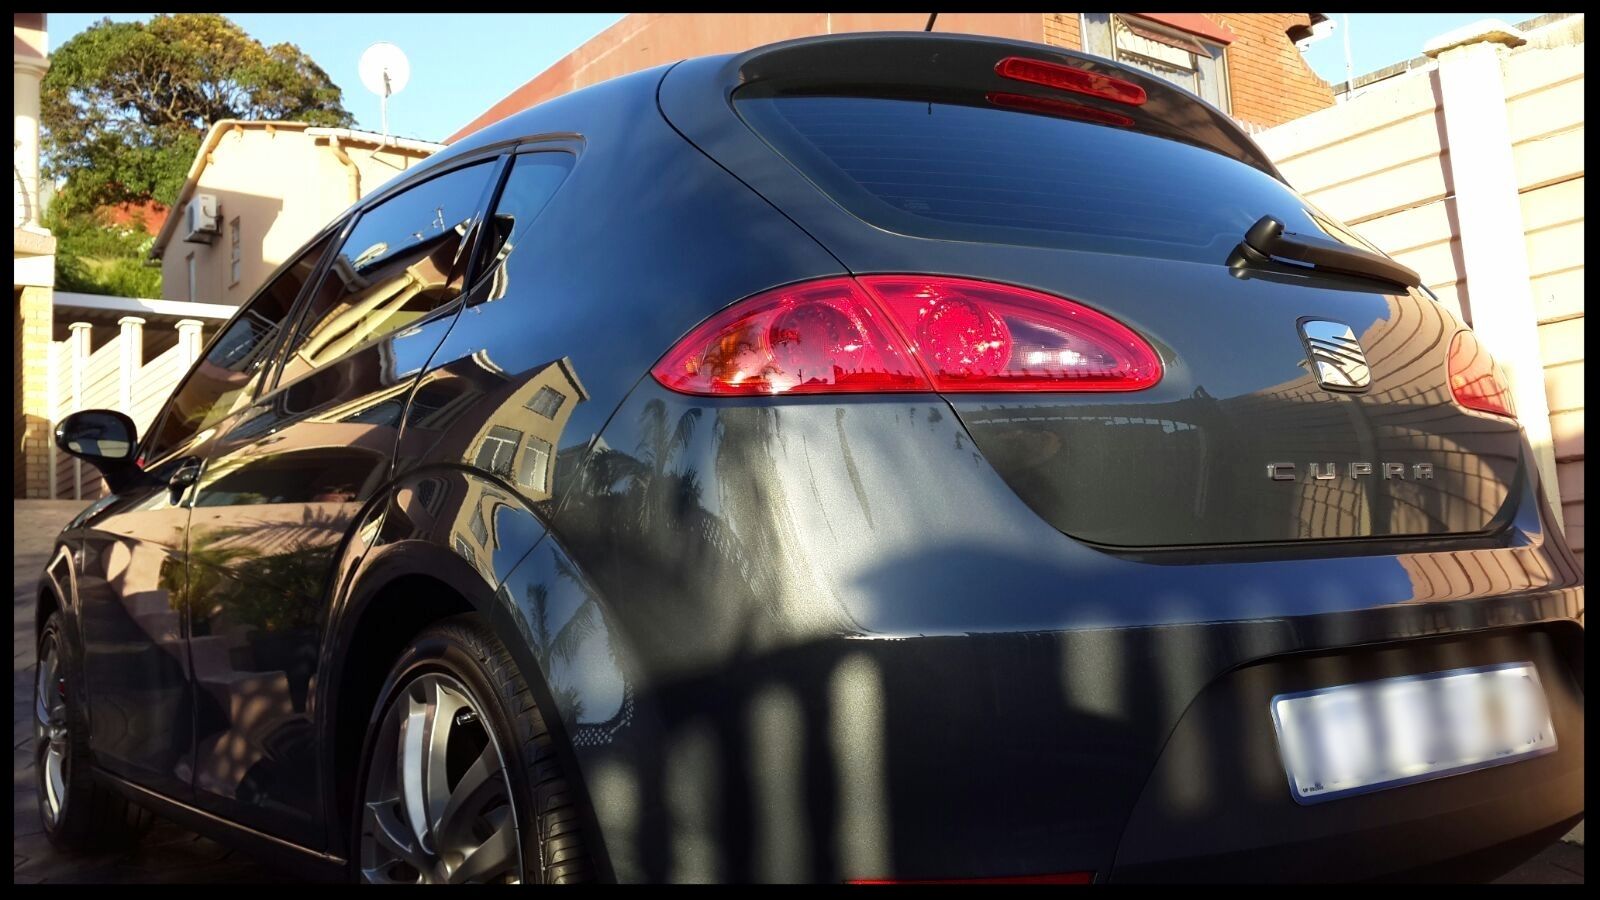
And a couple the owner sent me
Total time spent = 31 hours
As always, thanks for taking the time to read this, and any questions or comments are welcome
When cleaning your car, you should always start with the dirtiest area first and progressively work cleaner. This prevents having to clean the same area twice, reducing time, product usage and most importantly, the chance for swirls. The microfibre towels you use to touch the surface you are cleaning, should, IMO, follow the same approach, with your plushest cleanest towels only coming into play on perfectly clean paint, and towels in worse condition being reserved for things like wiping clean the fender liner for example, and as many categories in between as you deem fit.
If I am detailing an engine bay, it's always where I will start so I have the opportunity to clean up any product, dirt or water that gets onto the fenders, front windscreen or anywhere else, during the wash - if not, its usually with the wheels, which can be as dirty or sometimes even more dirty than the engine bay.
So the first order of business was to remove this from the underside of the bonnet.
Looks clean enough right?
Wrong.... :lol:
First it was vacuumed, then some of the product sprayed into the MF towel which was then used to rub it clean. Then wiped down again with a damp clean MF towel. The little plastic clips were cleaned and dressed with Autofinesse Dressel before it was put back in place after I had finished the rest of the engine bay detail. I then forgot to take a few decent before shots of the dirt in the bay itself, but did get this during the taping up of the sensitive areas I didn't want to get wet (it was still a work in progress at this stage). The bay was quite dirty though.
Once I had protected I didn't want to get wet I first cleaned the underside of the bonnet using Carchem Citrus APC @ 1:5 and various brushes then HP rinsed it. Again, you wouldn't start in the bay itself, then do the underside of the bonnet and allow that dirt to drip back down onto the clean bay - common sense, but you'd be surprised.... :crazy:
Then the bay itself was done, using the same approach. I then blew dry the underside of the bonnet and the bay itself and removed all the protective tape/plastic wrap/packets etc (these sections were cleaned using the same product and a combination of q-tips, mf towels and brushes. The painted surfaces were then cleaned/polished/protected using Autofinesse Tripple on a MF hand applicator which was then left to cure overnight. The bay itself was then liberally dressed with Autofinesse Dressel which was then also left on overnight. The following morning I buffed off the Tripple (any dust the falls onto any plastics in the bay is then wiped away when you wipe there - again, don't work backwards) and buffed off of the Dressel residue .
This was the end result.
Then it was time to tackle the arches, tires, brake calipers and wheels.
This is how they looked on arrival.
After having already mixed up some shampoo - Cyclo Polymer Hand Wash with some hot water - in my 'wheels' bucket (fitted with a grit guard) and placed all the brushes [Speedmaster and Speedmaster Jnr, Wheel Woolies, Mothers Fenderwell Brush, Mothers Tire Brush and Valet Pro Boars Hair Brushes] in the bucket and allow them to soak for about 20 min to half an hour to allow them to soften up before use, It was time t get cleaning.
I also removed the plastic lug nut covers and placed them in the wheels bucket to start cleaning themselves :lol: Later these would be dressed with Autofinesse Dressel before being put back in place
Then onto the process itself.
- HP rinse arches, tires and wheels to remove any loose dirt, debris, brake dust etc
-Spray arches with a Carchem APC at 1:5 through a foaming trigger head, allow to dwell, then scrub using various brushes
- HP rinse
- Clean tires with Valet Pro Billberry Wheel Cleaner @ 1:6 and a Mothers Tire brush.
- HP rinse
- Repeat tire cleaning
- HP rinse
-Wash wheels and brake calipers with VP Bilberry Wheel Cleaner @ 1:6
- HP rinse
- Quick Dry with WW drying towel
- Remove tar using Valet Pro Citrus Tar Remover and MF towels
- Spray with APC, let it dwell a bit, then HP Rinse to remove any remaining tar remover residue
- Quick Dry with WW drying towel
- Remove bonded and embedded ferrous contaminants on wheels and brake calipers with Carchem Revolt, Speedmaster (big and small) brushes and Valet Pro Boars Hair Brushes
- HP Rinse + flood rinse
- Spray Gyeon Wetcoat onto the wheel, let it sit for a few moments, then blast with a HP washer
(later in the detail)
- Tires dressed with 2 coats of Optimum Tire Shine.
- Arch liners sprayed with Autofinesse Dressel
After
Now that the dirty engine bay and wheels were taken care of, it was time to tackle the rest.
Here is how she looked....
To start with the car was given a thorough HP rinse to remove as much dirt as possible. Then I used Anglewax Fast Foam to foam the car.
While the foam was dwelling the grills and emblems were agitated
And the door and boot shuts were sprayed with Carchem APC via foaming trigger head and agitated.
Then everything was HP rinsed off and the car given a 2 bucket wash with Carchem Luxury Shampoo and Lambswool Wash Mitts.
Another HP rinse, a very quick dry to remove most of the standing water, not all, and then a liberal spraying of Carchem Revolt, which was then covered with another layer of Angelwax Fast Foam and worked over the paint using a dedicated Wash Mitt.
Finally the car was HP rinsed, flood rinsed and pulled into the garage to be clayed (using Shield Heavy Duty Clay - there was still a fair amount of gunk on the car).
So, on to the correction.... the paint readings were fairly typical (if there is such a thing) [110µ to 140µ]....
But to achieve an acceptable level of correction I needed to resort to the Blue Lake Country Wool Pads, Menzerna FG400 on the Flex 3401, followed by SF4000 on the Black hybrid.
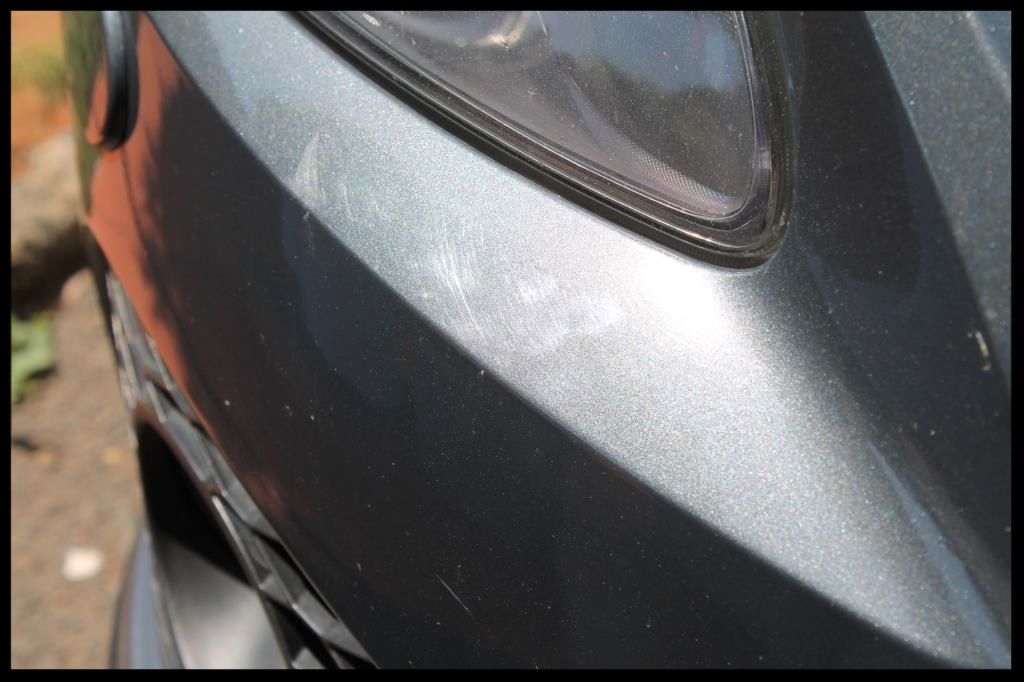
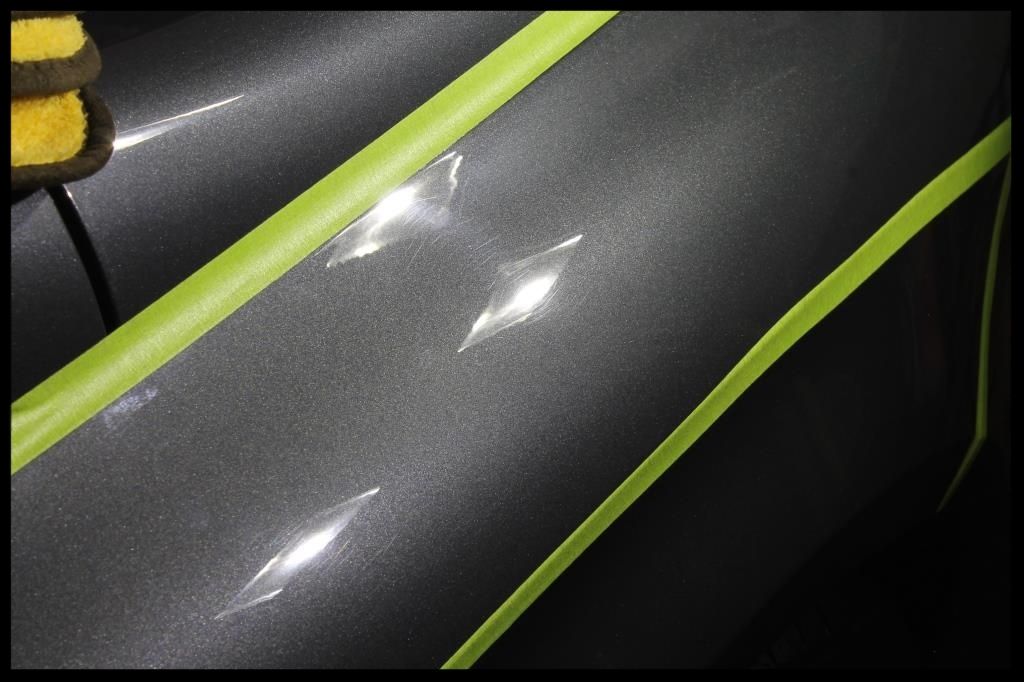
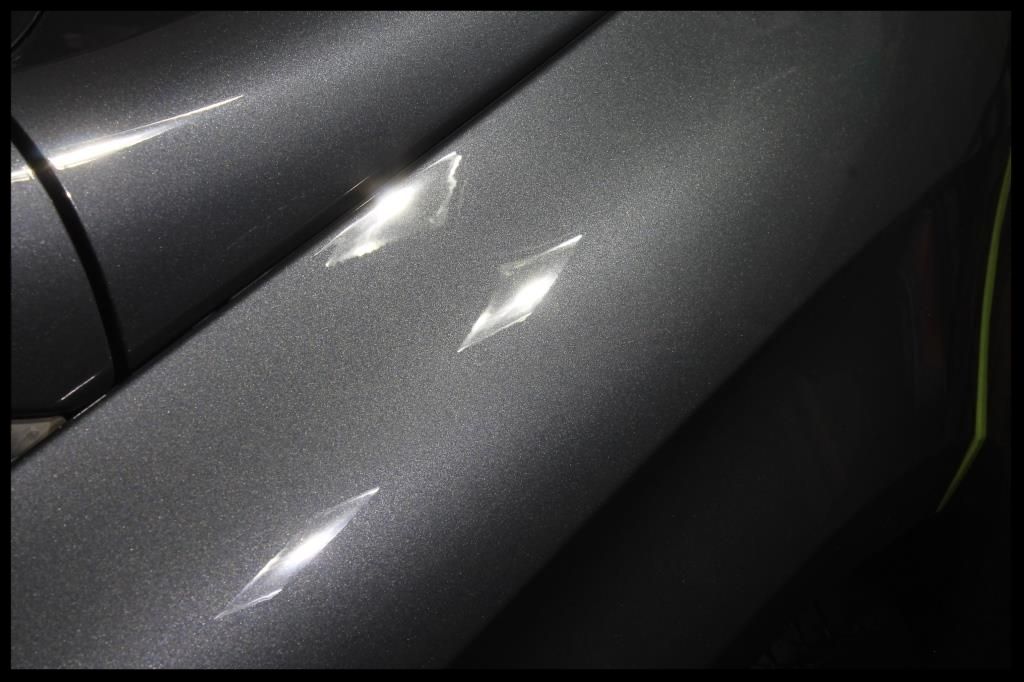
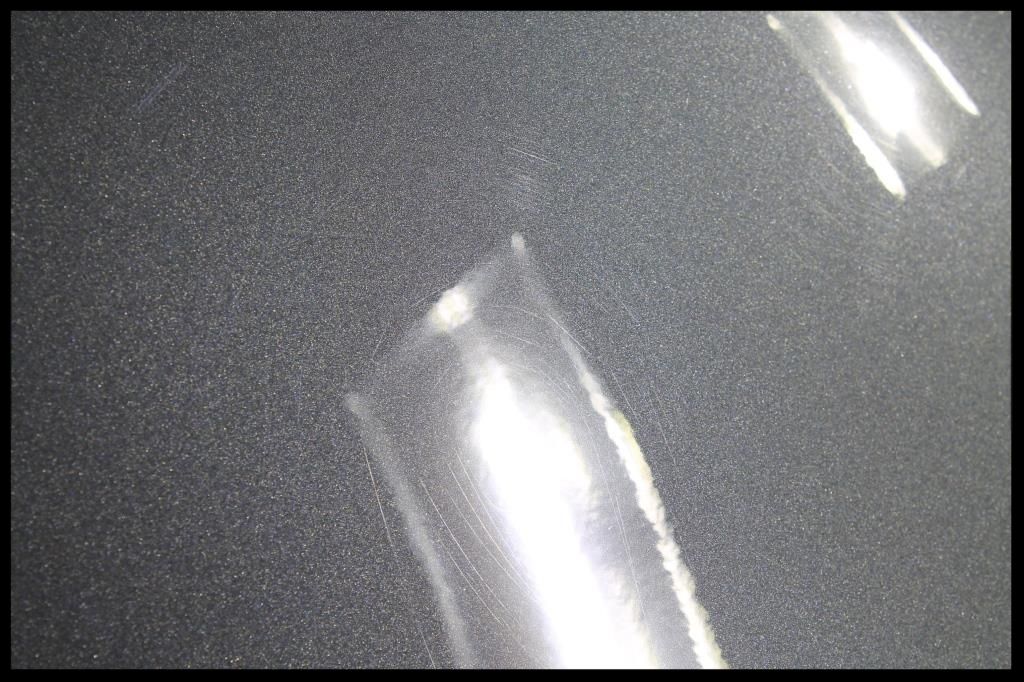
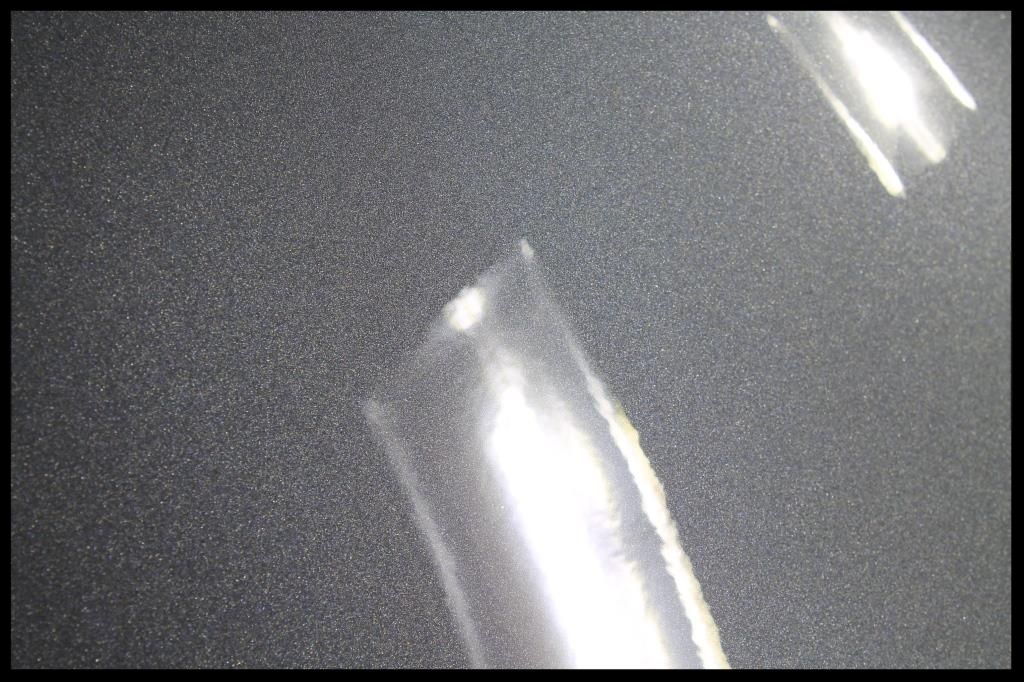
So in preparation for polishing I removed the side markers, cleaned out the other guys wax (which as you can see from the below, was pretty much everywhere.
And obviously taped off any edges I didn't want to run over
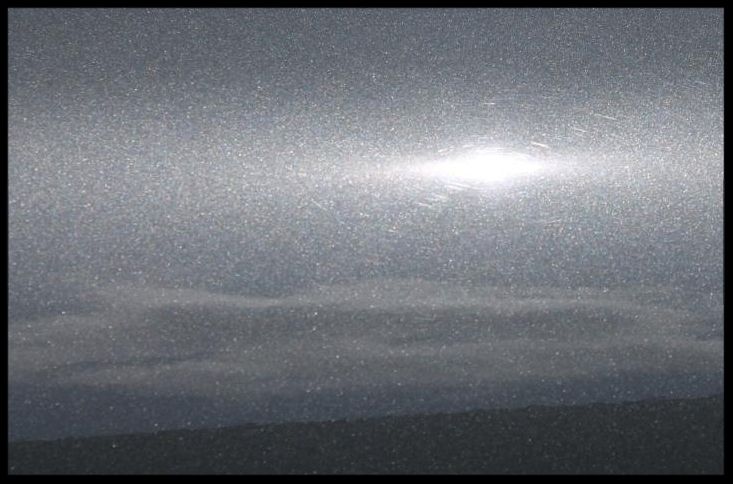
Then corrected the paint so it looked like this
Another example
Before
After
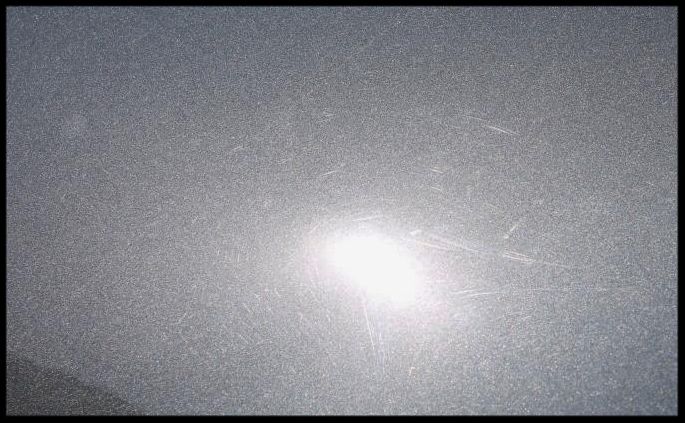
Before
After
The B-pillars being much softer, require a much less aggressive approach - Menzerna 3-in-1 on White Hybrid Pad on the Flex
Before
After
Before
After
Then I applied a coat of Menzerna Powerlock, left it on for an hour and buffed it off.
In the meantime the exhaust tip was first cleaned using Carchem APC via a foaming trigger which was then left to dwell and agitated with MF Towels (on the outside) and brushes (on the inside). Then it was polished using Mothers Aluminium Polish.
Before
After
Other things done:
Interior
- Blow out loose dirt with blower
- Vacuum
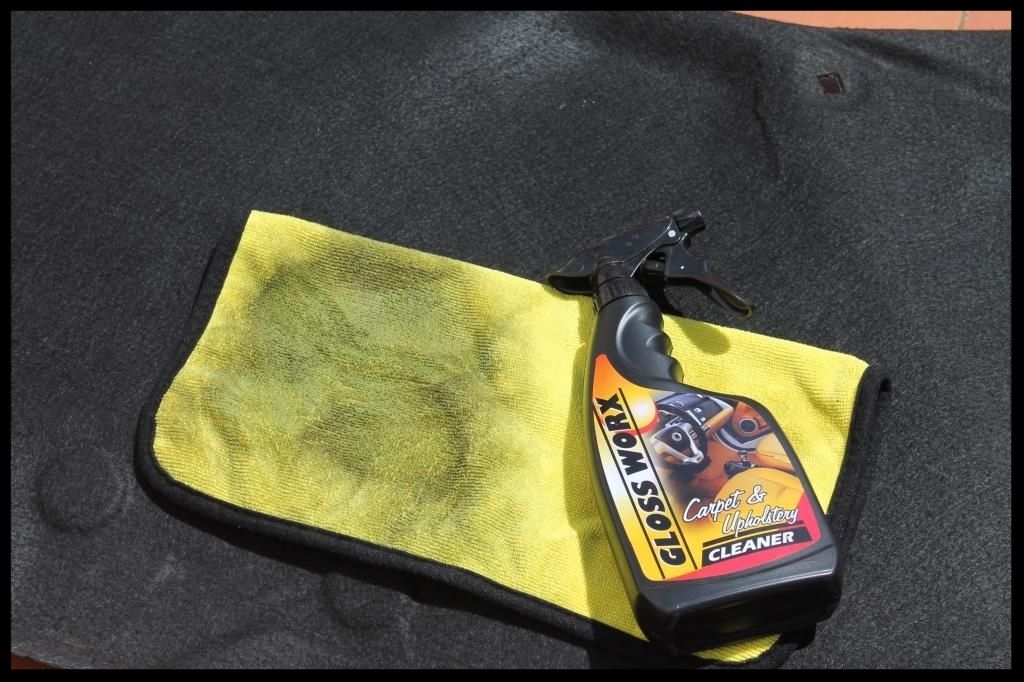
- Upholstery cleaned and with Glossworx Carpet and Upholstery Cleaner
- Plastics and dash cleaned with Carchem APC then given a final wipe using Autofinesse Spritz
- Final Vacuum
Glass
- Clayed using Shield Heavy Duty clay with ONR as lube
- Front windscreen polished using Autoglym Glass Polish on a Green Lake Country Polishing Pad on the Flex 3401. Then 2 coats of Wynn's C-Thru were applied.
-The remaning glass (inside and out) was cleaned using Autoglym Fast Glass
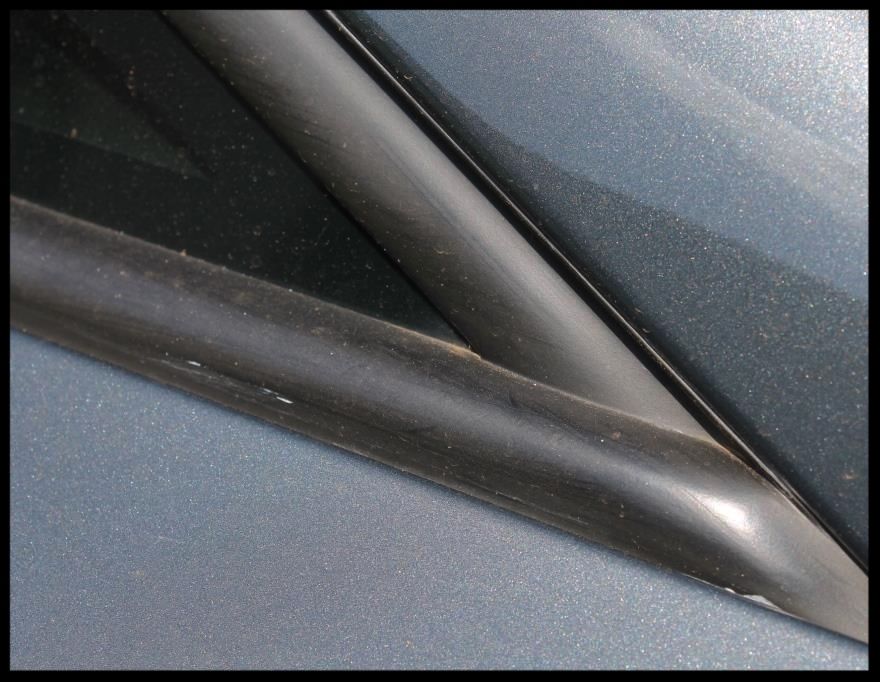
Door and window rubbers
- Cleaned using Shield Heavy Duty Vinyl and Rubber Cleaner
- Protected using Aerospace 303
Exterior plastic trim/honeycomb
- Cleaned using Shield Heavy Duty Vinyl and Rubber Cleaner
- Dressed using Carchem Tire and Trim Gel
Badges
- Autofinesse Tripple, Q-tips and MF towels
Before
After
Then a final coat of Autofinesse Glisten was applied to the paint
Some after shots of the paint in the sun
And then some general after pics
And a couple the owner sent me
Total time spent = 31 hours
As always, thanks for taking the time to read this, and any questions or comments are welcome
