ThunderGun10
New member
- Mar 25, 2019
- 7
- 0
Please Help Fixing Swirl Marks!
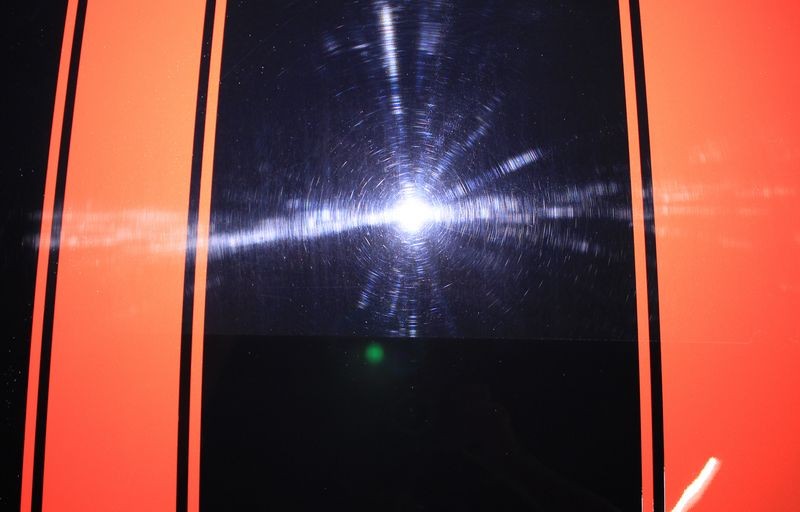
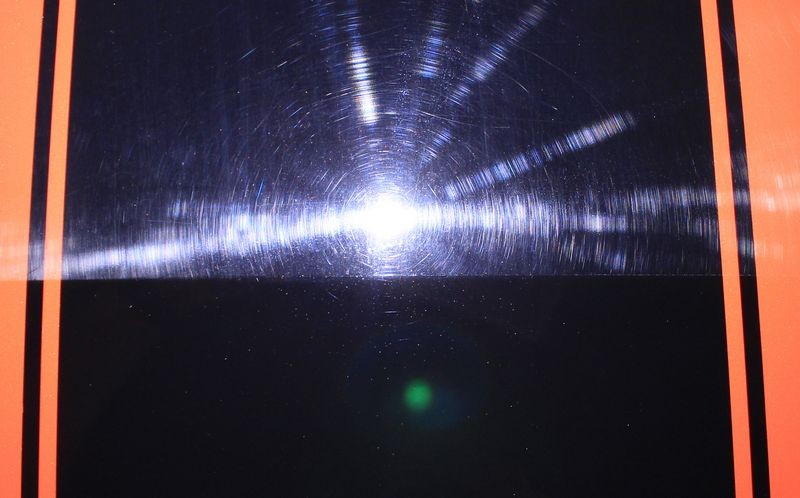
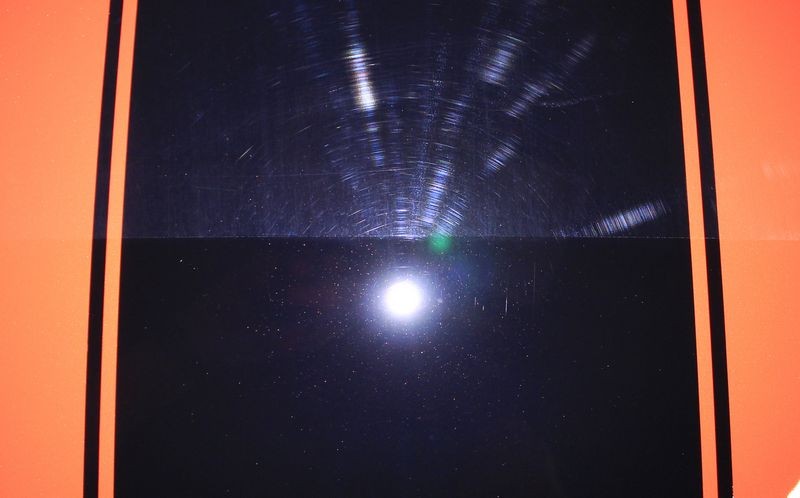
About 2 months ago I bought a very lightly used 2017 F150 in the Lithium Grey color from a local dealer. The day I bought it it was cloudy and snowy but I did my best to inspect the undercarriage and paint and didn't notice any issues. In the following weeks I noticed that there are swirl marks pretty much all over the truck that are quite noticeable when you look at it in the sun.
Since then I have been doing quite a bit of reading on how to fix the swirl marks. Needless to say, it is a bit overwhelming for someone with no detailing experience considering the amount of products on the market. I also debated taking it to a local detailer but I have a hard time trusting anyone to do a really good job and i'm not sure how to find a reputable one.
So now I have purchased a Porter Cable 7424 XP polisher and some Chemical Guy's hex pads. However, I am still feeling uncertain about how to proceed.
My biggest concern is using something that is too aggressive and doing more damage to the paint. I plan on having this truck for a very long time so I don't want to do something that is going to cause issues down the road. My goal is to make the swirls less noticeable with doing the least amount of paint removal as necessary.
I am also quite busy so I would like to do this in the quickest way possible (a day or less). Can you give me some recommendations on how to proceed? I am looking for product recommendations and steps I should take. Any guidance would be greatly appreciated!
Below are some pictures of the swirl marks.
Thanks!
View attachment 66206
View attachment 66207
View attachment 66208
")
About 2 months ago I bought a very lightly used 2017 F150 in the Lithium Grey color from a local dealer. The day I bought it it was cloudy and snowy but I did my best to inspect the undercarriage and paint and didn't notice any issues. In the following weeks I noticed that there are swirl marks pretty much all over the truck that are quite noticeable when you look at it in the sun.
Since then I have been doing quite a bit of reading on how to fix the swirl marks. Needless to say, it is a bit overwhelming for someone with no detailing experience considering the amount of products on the market. I also debated taking it to a local detailer but I have a hard time trusting anyone to do a really good job and i'm not sure how to find a reputable one.
So now I have purchased a Porter Cable 7424 XP polisher and some Chemical Guy's hex pads. However, I am still feeling uncertain about how to proceed.
My biggest concern is using something that is too aggressive and doing more damage to the paint. I plan on having this truck for a very long time so I don't want to do something that is going to cause issues down the road. My goal is to make the swirls less noticeable with doing the least amount of paint removal as necessary.
I am also quite busy so I would like to do this in the quickest way possible (a day or less). Can you give me some recommendations on how to proceed? I am looking for product recommendations and steps I should take. Any guidance would be greatly appreciated!
Below are some pictures of the swirl marks.
Thanks!
View attachment 66206
View attachment 66207
View attachment 66208