The following is an itch that has finally been scratched after a lot of procrastination, research and money spent.
In mid-2020, I decided it was time to replace my old Karcher K2, which was starting to show wear and tear. At the time, I knew absolutely nothing about pressure washers other than you plug it in, connect the water and turn it on. But I did know that I wanted to upgrade to a short gun for superior ergonomics and easy connection of a foam cannon. But I didn’t know how that would be possible for my old machine, let alone the Karcher K5 I had my eye on.

I had no intention of spending more than what a Karcher K5 was going to cost me. Somehow, I started to become aware of Kranzle pressure washers, which were being sold at Waxit as singular items, and in package form at Detailing Shed. The packages that Nick was selling in his store had everything I wanted, all in one transaction and without having to figure out what fitting went with what to make it all work. I eventually bit the bullet and ordered a Kranzle K1152 with the MTM package from Detailing Shed.
The biggest online order I had ever made, Nick personally called me the next day to discuss my purchase. I remember that call well because it came up as an un-recognised number and me expecting it to be a spam call, so my initial tone was somewhat terse. However, that call would be the beginning of an ongoing relationship, one in which I have enjoyed contributing to.
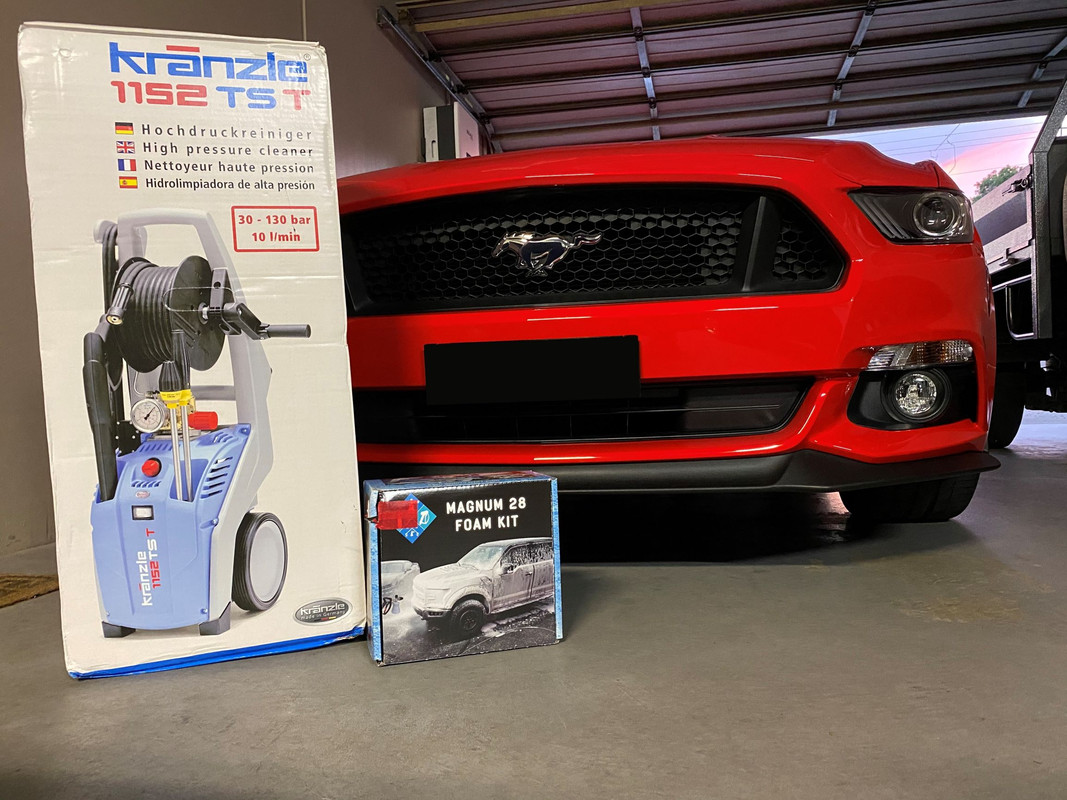
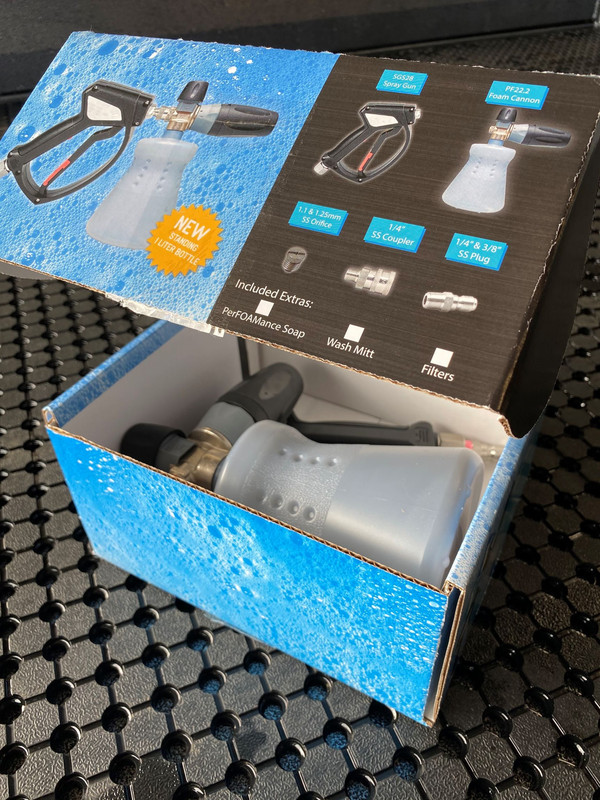

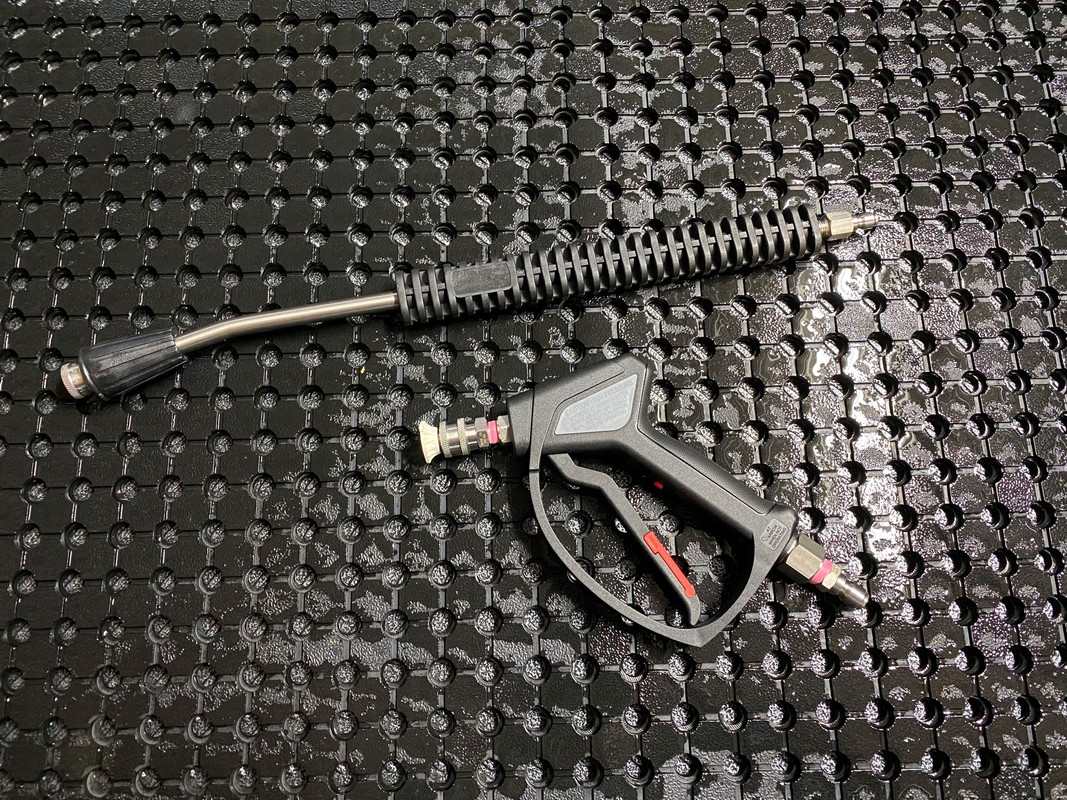
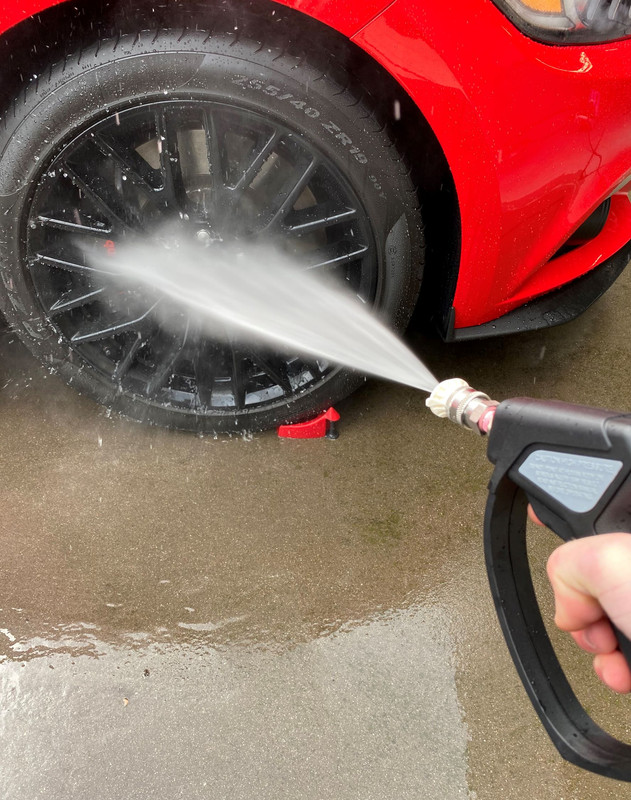
The very first time I fired up the Kranzle, I instantly knew I had made the right choice, it being worth every single cent. The actual pressure of the K1152 is on par with my old Karcher K2, but it’s the flow rate that makes a Kranzle perfect for cleaning cars. The sound of the unit is super stout, with none of the wheezing, screeching noises that most pressure washers make. In fact, the sound of the water coming out of the nozzle is louder than the motor and pump itself. And teamed with the MTM SGS 28 short gun, MTM PF22.2 foam cannon and the pliable 15m hose, this setup transformed my car washing efficiency. And enjoyment.


In no way have I been disappointed with the Kranzle K1152, and the whole experience has also taught me about pressure washers and pressure washer fittings and accessories. In reality, what I now know could have been put to use converting my old Karcher to these much-improved aftermarket accessories. And what I now know would have seen me bypass the mobile K1152 for a wall mounted set up. Three years later, I’m now scratching that itch.

Once again, I went shopping at Detailing Shed. Nick has the best range of car washing focused pressure washer accessories and packages in the country. For a wall mount system, they sell an all-inclusive package, but also have everything available in singular form, allowing you to piece together what you need for your situation. For me, I already had the accessories, so I only needed the pressure washer, hose, hose reel, jumper hose and stainless-steel shelf. Nick did me a custom price to suit my needs.
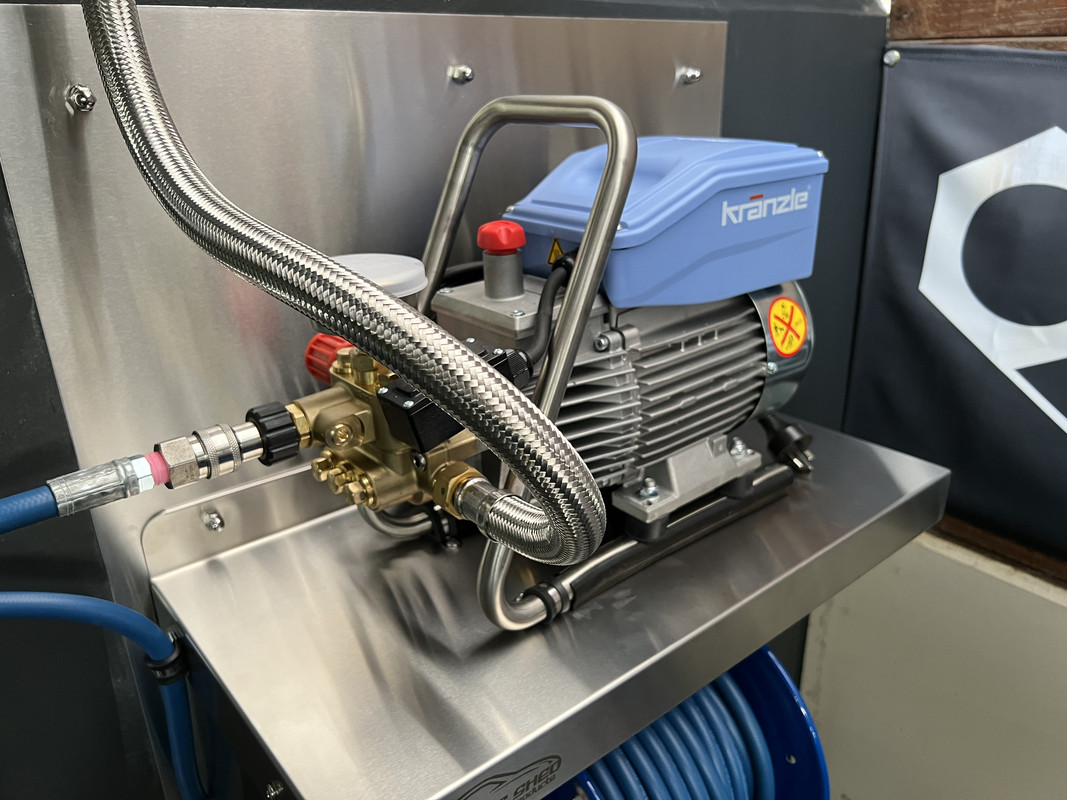
The pressure washer itself is the Kranzle KHD10/122, which offers the same flow rate as my current K1152. A KHD7/122 is also offered, but only does 7 litres per minute compared to 10 lpm. The advantage of the KHD7/122 is that it can be run on a normal 10-amp circuit, whereas the KHD10/122 must have at least a 15-amp circuit. For some reason, the K1152 is able to run on the 10-amp plug, while also delivering 10 lpm. So, I’m not sure why the KHD10/122 with the same outputs needs more amperage. My chosen install location was going to need a power point run to it anyway, and I wasn’t prepared to give up the flow rate I had become so accustomed to with my 1152. Nick also said the KHD10/122 was the machine to have, so the decision was a simple one.

Unlike the earlier versions of the static Kranzle’s, the KHD7/122 and KHD10/122 are now fitted with “Total Stop”, which stops the motor when the trigger is released, rather than having the motor running on an extended time delay. Like all Kranzle’s, the KHD10/122 has an oil supply, which is changed after the first 50 hours and then never again, although I have been changing the oil annually on my 1152. The machine has a 2-year warranty, with a 10-year warranty on the pump. The unit can also be serviced and rebuilt if required, rather than be a throw away item after a certain number of operational hours.
The selling point for these particular Kranzle’s is the high flow rate, which is what does the work when washing cars. Ultimate pressure is not the goal, although it can deliver up to 1800 psi with the standard gun and wand. The KHD10/122 is supplied with a 10-meter hose and the Kranzle “riffle” gun and wand, all will be sidelined for more application specific upgrades to deliver about 1000 – 1200 psi and 10 lpm.
For the hose, I went with the smooth jacket, non-marking MTM CobraJet in blue. There is a grey version of this hose, but it was always going to be the blue. Obsessed Garage also sell a blue, non-marking smooth jacket hose which is apparently slightly more pliable and available with Mosmatic fittings. However, the only version sold officially in Australia is the 15-meter length. In my case, I was wanting more than 15 meters to account for the location of the unit on the wall and having a comfortable length to get around the car efficiently. I also wanted to buy everything from Nick for simplicity.
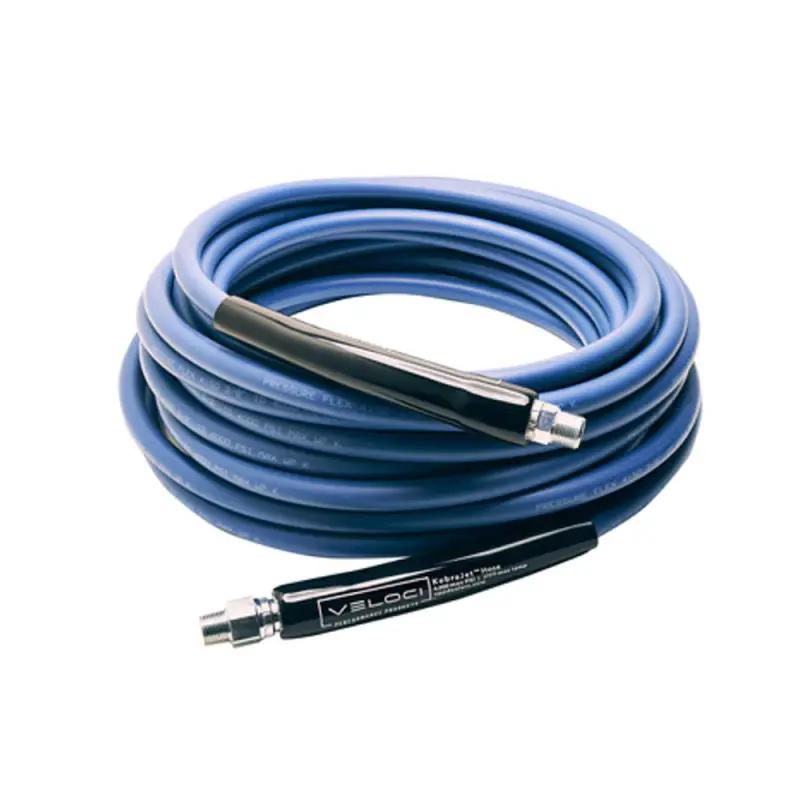

One benefit of buying it all from Detailing Shed is the hose is pre-installed on the hose reel, I was fully expecting to have to do that myself. Having seen videos of that process, I’m glad I didn’t need to do that. They also install the 3/8 MTM quick connect on the hose outlet. Ideally, I would have preferred the Mosmatic part here, but it's not offered by Detailing Shed. The hose reel in question is the American made Cox, again in blue. I really love the industrial look of these hose reels, being a very simple and robust in construction. This is not a retractable hose reel, the 3/8 hose does not function well with those. This reel easily accepts the 22.5 metre hose I had selected.

For the whip line, the hose that transfers the pressurised water from the pump to the hose reel swivel connector, I had two choices. The first being a black MTM KobraJet, but I went with the newer blue version for continuality. This line is also pre-installed on the Cox reel, the other end is fitted with a 3/8 MTM quick disconnect that is then connected to the pump outlet via a twist and seal quick connect.

For the pump inlet, this this took me a lot of time to find the right parts. For some reason, Detailing Shed don’t really offer inlet hoses and fittings, at least not what I was wanting. After a LOT of searching, I came across these 20mm braided stainless steel hoses. The pump inlet requires a rubber O-ring to seat and prevent leaks, and for some reason, the KHD10/122 has a different inlet thread compared to my K1152. I actually ended up buying 3 different lengths of this hose as well as several adaptors. More money.
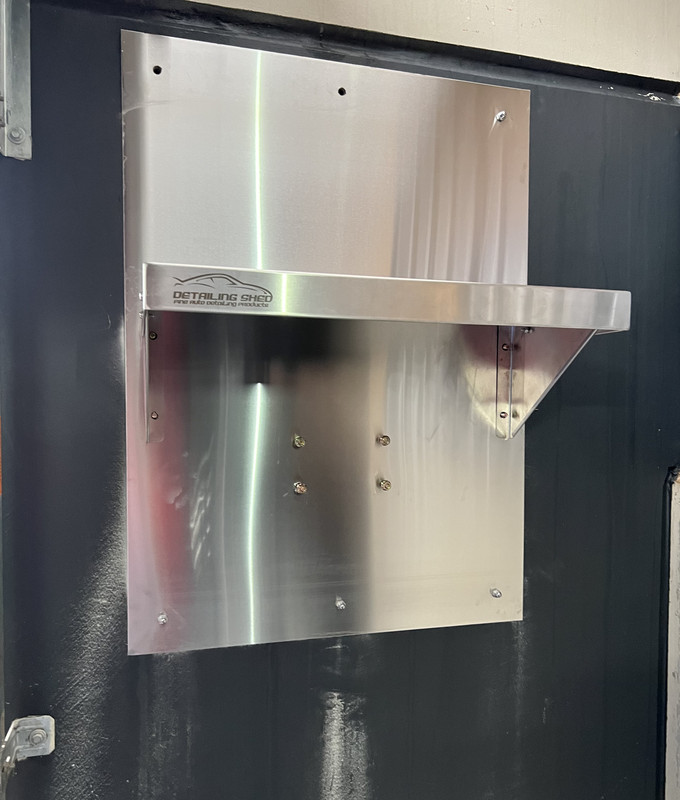
The Kranzle sits on a Detailing Shed spec stainless steel shelf. This is a three-piece design and seems to be noticeably bigger than what Obsessed Garage use for their wall mount setups. The shelf comes with mounting hardware, which are not applicable for my install.
At this point, I want to point out that despite companies like Detailing Shed offering packages to make purchasing a system easy, there is still a fair bit of work to pull it all together. I would say if you are looking to do something similar, these packages are a good launching pad, but you will still spend a lot of time searching for some of the finer details. Although, I’m particular in what I want, so I end up procrastinating more than I should.
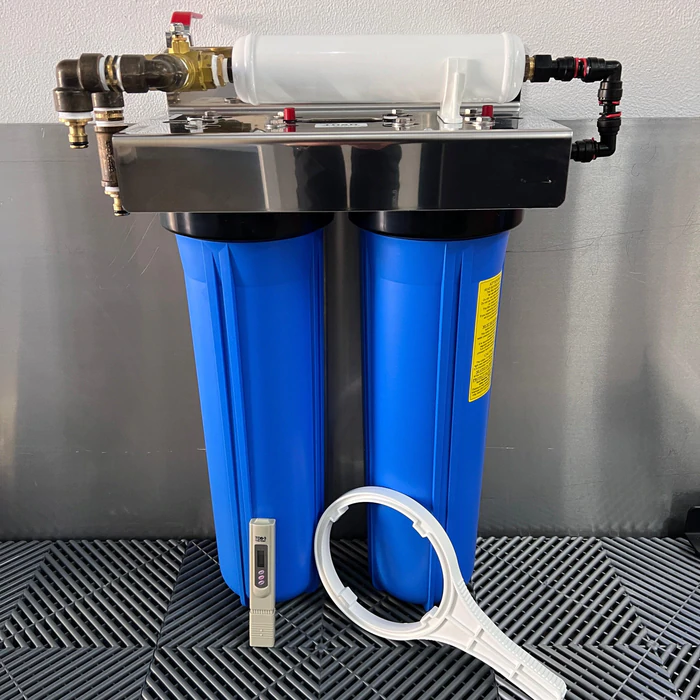
You will also note the lack of a water filtration system. Having relatively soft water, I did not see the need for the added complexity and cost this would have brought to the table. And although undeniably cool looking, I also did not need a bucket filler………….I do all that at the sink. Detailing Shed do offer filtration should you need.
The first step of my install involved giving the chosen wall a fresh coat of paint. This slate grey is similar to an existing colour used further into the garage. The wall in question was also a natural choice, being ideally located and already featuring a Mosmatic wand holder.


Due to delays with tradesman (isn't that always the case), the painting step was actually done way back on April 7 / Good Friday!
The big challenge with this install was the need to have both water and power ran to the location, both routed across the roof above the garage. If it wasn’t for the need to have an electrician and plumber involved, I would have tackled this project sooner. It also created a lengthy delay in getting this project properly underway. In fact, the plumber had promised to do the job a week after Easter. Eight weeks later, I had water………………

Power wise, I needed a dedicated 15 or 20 amp circuit to prevent overloading the machine and tripping the breaker. We have three phase power here, so that wasn’t a problem, just time and money. (At the time of writing, I'm STILL waiting for this to be done, but I cracked the sh.t's and went ahead with the install, I couldn't wait any longer!)
Because I’m dealing with pre-cast concrete walls, my installation process is a little different to most. Ideally, I would have pre-installed everything to a painted plywood sheet, making the on wall install much simpler. I tossed and turned over several different install options, but eventually went with the following –
Firstly, I decided to use a sheet metal splash back. I looked at a few different options but wasn’t happy with the quality or styles offered. I eventually chose a stainless-steel kitchen backsplash from Bunning’s. This would also become a template in which to drill the holes required to mount everything to the wall with concrete anchors. With the protective plastic still on, I laid out the system on the stainless panel, measuring and marking so everything would be aligned. It was then a matter of drilling each hole to form the template, which would act as the pilot holes when drilling into the wall. I also had to drill out the holes on the shelf to accept the anchors.


The template was then offered up to the wall, levelled, the first top hole drilled and a concrete anchor installed. I then checked the level again, drilled and secured at the opposing end. (The three top and three bottom bolts are simply for mounting of the backsplash and don't hold weight.) I now had the template secured in place, allowing me to drill and install the anchors for the hose reel and shelf. I will say, I hate drilling into concrete, especially precast concrete with reinforcement mesh and plates installed. Even with the effective engineer on site, this part of the install was not smooth sailing. Let's say, it's all good now!

This Milwaukee M18 SDS drill is the bomb by the way!

First to go on was the shelf, a dummy fitting to find the location of the Kranzle. I then marked the locations for some anti-vibration clamps to prevent my $2000 pressure washer falling off the wall.

With those drilled, I then secured the machine to the shelf. Honestly, the Kranzle is so heavy that it's unlikely to have needed this step, but I wasn't going to chance it and the install of these clips took minimal extra time. Although these will need to be removed when it's time to change the oil on the unit.


With the shelf re-installed and secured, I then installed the hose reel. The reel has slotted mounting holes, allowing you some leeway in terms of height, but also so that you have further adjustment when levelling despite the mounting holes and bolts being fixed.
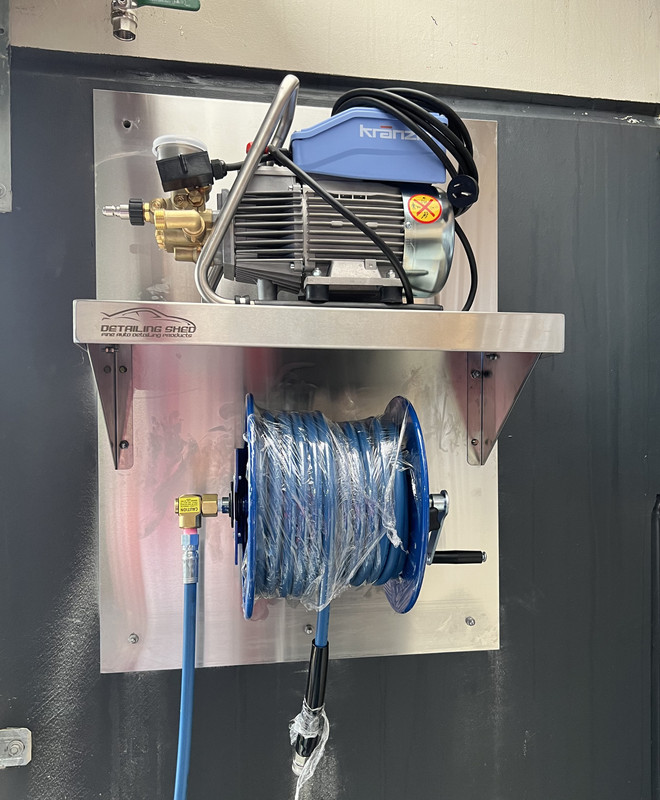
It was then time to start to make the connections. First, the 3/8 M22 twist and seal pump outlet fitting, followed by connecting the whip line to the pump. I also secured the whip line using another antivibration clamp, through an existing mounting point on the shelf. This keeps the whip line nice and tidy.

The stainless-steel pump inlet hose was next. I ended up using the longer 600mm version of the three I bought. The male end is taped and installed on the tap outlet, the female end secured to the pump using only a washer.
That concludes my end of the install, and thankfully, no leaks! Without the correct electrical outlet, I couldn't give the unit a brief test run.
One minor thing I forgot to remember was to purge the lines with water
WITHOUT the gun/wand/nozzle installed, as I managed to run some swarf through the hose and blocked my nozzle. I have heard and seen this happen before, consensus being that it's from the hose reel, which is then passed through the hose and into the nozzle. Easily fixed though.


Don't ask me what all this has cost me in the end! I stopped counting a while ago, and I still haven't seen the invoice from the plumber and electrician, not to mention all the little bits and pieces like mounting hardware, tools and various hose fittings.
This pressure washer is the culmination of several years of research and a lot of hard work to make it all possible. It looks even better than I had envisioned, and certainly worth all the lost sleep and countless hours research trying to figure out what I wanted it to look like. Final test will be once I get some power to the thing..............can't wait!
This was not a purchase I took lightly, and I knew it was going to be a major project for me, both financially and skills wise. Put it this way, I don't drink, I don't smoke, I don't go on holidays, I don't go out for dinners, I don't have children. I do however enjoy washing cars, and to me, spending money on something that is important to
you is easily justified.
With special thanks to Nick at Detailing Shed and Obsessed Garage for the inspiration


 rops:
rops:
