DFB's Garage

Well, the native pressure pump did its job! Was in and out of hospital in 5 hours, and despite the usual runaround with paperwork, I managed to hit theater at the exact time I was booked for, can't ask for more than that. Pump and tube are gone, wound finally stitched up. It felt like I took ages to go under this time, which I suspect I got dosed up more than last time because apparently it took me a while to wake up, and I still feel groggy.

Many thanks to those who reached out. I have had sick pay substituted instead of burning my leave. I needed that push because I was just going to ignore it and just focus on getting better.

I'm still a little movement restricted, but.........................LETS GET THIS SHOW BACK ON THE ROAD!
 
At the moment, I'm super keen to get this installed.................................


Compared to the S550, the added hardware on the Gen-4 Coyote means the install now includes two brackets that need to be installed, which stand the catch can off the rocker covers.

(Image courtesy of Mustang7g forum)

 
Generally not a ‘stripe guy’ but that’s pretty nice


Sent from my iPhone using Tapatalk Pro
Not a stripe guy either, but on some cars, they have their place.

Those fade stripes were the factory fit option offered in black and silver for the 2014-2017 models, not the 2018+ examples. So those on the red car would have been fitted at dealer level. The factory option offered on 2018+ cars were these.......................

...
68665f54028f7e8ba79f9f83d47cae16.jpg


Sent from my SM-G991U using Tapatalk
 
...
68665f54028f7e8ba79f9f83d47cae16.jpg


Sent from my SM-G991U using Tapatalk
I'll just smile and politely nod over that...................................I've no knowledge whatsoever when it comes to ball sports. ;)
 
I'll just smile and politely nod over that...................................I've no knowledge whatsoever when it comes to ball sports. ;)
It's the Tennessee Volunteers, college football team, ummm, our football

Sent from my SM-G991U using Tapatalk
 
  • Like
Reactions: DFB
Ford Performance Oil-Air Separator Kit Installation

One of the things I love about Mustang ownership is the huge aftermarket support for the car, allowing customers to tailor the car to their heart’s desire. Now, I normally don’t do aftermarket, so this is where Ford Performance comes into the equation. Ford recognizes the desire for high quality aftermarket parts, and so via Ford Performance, owners can buy and fit OEM quality parts without voiding warranty or looking tacky. To me, this means my car remains OEM looking, and without the janky fitment often found on aftermarket parts.

Like my previous Mustang, I’ve decided to fit a Ford Performance Oil/Air separator, or catch can. Now, there are countless aftermarket options in this space, some actually offer easier emptying via a screw-on cannister. But some of those also require butchering of the OEM hoses. So, I think you can see why I stuck with the OEM+ option here, it just fits as it should.


For S650, Ford Performance are selling this kit with a pair of catch cans, one for each cylinder bank. On earlier S550’s, only the left-hand bank was covered, although FP did offer a dual kit for Mach1 and Bullitt due to the removal of that hideous engine cover. Because of the dual cans and double the hose count, you are looking at twice the price. I was actually a little shocked by the price of this kit offered by local vendors, but once I had added shipping and currency conversion, then factored import duty, its no cheaper ordering from the USA directly.

https://www.themancavegarage.com.au...rue&sa=false&sbp=false&q=false&category_id=57
https://www.herrodperformance.com.au/2024-mustang-5-0l-air-oil-separator-kit-l-r/


Installation is easy, if someone with low mechanical confidence like me can do it, so can you. Each kit comes with a QR code that links you to the Ford Performance website, where you can then download the installation instructions. Word of warning for RHD customers, the instructions are orientated for LHD/US market cars, so take that into consideration when directed to work on the "passenger" side or "drivers" side. You will also notice differences in the pictures as the RHD cars have different placement of the battery and wiring harnesses. What you see in the following install should provide a better guide for RHD applications.

https://performanceparts.ford.com/download/instructionsheets/IS_M-6766-A50D_012524.PDF

Only basic tools are needed. I'd suggest a smaller 1/4-inch socket set, ratchet spanners and a torque wrench if you are super keen..............or super anal.....................I'll let you figure out which is me.


On S550, the catch can was attached to the rocker cover using push pins that clicked into two existing holes. On S650, the new throttle body arrangement means the catch cans need to be mounted on the body, which explains the two black painted steel brackets. Those two brackets are your starting point.

For the right-hand (driver) side, the bracket with two mounting points is used. You first need to remove the two 8mm fasteners from the grounding straps.


Using the two stud bolts supplied with the kit, install these in the same locations using a 13mm ratchet spanner. Ford suggest tightening to 12 Nm, but you will only have access to the lower stud for a torque wrench.


Next, wrangle the bracket onto the studs. I found it needed some slight persuasion to align the two bracket holes, which I suspect was due to the slight difference in RHD layout. Using the supplied 10mm nylock nuts, secure the bracket in place with a ratchet wrench. Ford suggest 10 Nm for these fasteners, but again, only the lower nut is accessible with a torque wrench.

(Apologies for this image, just couldn't get it right)


To fit the left-hand (passenger) side bracket, only one mounting point is used. First, you need to remove the wiring harness clip from the coolant tank stud. You may need to use angled pliers to help release this press-fit clip, it fought me a little.


The bracket is then slid over the stud and secured with the remaining 10mm nylock nut, again 10 Nm is the spec. On RHD cars, you will need to hold the wiring harness away with your finder to get the bracket in place and secure that nut, LHD cars don't have a harness here. You will also notice it orientates a specific way to straddle the coolant tank. I didn't photograph this, but you will see what I mean. I found a deep socket useful here, but a socket extension will work too.


With the brackets installed, you can now remove the factory PCV hoses. These are removed by pushing on the release tab and gently lifting off the spigots. Ford Performance recommend removing the engine cover to get access to the connection on the intake manifold. However, the strut tower brace makes this hard and rather than risk damaging it, I simply unclipped and raised the front of the cover enough to get access to the hose.

Right-hand rocker cover spigot -


Intake spigot -


OEM right-hand PCV hose -


The left-hand side hose is easily accessible and removed.

The following images will show the catch can slid down onto the mounting brackets prior to hose installation. You may find it easier to install the hoses first, then sliding the catch can into place, lining up the hoses as you go.

Each of the four supplied hoses are the same OEM grade as fitted on the production line and are perfectly molded for this application. No janky, ill-fitting hoses here. The hoses aren't interchangeable, but you will quickly understand which hose goes where.


For the line routing back to the intake manifold, make sure it goes under the existing rubber hose. Click the engine cover engine back in when you are done.


It's also worth going around and checking the catch can screws as mine required some additional torque to ensure tightness. You will need a T25 Torx bit for this.

From here, you are done!


Now, the elephant in the room.............are these catch cans necessary? I guess that depends on how long you intend on keeping the car and how particular you are. These catch cans stop oil vapor being deposited into the intake manifold. Some engines produce more of this oil vapor than others, especially engines that are often run at higher RPM's.............which is precisely the Mustang's MO. So, too me fitting these makes a lot of sense. On my previous car, despite only doing low kms, the engine often got a high RPM workout. The below was after 7-months....................


Not terrible, but also not something that needs to be captive in the one-piece intake manifold. If you covered more kms than me, you would likely have a lot more than that.

So, well worth doing if you intend on keeping the car longer term. And the best bit? I got to make use of those fancy tools! 😁
 
Battery & CTEK Pig Tail Installation

I'm sure many will remember this, but late into my ownership of the S550, I had a little hiccup with the battery. The cause and result were both my own and the dealers doing. Because these batteries are covered and hidden from view, an owner is less inclined to inspect for condition.............out of sight, out of mind. On the dealer's behalf, the car had been serviced a week prior to me discovering this problem. They supposed to inspect battery condition during scheduled services.............they even note it on the invoice and emailed condition report. If both of us had done our jobs, then perhaps the following wouldn't have happened.


As I said at the time, batteries have a lifespan, this one being the OEM fit and 8-years old. What pis.ed me off the most was that it wasn't picked up and sorted while I had the car in for service.................despite noting it was in fact inspected. It clearly wasn't! Not only had the battery failed here, even if it still started the car fine, it also ruined the negative terminal and my CTEK pig tail. I cleaned it up best I could, then slathered it with Vaseline until I could have the battery replaced.


I sent an expertly worded email with supporting images and highlighting of the service report to the service department. The service tech was scolded for his negligence, and I was profusely apologized to. In the end, they offered to replace the battery free of charge as a goodwill gesture, fitting a new negative terminal and pig tail in the process.

Except, that wasn't the end of it. When I got the car back, I noticed instead of washing the battery tray out, they used compressed air and showered the engine bay in potassium hydroxide. Which then involved a lot of work to remove and neutralize. Then throw in the oil they spilled down onto the exhaust manifolds during the service, they completely ruined my pristine car. That was the final straw with the dealer, I won't be going back unless I need warranty work on the S650.

As you can imagine, I don't want a repeat performance. I've since gone around and applied battery terminal protector to all my cars, as such it was the S650's turn today.

To gain access to the battery, you need to CAREFULLY remove the plastic fasteners that hold the rubber cover in place. These fasteners are fiddly and prone to being dropped into the abbis, ask me how I know this! If you do lose them, these are what you need....................

https://globaltrim.com.au/products/ford-mustang-clip-battery-cover-compartment-hold-down-7mm-dia


(S550 shown, but they are virtually the same)


From here, you have direct access to the battery. There are many terminal protectors on the market, I'm using the CRC version, which you spray directly onto the negative terminal. If you end up with overspray, a little mineral spirit on a rag will easily remove it.


While I had it uncovered, I decided now was a good time to fit a pig tail for my CTEK chargers. This is probably redundant now that Ford include a remote positive terminal next to the fuse box, but that would require using the fiddly alligator clips. The pig tail allows charging access to the battery without removal of the cover, negating the need for those alligators and can then be tucked back under the cover when finished.

In the past, I found the terminal nuts were captive, so I had to secure the eyelets with a second nut. CTEK have a version with open eyelets to account for this, but they weren't in stock for me today.

https://www.repco.com.au/globes-bat...eye-terminals-56-260/p/A9337381?kwSearch=ctek
https://www.repco.com.au/globes-bat...e-connector-terminal/p/A5611358?kwSearch=ctek


There are a few different ways to rig up a trickle charger line, some even do it via the fuse box. On all my cars, I just fit them to the terminals and have done so for a decade now.

With the cover back in place, and no lost fasteners, I decided to dress the engine bay plastics with Carpro Reload. I love Reload on trim, it adds richness to the finish without looking greasy or slick. It's also going to last a lot longer and won't attract/retain dust.


Now I just need to track down a badge for the strut tower brace. Ford were fitting them to all Mustang GT's, without one it looks very unfinished. From what I read, they stopped fitting them due to a supplier shortage, but probably more in line with saving fifty cents per car. Darkhorse still have them though.
 
Battery & CTEK Pig Tail Installation

I'm sure many will remember this, but late into my ownership of the S550, I had a little hiccup with the battery. The cause and result were both my own and the dealers doing. Because these batteries are covered and hidden from view, an owner is less inclined to inspect for condition.............out of sight, out of mind. On the dealer's behalf, the car had been serviced a week prior to me discovering this problem. They supposed to inspect battery condition during scheduled services.............they even note it on the invoice and emailed condition report. If both of us had done our jobs, then perhaps the following wouldn't have happened.


As I said at the time, batteries have a lifespan, this one being the OEM fit and 8-years old. What pis.ed me off the most was that it wasn't picked up and sorted while I had the car in for service.................despite noting it was in fact inspected. It clearly wasn't! Not only had the battery failed here, even if it still started the car fine, it also ruined the negative terminal and my CTEK pig tail. I cleaned it up best I could, then slathered it with Vaseline until I could have the battery replaced.


I sent an expertly worded email with supporting images and highlighting of the service report to the service department. The service tech was scolded for his negligence, and I was profusely apologized to. In the end, they offered to replace the battery free of charge as a goodwill gesture, fitting a new negative terminal and pig tail in the process.

Except, that wasn't the end of it. When I got the car back, I noticed instead of washing the battery tray out, they used compressed air and showered the engine bay in potassium hydroxide. Which then involved a lot of work to remove and neutralize. Then throw in the oil they spilled down onto the exhaust manifolds during the service, they completely ruined my pristine car. That was the final straw with the dealer, I won't be going back unless I need warranty work on the S650.

As you can imagine, I don't want a repeat performance. I've since gone around and applied battery terminal protector to all my cars, as such it was the S650's turn today.

To gain access to the battery, you need to CAREFULLY remove the plastic fasteners that hold the rubber cover in place. These fasteners are fiddly and prone to being dropped into the abbis, ask me how I know this! If you do lose them, these are what you need....................

https://globaltrim.com.au/products/ford-mustang-clip-battery-cover-compartment-hold-down-7mm-dia


(S550 shown, but they are virtually the same)


From here, you have direct access to the battery. There are many terminal protectors on the market, I'm using the CRC version, which you spray directly onto the negative terminal. If you end up with overspray, a little mineral spirit on a rag will easily remove it.


While I had it uncovered, I decided now was a good time to fit a pig tail for my CTEK chargers. This is probably redundant now that Ford include a remote positive terminal next to the fuse box, but that would require using the fiddly alligator clips. The pig tail allows charging access to the battery without removal of the cover, negating the need for those alligators and can then be tucked back under the cover when finished.

In the past, I found the terminal nuts were captive, so I had to secure the eyelets with a second nut. CTEK have a version with open eyelets to account for this, but they weren't in stock for me today.

https://www.repco.com.au/globes-bat...eye-terminals-56-260/p/A9337381?kwSearch=ctek
https://www.repco.com.au/globes-bat...e-connector-terminal/p/A5611358?kwSearch=ctek


There are a few different ways to rig up a trickle charger line, some even do it via the fuse box. On all my cars, I just fit them to the terminals and have done so for a decade now.

With the cover back in place, and no lost fasteners, I decided to dress the engine bay plastics with Carpro Reload. I love Reload on trim, it adds richness to the finish without looking greasy or slick. It's also going to last a lot longer and won't attract/retain dust.


Now I just need to track down a badge for the strut tower brace. Ford were fitting them to all Mustang GT's, without one it looks very unfinished. From what I read, they stopped fitting them due to a supplier shortage, but probably more in line with saving fifty cents per car. Darkhorse still have them though.
Why ford continues to mount ground straps to painted surfaces is beyond me. It is common knowledge you need bare metal to metal contact for an optimal ground.

On my focus there are many complaints of the DCT being jerky and sluggish overall. I even installed a pedal tuner to combat this issue. Turns out one of the culprits is the battery ground strap is grounded to a painted surface and not bare metal. Ended up cleaning off the paint on the mounting surface and it's like a night and day difference. The car runs much smoother. Blew my freaking mind.
 
With your weather, I wonder how much gets collected in the catchcan? How often/much did the S550 produce?

Sent from my SM-G991U using Tapatalk
 
With your weather, I wonder how much gets collected in the catchcan? How often/much did the S550 produce?

Sent from my SM-G991U using Tapatalk
I fitted that catch can on the S550 in October 2021, in the three years I had it on the car I only "emptied" it twice. The first time was 7-months later and oil was minimal. I then made sure to crack it open and clean it out before trade last month, again a similar amount. Keep in mind I don't do many miles, but then I also like to give the engine a good workout. As for temps, I'm not sure that matters as the oil temps are regulated by the cooling system. Having said that, I found it interesting to see how heavy throttle applications and high revs bump up the oil temps.

This was 7-months worth.........................


Not a lot, but that all ends up back in the intake manifold, some of which will be burnt, which is not ideal for a variety of reasons.
 
Finally getting to wash cars again!

Washing the Ranger was the last thing I did before heading to the doctor, then being sent to hospital on November 6th. And even then, I didn't get to finish the job. It was then lent to my father to move a two-piece sofa, so it was covered in bugs and traffic film from wet roads last week. So, yes, it was bugging me.

Adam's Mega Foam was the soap of choice, which I also used on the wheels, Brake Buster for the tyres. I was then dried with Clean Maker, Gyeon Quick Detailer for the door jambs and tray, Bilt Hamber Traceless for the glass.

For the interior, I wanted to go a little deeper than the usual wipe over with a detailer. The drivers floor mat was cleaned with McKee's and the Detail Factory Tire Brush. I then used P&S Xpress to lightly scrub the door panels, steering wheel, gear shifter and lower scuff panels, the rest was wiped over with a towel. I don't normally do this, but today I followed with Koch Chemie Top Star, probably not a bad idea now we are approaching summer UV levels.


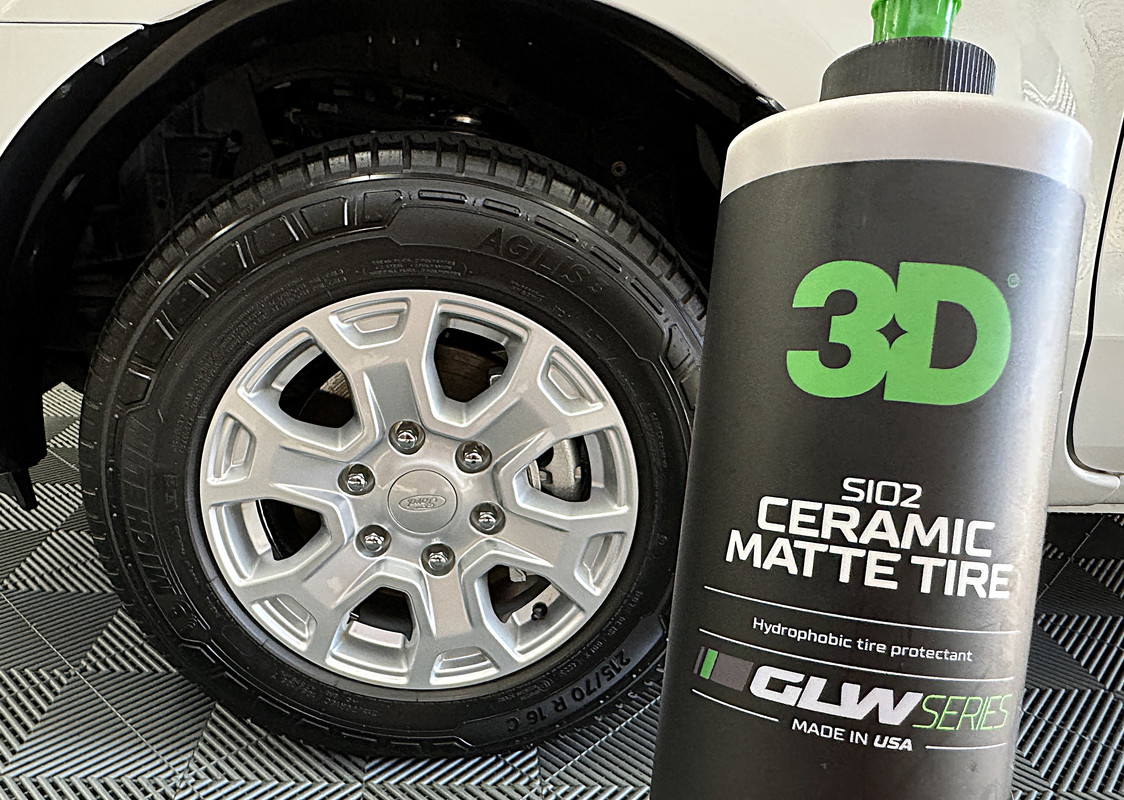
Dressing the tyres, I chose 3D Cermaic Matte Tire. This creme like product spreads easily, so a little goes a long way. It's also easy to achieve that subtle enhanced look without gloss, a follow up wipe levels it even further. It smells lovely too. Certainly a sleeper product.


I'm also driving cars again! 😁 You know how it is, there is always something you forget to pick up from the shops! ;)

 
I went to Repco today, to just wander around and not buy anything, but just after I parked, an XR6 drove in, identical to yours, same colour, same wheels, and it was in very nice condition, of course it wasn't a young guy driving it. I watched as he looked at the empty spot next to me, and then looked at the tradies ute parked on the other side, and drove off and parked at the far end of the lot, where no one else was parked, fair enough.
 
I went to Repco today, to just wander around and not buy anything, but just after I parked, an XR6 drove in, identical to yours, same colour, same wheels, and it was in very nice condition, of course it wasn't a young guy driving it. I watched as he looked at the empty spot next to me, and then looked at the tradies ute parked on the other side, and drove off and parked at the far end of the lot, where no one else was parked, fair enough.
I'd say he played that well then! ;)
 
Heart & Soul!

There are a few prerequisites for me to like a car. Those would include exterior styling, exterior colour, the transmission type and, crucially, the engine and how it sounds. Ever since I helped my dad rebuild the engine on the lawn mower, I’ve been obsessed with engines, how they work, how they sound. And when it comes to cars, I probably choose the engine over the car itself.


I like a variety of different engine layouts. I love the off-beat thrum or a 3- or 5-cylinder engine. Inline 6's have a special place in my heart, especially that manic BMW E46 M3. The VW VR6 and Alfa Busso V6's sound amazing. That loping wail of an Aston Martin V12 will always be a favorite. But, having grown up in Australia, the V8 has always been the holy grail, so guess I followed true to type.

I didn't own a V8 until 6 years into my driving career, prior to that I was more of an inline 6 kind of guy. My first V8 was 5.6-litre Windsor V8 in a 2002 T3 TS50. That engine sounded like a good old fashioned muscle car, raw and rough around the edges. Glorious in other words!


I traded that car for my second V8, a 2014 FGX Falcon XR8. While this engine doesn't have the that glorious blood'n'guts wail of the Windsor V8, the Miami has an intoxicating blend of Cleveland V8 crackle mixed with delicious supercharger whine. Oh, and it goes like the clappers!


My third V8 was a Gen-2 Coyote in the S550 Mustang. In classic 5.0-litre capacity, while this engine was heavily choked by the standard AU-spec exhaust, with an aftermarket cat-back it sounded glorious. I love naturally aspirated engines, in particular the throttle response and crisp induction noise. Everyone focuses on the exhaust note with V8's, but the Coyote has lush induction noise as well. It’s also such a rev-happy engine, one that really loves winding out to the redline.


And my fourth V8? Well, that is sitting in my garage right now, the latest version of the Coyote V8. Because I skipped the Gen-3 Coyote, stepping into the S650 Mustang GT is quite the upgrade compared to its Gen-2 predecessor. While the basic bones are the same, there are quite a number of differences here, to the point where some backstory is required.


In 2010, Ford redesigned the modular V8 to create a thoroughly refreshed and simplified V8 engine lineup. While the old 5.4 continued in the Mustang GT500, gone where the multitude of 4.6 and 5.4 V8 engine variants, differentiated by cylinder head and valve count. Certain aspects were carried over to utilize existing modular factory tooling, for example the bore spacing, deck height and bell housing bolt pattern. The firing order was also changed, from the 1-3-7-2-6-5-4-8 of the older modular, to 1-5-4-8-6-3-7-2 shared with the Ford Flathead V8. This explains why the Coyote sounds very different to those 4.6 and 5.4’s and produces a sharper/raspier note. Overall, the new 5.0 Coyote represented Ford throwing all the good bits in the pot, adding some herbs and spices, stirring, then dishing out a very tasty meal! No more low spec V8’s, the Coyote had it all!


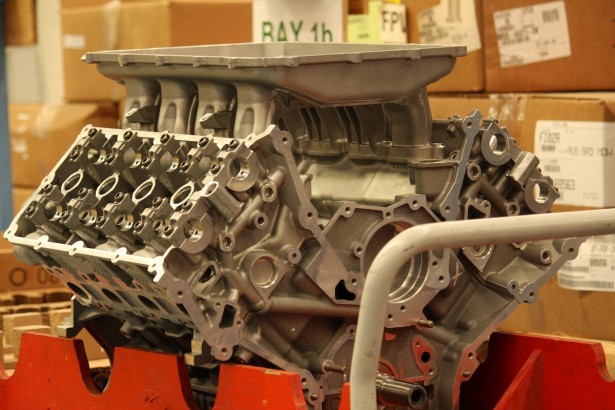
At it's core, the Coyote is an all-aluminum quad-cam V8 with four valves per cylinder and independent variable valve timing for both inlet and exhaust camshafts. The heads were new and featured different camshaft location to the older 4V heads. And it’s the Ti-VCT system that most differentiated the new engine over the older DOHC modular V8’s. Those 4V engines never got VCT and needed a supercharger to flesh out the low rpm torque. Anyone who has driven a 5.4 BOSS will know what I mean here.

The early examples of this engine are now known as the Gen-1 Coyote and were fitted to the F-150 and late SN197 Mustang.


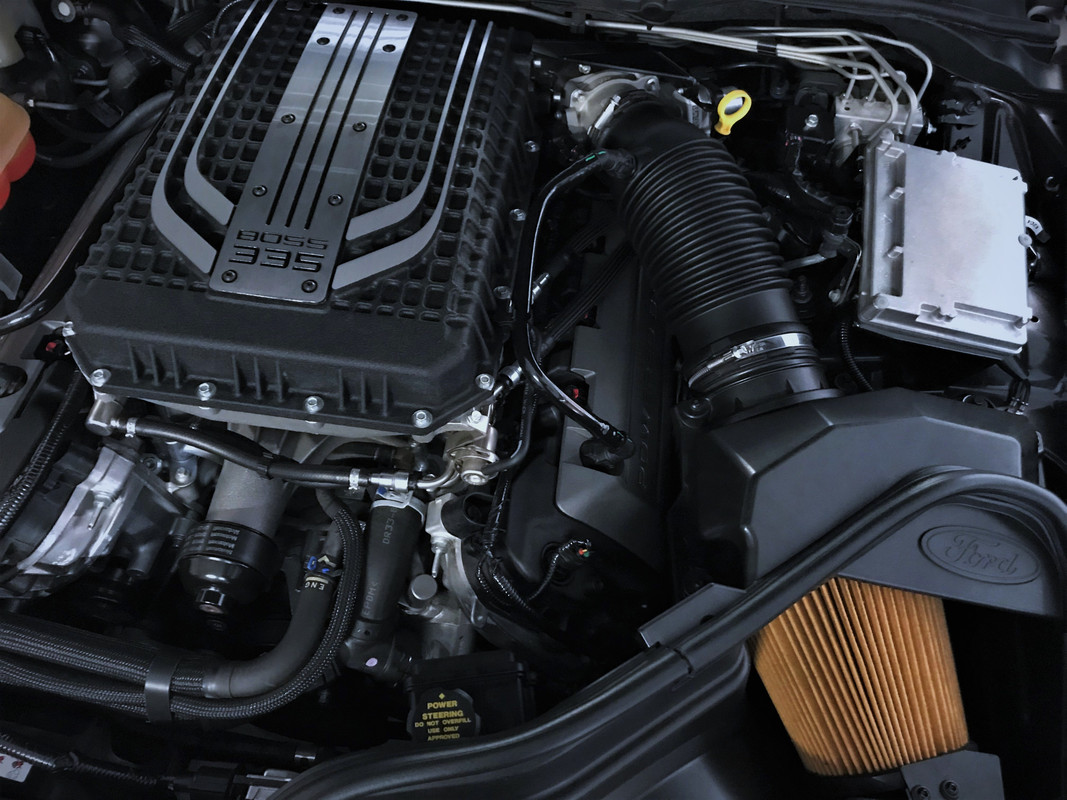
The Gen-1 Coyote also provided the basis for the FPV Miami V8, a $36-million development. These used common block and cylinder heads, combined with a variety of locally sourced parts to create a unique package, the first factory supercharged Coyote in the world. Interestingly, the carry over Falcon powertrain control module did not have enough inputs to support the DI-VCT system, so only the intake camshafts are variable on a Miami, the unused exhaust side simply capped off with a rubber boot.

More here -
Ford Miami V8 Engine: Boss 315, 335 and 351 – Australian Car.Reviews


For the S550 Mustang, Ford implemented several improvements to boost power and torque, with these engines considered the Gen-2 Coyote. Revving to 6800 rpm, I always felt like the rev-limiter stepped in far too early, such was the rev happy nature of this engine.


The Gen-3 Coyote represented quite the upgrade. Instead cast cylinder liners, Ford switched to Plasma Wire Arc Transfer liners, in the process bumping the cubic capacity from 4951cc (302ci) to 5035 cc (307ci). Also new, Ford installed direct injection, while keeping the traditional port injection. The concept here being the direct injection provides low rpm fuel economy, while the port injection maintained top end power. Keeping the port injectors also helps prevent the buildup of carbon. There were new camshafts, larger valves and a revised intake manifold. Compression ratio was also bumped via new raised dome pistons, and the oil pan was changed from steel to composite. Power and torque improvements were quite noticeable, as was the new 7500 rpm rev limit. This gen also had the hideous flying saucer engine cover in an attempt to cover up all the DI hardware and clatter.


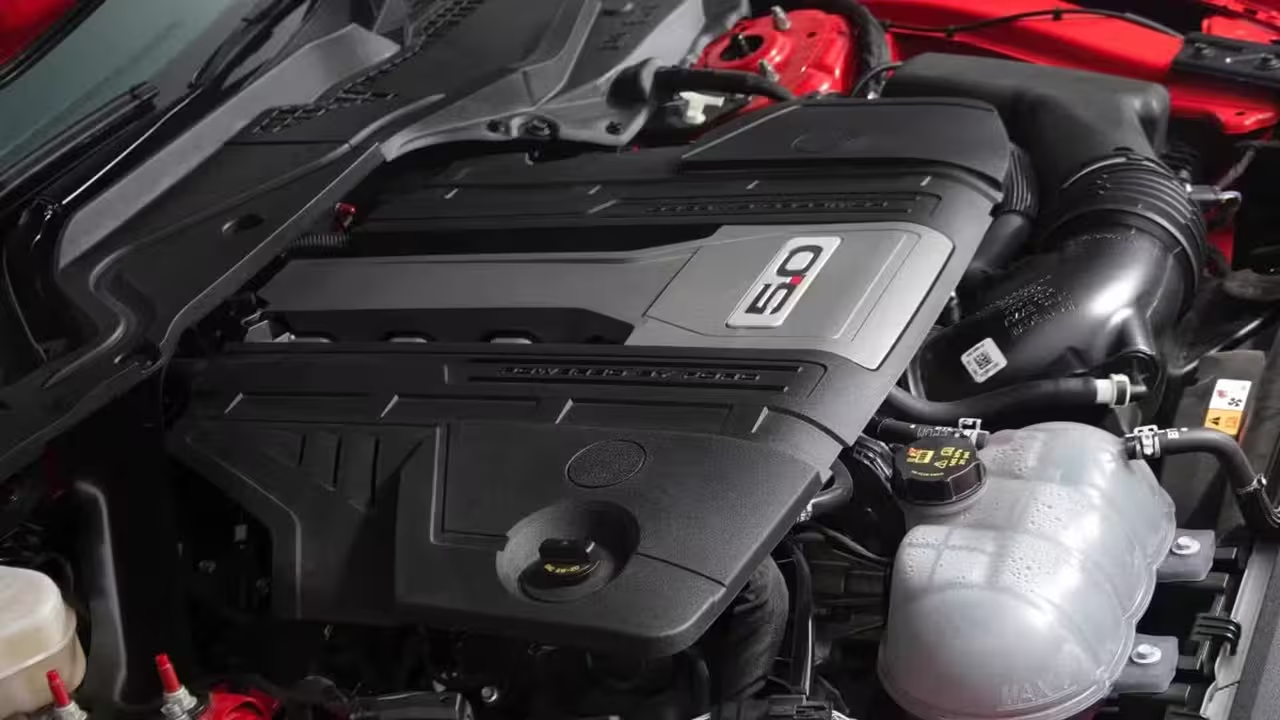
For Gen-4, it was about finessing the details. Ford revised the exhaust manifold, introduced a new intake system with dual 80mm throttle bodies and the oil pan was returned to steel, presumably to suppress the BBQ tick. Darkhorse models got revised camshafts and forged connecting rods from the GT-500. Power and torque were boosted to 480, 486 with the Active Exhaust and 500 hp for the US-market.

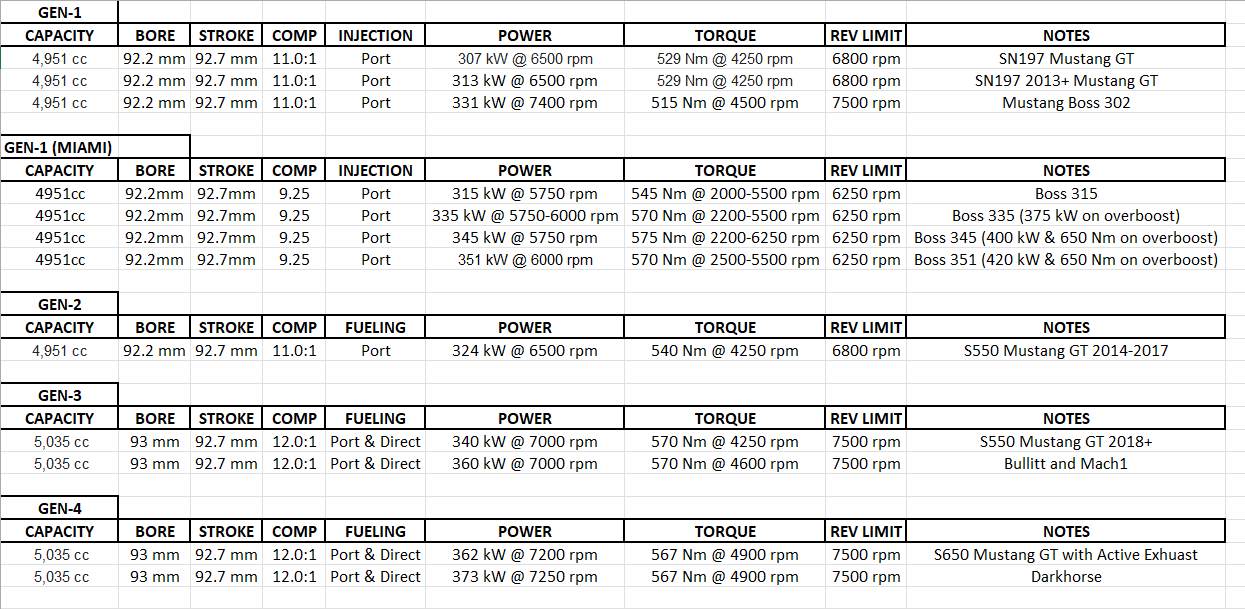
To show the evolution of specs from the Coyote’s introduction to this day, I created a spreadsheet. Note that I’ve used the US-spec performance numbers for the Mustang. While there was some power loss for RHD due to different exhaust headers, the differences between US and AU power figures is due different measurement standards, the AU numbers don’t do justice to the improvements Ford made over the years. For comparison, I've also included the Miami figures.


To be continued...............................
 
Heart & Soul Continued.........................

So why do I love this engine so much? Because Ford still makes it! Instead of downsizing and adding their EcoBoost technology, they have kept the Coyote naturally aspirated. Sure, there are more potent V8’s on the market, but they are at the very least twice the price, not to mention sound absolutely terrible. I CAN NOT stand that horrible synthesized buzz pumped into the cabin of a BMW M 4.4 V8, or the muffled fart noises coming from a 4.0 AMG V8. The sounds coming from the 5.0 Coyote V8 are all natural and authentic.


Staying naturally aspirated, there is a crispness to the induction note with the Coyote. On the outside, it sounds absolutely horny as it charges towards you, and from behind the wheel, I love how it barks back through firewall. The Active Exhaust may be tuned via valves and software, but the sound is pure, crisp and as loud as it should be. For S650, it will give the occasional pop on overrun, but there is none of the tacky AMG farting going on here.


A lot of first time Mustang owners who came out of high-performance Falcon’s would complain about a lack of torque. The reality is, the torque was there, you just had to rev it harder to achieve it. From my perspective, we were spoiled with those turbo and supercharged Falcon’s, they were torque monsters. The Coyote on the other hand loves to rev, and to me, that makes it more rewarding to drive. I have yet to fully wring the S650’s neck, but there seems to me more low rpm torque compared to my old Gen-2 Coyote, and with the short gearing, it feels faster and more urgent.


As I endured the 2-year wait for this car, many suggested I cancel the order and supercharge my S550. To me, that car was more than powerful enough without throwing a blower into the equation, in the process muffling that induction note I so loved. And including the fact I already had a supercharged Coyote in the XR8, I just didn't see the point.

I think what I was anticipating most about this new car was the engine, in particular the higher rev limit and amazing Active Exhaust. And so, sticking to the "plan", my reward is a great sounding engine that has not disappointed.

To close, this video sums up why the V8 is the holy grail for many car enthusiasts.

 
Oh, and if you wonder why I have been splitting these posts into two, there is a 1000-word and 20-image limit per post with this new forum software.
 
Back
Top