DFB's Garage

Wash day on several fronts today.

First, my little man was off for a bath and haircut..........................


Next up, the XR6.............................


Shine Supply Wise Guy on the tyres, then Shine Supply Shift for the wheels and paint. Drying Aid was ADS Amplify, interior wiped over with ADS Pilot, glass via Gyeon Q2M Glass and tyres dressed with Auto Finesse Satin. Covered up, it was time to move on.

For the Mustang, this was wash number four, and the second since the coatings went down on the paint and wheels.


A little post wash rinsing action for you....................


Wise Guy was again used on the tyres, but I switched to Carpro Reset for the wheels and paint. Drying aid was also ADS Amplify, switching to ECH20 for the door jambs and engine bay. With the hood vent on this car, I've found there is a lot of extra water to mop up in the engine bay after washing. Amplify also went on the wheels before dressing the Michelin's with OG Tire Dressing. The interior only needed a wipe over with a damp towel, then a quick vac of the carpet mats. Invisible Glass for the windows.

While I have ordered a new one, it's interesting to note that the S550 cover will fit the S650 to perfection. This particular one is the CoverCraft FormFit, which I got while they still had an Australian agent.

CoverCraft -
Covercraft Custom Form-Fit Car Cover


The new one I have ordered from Purefit, who were actually the old CoverCraft agent, so the new ones are virtually the same thing. I will say though, the Purefit website is woeful with several bugs, and even after contacting them, the owner clearly doesn't notice these bugs. So, be careful when ordering.

2023-2025 Ford Mustang Coupe GT + aerial 2 mirrors (no wing) Purfit In – purfitcovers.com
I was thinking on this post this morning, trying to come up with something humorous along the lines of "be careful of your knock sensor with all that water getting in through the hood vent", sorry Roger if you read this. But I actually have a suggestion, maybe put an old, but absorbent, towel under the vent, or even something like the old sham-wow, to avoid too much water getting in there and doing who knows what.
 
I was thinking on this post this morning, trying to come up with something humorous along the lines of "be careful of your knock sensor with all that water getting in through the hood vent", sorry Roger if you read this. But I actually have a suggestion, maybe put an old, but absorbent, towel under the vent, or even something like the old sham-wow, to avoid too much water getting in there and doing who knows what.
Great idea, I've got plenty of towels! :ROFLMAO:

 
I was thinking on this post this morning, trying to come up with something humorous along the lines of "be careful of your knock sensor with all that water getting in through the hood vent", sorry Roger if you read this. But I actually have a suggestion, maybe put an old, but absorbent, towel under the vent, or even something like the old sham-wow, to avoid too much water getting in there and doing who knows what.
It's all good Dave and your ideas worth a try

Sent from my SM-G991U using Tapatalk
 
Made the two-hour trip to Melbourne this afternoon, tomorrow is my Advanced Polishing Clinic with Sandro at Waxit. The class starts at 8.30am, so I didn't want to be up early to drive, then the training session, then make the trip home.........................would have been a big day, so I booked a hotel a 10 min drive from Waxit.

I'm not a confident long distance/city driver, and its been more than 4-years since I last drove to Melbourne. It poured rain for a large portion of the drive, then I nearly got side-swiped by some halfwit at 60 mph on the four lane hwy leading into Melbourne, cue full panic braking and screeching tires. And there was no way I was driving my new car either, I was stressed enough as it was without having to be paranoid about the car that took me so long to get. The Ranger is on the border line of being uncomfortable for long distance drives, especially on the disgraceful state of Victoria roads.
 
Be safe Deyon

Can't wait to see the pics from this, Sandro is such a positive person in this hobby of ours

Sent from my SM-G991U using Tapatalk
 
Made the two-hour trip to Melbourne this afternoon, tomorrow is my Advanced Polishing Clinic with Sandro at Waxit. The class starts at 8.30am, so I didn't want to be up early to drive, then the training session, then make the trip home.........................would have been a big day, so I booked a hotel a 10 min drive from Waxit.

I'm not a confident long distance/city driver, and its been more than 4-years since I last drove to Melbourne. It poured rain for a large portion of the drive, then I nearly got side-swiped by some halfwit at 60 mph on the four lane hwy leading into Melbourne, cue full panic braking and screeching tires. And there was no way I was driving my new car either, I was stressed enough as it was without having to be paranoid about the car that took me so long to get. The Ranger is on the border line of being uncomfortable for long distance drives, especially on the disgraceful state of Victoria roads.
I've driven in Melbourne a few times, and I much prefer it to driving in Sydney, where I grew up, and learned to drive. That should tell you something about the drivers and roads in Sydney. The only sketchy thing in Melbourne is the trams, and those stupid J turns. One time I actually called in at Waxit and bought some stuff, and they gave me some free samples when they heard I'd driven down from Sydney, even though it wasn't just to go there, that trip was in my SV6 from memory.
 
Changing gears today..........................


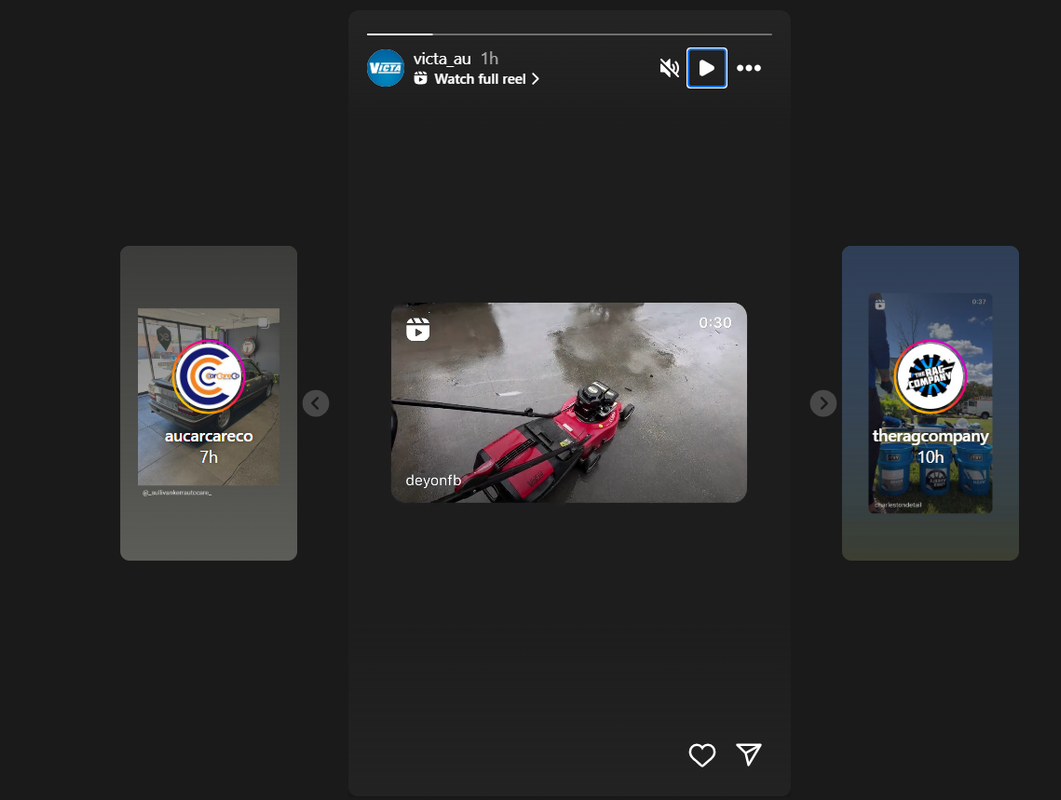
I have been planning this project for nearly a year, and I've had the parts sitting in the cabinet for months. This engine is off my very first lawn mower, one that made me a fortune over the years. It's been a smoker for a while now, so I thought I would have a go at re-ringing it. Not going to lie though, I've been apprehensive doing this.

First up, I disconnected the throttle cable. On this era of Victa, the Briggs & Stratton engines had an alloy adaptor ring that sits between the deck and sump. This helps space the crankshaft to the correct height and accounts for the different mounting points between Briggs and the Victa engine. Removing the blade carrier first, you then remove the three bolts that secure the engine and adaptor ring to the chassis.


I then drained the oil and fuel from the engine.

I have to admit, the next step nearly had me backtracking and putting the project on ice. That next step being the blade disk boss that is press-fit onto the crankshaft. There are two ways to remove these, by hammer or puller. However, I don't have a vice or anvil to support the crankshaft to "shock" it off via hammer. So, I needed a puller. I had actually planned on buying a puller, but for some reason didn't bother. So, off I went to Total Tools to buy a puller.


Then, after a little bit of stuffing around, I was ready to quit. But, after consulting Youtube and a change in technique, the blade boss slid off the crankshaft as easy-peasy! I have said this before, but Youtube is such a brilliant resource for learning. At one point, I thought I was going to have to introduce heat, but not something I wanted to do for obvious reasons.


From here, things went relatively smooth. After cleaning off the 23 years' worth of crud from the underside of the engine, I then cracked the sump bolts loose. I then lightly tapped on the sump, which slid easily down and stopped. So, I tapped the sump back in place and lightly scuffed the crankshaft where the blade boss had been, the sump then slid off with ease. I then removed the cylinder head, making sure to keep track of the bolt locations as there are longer versions for around the valves. I then removed the oil slinger, cracked the conrod bolts, tapped off the cap, then pushed the piston out of the cylinder.

It was then clean, clean, clean. Starting with the piston, I removed the old rings, then started removing the buildup of carbon on the crown. Because of the oil consumption, there was also significant carbon deposits on the cylinder head and valves, the crankcase and sump were surprisingly clean, a testament to frequent oil changes. I then removed the old gasket material off the head and sump mating surfaces, followed by cleaning everything with kerosene and set aside ready for reassembly tomorrow.

The piston has some very mild scoring, but they are smooth and won't catch a fingernail, the cylinder likewise. There was plenty of blowby on the piston though. To be honest, I wasn't expecting anything more than that, the engine always had plenty of fresh oil in it, so the wear on the piston and cylinder is from use, not abuse.

Having done all that, I'm still apprehensive about the end result. At the very least, I'll be happy to have the engine back together and running, but ideally, I hope to have cured its smoking habit.
It can smoke, it's certainly old enough. ;)

Great job. Thanks.
 
  • Like
Reactions: DFB
Ok, so WOW! What a positive experience today was. I'm very tired, but at the same time quite pumped!

It's been said that the Australian detailing industry has a severe lack of training avenues when it comes to helping upskill and further budding detailers, or even for those like me who live and breath this industry as a extreme hobby. The body shop industry certainly has avenues for training, but that is quite a different trade entirely. So for detailing, you either teach yourself, or go and work for someone who can guide you along. Me personally, up until today, I've been 100% self-taught, aided in the last decade by Youtube and online forums.

For a few years now, I have eyed off the training workshops offered by Waxit. As far as I can see, other than the occasional brand event offered elsewhere, Waxit seem to be the only ones offering such avenues for training and upskilling. The training sessions started about seven years ago with just one singular class, but it has built and built since then to the point where they now offer nine different classes several times a year, catering to the beginner right up to the pro.

The classes range from basic detailing skills and polishing to advanced polishing and detailing, basic and advanced interior detailing, ceramic coatings, authorized installer accreditation, they even now offer PPF preparation and installation workshops. Other than the PPF classes, each workshop is run by Sandro from Car Craft Auto Detailing. Not only is Sandro one of the best detailers in the country, but he also has the best Australian-based YouTube channel of the same name. I'll cover this later, but the chance to meet Sandro, someone who is highly respected in the detailing world, had great appeal too.

(3) Car Craft Auto Detailing - YouTube

For me, it was the paint correction side of things I wanted to hone. I've been machine polishing for more than a decade now, self-taught via my little Concourse Polisher that was sold via Waxit as a beginner's kit. After chatting with Sean from Waxit, he confirmed that I would be best to skip straight to the Advanced Paint Correction 202.


The basic class is more of an introduction to random orbital (DA) polishing, the advanced class looks beyond that to higher levels of paint correction, wet sanding and exploration of different machine types. With my leave approaching a few months ago, it was now or never, so I took the plunge and booked my spot in the latest round of workshops starting late November.

For the Advanced Paint Correction 202, the class is made up of five students, giving each plenty of one-one with Sandro. Proceedings start with usual introductions in the classroom, then an outline of the day's activities. For anyone who watches Sandro's videos, the following shots will look familiar. The Waxit warehouse is the location for the training sessions, but also the studio where Sandro makes his videos. Sandro doesn't necessarily work directly for Waxit, but works with them to deliver these workshops and help test new products and tools.


It was also great to see the inner workings of a company I have been buying from for more than a decade. I would love to work there, even if the place has a lingering scent of iron remover.


After an introduction to the pads, compounds and machines at our disposal today, it was into action. All pads today were from ShineMate, which included foam, wool and microfiber pads. Compounds were mostly Scholl, with a couple of NV and Rupes on hand too. Machines included ShineMate and Rupes, they even had a gear-driven Mille on hand.

Where the Random Orbital Clinic is taught around test panels, the Advanced workshop uses an actual car, in this case a Waxit employee's Subaru Forrester. We were then given a demo and explanation as to why taping is so important, then set about getting the car taped up. I always thought I was pretty ordinary with my taping skills, it's a job I hate doing, but it seems I did pretty well when compared to Sandro's work and the other students. Sandro, of course, makes it look easy.


After a tea break, it was then time for measuring the paint depth. I've never seen one of these in action before, and while not a 100% indication of the paint you have to work with, its an important tool for discovering potential resprays or areas thinner than expected.

Up next, a wet sanding demo on a test panel, something I have never done. In this case, Sandro went over the various methods for sanding deeper scratches and etchings that otherwise wouldn't be removed via polishing alone. Both machine and hand sanding techniques were covered, followed by refinishing the sanded section via polishing. While I would still be apprehensive, I feel like I could tackle this myself now.


That same test panel was then used to demonstrate each student's technique using a dual action and rotary polisher. This was more about showing Sandro where he could help us improve. Me? I move too quickly, which I already suspected, but its good to have it confirmed. Apart from 1-inch pads on my iBrid Nano, this was the first time I have used a rotary polisher. The machine in question was a 6-inch ShineMate battery powered machine, and as I suspected, I didn't like it. Some of that will be a lack of experience, but I didn't like how it would steer itself with even the slightest movement and needed constant adjustment. And that was on a completely flat panel, on a door with plenty of curves, it would be nightmare.

The lunch break was quite insightful too. Mainly because for the first time in my life, I had five other people in the room who were as into detailing as I am. The chat wandered from talking about polishing machines, to chemicals, to distribution and pricing concerns, and cars in general. Actually, one of the students recently had to turn down work on a brand new black Mustang Darkhorse, the paint quality was full of solvent pop and nibs that he refused to work on it and that the customer should be perusing it with Ford. While both of my Mustang's have had a few factory installed blemishes, they were nowhere near the bad stories being told today about Mustang paint, and that included Sandro.

After lunch, it was time to get on the tools. First up, a test section demo by the master. In most cases, Japanese paint, and Subaru's in particular, are known to be soft. But this car needed quite a bit of aggression to remove car wash swirls and a smattering of random isolated deeper scratches (RIDS). In the end, the combination of a 5-inch ShineMate battery machine, ShineMate yellow foam cutting pad and Scholl S2 Black was needed. Each student was then assigned to a panel to correct, then allowed to select the machine, pad and compound they wanted to use. With Sandro insisting on a 95% correction, mainly to assess our skills and ability, we were then left to get on with it. Sandro then moved from student to student to guide where needed, make suggestions.

A variety of ShineMate and Rupes machines were on offer, and it was interesting to see where others gravitated towards. One guy found the battery placement a hindrance and therefore went with a corded ShineMate. Another wanted to experience rotary. Myself, I went with an old favorite, the ShineMate EB351-15, then decided to try out some of the machines that I don't currently have. The first being the Rupes HLR75, which is their battery powered 3-inch. I also wanted to try out the ShineMate EB210 with the swappable heads. I then started with a combo I have used before, a blue ShineMate pad and Scholl S20 Black, but ended up needed the S2 and yellow pad.

One of the main takeaways for me today was that, in the past, I have probably been way too conservative with my choices of pad and compound. In this instance, what is normally a decently aggressive compound and pad choice actually finished out to near perfection as a single step when used with a DA machine. The guy working next to me did his panel with a rotary to cut, then went back with a lighter pad and polish to remove the holograms installed on the first step. I'd say his panel probably had some additional clarity at the end, but obviously required more work, more pads and more compound to achieve what I did with a single step.

After finishing our panel, Sandro then inspected our results, my panel meeting with his approval. The tape was removed and the car wiped down with IPA.


To wrap up the workshop, it was back into the classroom for a final Q&A and presentation of our certificate.


To be continued....................................
 
Advanced Paint Correction Workshop continued...........................

As much as anything, I think what I enjoyed most about today was being able to discuss various detailing related topics that I wouldn't always have an outlet for in person. By far the most popular topic today was machine choice and technology, especially Sandro's insight into where the major players sit at the moment. And by far, other than me, everyone gravitated towards the ShineMate machines. The Rupes iBrid was temperamental today, and while the HLR75 had oodles or torque, it was noisy and the speed control clunky. Everyone universally liked the new EB210, although I found it hard to modulate speed.

While still on ShineMate, put it this way, if you have a ShineMate or are thinking of getting one, well it seems the brand easily outshines the bigger brands for reliability and performance. And when you consider the short window of operation with the Rupes stuff, pad stall/pad sensitivity/compound sensitivity/battery stamina ect, the ShineMates just work! It also sounds like ShineMate have some new products in the pipeline that sound very promising. And on that, I noticed quite a few new, yet to be released products hanging around....................hey, I'm an observant type of guy.

On the product side, finally, I have an explanation as to why I have always struggled with the UK brands................ I thought it was only me. It would seem most of the UK stuff is based around UK climate, in other words, they just don't work in the Australian climatic conditions, ie summer heat and humidity. And finally, I have met someone who agrees Meguiar's products are massively overpriced in Australia. That also lead to a discussion on the local distribution of Rupes and Koch Chemie brands, and how poor management is simply pricing the out of the market. It was agreed that the products are great, but just too expensive. I've stopped buying GSF for that reason.

And finally, it's not often you get to meet a hero, and even less often to have that hero turn out to be exactly who you thought they were. Sandro is one of those rare hero moments. He is exactly the same in person as he comes across in his videos. He is a gentle and kind man that is a natural born teacher. It's also fascinating to watch someone at one with his craft, his movements are so natural and skillful. So when you combine that skill with natural teaching ability, you can only but learn from the man.

As everyone else left, I just knew I had to thank him for his content, that I had learned so much from just watching and listening to him. For me, what I have learnt most over the years from him has been his methodical, multi-faceted approach to decontamination. Because ultimately, those steps prior to a polisher even hitting the paint play a huge role during polishing, and the overall finished result.

I'll be honest, I did feel a bit apprehensive while polishing today. Put it this way, no one has really ever seen me using a polisher before, so I felt very self-conscious. As I watched the guy next to me skillfully complete his panel to perfection with rotary machines only, I actually felt I was struggling. Well, according to Sandro, I have the temperament and skill to be doing 95% corrections if I ever chose to follow that path. As he acknowledged, and I agreed with, that temperament can be a blessing and a curse when chasing such perfection. But the takeaway for me during this one-on-one interaction was that I was actually doing better than I thought................my natural self doubt has always held me back. So while I learnt plenty today, I feel like it also confirmed a lot of things too.

Now the question is, which car will be next in line for treatment? 😁
 
Sounds like you had a very good day. About 16 years ago I did a day course with CCP, it was basically a beginners course in how to do things properly, and what to look out for, it was hands on as well, but they asked one of the attendees to volunteer their vehicle, and you know, I can't even remember what it was. It was also about getting us hooked and securing regular customers, but I really enjoyed myself, everybody was there to learn.
 
  • Like
Reactions: DFB
Deyon, while we only read and look at the pics you post I have NO DOUBT you'll hit that 95%, that other 5% would be damn near impossible to see, maybe Sandro or Pan could see it (just kidding about Pan ) so you forge ahead and do what YOU do

I'm also glad Sandro was the exact person you see and hear in his videos, I knew it

Sent from my SM-G991U using Tapatalk
 
  • Love
Reactions: DFB
Hey Deyon, your favorite artist sang at the Macy's Thanksgiving Day parade today! Tried to find her performance but it wasn't up yet

Sent from my SM-G991U using Tapatalk
 
In limbo at the moment. I'm trying to fit in a few gardening jobs and line up a few days to hook into my next project. But with all the rain that's been falling, that's been a challenge. I'm also exhausted again.

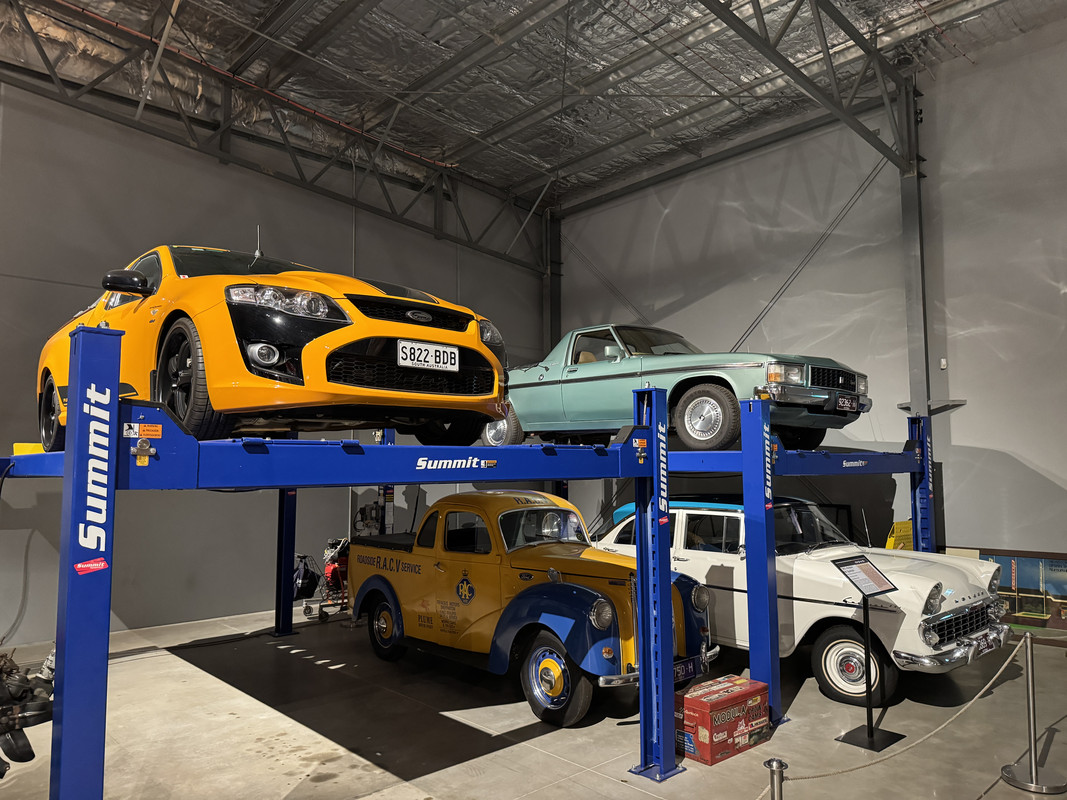
So, it was the perfect day to be indoors and visit the local car museum. I actually work next door to this place, but apart from before it was expanded and after an initial tour through after the renovation, I've never had the time or desire to take a proper look. Going back earlier this year, I wish I made the time because they had Marcos Ambrose's championship winning BA Falcon on display. Marcos and that car were hugely influential to me back then, seeing a Ford thrashing Holden's each race was almost a confidence builder for me as much as the driver itself. Then seeing him win the championship, well, he became a hero to me.

Anyway, when the museum was closed for renovations to expand the facility, the name was changed to better represent what would go ultimately call the place home. The M.O.V.E name stands for Museum Of Vehicle Evolution. Where previously the focus on was on cars and memorabilia, the museum now houses a range of transportation devises. The massive expansion was done to accommodate the trucking side, in effect representing the towns rich history in transportation. Upstairs, which allows visitors to look down at the cars and motorcycles on display, there is a range of vintage bicycles to look at. A separate section is used to display the history of the Furphy & Sons and Furphy Foundry businesses, which continues to operate to this day. There is also a collection of Australian clothing, jewelry, and fashion accessories dating back 200 years. This joins a bunch of displays memorabilia displays spread through the facility, with the building flanked either side by a cafe and antiques shop. The idea behind such diversity is to offer something for everyone, so if you aren't into cars, you might be drawn to the trucking side, or the fashion, or in the case of my father, the bikes.

https://www.moveshepparton.com.au/

On top of the displays, the facility also has the ability to host functions and car club meetings. In fact, the 2025 Falcon GT Nationals Concours Event will be held there on the 13th - 16th March 2025. I actually met some of the organizers during the planning stage, let me say, they were VERY particular.

https://www.20thfalcongtnationals2025.com/event

Anyway, onto the display....................

This Ford caught my eye, or more specifically, the V12 engine did...................


Next, this Elfin, which used Holden/GM running gear and, from memory, was designed by Australian designer Mike Simcoe, the man currently in charge of the whole of General Motors design.


While I have seen a C8 on the road, this was the first time I have seen on up close. I think time is being kind to the C8, but I wouldn't say that I like the design, to me it just presents very generic, almost small-scale production like a TVR or Nobel. White doesn't do it justice either. The car is currently for sale, so I guess that says it all.


Seeing a Ferrari in a small country town is pretty unique.................


The gorgeous Jaguar XK engine and E-Type.................


I can't believe how big these things are! They would dwarf a modern Mustang!


I seem to remember this BMW M5 Ute featuring in MOTOR magazine back in the day and was created/commissioned by golfer Stuart Appleby’s. Certainly a unique concept.


The 427 Monaro's.....................


To be continued..................................
 
M.O.V.E continued............................

Never did see the appeal of these............................


This final Pursuit Ute has called the museum home for many years now, exactly the colour I would have chosen, Octane Orange...............................


There are also quite a few Garry Rodgers Motorsport cars on display..............


This Tucker with its rear engine was apparently imported into Australia at EXTREAM cost. Not my usual type of car, but it certainly had a lot of presence.


Naturally, the trucking side is huge! I have to say, the 50's and 60's buses look so iconic, almost from a different planet, as in, they have personality.


This truck is quite interesting, but not for the truck itself. That bull bar was made by my father, who back in the day had a small backyard-run business making bull bars for cars and trucks. Like me, he also used his initials for the business name, TFB, and I have a cabinet in the garden shed with his blue and yellow business sticker on it.


To be continued........................
 
M.O.V.E continued.....................

I'm not sure the details on this Mack, but it's absolutely hideous in person.


The bicycle collection housed upstairs. If you thought your fancy mountain bike with suspension is special, well this 1887 bike has suspension too...........................


Pretty much every single grade 6 kid in the area drove one these in the 80’s and 90’s. Called Careful Cobber's, these were powered by a small engine and were housed at D.E.C.A (Driver Education Centre Australia). The concept here was to introduce kids to the concept of driving, while also teaching road safety and road rules. Students were sent off in pairs, one vehicle per pair. I remember despite being nervous, I was a natural, but my partner was struggled with the concept of braking. Even Princess Diana went for a ride...................


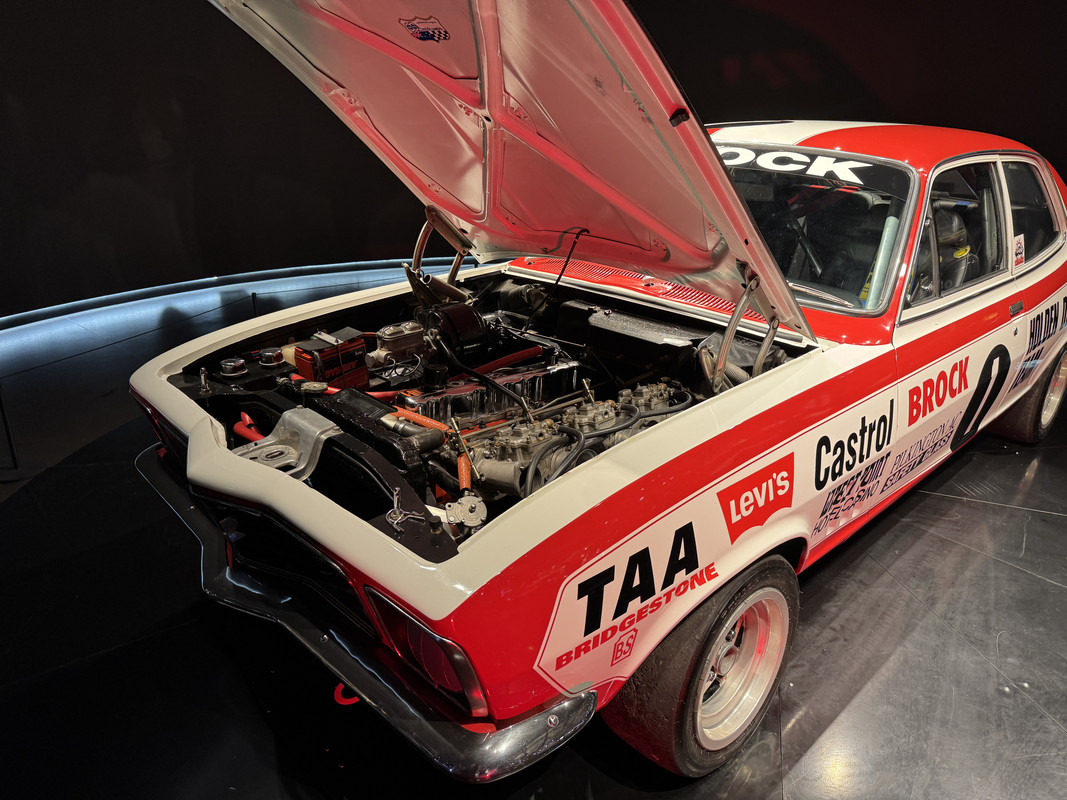
And finally, this stunning Holden Torana spinning on the turntable at the entry/exit……………………


M.O.V.E is definitely worth a look if you are passing through.
 
Wow...wow...WOW!

That blue Holden early on, something about that car, AWESOME

The C8....Zzzzzzzz but the upcoming ZR1 with 1.064 hp though, don't like how it looks buy the numbers are MIND NUMBING, between hp, tq, top speed, 0-60 mph, 1/4 mile...IT DOES IT ALL but like you said Deyon it looks generic AF, see them all the time, I'll never EVER like it

Sent from my SM-G991U using Tapatalk
 
  • Like
Reactions: DFB
Back
Top