***Update***
First a quick note about safety. Aluminum stands like the one sin the picture below provide a stable base to stand on whenever you're working on elevated or high surfaces, for example the roofs of most S.U.V.s
Safety first...
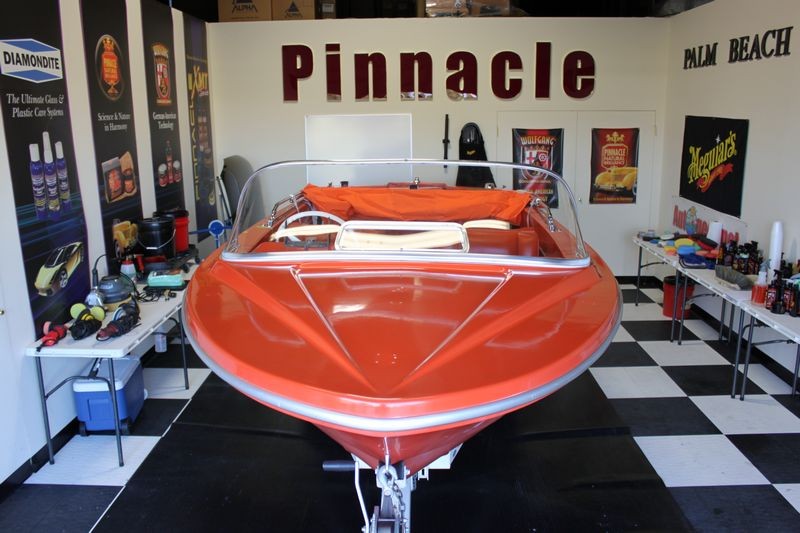
Now onto the progress in the 1967 Starline Deville
Menzerna + Kompressor Pads + Rotary Buffer = 1 sweeeeet looking 42 year old bow!
Over the weekend I put the Menzerna product line to work using the 7" and 6" Kompressor pads removing oxidation and restoring the color and gloss to the passenger's side bow on the 1976 Starline Deville here at the Autogeek Garage.
First up a few pictures followed by a few comments on the Menzerna products and Kompressor pads.
I started with the
Menzerna Power Gloss Compound S34A and the
Purple Hybrid Heavy Compounding 7 inch Foam Pad to cut off the surface oxidation.
I really liked this hybrid wool compounding pad, its unique circular or loop fiber design of the foam formula provides some very aggressive cutting and even slicing action when used with an aggressive compound.
The
slotted pad face unique to the Kompressor line of pad enables the pad to easily conform to curves in the surface of whatever you're working on.
Next up we hit the bow with the
Menzerna Super Intensive Polish PO 83 and switched to a
6" Kompressor White Polishing Pad. Long play time, easy buffing and the 6" Kompressor Polishing pad worked great for getting into the tight areas and rounded curves on the bow.
Next up we switched to the
Menzerna Intensive Polish PO 91E with a
7" Kompressor White Polishing Pad. The goal here wasn't to try to improve the finish but to take the Menzerna Intensive Polish for a test drive immediately after using the Menzerna Super Intensive Polish for comparison reasons.
As far as buffing cycle or play time, both buffed the same, there's plenty of play time with both of these products and you can see by the amount of pigmented gel-coat on the 7" Kompressor White Polishing pad used with the Menzerna Intensive Polish as compared to the 6" Kompressor White Polishing pad used with the Super Intensive Polish that the SIP had quite a bit more cutting power.
Continuing to refine our results, next up is
Menzerna Final Finish PO 85U with the the
6" Kompressor White Polishing Pad.
This was another real easy buffing combination that increased the gloss and richness of color just a little bit more and like the last two polishes, wipe off was as easy as a summer breeze. Little to no pigment was removed using this combination as the previous steps have for the most part removed any deteriorated gel-coat at this point and now were pretty much just jeweling the surface or doing the final polishing step.
Next up is the
Menzerna Finishing Glaze PO 115C with a
Kompressor 7" Red Finishing Pad
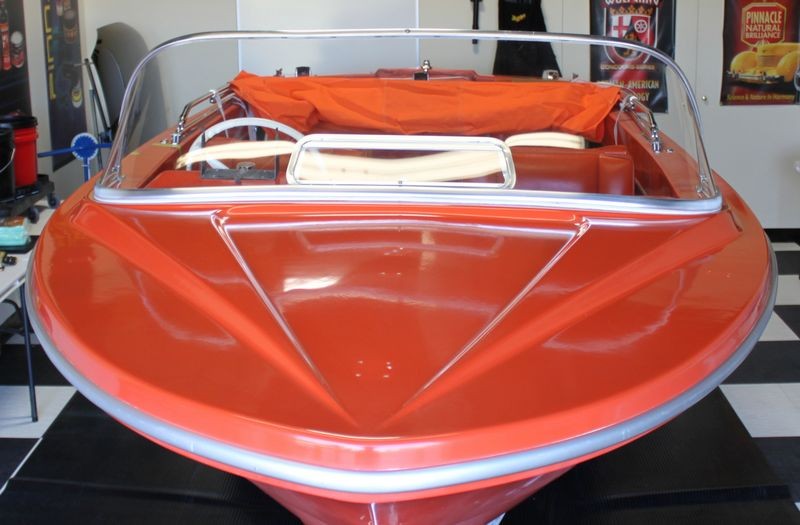
The Finishing Glaze is very slippery and brought out a little deeper orange color while maximizing the gloss on all the body lines of the bow.
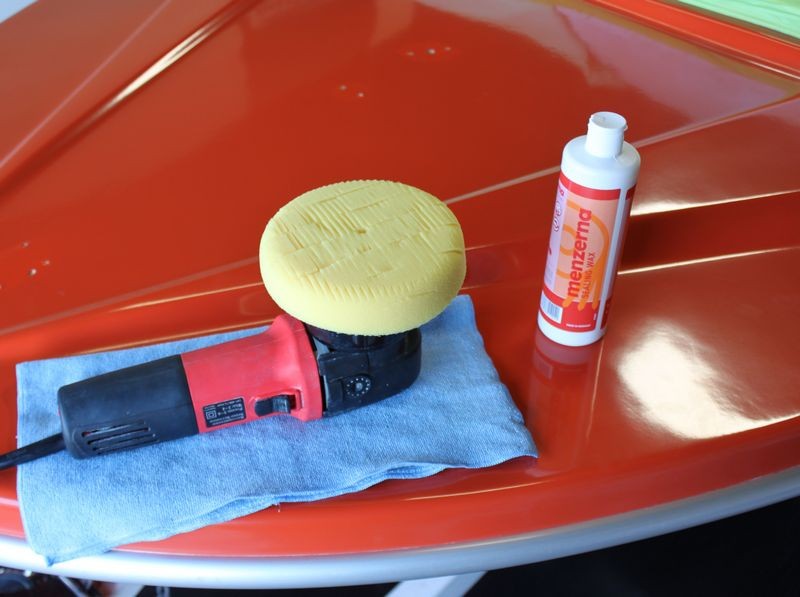
To top it off we used the
Menzerna Sealing Wax APO 60 with a
Kompressor 6" Super Soft Gold Jeweling Foam Pad on the
Griot's Garage Random Orbital Polisher (love this polisher), on the 4.0 Speed Setting.
The Menzerna Sealing Wax does offer some very light cut and we're not to worried about the cleaning action as there's going to be
another LSP applied to the bow before the brightwork is installed. But taking this light cutting or cleaning ability into account we chose the 6" Super Soft Gold Jeweling Foam Pad to take the emphasis on the cleaning ability and keep the focus on just sealing the surface. Keep in mind, at this stage of the game we're not working and working and working the product, all we're doing is making 2-3 passes over each square inch to thoroughly work the wax and the protection ingredients into and over the surface to whatever level is possible.
A very thin coating which was allowed to dry to a haze before removing using a clean, soft microfiber polishing cloth.
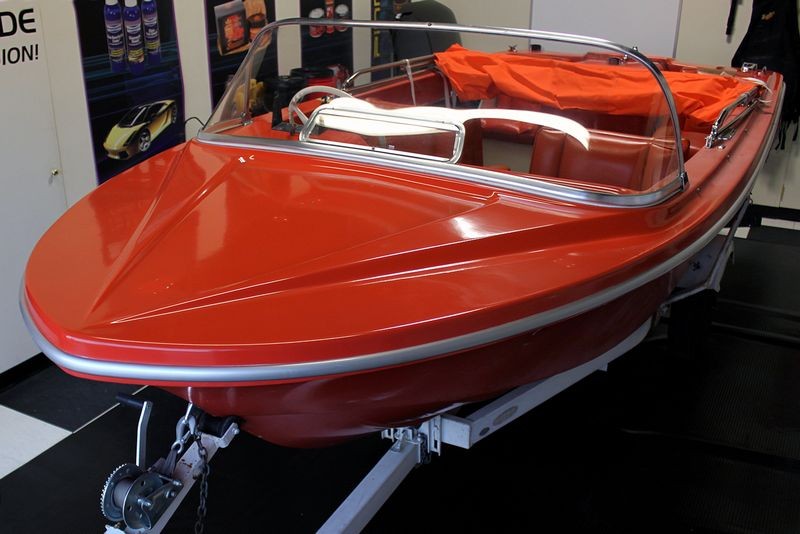
And here are the results,
Comments
The Menzerna Product Line
The Menzerna Power Gloss Compound worked much like the M105 Ultra Compound in that it had a fairly short buffing cycle or play time. I found myself misting some water onto the surface to get a little more working time out of the product I had applied. Note this product is recommended for automotive paints, so using it on an oxidized 42 year-old gel-coat finish is out of the spectrum of duties it was intended to be used on and very well may be the root cause of the short buffing cycle. Regardless, with a little patience and perseverance, together with the Purple Kompressor 7" Compounding pad it chewed off all the old oxidized gel-coat and left a smooth, glossy surface.
If you need some aggressive cutting action for neglected paint or removing sanding marks, the Menzerna Power Gloss Compound and Purple Kompressor 7" Compounding pad or an aggressive wool cutting pad can handle it.
All of the polishes were a pleasure to work with, they offered plenty of working time on the surface, each one left the finish as good or better looking than the previous polish and wipe-off was always very easy, a real plus for whatever you're detailing.
Kompressor Pad Line
At first I didn't think I would like these pads as they look so different with their slotted pad face but to my surprise I loved how they will conform to the surface making buffing out any type of curvature simple and easy with a rotary buffer and also a DA Polisher. Also the slotted design made them very easy to clean using the
Grit Guard Pad Washer with some
Wolfgang Polishing Pad Rejuvenator. Don't waste time just using water or soaps not formulated for cleaning pads when using a pad washer, the difference in cleaning ability and results is night and day.
The 6" Compressor pads are very versatile in that they work great with both Rotary Buffers and DA style Polishers. We'll test them out on the Flex 3401 in the near future and post our results.
Observations about the Kompressor pads,
- Excel at working on curved panels.
- Indestructible under hard buffing.
- Easy, easy easy to clean using the Griot's Garage Pad Cleaner.
- Worked well with both the rotary buffer and the DA Polisher.
Next up, polishing the brightwork and re-installing it.
")