Need some help

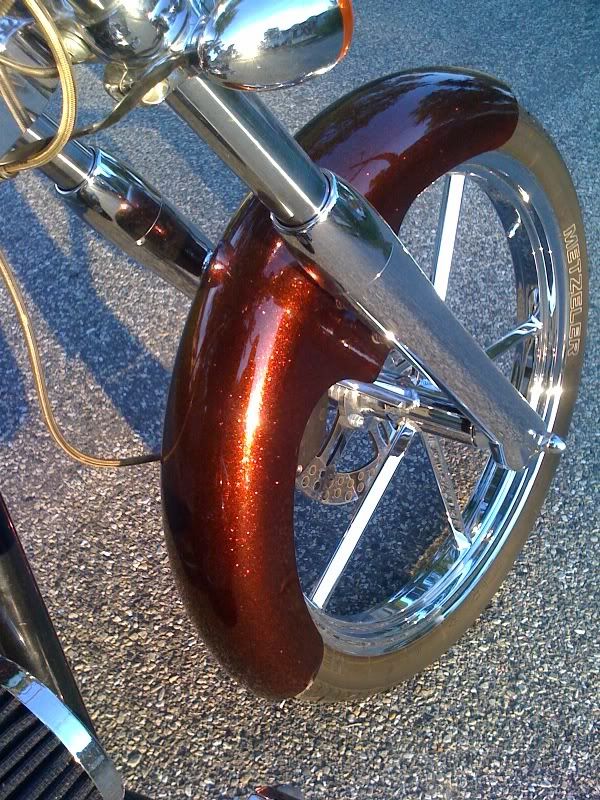
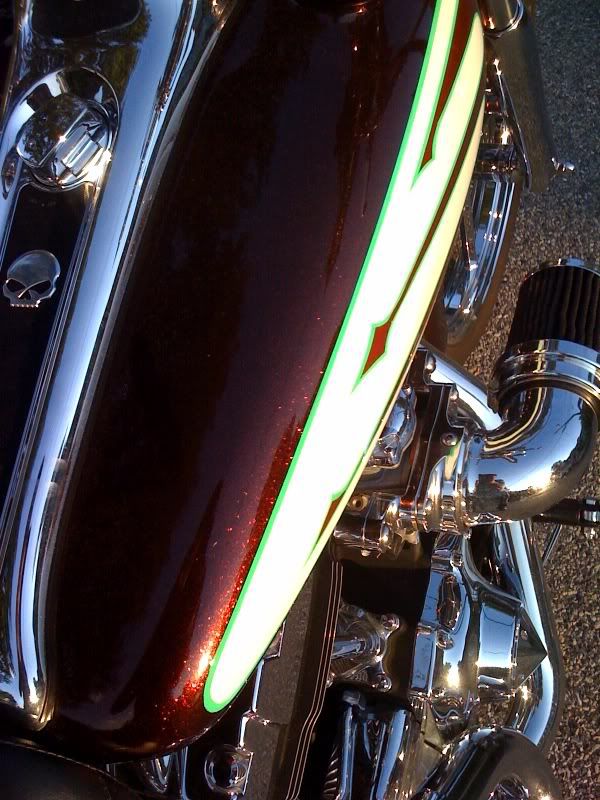
I paint on the side, I do custom motorcycle stuff. the compressor is plenty big. Its a stand up 2 stage deal. I am pretty good at the painting part, and I can wet sand with the best of them, the buffing out is what has always got me. I can get small stuff to come out pretty well but I also know that I have plenty of clear to work with on my own stuff.

bikepaint1.jpg

bikepaint2.jpg
 
Long Ball first things first your are going to need some gloves with that buffer. With size your truck and the massive are consumption that thing going to get very cold. One your problems is your products & Pads aren't really helping you. you could go with wool or yellow with Perfect 3000. From Here you don't really have somthing to dress down further you have the white pad but nothing to polish with. Finese it you can ose your black pad but you can't jump that far down that quik and get real good results. That's why the guys are recommending the twins 105/205 you can use multiple pads to achieve your results Such 105 w/wool then 105 w/yellow then 205 w/white then 205 with black for jeweling the finish. Then go to sealant or Wax. I not a big fan of the air buffer you don't really have enough control of speed as setting wise
And you should really try stay with the same manufactures of pads so they're constant when step down everybodys color/grade are different. In general yellow is much to coarse strips away alot paint quik. Orange is usually the pad of choice for the start of the polishing. I would recomend getting. A buffer kit with pads& compound

http://www.autogeek.net/porter-cable-meguiars-kit.htmlhttp://www.autogeek.net/random-orbital-polisher-kit.html
Meguiars Swirl-Free Kit for Machine Application, Meguiars Swirl Remover Kit, Meguiars Machine Polishing Kit

Both machines have plenty power for correction and you have theoption changing pads to go w/ smaller pads like 3or4 inch. And when your polishing Bikes the smaller pads are great. They've much more control and more pad contact for smaller areas. Although you have bodyshop exp. detailing is a whole differenent animal your exp with will help alot though. Its like a Framing carpenter to Finish carpenter the can both do the job but are very different animals but you at the right sight to learn .

LOL Steven:buffing:
 
Hey Steven,

I'm sure he has some changes coming. :idea:
 
Follow me now as I'm going to reverse the order in which you posted the below comments... not the portions a bolded

I clayed it pretty well , took me 2 hours. I washed, clayed, used 3m perfect it 3000 applied with a random orbital buffer black pad, then moved to another black pad with 3m polish, then hand waxed.

but as soon as it rains or something and the truck needs to get washed again, it looks so so unless you wax it.

I washed it over the weekend and dried it with a shamy, went out and parked it with the sun coming down on the driver side. I looked it over and was horrified.

There are so many little fine scratches (cobwebbing), and the black just doesn't look black, it looks almost like a grayish black.


This reads like you parked it in the sun and inspected the finish after previously using a air powered DA Sander to polish the paint using the 3M


I've never used the #06062 Perfect=-It 3000 Rubbing Compound but with a Google search found this,

3M™ Perfect-It™ 3000 Rubbing Compound 06062

Effectively removes grade 1200 and finer sand scratches while producing a very fine compound swirl mark finish. Good handling with easy cleanup. Safe for clearcoats.

First this product has been discontinued, that's a sign that it's been replaced with new technology and likely something that works better. From my background at Meguiar's, (now owned by 3M), when it comes to cutting compounds, when they're discontinued and replaced with something else it usually means the new technology will cut faster or the same but at least finish out nicer.

The product reads like it's really abrasive as the description says it will remove #1200 grit sanding marks and will leave behind fine compounding swirl marks, which are circular scratches in the paint.


From experience, if you apply an abrasive product like this to a clear coat finish using a random orbital polisher, like your air powered DA Sander, it will leave what we call tick marks also referred to as micro-marring or hazing.

The polish you chased it with water soluble and while the wax would lock on the polish, washing is still going to result in removing 'something' and thus when you pulled it into the sun and inspected it you saw in your words,


There are so many little fine scratches (cobwebbing), and the black just doesn't look black, it looks almost like a grayish black.


As SteveC pointed out, the soft polishing pads were not firm enough to be effective at removing the cobweb swirls but they would be firm enough to push an abrasive product against the paint and micro-mar it and this is where the grayish appearance comes from, you've dulled down the clear with micro-marring and now your eyes can's see past this to the black basecoat underneath.

This is just a guess based upon what I've read about the compound and your process.

Hang on and I'll add some more...


:)
 
I know most people want to use what they already have to do a project but here's a case where I think you're going to be better off upgrading your tools and chemicals.

First this thing is HUGE, that's a lot of paint to polish.

Second, unless you tell us otherwise, you're not trying to turn this into a "Show Truck", just restore the paint to higher level so you're proud of you're new truck.

So while some might recommend doing a huge elaborate buff-out process to turn this into a glistening gemstone, if it's going to be parked outside most of it's life and used as a daily driver or tow vehicle, then use the KISS approach.

KISS = Keep it Simple Simon


Invest in an electric dual action polisher, for the money you can't beat the new PC 7424XP dual action polisher. The brand and quality are time-proven and as a painter you can appreciate a quality tool.

Pick up a PC 7424 and a 5.5" pad kit of your choice, our CCS pads are real popular and a lot of people like our new Hydro-Tech pads which have a flat face design.

If you call our Customer Support Line at 1-800-869-3011 they can help you to pick out a pad kit that will have all the pads you need to tackle this behemoth.

As for chemicals, you want to do this truck in two steps if possible but to be honest, you're probably going to need 3 steps.

We care a lot of different compounds and polishes and others can chime in with their recommendations, if you want to make this easy on yourself and still get great results then I would recommend getting the Wolfgang Total Swirl Remover 3.0, better get a quart of this stuff because of the size of your truck. I come from a Meguiar's background and love their products but one thing I like about this product is it's easy to work with, does a great job of removing swirls and scratches and it's easy to wipe off and all three of these are important especially when working on something this large.

M105 is a great compound that finishes out nice but working time and wipe off can be hard sometimes and anytime you have to struggle to remove a product or it doesn't buff as long as you want and need then it takes longer to do the job overall.

Chances are very good you can use just the WG TSR 3.0 over the truck and afterward go straight to wax or a paint sealant.

That's how I would approach this truck, keep it simple, remove the swirls and then seal it up and move on.


Here's a link to our Porter Cable page, there's a number of pre-packaged kits so look through them and if you have any questions just call the Tech Hotline

Dual Action Orbital Polishers and pads: Porter Cable 7424 : Porter Cable 7424XP: Lake Country Buffing Foam Pads


Besides fixing the paint on this truck you'll love this polisher for all your custom paint work you do, the air polisher works but it's pretty hard to beat the new PC 7424XP for a quality tool that will stand the test of time.

:)
 
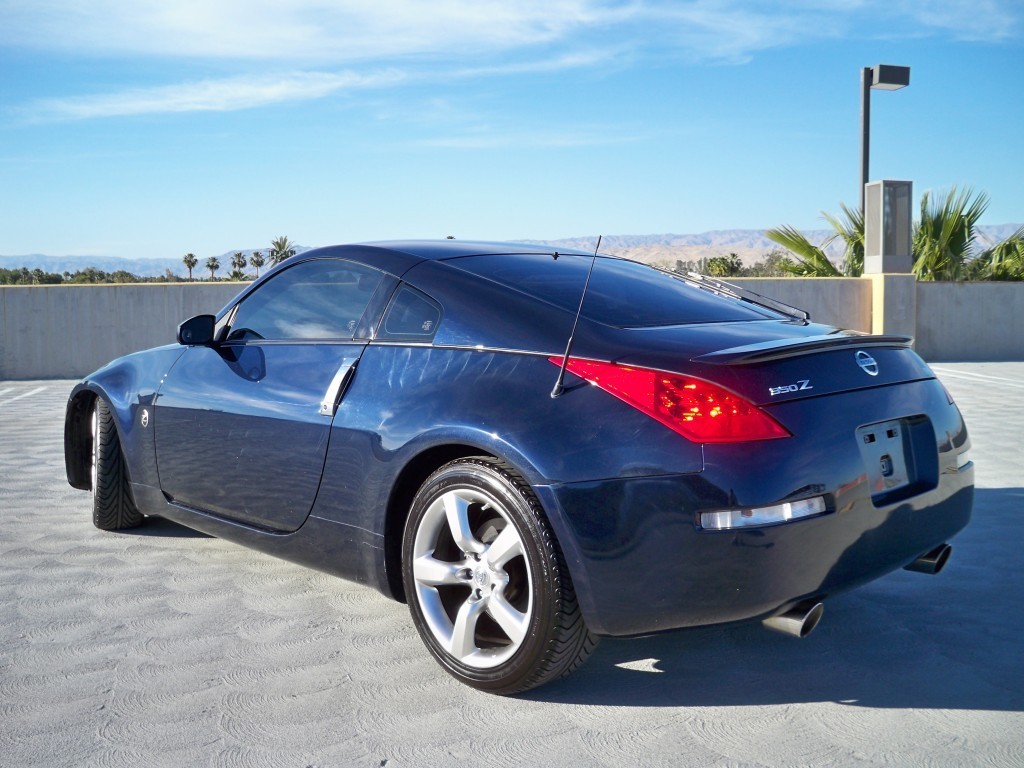
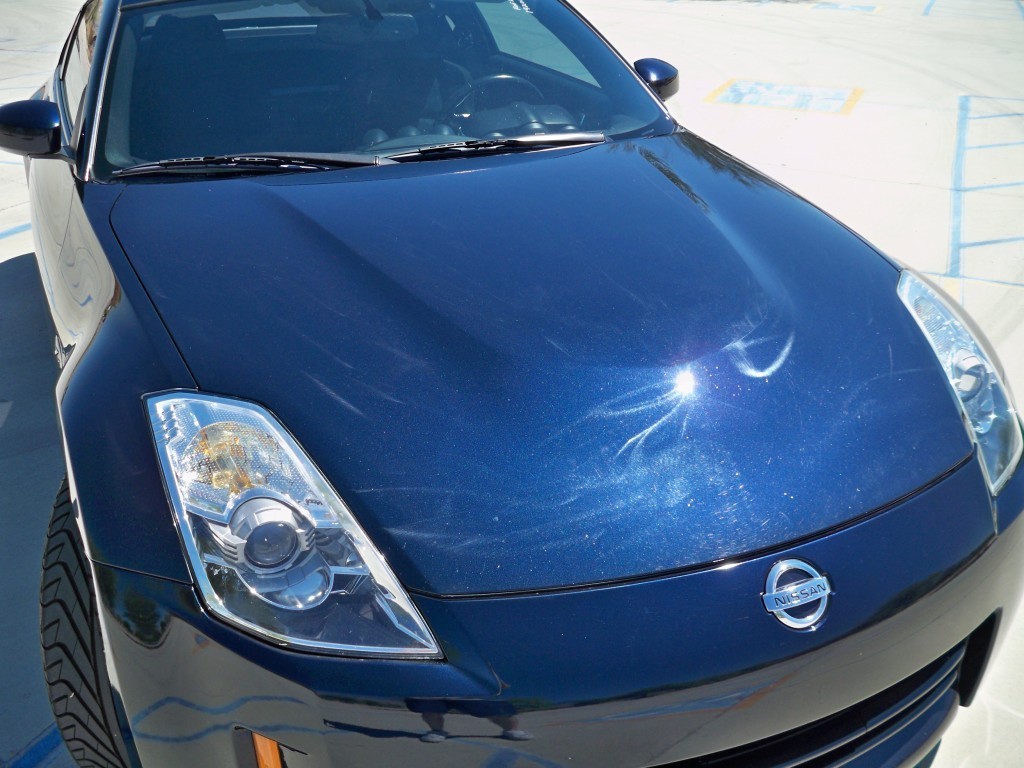
Here's what's so cool about discussion forums, you can see real-time results created from other forum members. Here's an example somewhat like yours, that is we had a forum member buy a swirled out 350Z filled with swirls at least as bad as the swirls in your car and probably worse since they were instilled using a Rotary Buffer and with the same tool and products I recommended in my last post, he removed the swirls and restored a show car finish.

You can read the entire thread here,
http://www.autogeekonline.net/forum/auto-detailing-101/21413-horrible-swirl-marks.html

Or the end-results and a re-cap on page 5 of the thread here,

Page 5 of the Horrible Swirl Marks Thread


And here's a portion of the discussion with pictures...


I can say that I am truly amazed with the Wolfgang TSR 3.0. I thought my paint was ruined, but now looks like a new paint job! Big :dblthumb2:

Awesome results and good job capturing the after shots. I've placed the before and after below in line for everyone that will ever read this thread to see the amazing transformation.

Just to re-cap, from your first post on page 1 of this thread, this was the first time you used a Porter Cable 7424XP and the Wolfgang Twins?

I got a 350Z at a very good price with a very bad detail. These pictures make me sick! lol


I just bought a porter cable 7424 PX, Wolfgang Total swirl remover 3.0, finishing glaze, orange light cutting pad and gray finishing pad, Wolfgang Deep gloss paint sealant, and Wolfgang instant detailing spritz.

Before - Rotary Buffer Swirls Everywhere in the paint
DunstonBefore01.jpg


DunstonBefore02.jpg


DunstonBefore03.jpg


After - A 100% Swirl Free Finish
DunstonAfter01.jpg


DunstonAfter02.jpg


DunstonAfter03.jpg


Will these products accomplish the goals I am looking for. I am also open to new suggestions to try. Thank you!

I think your after shots and your comments tell the entire story and answer our own question.

Nice work and great follow-up.

:dblthumb2:


:)
 
And here's another success story using the same products, Porter Cable 7424XP and process...

Here's the first thread Steve aka xxxc5 posted, it's a very good read with TONS of related links, information and pictures for what you want to do.

Posted 11-10-2009
http://www.autogeekonline.net/forum/auto-detailing-101/21683-corvette-swirls-need-advice-please.html


Here's the follow-up post a little over a week later,

Posted 11-24-2009
http://www.autogeekonline.net/forum...illips/21942-wg-tsr-fg-pc-7335-technique.html


And a follow-up was posted yesterday, 12-3-2009
http://www.autogeekonline.net/forum...lips/21942-wg-tsr-fg-pc-7335-technique-2.html


Steve already owned a first generation Porter Cable and in the discussion I was upfront and told him that it would work but because it lacks the power the new generation Porter Cable 7424XP offers it would take longer. If you read through the conversation in the thread posted 11-24-2009 he wrote,


Hey Mike,

So I have finally begun the paint correction process on my Vette closely following the advice you have given me in the following thread I posted:

http://www.autogeekonline.net/forum/auto-detailing-101/21683-corvette-swirls-need-advice-please.html

Now that I am on my way, I have some observations and further questions.

As you predicted, the G100/PC7335 is doing the job, but very slowly, and also requiring MANY section passes. Sometimes I need to go back and do again. I'm using a 5.5 CCS orange pad with WG TSR. I'm using a 5.5 CCS white pad with WG FG. I will definitely be purchasing a new DA in the spring!!!

Steve


And without further ado, here's some before pictures and one after picture with a comment...

Note the swirls are not real bad in his Corvette's paint but Corvettes are historically known for having paint that's as hard as glass and very difficult to remove swirls out of without the right products, tools and techniques.

StevesCorvette001.jpg


StevesCorvette002.jpg


StevesCorvette004.jpg


:dblthumb2:
 
That's good stuff, but just remember we are talking about cobwebbing from neglect, not swirling from bad buffing. If we all think that the wolfgang and proper pad will work, I will give it a shot.
 
That's good stuff, but just remember we are talking about cobwebbing from neglect, not swirling from bad buffing.

.

And if you re-read what I wrote, (I pick my words very carefully), I posted this was just a "guess".

See bottom of post 30 on page 3 of this thread,

This is just a guess based upon what I've read about the compound and your process.

Hang on and I'll add some more...

:)


Again, I can only go by what you typed and you typed, at least it reads like you typed that you used an aggressive cutting compound with a soft polishing pad with an air powered DA Polisher on a clear coated black paint and then after washing, drying and pulling the truck into the sun the paint looked grayish.

That could be "just" the cobweb swirls" or it could be both the cobweb swirls and what's called micro-marring or tick marks that are caused by abrasives being worked against paint with a tool that oscillates.

Again, I had to take a guess because I'm not there with a Brinkman Swirl Finder Light in person to inspect. :D


If it just swirls the it should be an easy fix, I hope the rest of what I wrote was helpful.


Also, I've been typing about doing what's called a Test Spot on the Internet since 1994, long before most people even new what the World Wide Web was let alone that it existed.

The point being, test your next product, pad and process to one small area and make sure you're getting the results you want and expect in that one small area before going over the entire truck.

If you can't make one small area look good you'll be glad you didn't spin your wheels and go over the entire truck only to find out after the fact.

Dial in a successful system approach and then duplicate it over the rest of the truck.

:xyxthumbs:
 
My last post wasn't necessarily at you mike, after you wrote your solution, there were others giving me success stories. That is great that they are offering there stories, but the corvette and 350z had problems that really did not relate to mine. Again, not dissing Antibes post, they are all helpful, just want to make sure the cobwebbing comes out with the wolfgang 3.0.
The pictures I posted mike, are actually what the truck looks like after a wash. Those were before any attempt from me to buff them out. After I did what I did, they actually look a little better but still not up to par. I showed you the pics I did because I wanted you to view the most problematic concerns. I have taken your advise as well as others to heart, I will be purchasing a new DA and supplies within the weekend. I will post detailed before and after pics when done.
 
My last post wasn't necessarily at you mike, after you wrote your solution, there were others giving me success stories. That is great that they are offering there stories, but the corvette and 350z had problems that really did not relate to mine. Again, not dissing Antibes post, they are all helpful, just want to make sure the cobwebbing comes out with the wolfgang 3.0.

(That was me posting other success stories)


The pictures I posted mike, are actually what the truck looks like after a wash. Those were before any attempt from me to buff them out.

And that's what I wasn't sure about and thus my use of the word guess

After I did what I did, they actually look a little better but still not up to par. I showed you the pics I did because I wanted you to view the most problematic concerns. I have taken your advise as well as others to heart, I will be purchasing a new DA and supplies within the weekend. I will post detailed before and after pics when done.

Sounds good...

That looks like a really nice truck, I'm guessing you bought it because it's in mechanically great shape an you needed or wanted a tough hauling truck?

Regardless, it's going to look great after it's all buffed out...

I know you are a painter and know how to buff so I'm really not trying to tell you how to buff paint, but that said I've taught a lot of people how to use a DA Polisher, my guess is probably more than anyone else on earth, not bragging, it's just been a huge part of my career.

When you start out, just buff a small section, about 20" squarish or so and check your results. Make 6-8 section passes and maybe lay down a piece of painters tape to one side of where you're buffing to give you a very clear demarcation line to reveal before and after results.

From this thread,
Tips and Techniques for using the PC 7424XP Dual Action Polisher to remove Below Surface Defects


The definition of a pass
There are two definitions of the word pass as it relates to machine polishing with any type of machine.


Single Pass
A single pass is just that. It's when you move the polisher from one side of the section you're buffing to the other side of the section you're buffing. That's a single pass.


Section Pass
A section pass is when you move the polisher back and forth, or front to back with enough single overlapping passes to cover the entire section one time. That's a section pass.


And while the video in this thread shows a Flex 3401 it's the same principal of testing and dialing ins a proven system.


Scroll down a ways to get to the video...
1957 Chevrolet Belair Extreme Makeover - Flex 3401 & Wolfgang Smackdown!


Good luck and have fun!

:)
 
Thanks mike, I actually bought the truck from a friend of mine, he needed to get out of it and sold it to me dirt cheap. The interior is very nice, it has full heated leather, 17" tv, wood grain and such. Truck also has 24" wheels coming, and I will mainly use it as a daily driver and work out of. It's great on roadbyrips, we just came back from PA in it and my daughter loved the tv and the wife loved the room.
 
Back
Top