Horrible swirl marks!

dunston

New member
Joined
Oct 23, 2009
Messages
101
Reaction score
0
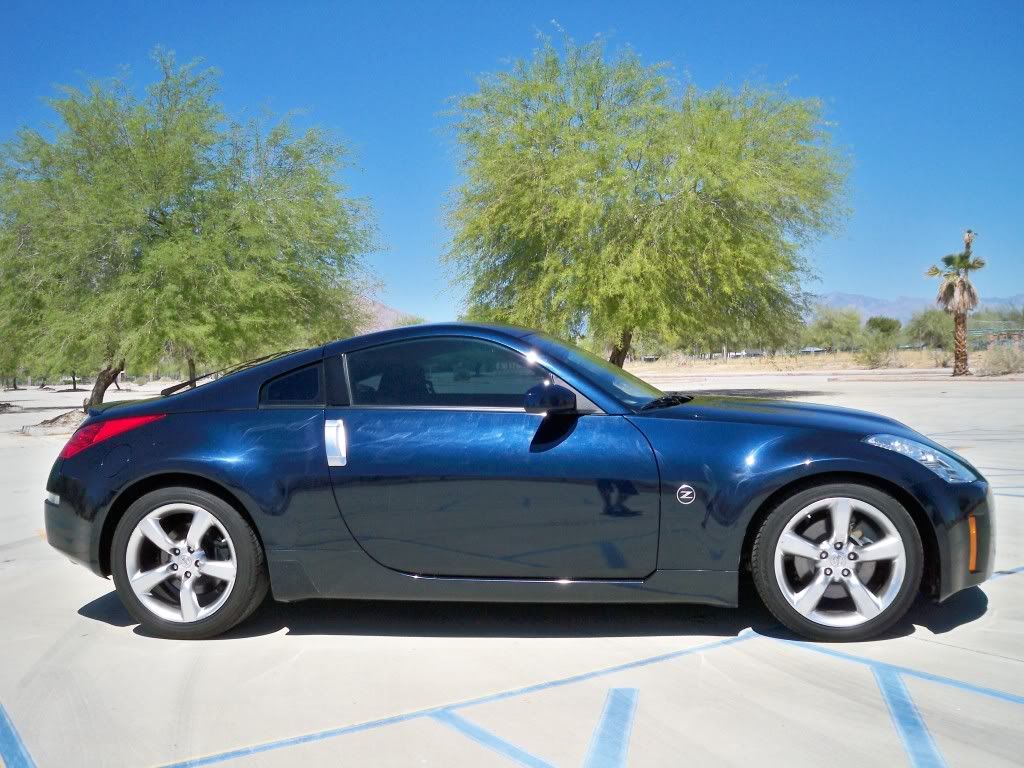
How To Remove Horrible Rotary Buffer Swirl Marks out of a 350Z using the Wolfgang Twins

I got a 350Z at a very good price with a very bad detail. These pictures make me sick! LOL I just bought a porter cable 7424 PX, Wolfgang Total swirl remover 3.0, finishing glaze, orange light cutting pad and gray finishing pad, Wolfgang Deep gloss paint sealant, and Wolfgang instant detailing spritz.

Will these products accomplish the goals I am looking for. I am also open to new suggestions to try. Thank you!

104_0505.jpg


:)
 
Last edited:
I got a 350Z at a very good price with a very bad detail. These pictures make me sick! lol I just bought a porter cable 7424 PX, Wolfgang Total swirl remover 3.0, finishing glaze, orange light cutting pad and gray finishing pad, Wolfgang Deep gloss paint sealant, and Wolfgang instant detailing spritz. Will these products accomplish the goals I am looking for. I am also open to new suggestions to try. Thank you!

You should be able to knock out the swirls, although you may want/need a white pad in addition to the other pads you mentioned.

Make sure you post some pictures of your process.
 
You should be able to knock out the swirls, although you may want/need a white pad in addition to the other pads you mentioned.
.

:iagree:

Yes, I would also get a few white pads. I would use them with the WG finishing glaze.
 
The Wolfgang TSR 3.0 with the orange cutting pad on the 5.0 to 6.0 speed setting should do the trick no problem. Best thing to do would be a Test Spot when you first start out, that is test the TSR with the Orange cutting pad to one section and then inspect your results.

It helps to place a single strip of painter's tape on a horizontal surface and then just work on one side of the tape. Then you can look at the before and after results and quickly and easily see if this combination of products is getting the job done.

The sides look like they have horrible rotary buffer inflicted swirls; does the hood look the same way?

If so, and if you haven't already started working on it,then position the hood with the sun on it when the sun is directly overhead and capture some good before shots.

If you what to show the world what you can do with you new toys, then tape off half the hood and only buff out one half and the remove the tape and re-position the hood in the sun and take a few before & after shots.

Next buff out the other half of the hood, (and the rest of the car), and then take the final beauty shot.


The power in the after shots is created in the before shots


:xyxthumbs:
 
Thanks for the help guys! :xyxthumbs:

Whats a good white pad I should get?

I will take plenty before, during and after pictures. Yes, there is horrible rotary buffer inflicted swirls all over the car. When you tape off half the hood for a before and after shot, does a line show up after you do the rest of the hood? Or does it just blend in when you complete the other half? Thanks!
 
Go with TSR and Orange Pads and then follow up with Finishing Glaze and White Pads. You should probably have two of each pad on hand because the pads get clogged up after doing a panel or two. You also need a good pad cleaner, Pinnacle XMT Pad Cleaner is awesome stuff.
 
Here are a few more pics I have. Yuk!

zigzagrotarybufferswirls01.jpg


zigzagrotarybufferswirls02.jpg
 
Thanks for the help guys! :xyxthumbs:

Whats a good white pad I should get?

I will take plenty before, during and after pictures. Yes, there is horrible rotary buffer inflicted swirls all over the car. When you tape off half the hood for a before and after shot, does a line show up after you do the rest of the hood? Or does it just blend in when you complete the other half? Thanks!

Being a newer car it should just blend in, you're going to want to buff both sides equally for a uniform, swirl-free finish.

For the purpose of just showing before and after you don't have to use tape and you don't have to buff a lot on the tape-line. Work inside your comfort level for sure.


:)
 
So is this the steps I should use...

TSR = Orange pad
Finishing Glaze = White pad
Paint sealant = Grey pad

I was also planning on using a clay bar. Is it necessary to use if before doing this 3 step finish? Thanks!
 
So is this the steps I should use...

TSR = Orange pad
Finishing Glaze = White pad
Paint sealant = Grey pad

I was also planning on using a clay bar. Is it necessary to use if before doing this 3 step finish? Thanks!

Yes, those steps should restore a swirl-free finish as long as the swirls are not too deep. You should be able to prove the above system by buffing out just a small section and then inspecting your results.


As for claying, feel the paint after washing and drying or wiping clean, if it feel like it has a texture or little bumps then clay before buffing. Claying is the most effective way to remove above surface bonded contaminants.

Machine cleaning with a SMR like TSR 3.0 will remove some above surface bonded contaminants but claying is the most effective way to remove all the aboves surface bonded contaminants.


:)
 
In this shot here, where you see the zig-zag pattern just below the passenger's window, it's as though the person has no clue as to what they're actually doing to the paint.


Maybe they consider themselves to be an artist? Instead of removing swirls they put them in and charge more for it and call it shimmer?

LOL

104_0521.jpg
 
Got all my supplies in and camera all charged, ready to start my detail and its cloudy outside! Go figure, my one day off and its the one day in Palm Springs when its overcast. lol
 
Good luck with it, take your time and enjoy it, that colour is gonna look great when your done. Look forward to seeing it finished
 
I can relate to the dealerships so called artist in residence. I had to take my vehicle in for warranty repaint work. It was a cloudy day when I picked the car up (it was also inside). Next day when the sun came out the entire car lite up with swirl marks over swirl marks. When I took it back they gave me the line that it did not look that way when it was in the shop. They finally fixed it, after a couple of tries. After the 90-day cure time, I took it in for normal maintenance and door hinge replacements, they washed it. Currently searching for a good detailer for some work in the spring. Also, looking for a paint meter to find out how much clearcoat they took off. Its hard to locate anyone with a meter around here. Question?? Would AG or Mike be willing to rent out theirs for a couple of days. $695.00 for a one time use is very expensive. Again I can feel the pain.
 
I can relate to the dealerships so called artist in residence. I had to take my vehicle in for warranty repaint work. It was a cloudy day when I picked the car up (it was also inside). Next day when the sun came out the entire car lite up with swirl marks over swirl marks. When I took it back they gave me the line that it did not look that way when it was in the shop. They finally fixed it, after a couple of tries. After the 90-day cure time, I took it in for normal maintenance and door hinge replacements, they washed it. Currently searching for a good detailer for some work in the spring. Also, looking for a paint meter to find out how much clearcoat they took off. Its hard to locate anyone with a meter around here. Question?? Would AG or Mike be willing to rent out theirs for a couple of days. $695.00 for a one time use is very expensive. Again I can feel the pain.

I went into a local auto body shop and explained that the dealership scratched my car and sent it to their body shop to repaint the panel. I asked if they could take a reading on my paint thickness and they were more than happy to check the paint thickness on the repainted panel as well as the rest of the car. I took less than 2 minutes and they made a potential new customer. Good luck:xyxthumbs:
 
My mom VW SUV looks like this from the dealership. When I'm not so busy I have to take care of it for her.

I would apply WGPS by hand or with a red pad
 
Are you all recommending to the thread starter that he use TSR 3.0 via Orange pad then Finishing Glaze via White pad because of the severity of his swirls??? or simply because TSR/Glaze work best with this combo?

Reason why I ask is because I used a white pad for TSR then gray pad for glaze and that combo was sufficient to remove my swirls. Should I have gone with an orange/white combo instead?
 
In this shot here, where you see the zig-zag pattern just below the passenger's window, it's as though the person has no clue as to what they're actually doing to the paint.


Maybe they consider themselves to be an artist? Instead of removing swirls they put them in and charge more for it and call it shimmer?

LOL

104_0521.jpg

haha i was gonna say something bout how this one looks like some kinda crappy flame job
 
wow that sucks that they give buffers to people like that. I hope you got it for a really good deal . . . . . the thing is when ur done it will look like a new car
 
So since there was a dark cloud over the sun all afternoon I just decided to wash and clay the car. I was amazed that when I was using the clay I could see scratches in it. Took a few pictures after I washed it to try to get some good before shots. Amazingly at the gas station I noticed was less swirl marks. I'm getting excited about finishing it up tomorrow and getting some more photos since the sun should be shining. :dblthumb2:
 
Back
Top