The Secret to Removing Oxidation and Restoring a Show Car Finish to Antique Single Stage Paints

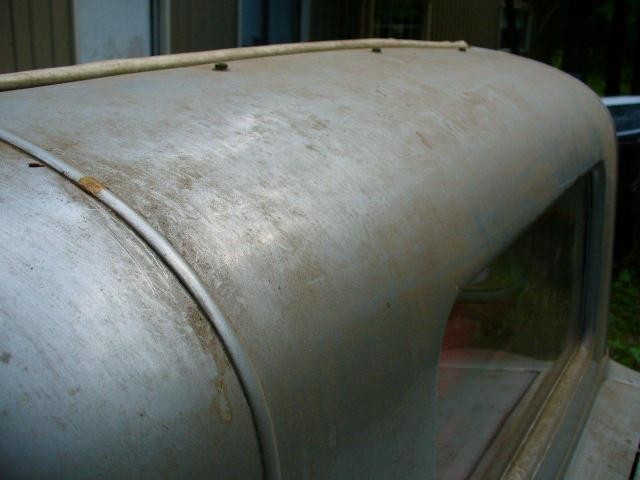
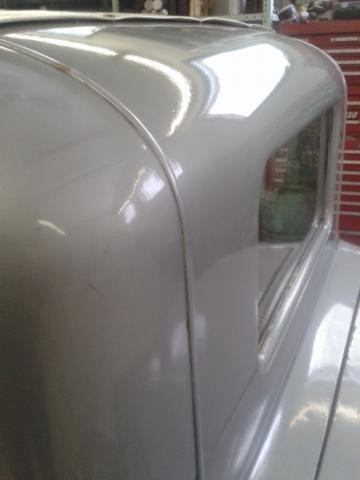
Thank you so much for sharing this process, with the help of a friend we were able to bring back the paint on my "Survivor" Hot Rod this past weekend, painted in approx 1961 & parked in a garage from 1970 - 2014 without ever being washed I followed your instructions & was blown away with the results.

Thanks Again

Jer

Before & After


Hi Jer,

The before and after difference is incredible!

I uploaded your pictures to the gallery so they can be displayed in full size...

rearwindow_before.jpg


rearwindow_after.jpg


How about starting your own thread and share the story behind the car? Do you have any more before and after pictures for example of the entire car?


:dblthumb2:
 
FANTASTIC!

As Mike asks, may we have the 'back story'?

Bill
 
Mike,

As had been said many times before this is a fantastic article/thread that you've made available to the world. I'm really looking forward to trying this mg07 trick on my Avanti.

I noticed though on page 6 of this thread you mention paint condition and "extreme oxidation." I think I may have a case of this in some spots on my car. It appears there was some heat damage around the hood from engine heat at some point in time (see the attached pictures).

Anyway you mention needing to remove that "dead" paint. What do you recommend? My first thought would have been a compound, but after reading your article I'm not sure. As you can see I've been able to restore a decent shine to most of the other paint (sorry no before pictures this was a couple of years ago before I had found autogeek). I'm just not sure where to start.

I will definitely begin a dedicated project thread once I get going on this (need to do a little shopping first :-) This car is hopefully going to a big concourse at the end of the month.

image1166.jpg


image1168.jpg
 
Mike,

As had been said many times before this is a fantastic article/thread that you've made available to the world. I'm really looking forward to trying this mg07 trick on my Avanti.

I noticed though on page 6 of this thread you mention paint condition and "extreme oxidation." I think I may have a case of this in some spots on my car. It appears there was some heat damage around the hood from engine heat at some point in time (see the attached pictures).

Anyway you mention needing to remove that "dead" paint. What do you recommend? My first thought would have been a compound, but after reading your article I'm not sure. As you can see I've been able to restore a decent shine to most of the other paint (sorry no before pictures this was a couple of years ago before I had found autogeek). I'm just not sure where to start.

The first attempt to remove the oxidation if you want to be uber careful is to simply use a terry cloth wash cloth like you use when you take bath or shower. Like this,

Wayne_Carini_Hudson_Restored_By_Mike_Phillips_005.jpg


Wayne_Carini_Hudson_Restored_By_Mike_Phillips_013.jpg


Basically you're using these two things to remove the oxidation...

The nap or cotton loop of fiber.
You're elbow grease.

By staying this safe you can remove a lot of the oxidation in the safest manner possible.

If using this technique isn't working fast enough or effective enough AND you feel you have enough paint then you can try using either a medium cut polish or a compound to remove more of the dead topical paint.

Just be warned that

A: If the paint is thin already you may remove too much and expose the primer.

B: If this is a metallic finish you'll start changing the looks of the paint as you compound into the actual metallic flake.


Neither of the above to mistakes can be undone.

How to proceed is up to you but work carefully.


:)


I will definitely begin a dedicated project thread once I get going on this (need to do a little shopping first :-) This car is hopefully going to a big concourse at the end of the month.


[/QUOTE]
 
Thanks a ton Mike! This is the progress I've made so far using this process!
 
Would any age SS paint benefit from #7?

The mother-in-law has '68 California Special that was repainted a few years back, the only thing I know so far is it was painted to match back then. (I'm looking into where she got it done, and I'll be giving them a call to see exactly what was used to repaint)

I'm just curious if they used SS, would it help? It's been garage stored, but rarely, if at all waxed.
 
I got linked to this thread via a thread on another board and I gotta say, this might be the most awesome information filled thread I've ever read on any detailing topic. I find it to be incredibly selfless and awesome to be willing to share this knowledge with everyone.

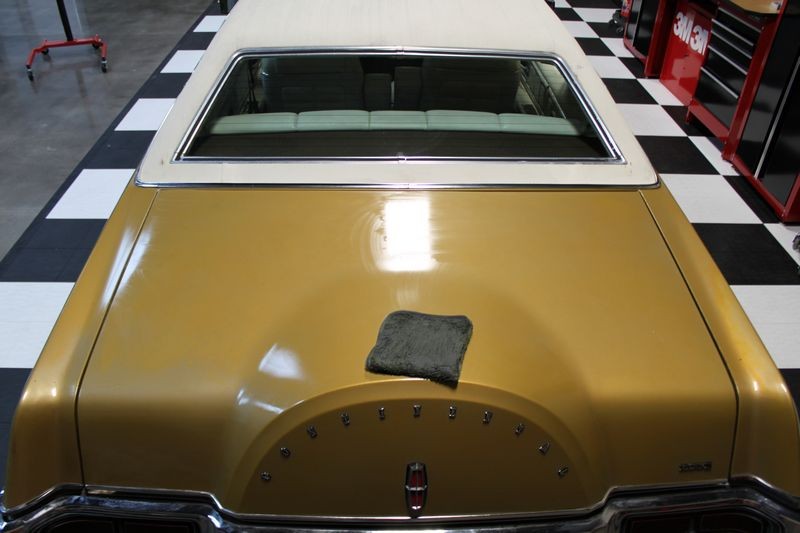
I'm going to re-read this post several times so I can soak it all in (no pun intended), especially since my neighbor, who coincidentally has a mid-late 70's Lincoln, wants to do some work on his car. It's his grandfather's car that he bought new and still has the original paint on it
 
Would any age SS paint benefit from #7?

The mother-in-law has '68 California Special that was repainted a few years back, the only thing I know so far is it was painted to match back then. (I'm looking into where she got it done, and I'll be giving them a call to see exactly what was used to repaint)

I'm just curious if they used SS, would it help? It's been garage stored, but rarely, if at all waxed.

In a nut shell...#7 won't hurt anything. Just try it on an inconspicuous area(spot) and see what the result are to your liking.

Bill
 
can this method be used on a 1978 trans am that has original paint and original vinyl stickers ? will the #7 damage anything ?
 
can this method be used on a 1978 trans am that has original paint and original vinyl stickers ? will the #7 damage anything ?


Yes and no.

Yes you can use it and no it won't hurt anything.


I can no longer count how many cars I've restored using this product and technique nor how many people I've helped to restore the antique paint on their cars using this product and technique.

Also you're in good company... see what Barry Meguiar and Wayne Carini say out #7


Velocity Celebrity Panel Discussion


:xyxthumbs:
 
How do you know when you have done enough applications of #7 and you are ready to move on to waxing?

Would it work to start out or finish up with #9 to provide some abrasion to remove some of the old dead paint and some minor swirls or scratches.

Say, use it first to clear the dead paint and oxidation away then go to #7. Or do multiple #7 applications and then follow up with #9

Is there a rule of thumb you follow when using #7. Like, would you normally do at least maybe 3 applications but typically no more than? Depending on the condition
 
Mike, I've watched a video where Larry from AMMO wet sanded then buffed a single stage car.. Of course it being Larry it looked amazing on the Porsche but is that something you would recommend if you are looking for that "Show car" shine on a single stage?
I will be honest, he did say some parts of the car was repainted but the part he did was heavily oxidized and I don't if it that part had clear on it or single stage....but of course he did his thing and BAM.. Brilliance.
I have a customer who wants me to detail his very old oxidized Porsche and beside following your very detailed and expert advice, do you think sanding will be a stretch? and no, I don't have a PTG :

I have not went to see the car yet so I don't know if has ever been repainted or if it really is a single stage or just really neglected. The advice you provide will help me now and in the future regardless of the paint that is currently on the car.. And of course, when i do go see the car pictures will be posted.
 
If you're going to do say 4 applications of M07, do you use the same towel for all 4 applications?
 
How do you know when you have done enough applications of #7 and you are ready to move on to waxing?

When the paint looks good to you.

Chances are good, if you read my article and are working on something that's old, original or antique then it started out looking bad to you.

After applying and rubbing the paint down with #7 using the technique I share in this article by the time you do the rub-down 2-3 times it should look good.

If it doesn't then my guess is the paint is i both category #9 and category #11

See the link below for an excerpt from my how-to book,

Page 37 - Paint Condition Categories


Would it work to start out or finish up with #9 to provide some abrasion to remove some of the old dead paint and some minor swirls or scratches.

Say, use it first to clear the dead paint and oxidation away then go to #7. Or do multiple #7 applications and then follow up with #9

Both approaches will work but I think you're missing the point of my article. My article is for people working on antique and original single stage paint where it's IMPORTANT to them to do everything they can to preserve the original paint because they DON'T want to repaint their car. Usually for historical reasons, that is preserving history via preserving the original paint.

As such, the reason I have you rubbing the paint down with #7 instead of a product with abrasives is to gorge the paint with oils to revitalize it and make it safer to abrade in a secondary step.

The thing is however, the terry cloth acts as your abrasive and together with the lubricating oils in the #7 and your elbow grease you remove all the dead paint while you're bringing it back from the dead thus there is often no need to do a secondary abrading step just go to wax.

You can as an option but you need to be very careful if in fact you are working on antique, original single stage paint.


Is there a rule of thumb you follow when using #7. Like, would you normally do at least maybe 3 applications but typically no more than? Depending on the condition

No rule of thumb. Each car is different because the paint is different. Here's an example. In my article here,

Wayne Carini 1954 Hudson Hornet Original Paint Restored by Mike Phillips


I share a picture of Wayne's Hudson where you can clearly see PRIMER showing. It's in the first post of the above article, here you go...

Mike Phillips said:
Here's a thin spot where you can see black primer showing through...

Mike_Phillips_Wayne_Carini_Thin_Painta.jpg


Now follow me....

You DON'T want to rub that section of paint down more than once or that little black cloud looking area is going to GROW.

My guess is if I were have rubbed to hard anywhere on the paint on his car I would have created more thin spots. That's because it's old, brittle and dried-out from lack of proper care.

This old Hudson is just one example of restoring antique original single stage paint.

Each car to be worked on by someone reading this article is different. Maybe there's lots of paint, maybe the paint is what I call

Whisper Thin


You don't know, I certainly don't know so there is no rule of thumb. Each person has to inspect the car and then draw from all their experience and head knowledge including articles like this one an come up with a unique plan for the car in front of them.

I say error on the side of caution. Use the least aggressive product to get the job done.

If a mistake is made... words cannot describe the heart sinking feeling that will overcome you once the reality of what has happened had it's full impact.


By the way...

What are you working on?


:)
 
Mike, I've watched a video where Larry from AMMO wet sanded then buffed a single stage car..


is that something you would recommend if you are looking for that "Show car" shine on a single stage?

I have not seen the video but what I teach and practice myself is to use the least aggressive process to get the job done.

I don't know if the paint Larry was working on would be considered antique or original as I have not seen the video.

IF it was antique single stage paint I would not have wetsanded it but instead would have used the product and techniques I present in this article you're posting your question to.


The Secret to Removing Oxidation and Restoring a Show Car Finish to Antique Single Stage Paints


Rubbing oxidized antique paint down with #7 and a piece of cotton terry cloth is the least aggressive process I can think of to restore antique single stage paint.

Wetsanding antique single stage paint is the most aggressive process I can think of to restore antique single stage paint.

So if the car and the paint were antique I would not myself wetsand the paint or recommend it. If he was working on modern or recent paint then I personally would have probably not started out by wetsanding but I don't know the back story on the car, the paint or the project. I'm sure Larry did know the story and his procedure was spot on for his purposes.


I have a customer who wants me to detail his very old oxidized Porsche and beside following your very detailed and expert advice, do you think sanding will be a stretch? and no, I don't have a PTG :

If I go by just what you shared above, this part,


very old oxidized Porsche

Then I would personally would NOT wetsand the paint on the Porsche. I've been doing the #7 rub-down all my detailing life and I've been sharing this technique ever since I started posting to the Internet and I've been contacted by HUNDREDS if not THOUSANDS of people over the years that have followed the techniques I share for saving antique paint with nothing but glowing stories of success.

Rubbing with #7 and terry cloth and your elbow grease is very safe and very effective on this type of paint and that's what the goal is... safe and effective.

Wetsanding removes paint
Compounding to remove your sanding marks removes paint
Polishing to refine the results of compounding removes paint

That's just a little too much emphasis on removing paint for my taste when working on antique single stage paint and especially when it's someone else's car.

Read this write-up and look at the pictures and know that this antique single stage paint was saved by the simple approach.

Pictures: 1958 Cadillac Extreme Makeover- Original Single Stage Paint!


BEFORE
qhAtFa2.jpg


AFTER
uvYkbFu.jpg


And the above was done without wet sanding... just a little elbow grease, some cotton terry cloth and a product that's been around since the time of the Model T.


I have not went to see the car yet so I don't know if has ever been repainted or if it really is a single stage or just really neglected.

The advice you provide will help me now and in the future regardless of the paint that is currently on the car.. And of course, when i do go see the car pictures will be posted.

Where you at with this project? I'm confident you'll make the right decision and the car will come out looking beautiful!


:xyxthumbs:
 
If you're going to do say 4 applications of M07, do you use the same towel for all 4 applications?


Great question. If you read through this article, starting on page one of this thread,

The Secret to Removing Oxidation and Restoring a Show Car Finish to Antique Single Stage Paints


You'll come across this section....


Mike Phillips said:
I'm still using the same microfiber polishing towel and you can see I've removed a lot of black oxidation out of the paint.
NonAbrasiveMethod055.jpg


Your towel acts like a filter
Here I've unfolded the towel to show you what it looks like. As you can see the towel is completely saturated through and through with the polishing oils found in #7. The towel acts like a filter: as new product is placed onto the working face of the towel some product seeps through while the majority is worked into and over the paint after the towel reaches maximum saturation. The oils that filter through the towel are different than the original product that comes out of the bottle. If I were to refold the towel when applying the #7 I would be in essence changing the product as I would be introducing the fresh product out of the bottle to a different version of itself on a different fold of the towel. I could switch out the used towel for a fresh towel but then I would have to re-saturate the towel all over again and that would use up a lot of product.


Visually inspect the working face of your application towel
After each application I inspect the working side of the microfiber towel and if I see any particulates I remove them, one thing for sure, once you break in your towel it requires a lot less #7 to coat over and work the oils into the paint than when I first started out with a dry towel. This technique is actually written about in the booklet Bill Stewart wrote. I know it doesn't look pretty but it works in that the paint comes out looking great and after towel break-in you really feel like you're reviving the paint in very wet manner as you work around a panel. Keep in mind single stage paints are much different in their polishabilty and workability than a modern clear coat paints. Clear coat paints don't absorb oils like a single stage paint and they are scratch-sensitive, that is they scratch very easily and the scratches are easy to see.

NonAbrasiveMethod056.jpg


So "yes" you keep using the same towel for the reasons I outlined in the original article. You do want to inspect the working side of the towel and pick out and remove any foreign particles that you see so you don't rub them into the paint.


:)
 
I got linked to this thread via a thread on another board and I gotta say, this might be the most awesome information filled thread I've ever read on any detailing topic.

That's quite a compliment considering how many car detailing articles there are in the Internet.


I find it to be incredibly selfless and awesome to be willing to share this knowledge with everyone.

It's called paying it forward. I always appreciate when other's give due credit where credit is due. I know I practice this professional courtesy but I don't always see others doing it.


I'm going to re-read this post several times so I can soak it all in (no pun intended), especially since my neighbor, who coincidentally has a mid-late 70's Lincoln, wants to do some work on his car. It's his grandfather's car that he bought new and still has the original paint on it

Very cool. I'm already looking forward to the before and after pictures.


:dblthumb2:
 
Thanks Mike.

Yep, I think I was missing missing the point. I had read back through the article after posting and found that and felt kinda dumb for posting the question.

The car I was dealing with was a red Mercedes SL560 similar to the one you did that ended up on the Ultimate Compound bottle but not as oxidized.

I did my first application and it looked really good, but I did not "seal" it because I figured it would need another application or two. When I came back to do more work on the car a week later you tell it had faded some or the oils had washed away.

I did one more application of #7 by itself. I was getting low on #7 and did not have enough for another full application. Then I took what I had left of it and mixed it with a partial bottle of #9 and finished it out that way. Then I sealed it with Souverän paste wax. It's been about two months since and still looks good.
 
Back
Top