What to watch out for when using a rotary buffer?

gibbsj87

New member
Joined
Jul 1, 2010
Messages
108
Reaction score
0
Can everyone post pictures of what to "watch out for" when using a rotary buffer? Like burning though the paint, and other various things.

I know there is one thing my friend showed me. There are these little marks, it almost looks like the clear coat got mared in a area the size of a thumb nail. It almost feels as if you could pick it off the paint. He said he doesn't know how he got it there or what its called, but it was there after he got done rotary buffing the car.

Anyway, post away if you will :-)
:Picture:
 
watch out for trim, the buffer will burn plastic extremely quick. Also wrinkles from running a rotary over a painted plastic bumper. Heat is the main thing to keep an eye on, if your paint gets hot you can run into problems.
 
watch out for trim, the buffer will burn plastic extremely quick. Also wrinkles from running a rotary over a painted plastic bumper. Heat is the main thing to keep an eye on, if your paint gets hot you can run into problems.

Good call on the plastic. I would recommend if not experienced with a rotary to use a dual action (PC7424, Flex, Griots) and work with that for awhile until you feel comfortable and then upgrade to a rotary. :)
 
I would get a wool pad to practice with first so you can get a feel for the rotary. Also you want to tape up trim and mirrors that are attached to the door. Use light pressure at first and once you get used to the rotary then you can use more pressure to remove defects.

As far as those mentioning holograms that is the least of your problems when first starting out. You are going to induce holograms with a rotary, how bad they are while using it is a different story. Once you get the hang of the rotary you can remove them. Most people that use a rotary can not finish with a rotary, that will take a lot of practice.


I'm with stupid ^ :props:

Fear: If you are afraid to use a ratary then I would stay away from it. You should respect the machine, but if your afraid then you will most likely fail
 
I would get a wool pad to practice with first so you can get a feel for the rotary. Also you want to tape up trim and mirrors that are attached to the door. Use light pressure at first and once you get used to the rotary then you can use more pressure to remove defects.

As far as those mentioning holograms that is the least of your problems when first starting out. You are going to induce holograms with a rotary, how bad they are while using it is a different story. Once you get the hang of the rotary you can remove them. Most people that use a rotary can not finish with a rotary, that will take a lot of practice.
Any step(whether it's the 2nd or 3rd) trying remove holograms would be considered finishing, right?
 
Any step(whether it's the 2nd or 3rd) trying remove holograms would be considered finishing, right?

I'm not Dana of course(I'm sure he is still asleep)and he may have a different approach, but here is my take

Depends on the severity of what your working on, but in general, yes the 2nd and 3rd steps would be considered finishing IMPO

Here is an example: :buffing:

Step 1 Wool & 105

Step 2 Orange/Green & 205

Step 3 Black/Red & 85RD
 
If you use a wool pad, watch out for all the fibers that come out and spread over everything.
 
Rotary polishers in my opinion are a must when detailing. The DA units of today are relatively new on the detailing scene and while they aren't so sensitive they take allot longer to perform a like task then with a rotary polisher.

The biggest watch out when using a rotary if friction, period. While you're more apt to burn through paint on an outside corner or edge you can burn or at least soften the paint on a flat area as well. This is not to say rotary buffers or polishers are evil, they simply require more learning and experience that their DA counterpart.

For serious paint correction I always start by using my Makita 9227 and a purple, yellow, or orange Lack Country Kompressor pad and appropriate compound. For polishing I use my Flex 3401 and sealants and waxes go on with my Porter Cable 7424.
 
What to look out for?

Here's a few things off the top of my head... the most important thing when learn to use a rotary buffer is to learn and practice on something that's not important to anyone. An old junker car or go to the wrecking yard and get a hood off a car, maybe check the local body shops for a fairly straight hood you can probably get for free.

Don't learn how to use a rotary buffer on a black Viper...


  • Antennae
  • Trim, especially if it can be ripped off the car if caught by a spinning pad.
  • Any plastic or rubber trim, either avoid buffing over it or tape it off.
  • Felt gaskets, like you find around sunroofs, really hard to clean compound and polish residue out of this fuzzy stuff.
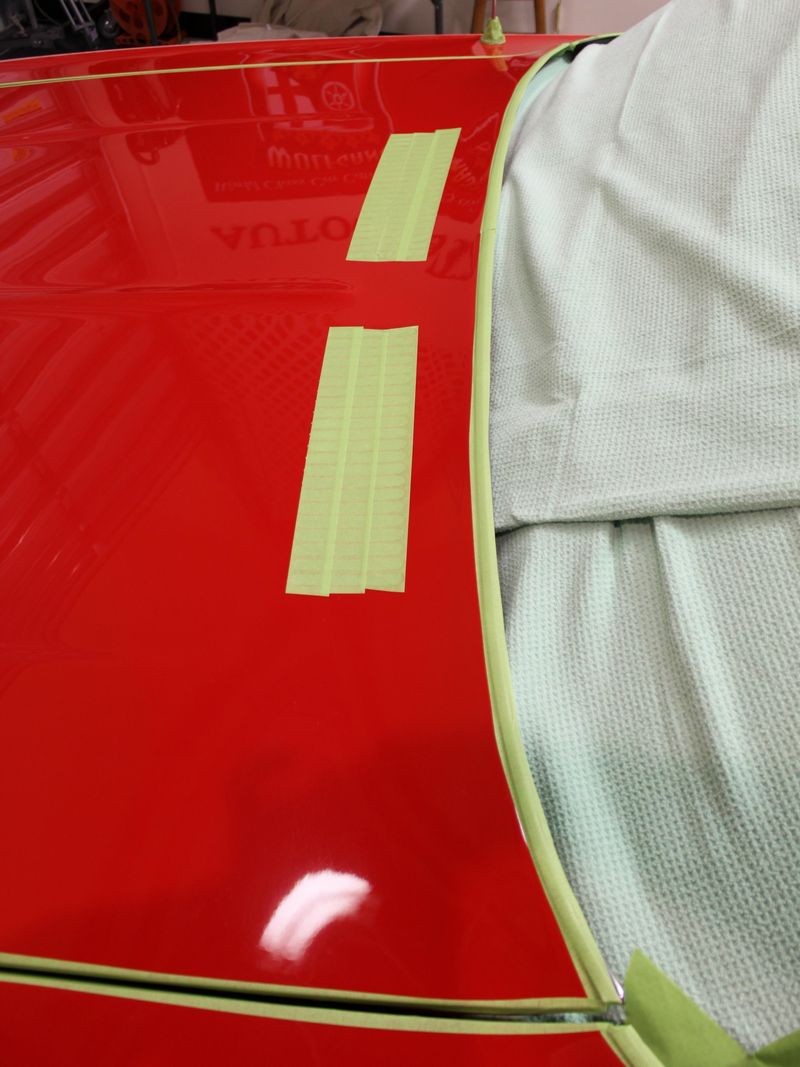
  • High point, Body Lines, Edges - Paint flows off high points so it will be thinner and more easily burned-through.
  • High points, Body Lines, Edges - Other detailer that have gone before you may have buffed on the high points and paint that started out thin will now be thinner. In this case, a high point can also mean the flat portions of the tops of fenders, the hood and the roof. Imagine the easiest places to stand comfortably and run a rotary buffer and then imagine a guy named "Bubba" standing there and buffing these area because it's easy and it makes him look cool. Then think about how much less paint will be in these area as compared to the lower side of the door that usually doesn't receive as much abrading attention.
  • If the car has inset grills, like you see here, tape them off so you don't throw splatter into places you can't get it out of.
  • Wear Safety Glasses, you only have 2 eyes and you'll need them the rest of your life.
  • Wear ear protection if buffing for extended time. You only have 2 ears and you'll need them the rest of your life.


Safety Glasses
Kind of speaks for itself...
DampSanding41.jpg


Some cars have inset grill areas that you cannot get to to wipe off splatter, tape these areas off.

redelcamino_020.jpg


I've written extensively on this but all my articles are on MOL


:)
 
Back
Top