Wills.WindowsAndWheels
New member
- Oct 31, 2009
- 1,682
- 0
This was, by far...the biggest RV we ever did...it was about the same as doing a wash and wax on a yacht! 40 ft long....12 1/2 ft tall...it was a beast...but she turned out nice :xyxthumbs:
Another job we got via 'word of mouth'...this big baby just got back from a trip ALL the way from Az to New England and back. The Lexus we did later that week was pretty bug ridden, but nothing compaired to this tour bus size giant.
As I said it was just a wash and wax, but at 40 ft this was still a 6 hr plus job for the 2 of us with 2 DA's goin. It was an 07' and all things considered, in pretty good shape. Coulda surely used some scratch removal..but for at least they were keeping it maintained") .
.
The RV was a Dutch Star:

BUT me being me I couldn't let it just stay at that. Since this thing was about the size of a pirate ship I had to rename it the Flying Dutchman like from the movie Pirates of the Caribbian. Not only because of its size but...because the weather we were doing this thing in was less than friendly and looked kinda like the Black Pearl was around the corner lol :


Not friendly right? Well thou it didnt hit us where we were working, where we lived (only about 12 miles from where we were working) was nailed by 70+ mph winds...up rooted 100's...yes 100's of tress in our neighborhood alone and MANY more than that thru the city we live in. Hail came from this storm up to tennis ball size in some areas. Now of course, we didnt know that it was THAT bad at the time...the wind was calm and no rain at all when we got there...but the race was surely on to get this thing done before the bottom dropped out.
To give you an idea of the sheer size of this thing, heres a pic my sister took of me standing next to get setting the hose up...note that im 6'3:

As you can see, super nice RV...but quite dirty..paint is kinda dry and later pics will show the bug massacre on the front.
We didn't get it finished in one day, the rain caught us with an hour to go...and there was lightning...and something told me standing on a aluminum ladder in a lightning storm PROBABLY wasnt a good idea...but we came back the next day and finished it up...heres an after picture from the same angle:

Luckly the owners were just going to park it for the winter in an open lot, so didnt care that it got rained on some...but it had a good coat of protection on it with the Meguiars FLAGSHIP (hah how appropriate for my write up theme!) Wax. Funny thing is after we finished up on the 2nd day...after we left...10 minutes later it poured again...we had a wash and wax on a car down the street after the RV...we pulled it out of the garage and started hosing it down and then the Big Fella up stairs decided he'd lend a hand lol...so we sat in the garage like a couple fools till it stopped 15 minutes later and we were able to finish the job. I swear Az weather is crazy....anyway back to the good stuff, the pictures!
Heres a full side shot of it before we started working...see how nice and blue the skies were at first! It sure changed fast:

And heres the after shot...you can see reflections even from this far away which was pretty sweet...

Here is an area on the back that proved to be a good before/after. Dirty and more like water streaks than spots...but we took care of that

Here is the after shot...bright and gold kinda like treasure...hey another theme plug in!

And now for the Bug Massacre...it wasn't pretty...and i'll tell you they were REALLY baked in there:

It was fun scrubbing in those small headlight areas...but we did pretty good i think..

Here is the other half...

and after :

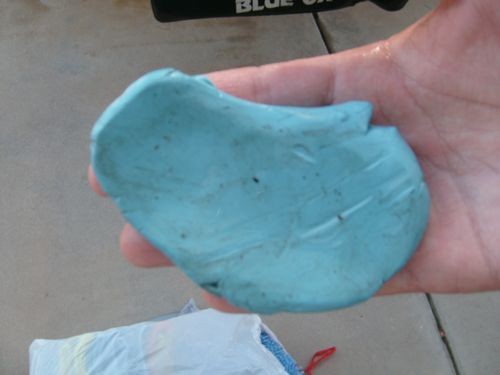
We had soaked the area first with water then went at it with a mesh 'bug scrubber' spong and dawn soap...they wernt budging too much...so then we broke out the APC and let it soak...it helped some..but still not as many were coming off as we wanted...so even thou it wasnt 'part of the job'....i had brought my clay and went ahead and took it out...here is how it looked after claying for about 30 seconds:
Wasnt fun...the 2 of us spent a good 45 minutes together just scrubbing and claying the front...then had to do the monster side mirror and movie theater screen size window. Then there were even more of my little buddies splattered across the area up top above the windsheild that I had the pleasure of getting to scrub off...but thats what we do and it was worth it in the end.
Heres one more before and after...this one is sort of a close up of the driver side fender

and here is an after of the full 1/2 of the driver side:

The back side wasnt pretty either. All these little grill slots were fun to do

Heres the after...CU N AZ!
(Continued Below...)

Another job we got via 'word of mouth'...this big baby just got back from a trip ALL the way from Az to New England and back. The Lexus we did later that week was pretty bug ridden, but nothing compaired to this tour bus size giant.
As I said it was just a wash and wax, but at 40 ft this was still a 6 hr plus job for the 2 of us with 2 DA's goin. It was an 07' and all things considered, in pretty good shape. Coulda surely used some scratch removal..but for at least they were keeping it maintained
.The RV was a Dutch Star:
BUT me being me I couldn't let it just stay at that. Since this thing was about the size of a pirate ship I had to rename it the Flying Dutchman like from the movie Pirates of the Caribbian. Not only because of its size but...because the weather we were doing this thing in was less than friendly and looked kinda like the Black Pearl was around the corner lol :
Not friendly right? Well thou it didnt hit us where we were working, where we lived (only about 12 miles from where we were working) was nailed by 70+ mph winds...up rooted 100's...yes 100's of tress in our neighborhood alone and MANY more than that thru the city we live in. Hail came from this storm up to tennis ball size in some areas. Now of course, we didnt know that it was THAT bad at the time...the wind was calm and no rain at all when we got there...but the race was surely on to get this thing done before the bottom dropped out.
To give you an idea of the sheer size of this thing, heres a pic my sister took of me standing next to get setting the hose up...note that im 6'3:
As you can see, super nice RV...but quite dirty..paint is kinda dry and later pics will show the bug massacre on the front.
We didn't get it finished in one day, the rain caught us with an hour to go...and there was lightning...and something told me standing on a aluminum ladder in a lightning storm PROBABLY wasnt a good idea
...but we came back the next day and finished it up...heres an after picture from the same angle:
Luckly the owners were just going to park it for the winter in an open lot, so didnt care that it got rained on some...but it had a good coat of protection on it with the Meguiars FLAGSHIP (hah how appropriate for my write up theme!) Wax. Funny thing is after we finished up on the 2nd day...after we left...10 minutes later it poured again...we had a wash and wax on a car down the street after the RV...we pulled it out of the garage and started hosing it down and then the Big Fella up stairs decided he'd lend a hand lol...so we sat in the garage like a couple fools till it stopped 15 minutes later and we were able to finish the job. I swear Az weather is crazy....anyway back to the good stuff, the pictures!
Heres a full side shot of it before we started working...see how nice and blue the skies were at first! It sure changed fast:
And heres the after shot...you can see reflections even from this far away which was pretty sweet...
Here is an area on the back that proved to be a good before/after. Dirty and more like water streaks than spots...but we took care of that
Here is the after shot...bright and gold kinda like treasure...hey another theme plug in!
And now for the Bug Massacre...it wasn't pretty...and i'll tell you they were REALLY baked in there:
It was fun scrubbing in those small headlight areas...but we did pretty good i think..
Here is the other half...
and after :
We had soaked the area first with water then went at it with a mesh 'bug scrubber' spong and dawn soap...they wernt budging too much...so then we broke out the APC and let it soak...it helped some..but still not as many were coming off as we wanted...so even thou it wasnt 'part of the job'....i had brought my clay and went ahead and took it out...here is how it looked after claying for about 30 seconds:
Wasnt fun...the 2 of us spent a good 45 minutes together just scrubbing and claying the front...then had to do the monster side mirror and movie theater screen size window. Then there were even more of my little buddies splattered across the area up top above the windsheild that I had the pleasure of getting to scrub off...but thats what we do and it was worth it in the end.
Heres one more before and after...this one is sort of a close up of the driver side fender
and here is an after of the full 1/2 of the driver side:
The back side wasnt pretty either. All these little grill slots were fun to do
Heres the after...CU N AZ!
(Continued Below...)


 rops:
rops:


