Wills.WindowsAndWheels
New member
- Oct 31, 2009
- 1,682
- 0
Well time for another write up that is long over due ") ...we did this Accura TL about a month ago. The owner desperately needed the inside and outside done...I can't tell you which was worse so i'll just flip a coin...heads for interior....tales for exterior......so the answer is!
...we did this Accura TL about a month ago. The owner desperately needed the inside and outside done...I can't tell you which was worse so i'll just flip a coin...heads for interior....tales for exterior......so the answer is!
...damn coin landed on its side...go figure!
So this car was a very nice car....i liked it quite a bit and am a big fan of pearl colored paint...this poor thing was not only swirled though, but was just a freakin mess...like she went off roading with it or something.
I'll give you a quick run down on what we used for those of you who want to know
Exterior:
Dawn soap (coulda used AJAX on this thing!)
Megs APC for bugs
Tarminator for...well...tar:idea:
Griots DA
Hydro Tech Polishing pad 5.5"
LC Flat Low Profile Polishing Pad 5.5" and 4"
Megs D151 (my go to single pass product!)
Megs #20 Sealant
Megs Hyperdressing 1:1 on tires
Interior:
Megs #39 and #40 for cleaning and dressing
Megs APC+ for carpets
Oxyclean for carpets
APC for leather seats
Pinnacle Leather Conditioner
I think thats all :dblthumb2:
So for the fun part...the pictorials! I've uploaded 79 of these damn things onto AG's photo album..I don't know how many I'll use but...probably a lot lol:dblthumb2:
Heres a full frontal :laughing:

yeahhh the bugs kinda had a field day right there as you can see.
Here it is from another angle...was kinda overcast that day but you can still tell the paint doesn't have the 'pop' that it should have.

Scuff marks anyone?

Now when i quoted the car..it was dirty yes (as you can see)...but after washing it i found something that i really wasn't expecting and cost me a good amount of time..
This is the area around where the license plate is...and nooo...the car does not have freckles. I was paint overspray...I asked the lady when we were done if she had her house painted since she had been there...she said yes about TWO YEARS ago (yeah it had been on there for a while). Well I guess the genius painters didnt A: ask her to pull the car out before they painted the garage door...orrr B: Put some damn plastic over the car!
Funny thing is, just a week before...we repainted a garage door for a guy and asked him to pull out his van because guess what....a 2000+ psi airless sprayer...has enough power to push paint through the splits between the sections in a garage door!:bash:
You would THINK a professional..or should i say "professional" painter would know this...but what do i know? ....Well i'll tell you what i know...it took about 45 minutes alone to clay the area around the license plate and the tail lights that the paint stuck to...but it came off...and my arm almost came off too
Ok enough ranting on my part...lets take a closer look at this paint:
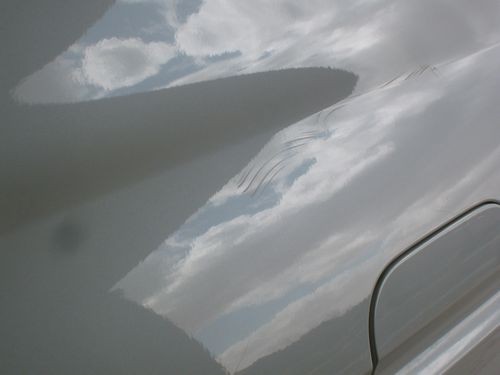
Here is a brinkmann shot of the front of the hood

Dull and swirled as you can see...a nice slow section pass took care of that though:

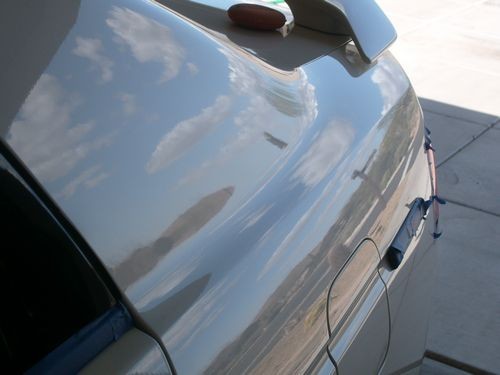
See...pearl...pretty and bright again hehe.
The sun had popped its head out just for a second because it knew that i wanted a good sun pic of the swirls on the hood...yeah me and the sun...we've got it like that :xyxthumbs:
Heres what the sun showed me:

ohhhh yeah thats the good stuff right there. THATS what i was lookin for.
Now by the time we finished...the sun of course...cause it likes me so much...had come back out because it knew i HAD to have sun shots to show off what awesome work me and Mr. Griots DA did. Tell me what you think:

Sweetness...heres another:

Some more brinkmann shots of the side:

Those went bye bye also:

Now probably the nastiest looking scratch on this thing was right here behind the drivers back door:
See that sort of 'squiggle' looking thing...yup...nasty lookin scratch. I don't know how it GOT there...but i know how it got OUT of there:buffing:
....I was a buffin, buffin, buffin machine! (instead of dancing machine..jackson 5 come on people!) Now..not only is that scratch gone..but you gotta admit that is a pretty sweet looking reflection shot now isn't itIm the MAN
Here is a nice sun shot of the roof when we were finished:

And the trunk

I gotta say..I'm gettin pretty good at those single passes...there is a deep scratch here n' there...but you'd have to really look to find em...i'd say 85% correction or so wouldn't you?
And here are a few beauty shots for you guys

No more bugs up front


Mmmmhmmm...doesn't it just look fast now? It had some 'oomph' to it trust me...i touched the gas a little to get it back in the garage...and that thing was ready to go for 60 mph lol.
Well that does it for the exterior pictures...but remember i said that coin landed on its damn side as far as which was worse..interior or exterior...well that was for a reason...take a looksie:
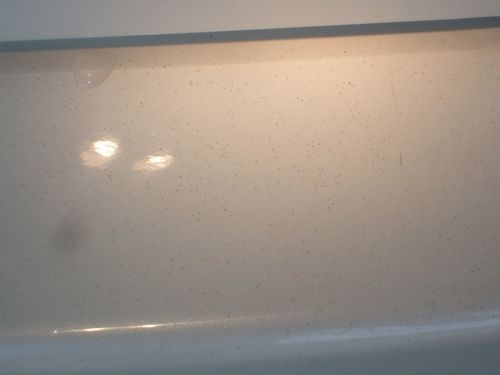
I'll start you out with the running boards...since thats the first thing that caught our eyes when we opened up the door...
...we did this Accura TL about a month ago. The owner desperately needed the inside and outside done...I can't tell you which was worse so i'll just flip a coin...heads for interior....tales for exterior......so the answer is!...damn coin landed on its side...go figure!
So this car was a very nice car....i liked it quite a bit and am a big fan of pearl colored paint...this poor thing was not only swirled though, but was just a freakin mess...like she went off roading with it or something.
I'll give you a quick run down on what we used for those of you who want to know
Exterior:
Dawn soap (coulda used AJAX on this thing!)
Megs APC for bugs
Tarminator for...well...tar:idea:
Griots DA
Hydro Tech Polishing pad 5.5"
LC Flat Low Profile Polishing Pad 5.5" and 4"
Megs D151 (my go to single pass product!)
Megs #20 Sealant
Megs Hyperdressing 1:1 on tires
Interior:
Megs #39 and #40 for cleaning and dressing
Megs APC+ for carpets
Oxyclean for carpets
APC for leather seats
Pinnacle Leather Conditioner
I think thats all :dblthumb2:
So for the fun part...the pictorials! I've uploaded 79 of these damn things onto AG's photo album..I don't know how many I'll use but...probably a lot lol:dblthumb2:
Heres a full frontal :laughing:
yeahhh the bugs kinda had a field day right there as you can see.
Here it is from another angle...was kinda overcast that day but you can still tell the paint doesn't have the 'pop' that it should have.
Scuff marks anyone?
Now when i quoted the car..it was dirty yes (as you can see)...but after washing it i found something that i really wasn't expecting and cost me a good amount of time..
This is the area around where the license plate is...and nooo...the car does not have freckles. I was paint overspray...I asked the lady when we were done if she had her house painted since she had been there...she said yes about TWO YEARS ago (yeah it had been on there for a while). Well I guess the genius painters didnt A: ask her to pull the car out before they painted the garage door...orrr B: Put some damn plastic over the car!
Funny thing is, just a week before...we repainted a garage door for a guy and asked him to pull out his van because guess what....a 2000+ psi airless sprayer...has enough power to push paint through the splits between the sections in a garage door!:bash:
You would THINK a professional..or should i say "professional" painter would know this...but what do i know? ....Well i'll tell you what i know...it took about 45 minutes alone to clay the area around the license plate and the tail lights that the paint stuck to...but it came off...and my arm almost came off too
Ok enough ranting on my part...lets take a closer look at this paint:
Here is a brinkmann shot of the front of the hood
Dull and swirled as you can see...a nice slow section pass took care of that though:
See...pearl...pretty and bright again hehe.
The sun had popped its head out just for a second because it knew that i wanted a good sun pic of the swirls on the hood...yeah me and the sun...we've got it like that :xyxthumbs:
Heres what the sun showed me:
ohhhh yeah thats the good stuff right there. THATS what i was lookin for.
Now by the time we finished...the sun of course...cause it likes me so much...had come back out because it knew i HAD to have sun shots to show off what awesome work me and Mr. Griots DA did. Tell me what you think:
Sweetness...heres another:
Some more brinkmann shots of the side:
Those went bye bye also:
Now probably the nastiest looking scratch on this thing was right here behind the drivers back door:
See that sort of 'squiggle' looking thing...yup...nasty lookin scratch. I don't know how it GOT there...but i know how it got OUT of there:buffing:
....I was a buffin, buffin, buffin machine! (instead of dancing machine..jackson 5 come on people!) Now..not only is that scratch gone..but you gotta admit that is a pretty sweet looking reflection shot now isn't itIm the MAN
Here is a nice sun shot of the roof when we were finished:
And the trunk
I gotta say..I'm gettin pretty good at those single passes...there is a deep scratch here n' there...but you'd have to really look to find em...i'd say 85% correction or so wouldn't you?
And here are a few beauty shots for you guys
No more bugs up front
Mmmmhmmm...doesn't it just look fast now? It had some 'oomph' to it trust me...i touched the gas a little to get it back in the garage...and that thing was ready to go for 60 mph lol.
Well that does it for the exterior pictures...but remember i said that coin landed on its damn side as far as which was worse..interior or exterior...well that was for a reason...take a looksie:
I'll start you out with the running boards...since thats the first thing that caught our eyes when we opened up the door...


 rops:
rops:


