Dalton, its great to see you out here again. You've been missed. I hope all your loved ones made it out of the tornadoes ok. The work looks incredible and I'll be checking back for the other pics later.
Corey - thanks for the welcome back. It has been a pretty crazy couple of months. BTW, I don't think I ever updated you on the UTTGP - I will shout at you later.
DLB - Incredible turn arounds. I'm positive that the owners having survived a tornado will appreciate your efforts. :xyxthumbs:
Sharing your knowledge on how to do an interior will be useful to several of us.
BTW: Nice ZR1 you got to take care. :hungry: Hope he/she took you for a ride in it afterwards.
Thank you very much. I hope it helps someone. Before and After pictures are useless on a forum really unless you help someone achieve similar results. Not ride in the ZR1 unfortunately.
Amazing job on the interiors. Really great work!
Thank You.
:applause:Great thread Dalton! Thanks for sharing. By the way, did you enjoy the ZR-1?
Thanks Richard! Did I enjoy it? Yes and No. I actually worked on it before my brief hiatus and talked to a few of the guys at L2D about it. It was a bear to work on - every part of it (except the interior, it was clean

) But it was a show prep with another friend of mine and it was tough going. However, it was very enjoyable to look at and listen too.
It was nice to see those cars brought back to life. Certainly one of the more outstanding cleanups I've ever seen....

rops:
Thanks Bobby.
Thanks for the write up. You provide some very good tips.
Al - no doubt you probably already know the tips, but thanks for the good word.
props! the cars look amazing!!! I'd be nervous that I was leaving microscopic shards of glass in the carpets/upholstery but I suppose that's why you use a shopvac AND pressure washer.:wow:
A note on that: On the Taurus and especially a Tahoe I did, (and several other of the cars) the front windshield was busted in. That leaves a lot of glass in the vents - especially the dash vent. Also with the tornado the other vent get lots of glass and trash blown into them. Turn the vehicle own, and with safety glasses on, turn the A/C, Defrost, etc. up on full blast mode. Keep your vac handy, because you will get lots of stuff. Also while doing this, beat on the dash if you aren't able to further disassemble it (like some good solid licks on the tap where you aren't going to break any plastic panels). This will shake loose lots of glass. (This is something I learned after I thought I was finished with the first one I did and started it up to move it).
If you have the opportunity to get to it and work on it before the windshield goes back in, do. Most of the large dash panels have the top vent built in and can be removed easily with no windshield. This allows much better access into the vents, and you can run a hose down into them a ways. The front (driver facing) vents are sometimes easily removable, but not always. If they are, I always take them out to clean them anyhow (on regular interior cleanings). Again, now you can get more junk out.
The last thing you want it someone getting shot in the eye with a piece of glass because you didn't clean the vents good. This is a time consuming task (the Tahoe was bad and easily took me an hour), but worth it. Especially when you see little car seats in the back with the center vents facing them.
")
Very nice work to get those looking the way that you did. You did those headliners which is a little too scarey for me. They turned out great.
Thanks - if you gotta do it, just do it. Actually the headliner in the Taurus had to come out as well (due to body damage). THAT was scary! It was permanently glued with what looked like 1x1 strips of super strong peanut butter adhesive. After removing the clips and all the parts that screw into the roof (handles, lights, etc.) it was still fixed tight. Had to cut it loose - that was a job!
Outstanding, Huge difference in the before an after..
I agree!
Perfect timing. I'm doing a very nasty interior on Friday, and cleaning the headliner is going to be a major part of the process.
Thanks for the great advice, especially your last point!
Take your time - and do the headliner first. You don't want to be getting junk all down in the car after you have spent the time cleaning it up. This is the tip I was talking about:
Man....that is impressive.
Thanks Jenn.
Really great work!!
rops:
Thank You.
Me too.
Epic turnaround! Excellent work. That Taurus was brought back to life.. I would have guessed the car was totaled just by looking at the before interior pics. April 27th will never be forgotten!
Chris - I hope you and all your family came out OK. Alabama was hit hard as well. The Taurus probably would have been totaled, but the guy I was doing the interior work for (friend who owns a body shop) knew the owner's family and wanted to help them. The lady also lost her house that was under construction.
Onto the write up...man that was an awesome job...really....and I've done a few details on interiors that were out of the ordinary..but obviously nothing like this.
Best wishes to you and everyone in your town..I hope things work out.
Thank You. The town is starting to rebuild. The first restaurant just opened back up last week after rebuilding (Taco Bell). My family was very fortunate - however our secretary at work lost her Brother-In-Law, his wife and two children. Some other friends of ours lost their entire homes - and one lost several collector cars. If anyone wants to see, you can search Google and Google Images for Ringgold, GA Tornado and Cherokee Valley Road, Ringgold, GA. Youtube has some vids as well.
A few questions about your technique...with the pressure washing...care to give a step by step for your process...specifically..
do you spray them right away or hit them with a type of cleaner while they are dry and THEN pressure wash?
Do you use an extractor to suck them dry AFTER you pressure wash?
Good questions. Loosely something like this:
Before all steps - This will introduce massive amounts of water to parts that are supposed to be 100% dry before shutting up a vehicle. If it is rainy, or excessively cloudy, you might want to rethink it. I have only done about 3-4 interiors this way in the dead of winter, and you have to allow a lot more drying time and get creative on how to do it (if you live where there is a cold dark winter like north GA). It will require extra steps and extra work though. The prime time to do this is the hot bright summer. Schedule these jobs then if you can.
Step 1: Remove the parts to be pressure washed from the vehicle. For 90% of the cars I do - this involves the floor mats. But on certain occasions the seats and cloth covered center consoles. Rarer is the carpet, because people have to understand the time it takes.
Step 2: Vacuum loose debris from parts to be washed. I just use the Shop Vac usually for this with the large nozzle. Don't have to be totally clean, just get the bulk.
Step 3: Prep clean surface. This is pretty much the same for any surface that you can wash (of course, leather doesn't get pressure washed). I always use the same chemicals. Folex and Meg's APC+. Those two will do all you need when cleaning the parts pre-wash.
3a. With pressure washer hooked up and ready to go (not running) lay the parts out that you are going to be washing. If doing multiple types of parts, only tackle one set at a time. Treat front seats individually. Rear seats (non-bucket) and their backs can be done easily at the same time. Carpet is always by itself - and if multiple pieces (larger SUV's) treat each piece individually.
Here's the scene before I started doing some mats:
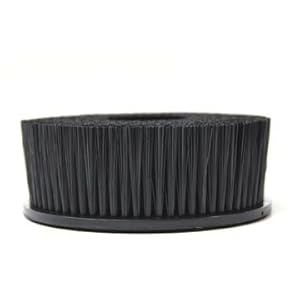
3b. Spray cleaner onto parts to be cleaned and brush/scrub/whatever. Remember, you are about to blast this with a lot of water at high pressure - that alone will get out a lot, but you do have to treat stains or excessive dirtiness. I have a Harbor Freight rotary that has one of these that stays on it all the time:
I use other brushes of course when needed, but I would say 99% of the mechanical cleaning I do on parts that are about to be washed, they get done with that. Way too easy.
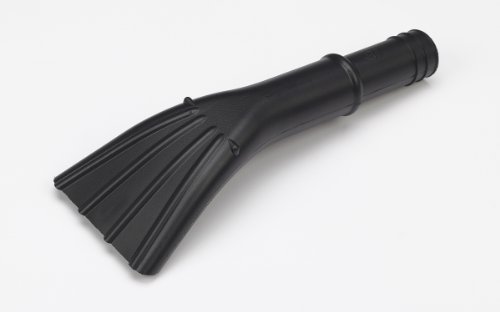
Step 4: Put wide fan high pressure nozzle (white tip on most) in wand and go to town. On carpet, unless it is an edge with no trim or there is a tear, you are pretty well safe on full pressure. Older carpets will shed, so be careful with them, but anything in decent shape from the past 8 years or so, it will be OK.
On seats, the fabric is thinner than the carpet tuft, so you don't want to tear it with your spray. Common sense is all I can really suggest. I still use full pressure, but adjust how close you hold the spray and judge how much the pressure is affecting the material. (e.g. - If the material is not "rolling" or "flexing" while washing, it is pulled really tight and is going to be easier to tear).
Step 5: Wash and Rinse until no more cleaner is being released. Do not leave anything behind. If you need to re-clean a spot or area, now is the time. You don't want to come back later to do it - get it done while you are working on it the first time.
Step 6:
6a.
Hang mats to dry out in the sun. It usually takes a few hours for them to completely dry. You can speed this process up by using a wet vac and helping them out - but it depends on what your schedule is like. The mats are the absolute first thing I clean on a regular interior job. This allows the full time you are working on the rest of the interior for the mats to dry. It usually times out about perfect. I bolded the Hang Mats because that is going to speed up the drying tremendously. Laying flat they will take a lot longer to dry.
6b. Seats should be folded out as flat as they can and sat in the sun to dry. Seats will take about a day and a half to completely dry in full hot sun. Again, you can wet vac them, but they still need their time to dry. Be ready - wet seats are quite heavy.
6c. Lay carpet out (face up) with edges hanging down as good as possible to dry. I use a couple of sawhorses to spread wet carpet on. You want to let the edges hang so that water runs down and off. Carpet will take about the same time to dry as seats. A full wet carpet is very heavy and cumbersome. You don't want to drop it after you wash it, so eat your Wheaties, or have someone to help you.
That's pretty much it. A couple of things consider - if a set of seats are bad enough to warrant washing, then you want to know what electronics are in them. Even your basic non-power seats usually have a couple of electrical connections now (air bags and seat belt warning buzzer). Check if these things are watertight, because they will get wet.
I have had a request to wash power seats before, and it all went fine. Seats worked great after drying and all, but it was solely at the owners request and I denied any responsibility if they quit working. But, they were trashed otherwise, so not much to loose for the owner (it was a used car they bought).
How strong is your pressure washer (PSI,GPM, TYPE...PICS
)
The pressure washer I use is the popular Honda 4040HG. It is a 13HP Gas Powered, 4000 PSI, 4 GPM washer. It is probably overkill if you are only using it to detail, but it washes houses also.
You can see it up in the picture above.
Also, think you could give a demonstration (step by step photos) of seat removal and carpet removal. I did a Durango once that was trashed because the owner was rebuilding much of the engine and just put the old parts he took out in the SUV lol..but he was nice enough to remove the rear seats before we went in for the clean up and it helped a TON...the room alone is awesome...but i'd like to know more if you care to get into 'details'
Again, awesome job
This is a great idea, and if I can get another one that requires it soon, I will try to do this. There are lots of things that you need to be aware of and stuff you need to watch out for. I don't have the pictures needed to do this at the moment, but I will see what I can do. The two main things are to be very careful, and make sure you securely and accurately tighten all the seats/belts, etc. It isn't rocket science, but I have learned plenty that I am glad I know now. And Thank You.
DLB