Wills.WindowsAndWheels
New member
- Oct 31, 2009
- 1,682
- 0
Whats up everyone,
I got a referral earlier this week from my buddy Mark (first Camaro we did a few months back). Patrick (the owner of THIS Camaro) was asking around about who could give him a good detail. Mark pointed him in our direction and a couple days later we got an email from him asking about the detail. He wasn't sure if he wanted a single or double pass, but we agreed on doing a test spot showing the results of both a single and double pass and then he could make his choice.
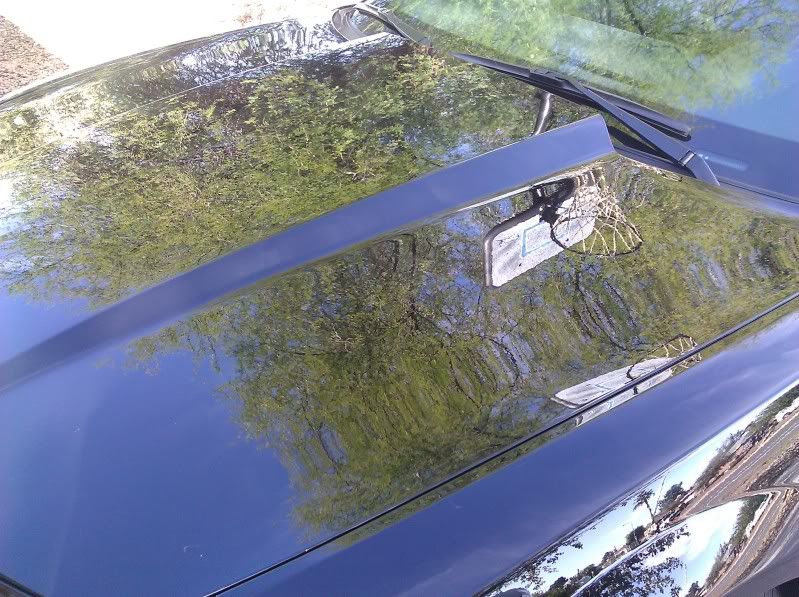
So this past Thursday we get there, grab all our gear (aka, temporarily moved in!) and took a look at the car. It was pretty clean, but of course being black it had very noticeable swirls all over.

Good ole black paint. Like i said before, its a love hate relationship lol...but the love over powers the hate for me. I love black...period.
So we went ahead and started with the tires, wheel wells and behind the rims... getting them all as clean as possible. Wasn't too bad but surely needed the cleaning.
Then we washed it and got it prepped for the clay bar. We just got a fresh bar of clay, Blackfire's Polyclay II...and i tried a new product along with it. I grabbed Blackfire Clay Cleaner just off of a whim to see how it would work. Well...it was a GREAT GREAT buy.
Personally, i think the stuff smells like windex, and for all i know it may actually BE windex lol, BUT, it cleans the hell out of the clay. I got a good amount of bonded contaminants off of the hood, roof and trunk and stuff off of the lower panels as well.
I just sprayed the clay once it got dirty, rubbed the cleaner over the face of the clay...the stuff i clayed off just started melting off...then rinsed the clay in clean water. Bam, fresh clay! Re-kneaded the clay and went back to work. Normally that piece of clay woulda been shot...but i used 1/3 of the 200 gram bar to do the whole car...and an entire BMW 320i the next day...and the clay is STILL nice and clean. Just thought I'd throw that out there.
After getting the paint nice and smooth we taped off two sections on the hood. I used D151 All In One on one test spot, and D300 Compound followed by Megs 205 finishing polish on the second test spot.
D151 did a nice job (sorry didn't grab pics), probably 70-80% of swirls were removed. Which isn't bad. But the D300/205 combo really hit the nail on the head, getting us very close 99% correction. Just a few deeper RIDS (Random Individual Deeper Scratches), very few actually, here and there. I showed Patrick the two areas...and he said he could really see how the double pass could make a big difference in some areas that were in worse shape...so a double pass it was! (Good choice!)
I set up the Flex 3401 with a 6" Megs Microfiber cutting pad and set Dani (my sis) up with the PC, a LC white polishing pad and Megs 205...and then, round and round we went.
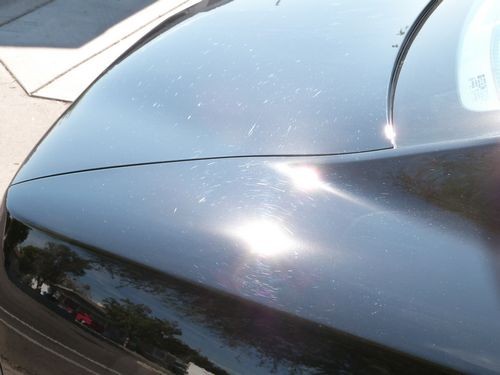
Started on the hood which was pretty swirled of course:
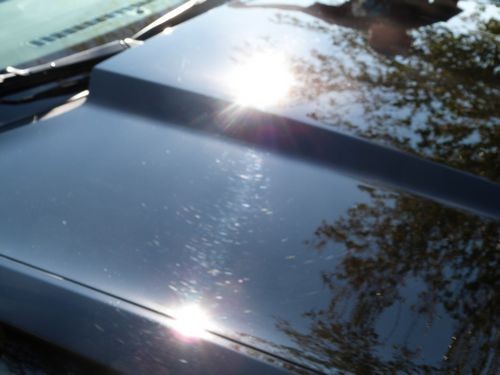
I got a little bit of a head start getting 2 or 3 passes done with D300 while my sis set up the pad washer. Then she came and followed up with the 205 behind me...and gotta say the finish turned out sweet.
It was DARK by the time we finished, so i had to use my swirl light (the one i made) to take the after photos, but take a look:

No swirls on this hood.
We continued around finishing up the rest of the car. Then dressed the tires with Wolfgang tire gel and then...oh yes...we sealed it up with Wolfgang Deep Gloss Paint Sealant...I'm SO glad he wanted the upgraded sealant because this stuff looks so nice on black.
Here it is with the pad all ready to be applied:

I LOVE how well this stuff spreads, a little goes a very very long way.
Here my sis caught me applying the sealant:

We let it set up and then took it off. It did dust a little this time which ive never had happen..maybe cause it was so cold. But still it wiped off super easy. Pulled it out and did a final walk around with my swirl light to make sure i got all the sealant and dust off and then just enjoyed the view.
Here are a couple more before and after shots, this one of the drivers door, as you can see, nice and swirled up

But the after shot was flawless:

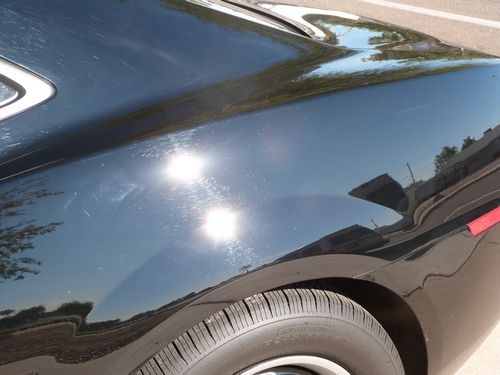
Andddd Patrick being the cool guy that he is, pulled the car out the next morning in the sun and snapped a couple pictures himself, one of the door as seen here:

All i could say when i saw this pic was...wow. No swirls...beautiful reflection...the gloss is just insane.
Then the trunk that was a mess:

Turned out very nice as well. I managed to just barely catch the sun as it was disappearing behind the house next door:

And that nasty quarter panel from earlier:
Turned out awesome...another great shot from the owner here!

Yeah, he's hired..our new camera man!
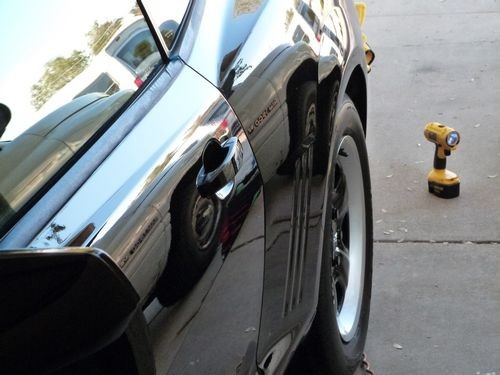
We also grabbed a couple reflection shots. This one here you can see the reflection of the truck...and also you can see my swirl light i made lol")
Here is another reflection, this time with my light actually in the paints reflection:

One more sweet shot from the front.

And the back... Windows and Wheels baby!

Now after we finished, the owner was REALLY interested in how he could go about keeping the car in great condition. So we gave him lots of pointers....some product ideas and just really made the point of good drying towels, washing mitts, clean buckets and a decent wash soap would really go a long way (along with good technique) in keeping the paint in good shape.
Well Patrick wasted NO time in getting some supplies.


Those goodies should help keep the paint looking right :dblthumb2:
So all in all we were happy, he was happy and the car was REALLY happy.
One last reflection shot from the owner.

Thanks all for reading.
Take care.
I got a referral earlier this week from my buddy Mark (first Camaro we did a few months back). Patrick (the owner of THIS Camaro) was asking around about who could give him a good detail. Mark pointed him in our direction and a couple days later we got an email from him asking about the detail. He wasn't sure if he wanted a single or double pass, but we agreed on doing a test spot showing the results of both a single and double pass and then he could make his choice.
So this past Thursday we get there, grab all our gear (aka, temporarily moved in!) and took a look at the car. It was pretty clean, but of course being black it had very noticeable swirls all over.
Good ole black paint. Like i said before, its a love hate relationship lol...but the love over powers the hate for me. I love black...period.
So we went ahead and started with the tires, wheel wells and behind the rims... getting them all as clean as possible. Wasn't too bad but surely needed the cleaning.
Then we washed it and got it prepped for the clay bar. We just got a fresh bar of clay, Blackfire's Polyclay II...and i tried a new product along with it. I grabbed Blackfire Clay Cleaner just off of a whim to see how it would work. Well...it was a GREAT GREAT buy.
Personally, i think the stuff smells like windex, and for all i know it may actually BE windex lol, BUT, it cleans the hell out of the clay. I got a good amount of bonded contaminants off of the hood, roof and trunk and stuff off of the lower panels as well.
I just sprayed the clay once it got dirty, rubbed the cleaner over the face of the clay...the stuff i clayed off just started melting off...then rinsed the clay in clean water. Bam, fresh clay! Re-kneaded the clay and went back to work. Normally that piece of clay woulda been shot...but i used 1/3 of the 200 gram bar to do the whole car...and an entire BMW 320i the next day...and the clay is STILL nice and clean. Just thought I'd throw that out there.
After getting the paint nice and smooth we taped off two sections on the hood. I used D151 All In One on one test spot, and D300 Compound followed by Megs 205 finishing polish on the second test spot.
D151 did a nice job (sorry didn't grab pics), probably 70-80% of swirls were removed. Which isn't bad. But the D300/205 combo really hit the nail on the head, getting us very close 99% correction. Just a few deeper RIDS (Random Individual Deeper Scratches), very few actually, here and there. I showed Patrick the two areas...and he said he could really see how the double pass could make a big difference in some areas that were in worse shape...so a double pass it was! (Good choice!)
I set up the Flex 3401 with a 6" Megs Microfiber cutting pad and set Dani (my sis) up with the PC, a LC white polishing pad and Megs 205...and then, round and round we went.
Started on the hood which was pretty swirled of course:
I got a little bit of a head start getting 2 or 3 passes done with D300 while my sis set up the pad washer. Then she came and followed up with the 205 behind me...and gotta say the finish turned out sweet.
It was DARK by the time we finished, so i had to use my swirl light (the one i made) to take the after photos, but take a look:
No swirls on this hood.
We continued around finishing up the rest of the car. Then dressed the tires with Wolfgang tire gel and then...oh yes...we sealed it up with Wolfgang Deep Gloss Paint Sealant...I'm SO glad he wanted the upgraded sealant because this stuff looks so nice on black.
Here it is with the pad all ready to be applied:
I LOVE how well this stuff spreads, a little goes a very very long way.
Here my sis caught me applying the sealant:
We let it set up and then took it off. It did dust a little this time which ive never had happen..maybe cause it was so cold. But still it wiped off super easy. Pulled it out and did a final walk around with my swirl light to make sure i got all the sealant and dust off and then just enjoyed the view.
Here are a couple more before and after shots, this one of the drivers door, as you can see, nice and swirled up
But the after shot was flawless:
Andddd Patrick being the cool guy that he is, pulled the car out the next morning in the sun and snapped a couple pictures himself, one of the door as seen here:
All i could say when i saw this pic was...wow. No swirls...beautiful reflection...the gloss is just insane.
Then the trunk that was a mess:
Turned out very nice as well. I managed to just barely catch the sun as it was disappearing behind the house next door:
And that nasty quarter panel from earlier:
Turned out awesome...another great shot from the owner here!
Yeah, he's hired..our new camera man!
We also grabbed a couple reflection shots. This one here you can see the reflection of the truck...and also you can see my swirl light i made lol
Here is another reflection, this time with my light actually in the paints reflection:
One more sweet shot from the front.
And the back... Windows and Wheels baby!
Now after we finished, the owner was REALLY interested in how he could go about keeping the car in great condition. So we gave him lots of pointers....some product ideas and just really made the point of good drying towels, washing mitts, clean buckets and a decent wash soap would really go a long way (along with good technique) in keeping the paint in good shape.
Well Patrick wasted NO time in getting some supplies.
Those goodies should help keep the paint looking right :dblthumb2:
So all in all we were happy, he was happy and the car was REALLY happy.
One last reflection shot from the owner.
Thanks all for reading.
Take care.